How to disable UAC
If you've been using Windows for a while, you probably remember how annoying User Account Control (UAC) was. It first appeared in Windows Vista. You can disable it on any operating system, including Windows 7, 8, and 10. Here's how to do it.
First, though, a word of warning. In fact, we recommend not disabling UAC. You'll end up with a less secure computer (and we've written an excellent guide explaining exactly this - you'll find it below, after the disabling instructions). If you always disable UAC on new Windows installations, you may want to try again. UAC in Windows 8 and 10 is much more streamlined and less annoying than before. However, we are not here to tell you what to do.
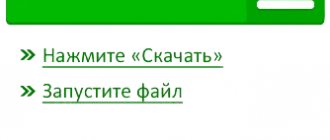
In Windows 7, 8, or 10, click Start or directly into a system-wide search, type “ change User Account Control settings ” into the search box and click the “Change User Account Control settings” result. In Windows 8, you'll use the Start screen (instead of the Start menu), and you'll have to change your search to "settings," but it still works basically the same.
In the User Account Control Settings window, drag the slider down to the Never notify . When finished, click OK.
Quite simple.
Also note that you don't need to turn off UAC completely. Here are the settings you can apply using the slider:
- Always notify : Windows asks you to check via UAC whenever an application tries to install software or make changes to your computer. It also asks for confirmation when you make changes to Windows settings.
- Notify only about apps : The middle two settings on the slider work similarly, both notifying you only when apps try to make changes, but not when you change Windows settings. The difference between these two settings is that the first one dims the screen during a notification, while the second one does not. The second setting is for people with computers that (for whatever reason) take a long time to dim the screen.
- Never Notify : UAC does not notify you about changes you make or make to applications. This setting essentially disables UAC.
As we already said, we strongly recommend that you do not disable UAC. This is what makes it safe to use the administrator account as your everyday user account. But if you're determined to turn it off, at least now you know how easy it is.
Enabling UAC in Windows 7
Along with enabling the security feature, activating UAC means that a confirmation window will always appear to confirm that an action has been completed, typically launching a program/installer. Thanks to this, many malicious applications in the background will not be able to launch important system components or a “silent” installation, since UAC will ask for confirmation for these actions. It is worth understanding that this method does not protect the user 100% from threats, but in combination it will be a useful tool.
Method 1: "Control Panel"
Through the “Control Panel” you can quickly get to the settings of the required parameter. Follow the instructions below:
- Open Control Panel through the Start menu.
- Go to the "User Accounts" section.
- On this page, click the “Change User Account Control settings” link.
- You'll see a bar showing how often Windows notifies you when changes are made. By default, the control is at the very bottom. Pull it up to the indicated marks.
- Each label assigns a different level of UAC response, so be sure to read the information to the right: it tells you in which cases you will receive notifications and which choice is recommended in which situation.
The system will prompt you to restart your computer to activate UAC.
Please note that if you want to configure the level of UAC behavior to an even higher level (for example, with input from an administrator account) or disable the darkened desktop background, you will not be able to do this through this window. Use the recommendations in Reason 4 at the end of this article. It talks about how to edit the behavior of the UAC window in more detail through the Local Security Policy .
Method 2: Start Menu
You can get to the window specified in step 3 of the previous method much faster if you open “Start” and left-click on the picture with your profile.
After this, all you have to do is click on the link “Change User Account Control Settings” and perform the same manipulations as indicated in steps 4-6 of Method 1.
Method 3: "Run"
The Run window can also quickly take you directly to the UAC Alert Level Edit window.
- Use the Win + R key combination to launch the Run window. Write the command UserAccountControlSettings.exe in it and press “OK” or Enter on the keyboard.
- You will see a window in which you can move the slider to turn on and set the frequency of alerts. More details about this are written in steps 4-5 of Method 1.
After completing these steps, restart your computer.
Method 4: "System Configuration"
You can also enable UAC through the standard System Configuration utility, but here you cannot select the level of operation of this function. By default, the highest response level will be assigned.
- Press the Win + R key combination and write msconfig in the window. Click on "OK".
- Switch to the “Tools” tab, single-click the “User Account Control Settings” tool, click “Run”, and then “OK”.
Restart your PC.
Method 5: "Command Line"
Users who are accustomed to working with CMD will find this method useful.
- Open the console by expanding the menu, searching for the Command Prompt application and running it as an administrator.
You can also run it by opening the Run window using the Win + R keys and writing cmd in the corresponding field.
- Enter the command C:\Windows\System32\cmd.exe /k %windir%\System32\reg.exe ADD HKLM\SOFTWARE\Microsoft\Windows\CurrentVersion\Policies\System /v EnableLUA /t REG_DWORD /d 1 /f and click Enter.
- A notification indicating successful activation will appear.
All that remains is to reboot the system.
Method 6: “Registry Editor”
The Registry Editor utility allows you to perform almost any manipulation with the operating system, so you should use it very carefully. However, enabling UAC through it is not difficult, and this method will be more effective than others in the event that viruses block the activation of this function.
Administrator and standard user accounts
Historically, Windows users used administrator accounts for day-to-day computer use. Of course, in Windows XP you could create a standard user account with fewer permissions for everyday use, but almost no one did this. Although using a standard user account was possible, many applications could not work properly under it. Windows applications typically assumed they had administrator rights.
This was bad - running all applications on your computer as an administrator is not a good option. Malicious applications can change important system settings behind your back. Security holes in applications (even applications built into Windows, such as Internet Explorer) can allow malware to take over your entire computer.
Using a standard user account was also more complex - instead of one user account, you would have two user accounts. To run an application with maximum rights (for example, to install a new program on your system), you will need to right-click its EXE file and select Run as administrator. Once you click this, you will need to enter your administrator account password - this will be a completely separate password from your main, standard user account.
Where do legs come from or a piece of theory about App-V
Microsoft App-V, also known as the application virtualization function, is a component of server and desktop operating systems whose function is to separate and isolate externally installed applications from the OS itself and other programs. The program is “intercepted” by the system and dynamically (online) processed for display to the user. In our case, we use one of the main capabilities of the App-V function (but far from the only one) - Compatibility of applications of different generations for the same platform. And from version to version of the system, the approach of App-V itself in relation to programs installed on Windows changed. So, in Windows XP, without administrative rights, the user could not fully work with some programs at all. But since the advent of Vista, all applications have been required to use a manifest file that specifies the requested level of rights. Among them were:
- asInvoker – run with limited rights until extended rights are requested by a separate command or by another process running as an administrator.
- highestAvailable – administrative level; Administrator rights are required if the user is an admin; If the user does not belong to the administrative group, access to the program's functions and capabilities will be limited.
- requireAdministrator – requires administrative rights; The program will not start at all until it is granted rights.
In general, given the fact that the rare program used “harmless” functions and did not delve into the nooks and crannies of the system, there is little that can be launched in Windows without granting it extended rights. Those. bypassing the UAC window. This issue was partially resolved by adding a variable to the package __COMPAT_LAYER=RunAsInvoker. It forced the system to push aside the requested level of rights in the virtual environment with the asInvoker . By the way, approximately the same capabilities are achieved by the SigCheck and Process Explorer utilities from Sysyinternals. And with Resource Hacker, the manifest can be viewed directly. But that's not the point.
What does User Account Control do?
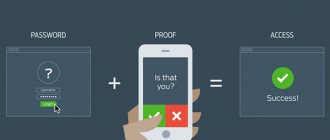
User Account Control helps address the security architecture issues of previous versions of Windows. Users can use administrator accounts for day-to-day computing, but any applications running under the administrator account do not run with full administrator access. For example, using UAC prevents Internet Explorer and other web browsers from running with administrator rights—this helps protect you from vulnerabilities in your browser and other applications.
The only price you pay for using UAC is that every now and then you'll see a window where you have to click Yes (or click No if you weren't expecting the prompt). This is easier than using a standard user account - you don't have to manually run applications as an administrator, they will simply display a UAC prompt when they need administrator access. You don't need to enter a password either - just press a button. The UAC dialog box appears on a special secure desktop that programs cannot access, so the screen turns gray when the UAC prompt appears.
Everyone after installing Windows 7 at startup or installing programs encountered a pop-up window asking permission to make changes to the computer - and many people are annoyed by this, in this article I want to describe step by step how to disable the annoying pop-up window User Account Control (UAC) .
First of all, I’ll say that by disabling User Account Control (UAC), you reduce the level of your computer’s protection from various threats, so think twice about whether it’s worth doing. The possible impact on computer security is described at the end of the article . If you are determined to turn it off, I suggest you consider several options on how to do this.
1 way to disable User Account Control (UAC)
Click “Start” in the Search programs and files enter the word UAC, click on “Change User Account Control Settings”.
In the window that opens, lower the slider to the very bottom and click “Ok” .
This way you will disable annoying windows from popping up.
2 way to disable User Account Control (UAC).
Go to the Control Panel, to do this, click “Start - Control Panel”
Select Small Icons and click on User Accounts .
After that, click on “Changes User Account Control Settings” .
In the window that opens, lower the slider and click
OK .
UAC is disabled.
Table depending on the choice of parameter and its impact on computer security.
| Parameter | Safety Impact |
| Always notify |
|
| Notify only when programs attempt to make changes to the computer |
|
| Notify only when programs attempt to make changes to the computer (do not dim the desktop) |
|
| Never notify |
|
I really hope my article helped you! Please share the link with your friends:
UAC makes using a less privileged account more convenient
UAC also has some tricks that you may not be aware of. For example, some applications could never run under regular user accounts because they wanted to write files to the Program Files folder, which is a protected location. UAC detects this and provides a virtualized folder - when an application wants to write to its Program Files folder, it actually writes to a special VirtualStore folder. UAC tricks an application into thinking it is writing to Program Files, allowing it to run without administrator rights.
Other tweaks made when UAC was introduced also make it easier to use your computer without administrator rights—for example, standard user accounts can change power settings, change the time zone, and perform some other system tasks without UAC warnings. Previously, only administrator accounts could make these changes.
User Account Control UAC
User Account Control (UAC) was introduced as a security tool for the Windows operating system to help regular users perform administrative tasks and to discourage users from running programs as an administrator. When a program requires administrator rights, UAC opens a small window and asks the user if he wants to continue with the action. When the tool was developed, it was assumed that UAC would help prevent the activity of potential malware.
Note : As a fact, the most common gap in computer protection is the user himself. In most cases, there is only one user on the computer - the administrator. So. Any program will be launched as administrator. When it comes to experienced users, this is not a problem, because, usually, they know what can be run, and what is suspicious and must be checked by an antivirus. In the case of novice users, this is a huge problem, since, out of ignorance, beginners launch everything, which viruses successfully take advantage of.
This article will help you understand the purpose of UAC, as well as how you can enable password protection and how it will help you secure your system.
UAC is not as annoying as it seems
Despite all this, many people now disable UAC as a reflex without thinking about the consequences. However, if you tried UAC when Windows Vista was new and applications weren't prepared for it, you'll find that using it today is much less nerve-wracking.
In Windows 10, UAC is more polished - Windows 7 has a more refined UAC system with fewer UAC prompts than Windows Vista.
Apps have become more compatible - app developers no longer assume their apps have full administrative rights. You won't see that many UAC prompts in everyday use. (In fact, you may not see any UAC prompts during everyday computer use if you are using well-designed software—only when installing new applications and changing system settings).
UAC is the most annoying thing when setting up a computer. When you install Windows or buy a new computer, UAC seems worse than it really is. When you install all your favorite applications and configure Windows settings, you will definitely see a UAC prompt after the UAC prompt. You might be tempted to disable UAC at this point, but don't worry—UAC won't offer you as much when you're done setting up your computer.
If you're using an app that shows a UAC prompt every time you launch it, there are ways to bypass the UAC prompt that are better than turning off UAC entirely.
Whitelist for black hats
In all versions of Windows for UAC, there is a so-called white list - a set of system components for which restrictive rules are not applied. Therefore, one of the most common attack methods comes down to trying to find any applications from the white list and trying to inject your own *.dll into them.
Carrying out a DLL hijack attack is relatively simple, although it is not without its pitfalls. They are different for each OS version, and also depend on the settings, account, OS bitness, installed components and patches.
For example, in Windows 7/8 (but not 8.1), you can use the standard system preparation program for deployment sysprep.exe to load your version of cryptbase.dll or another library. To do this, just place it next to the executable, since it begins to search for and load DLLs from its directory. However, if we try to simply copy our file to the %systemroot%/system32/sysprep/ directory, we will receive an error message.
Access to \system32\ is denied
Other articles in the issue:
Xakep #213. FUCK UAC
- Contents of the issue
- Subscription to "Hacker"
The user does not have write access to the system directory, and the administrator must confirm this action via UAC. To ensure that our code gets the necessary rights without any questions asked, we use another trick - with the offline Windows update installer.
Let's place cryptbase.dll in the CAB archive. We will not dwell on how to perform this elementary operation. It is described in detail on the Microsoft website. Let our library be called evil.dll and located in the \FCKUAC directory on the C:\ drive. Then with the following command we will make a “charged” archive:
makecab C:\FCKUAC\evil.dll C:\FCKUAC\evil.cab
Archive with our library
Let's feed this archive to the standalone update installer (Windows Update Standalone Installer).
wusa C:\FCKUAC\evil.cab /quite /extract:%systemroot%\system32\sysprep\
It will unzip it into \system32\sysprep\ and "User Account Control" will be silent.
sysprep utility as a built-in backdoor
If you know how to program, you can launch sysprep.exe hidden - for example, through CreateProcess() with the StartupInfo.wShowWindow = SW_HIDE flag. Today, the heuristic analyzers of many antiviruses complain about hidden windows, but now we are only talking about UAC - it doesn’t care. After such a launch, sysprep.exe will try to load and execute the CRYPTBASE.dll library, but in its place will be ours, which already contains the functionality we need. It will completely legally raise the rights of our code, and UAC will take it for granted.
This happens because wusa and sysprep are on the white list, and all applications on this list can elevate their rights without UAC. Our code from the library loaded by the installer will inherit the rights of the parent process sysprep.exe and will also be considered trusted.
Using sysprep to bypass UAC
The trick above using wusa and sysprep together is a modified Leo Davidson method. The original version was only applicable to unpatched Windows 7 and was described back in 2009 in the Oxford University Computer Society mailing list. A copy is provided on his website, which, due to the abundance of such code, is included in the list of potentially dangerous ones.
The Davidson method, in various modifications, has been used for many years to introduce Trojans, especially the Win32/Carberp family. The epidemic peaked in the fall of 2011, but the method still works in the following typical scenario: actions are performed in a 32-bit version of Windows 7/8 under an administrator account with UAC enabled with default settings. An ordinary user should not run wusa.exe, but many still sit under the admin account without a real need. They are just too lazy to create user accounts and manage access rights even through built-in tools.
Matt Graeber clarifies that this method does not work “as is” in Windows 8.1/10, since both sysprep.exe and UAC itself have been changed in these operating systems. System Deployment Preparation now only loads DLLs from %windir%\system32\.
Command line
Disabling Account Control using the commands:
- Start - Programs - Accessories.
- Right-click on “Command Prompt”.
- Select "As Administrator". A window will open with a black background and white font.
- Copy the command “%windir%\System32\cmd.exe /k %windir%\System32\reg.exe ADD HKEY_LOCAL_MACHINE\SOFTWARE\Microsoft\Windows\CurrentVersion\Policies\System /v EnableLUA /t REG_DWORD /d 0 /f into it " and press
- It changes registry settings. Through it you can reactivate the mode.
Account Control is a necessary security measure. Disable it only as a last resort.
Tell me, does UAC work for you, or do you manage without it?
Setting up UAC
Windows 7 introduced the ability to customize the warning level for UAC.
The UAC setup screen looks like this: Fig. 1. Configuring UAC in Windows 7. There are four levels of UAC warnings available:
- The highest level
is warnings for any attempts to modify system settings and files, as well as when installing software - Second level
– warnings only when attempting to make changes to the system configuration and user settings - Third level
- warnings only when attempting to make changes to the system configuration - The fourth level
is to completely disable UAC.
But much more important, in my opinion, are the additional UAC settings in security policies (Fig. 2): Fig.
2. UAC settings in security policies. Let's take a closer look at some of the UAC policies:
- Behavior of the elevation prompt for administrators
– allows you to set the behavior of the validation window when increasing administrative rights. For example, you can enable confirmation of rights using a password (prompt for credentials) or leave confirmation of rights only by clicking OK (prompt for consent). - Behavior of the elevation prompt for users
– similar to the first point, but for accounts in user mode. - Switch to the secure desktop when prompting for elevation
– switches the desktop to secure mode when passing validation. For the user, the inclusion of this policy is reflected in the form of shading of the desktop when passing the test. In reality, the role of this policy is to isolate the validation procedure from other running programs in order to prevent programmatic means from hijacking the UAC window. - Virtualizes file and registry write failures to per-user locations
– file and registry virtualization. Allows you to work with programs in virtualization mode to prevent damage to the file system and registry (sandbox mode).
UAC Configuration Recommendations:
Personally, I use the highest UAC security settings, including requiring a password for validation. This gives me complete protection for system files, registry and Windows services. Typically, the software uses system files and the registry as read-only. The only exceptions here are system utilities, where confirmation of access rights to the system is quite justified. The use of a password is due to the fact that sometimes not only I work under my account, therefore, just clicking the Yes button is not a sufficient security condition.