- How to unlock core voltage
Msi Afterburner what is it? Msi Afterburner is a program for overclocking video cards (memory and core), as well as for undervolting. The program allows you to monitor internal indicators of the card (monitoring temperature, voltage, fan speed and much more).
How to use
To use the program, you must first download, install and configure it. Let's consider all these points.
First you need to download the program.
To do this, go to the official MSI Afterburner website and scroll down the site to the download section:
How to install MSI Afterburner
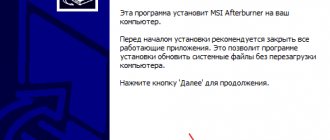
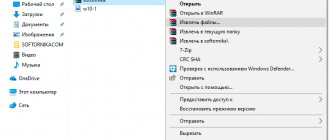
After you have downloaded the archive, unzip it, go to the unzipped folder and run the installation file “MSIAfterburnerSetup.exe”. Where to install is up to you, but it is advisable to use standard system paths - C:\Program Files (x86)\MSI Afterburner - this is for Windows 10.
Click “next” everywhere.
Having reached the point “select program components to install”, uncheck the “Riva Tuner Statistics Server” checkbox.
Then click “next” and wait for the installation to complete.
After installation, launch MSI Afterburner.
MSI Afterburner is very easy to use. In order to understand how the program works, let's study the parameters and what they are responsible for.
Preparing to overclock your video card using MSI Afterburner
To overclock the video card we will use the MSI Afterburner program. This is free software developed by MSI and based on the RivaTuner program. The MSI Afterburner program allows you to overclock any modern video cards from NVIDIA and AMD, starting from NVIDIA GeForce 8X00 and AMD Radeon 3000. You can download this program from the official MSI website or on the Guru3d website.
Installing MSI Afterburner should not pose any difficulties. Just agree to the license agreement and install.
At the stage of selecting components, we do not change anything and continue the installation.
Once the installation of MSI Afterburner is complete, you will be prompted to install RivaTuner Statistics Server. We agree and install.
After installing and launching MSI Afterburner, you should see an interface similar to the one in the screenshot below.
If in your case the MSI Afterburner interface is different from the screenshots, then you can change it in the settings. To do this, click on the settings button, go to the “Interface” tab and activate the “Default MSI Afterburner v3 skin” option.
You also need to enable all compatibility properties in the settings. To do this, go to the “Basic” tab and check the boxes as shown in the screenshot below. After this, you can close the MSI Afterburner program settings and proceed directly to overclocking the video card.
We also need the FurMark program to overclock the video card. This is a free video card stress test that can be downloaded from the official website. Installing FurMark is also not difficult, just run the installer, agree and install.
After launching FurMark, you will see a window similar to this.
FurMark has graphics settings and a “GPU Stress test” button that starts testing.
Setting up MSI Afterburner
- Gpu Clock
is an indicator of the clock speed of the video card. If you have a farm of several cards, the selected video card will be shown. - Core Voltage (mV)
– this slider is responsible for the power consumption of the video card. You can either overclock or lower this indicator. The lower the Core Voltage, the lower the energy costs: lowering this indicator will allow you to save on electricity, and if you hit the ceiling on energy consumption, this function will reduce the current consumption of video cards, and will make it possible to install additional cards if you are a miner . - Power Limit
– is responsible for the power consumption of the card. With greater overclocking, that is, if you want to greatly overclock the video card, then power consumption must be added, otherwise the card will not maintain frequencies and reset them to factory settings. The indicator is often blocked. Below we will tell you how to unlock it. - Temp.
Limit – slider responsible for the critical temperature of the video card. If this (set by you) indicator is exceeded, the video card will reset the frequencies (go into throttling). - Core Clock (MHz)
- This is overclocking the GPU (graphics processing unit) frequency of a video card.This overclocking is necessary to increase the hashrate of your video card during mining or to increase performance (FPS) in games.
- Memory Clock (MHz)
– This is overclocking the video card memory. Usually this gives a small increase in games, but in mining the increase is noticeable.Especially in the ethash algorithm.
- Fan Speed
– a slider responsible for the rotation speed of the video card fans. Where 100% is the maximum rotation speed, and 0% is the minimum speed. If Fan Speed is blocked, then you need to unlock it by clicking on the word “Auto”, which is located next to it. In the “Auto” mode, the fans will automatically set the load percentage, depending on the GPU temperature. But when mining in the “Auto” mode, this figure will almost always be 100%, since the mining process itself greatly heats up the video card.Fan Speed – if your video card gets very hot, we still do not recommend setting the speed to 100%, since this will exhaust the cooler’s life faster (and this is one of the most common breakdowns).
- Button that opens advanced settings
. - Video card core temperature.
If there are several video cards in the farm, the last selected video card and its temperature are displayed. - Start Up
– will allow you to add msi afterburner to startup. If the icon is circled (in this case in red, but it can also be a different color, since you can install a different theme), then MSI Afterburner will automatically launch when you turn on the computer (farm). - Profile
– These are indicators from one to five. They are responsible for saving your configuration. That is, you can set the desired overclocking (memory, core), the desired fan speed, and so on, and save it to any number from 1 to 5. If the “Start Up” function is active, then when you reboot or turn on your farm, it will immediately apply all settings to the video cards you specified.
When increasing the overclocking of a video card in memory and core, it is best to add 10 units each.
- Name of the selected video card
- When you click on the word “GPU”, a list of all video cards will appear. Select each card in turn and set its overclocking and cooler rotation speed.
- Reset all overclocking settings to factory settings.
You can also overclock video cards directly in miners. See overclocking examples:
How to overclock and reduce card voltage in PhoenixMiner
How to overclock and reduce voltage in Claymore Dual Miner
About the benefits of overclocking. Part three - overclocking the video card
- Introduction
- MSI AfterBurner
- Stability testing
- Test participants and overclocking
- Inno3D GeForce GTX 480 iChiLL
- Inno3d GeForce GTX 460
- Gainward GTX 550 Ti GS
- AMD Radeon HD 6870
- AMD Radeon HD 5850
This article is written for overclocking beginners.
Its goal is to consider “regular” overclocking of video cards, which does not involve replacing the cooling system, increasing supply voltages or flashing the BIOS. In general, such overclocking of video cards consists of increasing the frequency of the core and video memory. Overclocking a graphics processor (hereinafter referred to as GPU - graphic processor unit) is possible due to the fact that manufacturers of GPUs and video cards themselves assign frequencies based on the following framework:
- The frequency at which all GPUs of a given revision will be able to operate without exception (except for defective ones) - this means that some of them can actually work faster;
- The value of the video card core supply voltage (Vgpu) is optimal in terms of the ratio of GPU operating frequency and heat dissipation (uncharacteristic for top-end video cards);
- The level of heat generation (and therefore Vgpu, which also limits the GPU frequency) corresponds to the performance of the standard cooler used to cool this video card model.
Increasing the video memory frequency primarily depends on factors identical to the graphics core. But if Vgpu on video cards is set within the recommended values by NVIDIA and AMD, then the situation with the value of the video memory supply voltage (conventionally denoted as Vmem) is somewhat different. Memory from different manufacturers and different batches can be installed on the same video card model. Then Vmem can fluctuate within relatively significant limits, as a result of which there are often cases when the voltage across it is less than that recommended by the manufacturer. However, it also happens the other way around, when Vmem initially actually exceeds the recommended level.
The basic prerequisites for overclocking video cards are the same as for central processors and RAM: not all copies within the same family are overclocked equally, successful overclocking will require good cooling and a high-quality power supply, the final level of overclocking will also depend on the values of the supply voltages. But, unlike processors and RAM, video cards are overclocked primarily not using the BIOS, but by programs.
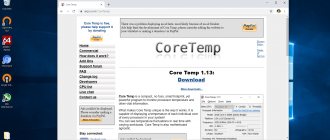
Controlling frequencies, pipeline formula, number of active vertex processors, and so on is most conveniently done with the GPU-Z program (a kind of analogue of CPU-Z for processors):
announcements and advertising
2080 Super Gigabyte Gaming OC for 60 rubles.
Compeo.ru - the right comp store without any tricks
RTX 2060 becomes cheaper before the arrival of 3xxx
Ryzen 4000
series included in computers already in Citylink
The price of MSI RTX 2070 has collapsed after the announcement of RTX 3xxx
Core i9 10 series is half the price of the same 9 series
The price of memory has been halved in Regard - it’s more expensive everywhere
Overclocking of video cards is performed by such programs as MSI AfterBurner, Sapphire Trixx, Riva Tuner, Ati Tray Tools, Power Strip and others. The most common one at the moment is MSI AfterBurner.
It is the successor to RivaTuner and allows you to overclock all modern (and not so modern) video cards. For a novice overclocker, its capabilities will be more than enough.
In order to switch the program interface from English (set by default) to Russian, click the “Settings” button in the lower right corner of the main program window. In the top line of the tab that opens, scroll to “User Interface”, then select Russian and restart the program. Unfortunately, the main program window will still remain in English.
Acceleration is carried out by moving the “sliders” to the right to the desired frequency value and then pressing the “Apply” button.
The main settings are hidden under the same “Settings” button.
Synchronizing the settings of identical GPUs (graphics processors) allows you to simultaneously overclock all identical GPUs installed in a PC when using SLI or CrossFire configurations. The purposes of the next two settings are clear from their names. Unlocking voltage control allows you to adjust Vgpu values on many video card models. Activation of voltage monitoring “speaks” for itself. Boosting the DC voltage allows you to raise the Vgpu value in 2D mode to the 3D level.
In the “Cooler” tab, when you enable software user mode, you can set a curve for changing the fan speed depending on the temperature of the video card core. The shape of the graph can be arbitrary - it is generated by the user by clicking the left mouse button. By default, the rotation speed is read every 5 s (5000 ms). Temperature hysteresis determines the difference between temperatures “A”, at which, according to the graph, the previous change in rotation speed occurred, and “B”, at which the next one should occur.
So, for example, if the fan starts to increase speed at a temperature of 60 degrees Celsius, then with a hysteresis value of 5, the speed will decrease only after the temperature drops below 55 degrees.
The meaning of most of the settings in the “Monitoring” tab is clear based on their name. Let us only clarify the purpose of the lower block of options.
Enabling data filtering allows you to minimize errors in reading data from sensors in the case of simultaneous use of several monitoring applications. If you have a Logitech keyboard with a built-in LCD screen at hand, then all the necessary information can be displayed on it. If you want to see the required parameters in the so-called “tray” window (in the lower right corner near the clock), you need to select the appropriate option.
We will pay special attention to the OED - overlay screen display. This feature allows the user to monitor the state of the video card in real time in 3D applications.
In accordance with the specified settings, the required parameters are displayed on the screen: GPU temperature, ambient temperature, GPU load, and so on in the list. When you click on the “Advanced” button, additional settings will be available:
In the “Screenshot Capture” tab, you can configure hotkeys, format and location for saving screenshots.
By analogy with the previous tab, video capture parameters are configured.
The next tab is for setting up profiles.
There are few interface settings: language, skin and display of interactive tips.
When you click the “Detach” button in the main program window, the monitoring window with graphs is detached. To return it to its place, you need to click the close window button in the upper right corner.
During the process of overclocking the Radeon 5850 video card, it turned out to be impossible to overclock the video card core to more than 775 MHz without additional program settings - the GPU overclocking “slider” simply did not move any further.
To increase the frequency limit of the program, open the MSIAfterburner.cfg file located in the program folder in Notepad. Find the following lines in it:
UnofficialOverclockingEULA = UnofficialOverclockingMode = 0
And give them the following appearance:
UnofficialOverclockingEULA = I confirm that I am aware of unofficial overclocking limitations and fully understand that MSI will not provide me any support on it UnofficialOverclockingMode = 1
Save the file, close it and restart the program.
After overclocking, you need to make sure that the video card is stable. For preliminary quick testing, Furmark or MSi Kombustor programs are often used.
To start testing, you just need to press the BURN-IN-test button. All necessary parameters (primarily core temperature) are displayed in the upper left corner:
Watch the video
subscribe
Before we begin, remember that overclocking is not without risk and there is a risk of causing irreparable damage when tuning your graphics card.
MSI Afterburner makes overclocking easy, but using a fair amount of common sense is highly recommended.
If you feel like you've gone too far with overclocking, stop immediately and seek advice from competent sources before continuing.
How to overclock a video card
Overclocking MSI Afterburner follows standard overclocking and testing techniques to find the highest and most stable settings. Don't forget to click the "Apply" button after any changes.
- To begin, set the “Power Limit” and “Temp Limit” sliders to maximum. With these settings, the graphics card will be more energy efficient and will reach higher temperatures. The graphics card will never reach its upper limit unless there is a serious hardware failure, so don't be surprised if the maximum temperature seems dangerously high. Card manufacturers define these parameters and therefore they are considered safe and there is no risk of damaging the video card.
- Increase the core clock speed slider a little. Each tick on the slider represents one MHz above or below the stock clock speed, depending on whether you move up or down. We recommend adding 20 to 30 MHz. Don't forget to click "Apply" after increasing the clock speed.
- For each increment, run Kombustor in the background and check for artifacts, flickering screen, black flashes, or crashes. Take a couple of minutes to observe each change.
- Once you encounter a consistent number of graphical issues, stop increasing the clock speed. Don't worry about unusual behavior; this is to be expected and is the GPU's way of telling us that it has reached its maximum power. Crashes and black screens will reset the graphics card driver, after which you can restore the clock speed in a few seconds.
- Reduce the core clock speed in small increments of about 5 MHz until all artifacts/graphics issues are gone and Kombustor is stable. We also recommend testing any changes in the context of a demanding miner or game. Raise the settings to ultra to force the graphics card to work harder to see the changes more clearly. If you have problems, reduce the clock speed.
- Next, we will apply the same stress test to the memory clock speed, but with a larger step. We recommend 50 to 100 MHz.
- Once you encounter persistent graphical problems in Kombustor, reduce the memory clock speed in small steps until you find a stable speed. Also test it in game.
- Now we want to test the new core and memory clock speeds over an extended period. Launch Kombustor and let it run for a good 10 minutes, checking for artifacts and glitches. Reduce the speed in small increments until you have a stable combination of both.
- Once you're happy with the overall stability, be sure to save your settings as a profile by clicking the floppy disk icon and then one of the profile buttons 1-5.
Overclocking the GPU of a video card in MSI Afterburner
Now you can proceed directly to overclocking. The process of overclocking a video card using MSI Afterburner includes 3 steps:
- Overclocking the GPU (Core Clock).
- Overclocking video memory (Memory Clock).
- Overclocking the GPU and video memory together.
The first two steps allow you to determine the maximum overclocking values that can be used for the GPU and video card memory. And at the last stage it is checked how it all works together. At each stage and after each change in parameters, the video card is tested. If everything is fine, you can continue, but if problems arise, then you need to go back and reduce the acceleration.
Step #1: We will start by overclocking the GPU. To do this, set the Power Limit to maximum and increase the Core Clock by 40-50 MHz. After this, save the settings using the “Apply” button.
Step No. 2. We run stress testing of the video card in the FurMark program and observe for about 5 minutes. If there are no problems during stress testing (artifacts, crashes, freezes, overheating), then launch some heavy game and play for 30-60 minutes . At the same time, we regularly monitor the temperature of the video card. It is advisable that the temperature does not go beyond 80 degrees. If problems arise during stress testing, then slightly reduce the Core Clock and run the stress test again. If everything is fine, we test it in games.
Step No. 3. After the first successful increase in Core Clock, you can repeat the procedure. Again, increase the frequency of the graphics chip (this time by 10-20 MHz), click “Apply” and move on to step No. 2 (stress testing and then games).
Then we repeat steps No. 2 and 3 until we determine the maximum Core Clock frequency with which the video card can operate. It is very important to increase the frequency gradually and in small steps, testing after each step. This is the only way to correctly and safely determine the maximum overclocking at which the video card remains stable. After determining the maximum frequency, it needs to be reduced by 10 MHz just to get 100% stability.
How to unlock the Core Voltage, Power Limit and Temp Limit sliders
Example of an inactive option:
To unlock core voltage, acceleration and fan speed, you need to click on the settings gear:
Here we can tick the options we need - “Unlock voltage control” and “Unlock voltage monitoring”.
You can also unlock Core Voltage in *.cfg files for each video card separately by enabling the VDDC_Generic_Detection function.
Example:
[Settings]
VDDC_Generic_Detection=1
If there are no such lines there, then you need to insert them into each configuration file yourself.
The Core Voltage slider now becomes active.
Also, do not forget to check the “Unlock voltage control” and “Unlock voltage monitoring” checkboxes in the settings.