What is the User Agent for and what does it consist of?
All browsers, mobile devices, and search robots contain UserAgent. The line displays all the necessary information about the computer or phone, browser version, operating system, robot.
Also, lines describing the User-agent can be written in the Robots.txt file; they are important for the correct operation of search robots on the site. Using strings, you can hide the data contained on a resource from all or from certain search engines: a specific page or the entire site, a certain type of file, personal data of users, etc. So, using User-agent, you can hide, for example, only pictures, or open them exclusively for indexing.
You can prohibit scanning information by means of instructions either to all bots or to the robot of a specific search engine recognized by the User Agent.
The User Agent description line contains the following information:
- Browser name and version.
- Language.
- Operating system version.
- Software installed on the device you are using.
- The type of device from which the user accessed the site.
You can change the User Agent in order to change resource indexing parameters, hide information that should not be shown to unauthorized persons, and update the old browser so that you no longer receive notifications about the need to install another application.
For each browser and device operating system, different instructions are written in the line.
What is a User Agent?
User Agent is a string that web browsers use as their name, it contains not only the browser name, but also the operating system version and other parameters. Using the user agent, you can determine quite a lot of parameters, for example, the name of the operating system, its version and bitness. You can also determine the device itself on which the browser is installed; it can be a computer, tablet, iPhone, iPad or other mobile device. You can also determine from the user agent the functions that the web browser supports, for example, JavaScript, Java Applet, Cookie, VBScript and Microsoft's ActiveX.
How to determine User Agent?
You can find data about requests coming to the site in the form of server logs. The function of saving server logs can be enabled in the Control Panel of your hosting account .
In the future, server logs can be found in the domains , namely in the logs .
Each line contains information about one specific request. Eg:
[u][26/Oct/2016:12:42:08 +0300] 0.350 0.350 200 55.22.33.11 imajor.ru GET / HTTP/1.1 “Mozilla/5.0 (X11; Linux x86_64) AppleWebKit/537.36 (KHTML, like Gecko ) Chrome/54.0.2840.71 Safari/537.36" "-" 6756
- 55.22.33.11 – IP address of the device from which the request came
- imajor.ru – name of the site where the request was received
- “Mozilla/5.0 (X11; Linux x86_64) AppleWebKit/537.36 (KHTML, like Gecko) Chrome/54.0.2840.71 Safari/537.36” – User-Agent of the browser used by the Internet user or robot visiting the site
A huge number of User Agent strings are stored in the browscap.org database. If you find this string in the database, you will get many parameters, such as the name and version of the web browser, operating system and much more. The UserAgent database is regularly updated and can be downloaded from browscap.org completely free of charge.
Why does a site need to know which User-Agent they came to it with?
As you already understand, the UserAgent line helps you find out where the request to the site was made from. This can be done by a computer, smartphone, search engine robot or software. You need to know this information in order to:
- redirect a request from a smartphone to the mobile version of the site;
- apply appropriate styles for a specific browser;
- block access to the resource to various utilities;
- collect statistics on how many requests come from which devices;
- create rules for processing requests coming from bots and so on.
To solve the above problems, a modern webmaster does not need to be able to develop scripts in PHP, because special extensions with all the necessary functions have long been developed for many popular engines, such as WordPress. You just need to find the appropriate plugin.
User Agent and search robots
The search giant Google has created a huge number of robots responsible for indexing various types of content contained on sites, as well as the devices from which users use the Internet.
Google's main search bot is Googlebot. If you need to completely block a site from indexing in a search engine, you need to specify a condition in the Robots file as a user agent for Googlebot that hides the resource from search engine bots.
You can also hide a certain part of the content. To do this, you need to write a rule for the agent indexing the content. For example, if you want to block images on the site from indexing, a condition is specified for Googlebot-Image. Here is an example of how this operation looks in the Robots file:
User-agent: Googlebot Disallow: (the line is empty because the main bot is allowed to index) User-agent: Googlebot-Image Disallow: /personal (prevents the bot from crawling images in the personal directory)
You can also hide the entire site from the robot, except for a certain type of content, for example, video. Then prevent Googlebot from indexing the entire resource, and register Googlebot Video as the agent that is allowed to index.
There is no need to make any changes to robots.txt if you want the entire site to be open to crawling by search bots.
What is a User-agent?
User-agent is available in any browser and mobile device. This line contains a lot of information about the computer, operating system, and browser version. The lines describing the User-agent written in the Robots.txt file affect the operation of search engines on the site. With their help, you can hide from search engines (from all or some specific ones) the information on the site - a certain page or the entire site, a specific type of file. By limiting indexing by file type, for example, you can make only pictures visible, only texts, or, conversely, exclude a specific file type from indexing.
Visibility restrictions can be specified for a specific search engine bot or for all robots. Instructions are written for each robot for which the User-agent spelling is known.
From the line containing the description of the User-agent, you can find out the following information:
The main robot for the Google search engine is Googlebot. If you need to completely block indexing of the entire site for this system, just add a condition to the Robots.txt file that sets Googlebot as the user agent. Then the site will become invisible to all Google bots. You can limit the visibility of certain content. Then you need to configure a rule for the agent responsible for this content. For example, Googlebot-Image scans images on a website. The entry in the Robots file where this operation is executed looks like this:
User-agent: Googlebot
Disallow: (there is an empty space here, since nothing is prohibited to the main bot)
User-agent: Googlebot-Image
Disallow: /personal (prohibits the visibility of images in the personal directory for the bot responsible for this type of content).
You can prevent your entire site from being indexed, but allow specific content to be indexed, such as videos or posted ads. For example, to allow scanning only videos, the main bot needs to prohibit indexing the entire site, and specify Googlebot Video as an agent for which no restrictions are provided.
If the site must be visible to the Google search engine in its entirety, without exception, then the Robots.txt file is not needed, it can be completely deleted (provided that there is no need to restrict any other search engine).
How to block access to a site using User-Agent?
You will need to use several rules in your .htaccess file. Let's look at an example using rules that block access to a resource through the java utility:
SetEnvIfNoCase User-Agent '^Java bad_bot Deny from env=bad_bot
After the User-Agent specified in the first line, there is a Java utility user agent. You see that it is given the name bad_bot . The second line begins with the Deny , which denies access to the request sent by bad_bot.
Instead of Java, you can register the user agent of any bot and browser, and also assign them the name bad_bot.
To check the correctness of the changes made, there is no need to access the site from different devices. For modern browsers, an abundance of plugins have been invented with the function of replacing User-Agent.
How to change user agent in browsers?
Mozilla Firefox
The method is suitable for Mozilla Firefox version 34.0 and later. Write about:config and then create a line calling it general.useragent.override . Initially, this line does not exist. In its value, enter the content of User Agent.
Chrome
Not suitable for browser versions older than 26.0.1410.64. Open Chrome by entering the key –user-agent=”enter a new line User-agent” . For example, if Windows is installed on your PC, use the Win+R key combination and enter chrome –user-agent=”MyBrowser” . To check the value, type about: in the address bar.
Opera
For those who have Opera version 12.15 and later. In the address bar, write opera:config#UserPrefs|CustomUser-Agent , and then in the highlighted Custom User-Agent , enter a new value for the User Agent line. Don't forget to save your changes at the bottom of the page.
Safari
For Safari versions 5.1.7 and later. Go to the Development . You can call the panel by clicking Alt. The menu can be disabled, but to enable it, go to Edit - Preferences - Add-ons, checking the box next to Show development menu in menu bar . Next in the menu, go to Development – User Agent . There is already a list of some user agents, but if you don’t need any of the proposed ones, click Other and write the line you need.
Internet Explorer
The method is relevant for versions of Internet Explorer 10 and later. Press the F12 key to open Developer Tools , there go to the menu Tools - Change user agent string . Here, too, there is a ready-made list of several User Agent lines, but if they do not suit you, click Special and enter the required line, then click Add , and then select from the list and Install .
The huge disadvantage of this method is that after closing the browser it stops working and, as soon as the browser starts again, you will have to go into the list again and select the created user-agent.
But there is an alternative option. Correct the UserAgent line in the registry. This way it will work even after closing the web browser. But this method also has a drawback. You won't be able to change the line to whatever you want. It contains various registry values separated by the symbol «;».
To change the value relative to all users use:
https://HKEY_LOCAL_MACHINE\SOFTWARE\Microsoft\Windows\CurrentVersion\Internet Settings.0\User Agent\
For one user:
https://HKEY_CURRENT_USER\SOFTWARE\Microsoft\Windows\CurrentVersion\Internet Settings.0\User Agent\
Initially there is only one key, Default or default . Create three string parameters:
- Compatible.
- Platform.
- Version.
The changes will take effect after restarting the browser. For example:
Default = "Mozilla/5.0" Compatible = "compatible" Platform = "Windows NT 6.1" Version = "MSIE 10.0"
How to change user agent in Mozilla Firefox
As with Chrome, not all versions of Firefox allow you to easily change the setting we're looking at. The instructions given are valid for versions starting from 34. In the address bar, enter about:config and in the page that appears, create the general.useragent.override parameter.
Select the type of parameter to be created “String” and in the new window enter the desired user agent value.
How to change User Agent on mobile devices?
In most smartphones, the user agent string is changed through the built-in browser settings.
Standard browser for Android
User-Agent can be changed in the browser settings. The UAString option is responsible for this. Although initially this menu is hidden. about:debuq in the address bar and click Search to make the option visible.
Dolphin Browser
The method works for Dolphin Browser version 11.4.2 and higher. The line in the menu Settings – Special – Personalization – User agent . Available in Android, iPad, iPhone, Custom and Desktop options. In “Custom” you can type your User Agent string.
Windows 10
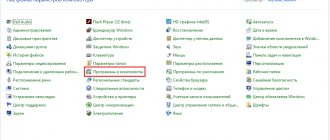
Click on the search button. In the input field, type Control Panel .
Press Enter.
The Control Panel will open, in it select Uninstall a program .
You will be shown a list of all programs installed on your computer. Review it carefully and uninstall the program that you suspect as the cause of the infection. This is probably the last program you installed. Also, take a close look at other programs and remove any that seem suspicious to you or that you are sure that you did not install them yourself. To remove, select a program from the list and click the Remove/Change .
Next, follow the Windows instructions.
Remove User-Agent Switcher ads from Chrome, Firefox and Internet Explorer using AdwCleaner
AdwCleaner is a small program that does not require installation on your computer and is designed specifically to find and remove adware and potentially unnecessary programs. This utility does not conflict with the antivirus, so you can safely use it. There is no need to uninstall your antivirus program.
Download the AdwCleaner program by clicking on the following link.
Downloaded 1021451 times Version: 8.0.7 Author: Malwarebytes, Xplode Category: Security Update date: July 23, 2020
After the program has finished downloading, run it. The main AdwCleaner window will open.
Click on the Scan . The program will begin checking your computer. When the scan is completed, you will see a list of found User-Agent Switcher components and other found parasites.
Click the Cleanup . AdwCleaner will begin cleaning your computer and will remove all malware components found. At the end of treatment, restart your computer.
Uninstall User-Agent Switcher using Malwarebytes Anti-malware
Malwarebytes Anti-malware is a well-known program designed to combat a variety of adware, potentially unnecessary and malicious programs. It does not conflict with the antivirus, so you can safely use it. There is no need to uninstall your antivirus program.
Download Malwarebytes Anti-malware using the following link.
Downloaded 385401 times Version: 4.1 Author: Malwarebytes Category: Security Update date: April 15, 2020
When the program downloads, run it. The Program Installation Wizard window will open in front of you. Follow his instructions.
When the installation is complete, you will see the main program window.
The program update procedure will start automatically. When it is completed, click on the Start scan . Malwarebytes Anti-malware will begin scanning your computer.
When the scan of your computer is complete, Malwarebytes Anti-malware will show you a list of malware and adware parts found.
To continue treatment and removal of malware, you just need to click the Remove selected . This will start the removal procedure for the User-Agent Switcher adware program.
Remove User-Agent Switcher ads in Chrome by resetting browser settings
Resetting Chrome settings will remove malicious extensions and restore browser settings to default values. At the same time, your personal data, such as bookmarks and passwords, will be saved.
Open the main menu of Chrome by clicking on the button in the form of three horizontal stripes (). A menu will appear as in the image below.
Select Settings. Scroll down the page that opens and find the Show advanced settings link. Click on it. A list of additional settings will open below. Here you need to find the Reset settings button and click on it. Google Chrome will ask you to confirm your actions.
Click the Reset . After this, the browser settings will be reset to their original settings and pop-ups or redirects to User-Agent Switcher will be removed.
Remove User-Agent Switcher ads in Firefox by resetting browser settings
Resetting Firefox settings will remove malicious extensions and restore browser settings to default values. At the same time, your personal data, such as bookmarks and passwords, will be saved.
Open the main menu of Chrome by clicking on the button in the form of three horizontal stripes (). In the menu that appears, click on the question mark icon (). This will bring up the Help menu as shown in the image below.
Here you need to find the Troubleshooting Information item. Click on it. In the page that opens, in the Set up Firefox section, click the Clean Firefox button. The program will ask you to confirm your actions.
Click the Clean Firefox button. As a result of these actions, the browser settings will be reset to their original settings. This will remove pop-up ads for User-Agent Switcher.
Remove User-Agent Switcher advertising in Internet Explorer by resetting the browser settings
Resetting Internet Explorer and Edge settings will remove malicious extensions and restore browser settings to default values.
Open the main browser by clicking on the button in the form of a gear (). In the menu that appears, select Internet Options.
Here, open the Advanced tab, and in it click the Reset button. The Reset Internet Explorer settings window opens. Check the box next to Delete personal settings, and then click the Reset button.
When the factory reset process is complete, click Close. For the changes to take effect, you need to restart your computer. This way you can get rid of User-Agent Switcher ads.
Block User-Agent Switcher advertising
To increase the protection of your computer, in addition to an anti-virus and anti-spyware program, you need to use an application that blocks access to a variety of dangerous and misleading websites. In addition, such an application can block the display of intrusive advertising, which will also lead to faster loading of websites and a reduction in web traffic consumption.
Download the AdGuard program using the following link.
Downloaded 189931 times Author: © Adguard Category: Security Update date: July 17, 2018
After the download is complete, run the downloaded file. The Program Installation Wizard window will open in front of you.
Click on the I accept the terms and conditions button and follow the instructions of the program. Once the installation is complete, you will see a window as shown in the image below.
You can click Skip to close the installer and use the default settings, or the Get Started button to familiarize yourself with AdGuard's features and make changes to the default settings.
In most cases, the standard settings are sufficient and there is no need to change anything. Every time you start your computer, AdGuard will start automatically and block pop-up User-Agent Switcher ads, as well as other malicious or misleading web pages. To get acquainted with all the features of the program or to change its settings, you just need to double-click on the AdGuard icon, which is located on your desktop.
By following these instructions, your computer should be completely cured of advertising banners and pop-ups that were caused by the User-Agent Switcher adware in Google Chrome, Mozilla Firefox, Internet Explorer and Microsoft Edge. Unfortunately, the authors of such applications constantly update them, making it difficult to treat your computer. Therefore, if these instructions did not help you, then you have become infected with a new version of User-Agent Switcher and then the best option is to contact our forum.
In order to avoid infecting your computer in the future, please follow three small tips
- When installing new programs on your computer, always read the rules for their use, as well as all the messages that the program will show you. Try not to install with default settings!
- Keep anti-virus and anti-spyware programs updated to the latest versions. Please also note that you have Windows automatic updates enabled and all available updates are already installed. If you are not sure, then you need to visit the Windows Update website, where they will tell you how and what needs to be updated in Windows.
- If you use Java, Adobe Acrobat Reader, Adobe Flash Player, be sure to update them on time.
How to change User Agent in PHP?
Suitable for PHP 5.6 and later. There are two ways to change the user agent in PHP:
- In the php.ini , change the user_agent .
- Apply stream_context_create during script execution.
Example usage for file_get_contents :
$opts = [ "http" => ["user_agent" => "my user agent"] ]; $context = stream_context_create($opts); file_get_contents("https://example.com/", false, $context);
Example for Soap Client :
$opts = [ "http" => ["user_agent" => "my user agent"] ]; $context = stream_context_create($opts); $soapclient = new SoapClient("https://example.com/wsdl/", ["stream_context" => $context]);
Lists and examples of User Agent strings
Desktop browsers:
- Mozilla Firefox 36 (Win 8.1 x64): Mozilla/5.0 (Windows NT 6.3; WOW64; rv:36.0) Gecko/20100101 Firefox/36.0
- Google Chrome 53 (Win 10 x64): Mozilla/5.0 (Windows NT 10.0; WOW64) AppleWebKit/537.36 (KHTML, like Gecko) Chrome/53.0.2785.116 Safari/537.36
- Google Chrome 40 (Win 8.1 x64): Mozilla/5.0 (Windows NT 6.3; WOW64) AppleWebKit/537.36 (KHTML, like Gecko) Chrome/40.0.2214.115 Safari/537.36
- Opera 40 (Win 10 x64): Mozilla/5.0 (Windows NT 10.0; WOW64) AppleWebKit/537.36 (KHTML, like Gecko) Chrome/53.0.2785.101 Safari/537.36 OPR/40.0.2308.62
- Opera 12.17 (Win 8 x64): Opera/9.80 (Windows NT 6.2; WOW64) Presto/2.12.388 Version/12.17
- Apple Safari 5.1 (Win 8 x64): Mozilla/5.0 (Windows NT 6.2; WOW64) AppleWebKit/534.57.2 (KHTML, like Gecko) Version/5.1.7 Safari/534.57.2
- Internet Explorer 11 (Win 10 x64): Mozilla/5.0 (Windows NT 10.0; WOW64; Trident/7.0; .NET4.0C; .NET4.0E; rv:11.0) like Gecko
- Internet Explorer 11 (Win 8.1 x64): Mozilla/5.0 (Windows NT 6.3; WOW64; Trident/7.0; ASU2JS; rv:11.0) like Gecko
- Microsoft Edge (Win 10 x64): Mozilla/5.0 (Windows NT 10.0; Win64; x64) AppleWebKit/537.36 (KHTML, like Gecko) Chrome/46.0.2486.0 Safari/537.36 Edge/13.10586
Mobile browsers :
- iPhone: Mozilla/5.0 (iPhone; CPU iPhone OS 6_0 like Mac OS X) AppleWebKit/536.26 (KHTML, like Gecko) Version/6.0 Mobile/10A5376e Safari/8536.25
- Android 2.3.5 (Philips W632): Mozilla/5.0 (Linux; U; Android 2.3.5; ru-ru; Philips W632 Build/GRJ90) AppleWebKit/533.1 (KHTML, like Gecko) Version/4.0 Mobile Safari/533.1
Tablets:
iPad: Mozilla/5.0 (iPad; CPU OS 6_0 like Mac OS X) AppleWebKit/536.26 (KHTML, like Gecko) Version/6.0 Mobile/10A5376e Safari/8536.25
Search engines :
- Yandex: Mozilla/5.0 (compatible; YandexBot/3.0; +https://yandex.com/bots)
- Google: Mozilla/5.0 (compatible; Googlebot/2.1; +https://www.google.com/bot.html)
- Bing: Mozilla/5.0 (compatible; bingbot/2.0; +https://www.bing.com/bingbot.htm)
- Yahoo! Slurp: Mozilla/5.0 (compatible; Yahoo! Slurp; https://help.yahoo.com/help/us/ysearch/slurp)
- Mail.ru: Mozilla/5.0 (compatible; Linux x86_64; Mail.RU_Bot/Fast/2.0; +https://go.mail.ru/help/robots)
- Sputnik: Mozilla/5.0 (compatible; SputnikBot/2.3; +https://corp.sputnik.ru/webmaster)
Robots , bots , analyzers :
- Ahrefs: Mozilla/5.0 (compatible; AhrefsBot/5.0; +https://ahrefs.com/robot/)
- Majestic: Mozilla/5.0 (compatible; MJ12bot/v1.4.5; https://www.majestic12.co.uk/bot.php?+)
- SMTBot: Mozilla/5.0 (compatible; SMTBot/1.0; +https://www.similartech.com/smtbot)
- linkdex: Mozilla/5.0 (compatible; linkdexbot/2.2; +https://www.linkdex.com/bots/)
- Exabot: Mozilla/5.0 (compatible; Exabot/3.0; +https://www.exabot.com/go/robot)
- StatOnline.ru: Mozilla/5.0 (compatible; StatOnlineRuBot/1.0)
How to change User-Agent in Google Chrome, Yandex Browser or Edge
Since Microsoft Edge uses Chromium, the process is the same for Chrome and Edge. Same as for Yandex Browser or Opera.
Right click anywhere on the web page -> "View Code"
Alternatively, you can use the keyboard shortcut CTRL + Shift + I on Windows, Cmd + Opt + J on Mac.
Select "More Tools" -> "Network Conditions"
Click on the three vertical dots in the right corner.
Uncheck "Select Automatically"
Select one from the list of built-in user agents
If the user agent you need is not listed, you can enter it manually in the empty line under the drop-down menu. For example, Google bot user agent:
Mozilla/5.0 (compatible; Googlebot/2.1; +https://www.google.com/bot.html)
This can be useful for SEO specialists when it is necessary to detect cloaking on a website (the user is shown one content, and the Google bot is shown another).
As an alternative, you can use any convenient extension for Chrome, for example, User-Agent Switcher for Chrome or User-Agent Switcher and Manager.
I myself usually try not to use unnecessary tools, such as browser extensions or plugins for CMS, when all the necessary actions can be performed manually. Otherwise, over time, the browser or site will begin to slow down greatly due to the many add-ons.
In addition, extensions tend to become outdated or unexpectedly break the site. As a result, you will be looking for a problem that is actually caused by one of the installed add-ons.


