- 0shared
- 0Facebook
- 0Twitter
- 0VKontakte
- 0Odnoklassniki
The best way to view high-quality videos and photos is on a large screen. This is why many users try to set up a data exchange channel between their computer/laptop and TV. There are many ways to do this, for example, we have already talked in detail about how to connect a TV to a laptop as another display. A connection via HDMI and WiDi makes it possible to duplicate the PC desktop, which in some cases is what the user requires. However, you usually want to watch movies from a computer on a TV without unnecessary manipulations, using a simpler mechanism for transmitting media content. We'll talk about one of these below.
We will talk about the so-called DLNA server, which allows you to broadcast photos and videos from the hard drive of a computer running Windows 10 to the screen of a Smart TV. The technology requires a mandatory connection (wired or wireless) of both devices to the same local network (one Wi-Fi router). The launch of a media server on a PC is controlled by special software. There are more than enough third-party applications with the necessary functionality, but you can get by with standard Windows tools. That's what we'll do.
Quickly output video from your computer to your TV
To send a video stream from a Windows 10 device to a TV screen, you don’t have to bother with servers. You just need to make a few mouse clicks. Select one of the movies in the folder and right-click on its icon. In the context menu that appears, find the item “Transfer to device” , next to which, when you hover the cursor, a list of available displays is displayed. If your TV is connected to the same local network as your computer, it should definitely be on this list. Sometimes you need to wait a little while the system finds all devices.
So, click on the item with the TV model, and the player window will immediately appear. It will take some time to establish communication between devices.
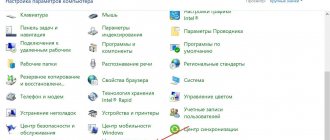
After this, the TV will start playing the video, be it a movie or a music video. You can control the process either through the player on your computer or using the TV remote control. Closing the window will stop the video stream.
As we can see, this method is simple and requires a minimum of actions. However, it is not reliable, since often the connection is not established for some reason, and a message appears on the TV screen that the device is not ready. Sometimes playback is interrupted and cannot be resumed immediately. This is why using a DLNA server still seems preferable.
Setting up DLNA on your TV
TVs connected to the home network automatically find the server and folders with content allowed for viewing. On LG TVs, folders of available media servers appear alongside pre-installed programs and features.
There are many alternative programs for creating a media server. The LG TV comes with a disk with a program called Smart Share, which can also be downloaded on the Internet. This program allows you to create a media server without using Windows tools. Just download it to your computer, click on its launch shortcut and wait for the installation to complete.
pp
A folder with the Smart Share logo will appear in the TV's programs and connections panel. On your computer, in the program settings window, you can assign folders for playing content. You can view photos and videos located in these folders on your TV.
Smart Share is a good program for those who are too lazy to delve into the Windows settings. It loads the system quite heavily. Even with the TV turned off, on a weak computer, its presence can be felt. For some reason, it does not always update the folder with added files. Sometimes you have to do this manually. It is better to set up a normal server using Windows.
There is a universal program that allows you to connect any TV that supports DLNA to a computer. It's called Home Media Server.
Video: instructions for installing and configuring the Home Media Server program
How to Set Up Media Streaming on Windows 10
The essence of this method is that individual folders and files on the computer are shared, after which you can open and view them on the TV. Data exchange between ordinary PCs on a local network is approximately the same.
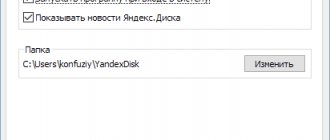
The media server is launched through “Media Streaming Options” . To access these settings, open the Control Panel, go to the “Network and Sharing Center” section and click on the appropriate link on the left.
This tool can be easily found through the Windows 10 search bar.
In the Options window, click the “Enable media streaming” .
Next, set the server name, and then set permissions for all detected playback devices.
The Configure link next to a specific device opens an additional settings window. If you are satisfied with the configuration, click OK to start the server.
Now let's move on to the TV. The mechanism for accessing shared files is implemented differently on different models. We will look at everything using the example of an LG TV. In older versions, launch the “SmartShare” , and then go to the “Devices” tab.
Find our server here and open the location. There will be folders “Video”, “Images” and “Music”, displaying the contents of the Windows 10 system directories of the same name. If movies are loaded into the “Video” directory, you can view them.
, “Home Control Panel” allows you to go to the media server folders .
Launch it and immediately see the required tile in the “Inputs” block.
Click on it, and then select “Photos and Videos.” The folders with media content already listed above will appear.
Everything seems to be clear, but there is one nuance. You probably have a separate directory with movies, and constantly copying files from it to the system folder is not very convenient. How to open access to any of the directories on a computer with Windows 10? Simple enough.
Windows 10 will make friends with all your devices
We want Windows 10 to connect every device in the home, whether it's a three-year-old printer or the latest TV with Miracast. In a multi-device world, you constantly switch from computer to tablet to phone and back again, and you can expect a familiar interface on each of them.
That's why we designed the common core for Windows 10 and provided support for Universal Windows apps so that users with Windows 10 on their PCs and smartphones can enjoy a seamless, natural experience as they switch between devices throughout the day.
However, many people use iPhone or Android phones, and we want to make sure that some of the Windows features and files they need are available to them on more than just Windows 10 PCs. Everything you need should automatically transfer between your devices, including your phone, regardless of operating system.
Organizing and supporting multiple devices to work together can be a major challenge. Today we're introducing Phone Companion, an app built into Windows 10 that will help you connect your Windows PC to any phone, be it Windows Phone, Android, or iPhone.
Launch the Phone Companion app on your computer and select your phone type: Windows Phone, Android or iPhone. For Windows Phone, no additional setup is required. For Android and iPhone, there are a few simple steps you can take to get the apps you want onto your phone and work seamlessly with Windows 10.
All your files and other content will magically be accessible from both your computer and phone
- If you set up OneDrive on your phone correctly, every photo from your phone's camera will automatically appear in the Photos app on your Windows 10 PC.
- With the newest version of the Music app, you'll be able to store and access your music on OneDrive, not just on your computer, but anywhere, and play it for free on your iOS or Android phone (Windows Phones already support this feature). This way, all the playlists you spent hours compiling on your Windows 10 PC will automatically appear on your phone and be available to play.
- Notes can be created in any situation. Notes you make in OneNote on your computer will appear on your phone, and notes you add from your phone will sync to your computer.
- You can work with Office documents from any device without worrying about the hassle of moving files.
Cortana: the first personal digital assistant that works on your computer and phone
for free this summer, you'll get Cortana[ii]. Users familiar with the benefits of Cortana's tight integration in Windows Phone will see a similar level of integration in Windows 10. Cortana can help you with a variety of tasks, from searching the web or on your device to setting reminders, dictating email messages, and switching device settings. Cortana is also integrated with the new Microsoft Edge browser for Windows 10.
One of the main advantages of a personal assistant is its availability wherever you take the device with you. In Windows 10, we want to make Cortana available to people who don't have a Windows Phone. How will it work? Today we're introducing the Cortana app for Android phones and iPhones to accompany the Cortana app on your Windows 10 PC. The Phone Companion app on your PC will help you install Cortana from Google Play or the Apple App Store on your phone.
The Cortana app supports most of the features available on its desktop or Windows Phone counterpart. You can ask Cortana to remind you to buy milk the next time you go to the store, and your phone will ring at the right time in the right place. With Cortana on your phone and computer, you can track flights and get the latest information on your mobile device so you never miss a thing. Any Cortana notepad entries will appear across all your devices, and any changes you make on one device will be reflected when you use Cortana on all your other devices. The companion Cortana app helps you finish tasks you started on your computer on your phone. The following video demonstrates Phone Companion in detail:
The assistant will be very useful, but the app's capabilities on another platform are limited, and some of the features available with Cortana on Windows Phone won't work on Android and iPhone devices. Some features require system access. This is currently not possible on iOS and Android, and the Cortana companion apps for those platforms will not allow you to switch device settings, open apps, etc. Voice activation of the assistant ("Hey Cortana!") requires special integration with the device microphone , so this feature will also only be available on Windows Phones and Windows PCs.
Windows 10 supports all your devices
The three features we're introducing today demonstrate our commitment to making your Windows 10 PC experience great across all your devices.
I think no other operating system is capable of this:
1. The Phone Companion app on your Windows 10 PC helps you set up your Windows Phone, Android, or iPhone so your files (photos, music, and documents) are automatically transferred and available everywhere.
2. The updated Xbox Music app for Android and iPhone lets you play music files and playlists from OneDrive for free, meaning all your music is with you anytime, anywhere.
3. The Cortana companion app for Android and iPhone connects the world's best desktop personal digital assistant to your phone. Now the assistant will be available from your phone and will always remind you of important matters, answer any questions and help you with your tasks.
At Microsoft, we want you to enjoy not only your Windows 10 PC, but also all the other devices that will work with our new operating system.
How and when to try all this?
Join the Windows Insider program and check out the Phone Companion app in the next Windows 10 Insider Preview, coming in a few weeks. The Cortana companion app will be available for Android phones at the end of June, and for iPhones before the end of the year. The updated Xbox Music app for Android and iPhone will be available in late June or July this year. In the beta version, music playback from OneDrive will be available.
Joe Belfiore Joe Belfiore
For more information, visit Windows.com.
[ii] Cortana will only be available in select markets when Windows 10 launches.
Updated March 4, 2020 3:36 pm
blogs.windows.com
Managing DLNA Server Folders
Adding folders to the list available for viewing on the TV is done through the settings of the standard Windows Media Player. Launch it from the Start menu or using the search bar.
Next on the left, in the “Library” section, right-click on “Video” and select “Manage video library” .
In the window that opens, you will see a list of already shared folders, although for now there is only one system directory here. Click "Add" on the right and find your movie folder. Click “Add Folder” and then “OK”.
Movies from the new directory will appear in the video library, which means they can be viewed on a TV via DLNA.
If you need to change the media server settings, here in Windows Media, open the “Stream” menu item and select “Advanced streaming options...”
Conclusion
We looked in detail at one of the working mechanisms for streaming data between two devices on the same local network. DLNA technology allows you to watch movies from your computer on your TV without using additional removable media. However, this type of connection is subject to various types of failures, especially if the connection is made wirelessly via a Wi-Fi network. Problems may also arise when transmitting high-definition video, which requires a channel of appropriate bandwidth.
If you have set up a DLNA server, but cannot achieve stable operation, you will have to use other methods of connecting devices. A proven option is regular flash drives and portable hard drives.
- 0shared
- 0Facebook
- 0Twitter
- 0VKontakte
- 0Odnoklassniki
How to connect to a DLNA server on Windows 10
When everything is set up and ready, all that remains is to connect the end device on which you will play the content. This depends on what operating system or application you are using to connect.
If you want to connect to the DLNA server from another computer, make sure both devices are on the same network. Then open File Explorer and click on the Network in the left pane. A list of available media devices will open. Select your server in it, after which Windows Media Player will open with access to your media library. From it you can play videos, music or view photos. Everything is done as simply and conveniently as possible, so even the most distant users should not have problems connecting.