Trim SSD function: what is it, what is it for, how to enable it. You will find answers to all these and many other questions in this article.
Modern operating systems, like file systems, are still designed mainly to work with HDD (hard mechanical disk or hard drive) and when writing a file, the operating system writes them to a special table on the hard drive (MFT - Master File Table - Main File Table) — the coordinate of this file. In this way, the file table tells the system a clear and precise location of the clusters with the recorded information. When a file is deleted from the hard drive, the system deletes the data of such a file from this MFT table, without touching the file itself. And when writing new data, the files are simply written over the old ones. This is how rewriting to HDD works. But to rewrite data on an SSD, you need to delete not only the coordinates from the MFT table, but also erase the no longer needed file from the flash memory cells. This is where Trim comes to our aid.
Educational program on function
When using SSD drives, over time a situation arises where their performance decreases significantly. When you just started using the disk and all the flash memory blocks are new and clean, the writing speed on them is quite high, in accordance with what is stated in the documentation. When the SSD disk is completely written, and then some files are deleted, rewriting will begin to occur on them at much lower speeds. After all, your disk controller will have to clear previously used flash memory blocks before writing before writing new data there.
To ensure that SSD operating speeds do not drop, the ATA TRIM command is added to new operating systems. When erasing a file, a special file system driver sends the Trim command to the SSD disk controller. When the SSD disk controller accepts the command, it immediately clears the no longer used flash memory blocks. This is done in the background, during breaks between any writing and reading operations.
Using the Trim command allows us to return the full write speed for secondary flash memory blocks. Unfortunately, not all operating systems work with the Trim command. It is supported by relatively new versions of systems:
Windows 7, 8, 10 and Server 2008 R2 with NTFS file system.
Linux kernel, from version 2.6.33 and higher.
Mac OS X, from version 10.6.6 (and then only after installing the appropriate update) and higher.
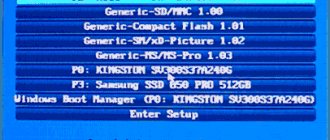
To use the Trim command, the SSD drive controller must support this function, it must be enabled in the operating system itself, and the disk controller must be in AHCI operating mode. You need to check that the BIOS for the SATA controller is set to AHCI mode. This can also be found in Device Manager.
Also, the Trim function will not work if:
- The SSD drive is connected via USB.
- The SSD disk is formatted in the FAT32 file system.
How TRIM works
The design of SSD drives is radically different from conventional hard drives. Their memory is organized in pages that can only be erased entirely. But the SSD drive itself cannot distribute information most efficiently, because the operating system does not give it information about which pages need to be physically cleared. Therefore, the drive operates at peak performance as long as it has free pages to write to. Once the empty pages run out, the drive will be forced to perform a cleanup operation before writing, which will greatly reduce its speed. The TRIM feature for SSDs was added to the operating system to communicate with the drive, telling it which pages can be cleared. This happens in the background, and overall computer performance remains high for a long time. In addition, flash memory has a limited number of write cycles, and this is also taken into account. Therefore, there is no repeated operation of some cells while others are idle, which is why the service life of the drive and its reliability are significantly increased.
How to check if Trim is enabled on Windows 7, 8 and 10 operating systems
First, open the Command Prompt console with administrator rights. Next menu Start - Programs - Accessories - Command Prompt. Right-click - Run as Administrator.
Then enter the command on the command line:
fsutil behavior query disabledeletenotify – Execute.
If the command output shows - disabledeletenotify=1, this means that the TRIM command is disabled. We connect using the command:
fsutil behavior set disabledeletenotify 0
Be careful: zero is an enabled command, one is a disabled command.
TRIM, do you even exist? And, if so, do you work?
You can find out whether an SSD supports the TRIM command using a fairly large amount of freely distributed software. Let's take CrystalDiskInfo for example:
But showing support is not work. First, let's go through situations when TRIM needs to be launched in a tricky way or this command does not work at all. Of course, the situation may change over time, but for now things are as follows:
- Standard Windows drivers cannot TRIM on RAID arrays. Depending on the system and type of RAID array, a driver from Intel called Rapid Storage may solve the problem. Arrays 0 and 1 are supported with the Enterprise driver.
- TRIM support in Windows begins with operating system version number 7. Vista and, especially, XP do not support TRIM at the OS level. Of course, this problem can be solved by third-party software, but it’s all at your own peril and risk - we cannot and will not recommend this.
- The Deallocate (TRIM for NVMe SSD) command is only supported with Windows 8 and later.
- TRIM does not work on virtual disks.
- TRIM only works in AHCI mode.
- TRIM does not work when connecting the drive via USB adapters.
- TRIM does not work with the FAT32 (or more “shaggy”) file system.
Now let's check - does TRIM work in the system?
To begin with, let’s try to find out this directly from the operating system. In a command line or PowerShell running as Administrator, enter the command “fsutil behavior query disabledeletenotify” without quotes and look at the result. If the output shows “0”, then this is good – TRIM is working. If “1”, then the TRIM functionality is not available. That's right: zero is an enabled command, 1 is a disabled command.
For example, you can use the easy-to-use trimcheck program from Vladimir Panteleev. The program works in two stages, between which a few seconds or tens of minutes can pass - it all depends on the specifics of the specific SSD model. The utility writes data to disk and marks the addresses of the virtual blocks in which they are located. It saves these addresses in a JSON file in its folder, after which it deletes the data, which causes the TRIM command to be sent. The utility checks whether previously recorded data is located at the saved addresses. Their absence means that the controller took note of the TRIM commands and deleted the data. If TRIM is running, the message will be as follows:
Otherwise, the inscription will read TRIM appears to be NOT WORKING
. Actually, if you receive a message about inoperability, then run the command “fsutil behavior set disabledeletenotify 0” without quotes in a command line or PowerShell running as Administrator. The TRIM function, if all conditions are met (supported OS, implementation in SSD, etc.), should turn on and work. If this does not happen, and all the requirements are met, then you will have to think about replacing the drive.
Problems, problems instead of lunch
The most common problem is inheritance. Of course, we are talking about Windows up to version 8. For example, when a user installs SSDs in old systems or switches from HDD to SSD without changing BIOS settings (if necessary) or even by cloning partitions or the entire disk. We remind you that TRIM is only available in AHCI mode. For example, many motherboards can operate in two modes: AHCI and IDE. Accordingly, if the SSD is connected to such a board in IDE mode, then TRIM will not work. Simply having AHCI mode does not solve the problem - Windows will install drivers according to the selected IDE. It would seem that the situation may occur rarely, but in reality it does not. If you are not comfortable with the BIOS settings, then you should at least check the operating mode. This can be done in Device Manager in the “IDE ATA/ATAPI Controllers” section:
Remember that after installing Windows, simply switching the operating mode from IDE to AHCI (and vice versa) without additional manipulations will not work - the operating system simply will not boot. Solutions to this problem exist (even from Microsoft itself), but they are not worth recommending. It requires changing the registry settings, adding the required driver, and being prepared to reinstall the OS in case of failure.
As for Linux systems, a prerequisite, in addition to the hardware component, is the ext4 file system. Enabling TRIM is indicated by the discard option in the fstab file. Additional useful options for the partition will be noatime (realtime or nodiratime), which will reduce recording by disabling updating the time of last access to files and directories. The TRIM command itself is launched using the fstrim program - “fstrim / -v” without quotes and with root rights.
Let's also remember about Secure Erase. You can restore performance with this function. But it’s unlikely to last long. Especially if you quickly fill up your drive with new data. So it will work as a temporary solution, but it will always remain temporary.
Let’s also add about SLC caching, which is quite often used in many SSD drives without being tied to an interface. The low recording speed of a large number of files (or large files) after a certain threshold is not a problem, but a feature of the work. The essence of caching is that the data being written first ends up in a special memory area, and only then is written to the main memory in the background. When the allocated high-speed memory runs out, data begins to be written directly to memory at a noticeably reduced speed - from 50 to 150 MB/s. This is a completely normal mode of operation of drives with SLC cache, so nothing can be done here at all.
Enabling TRIM on Linux
In order to use the TRIM function, we need our file system to be ext4.
Enabling the TRIM command must be specified in the mount option for ext4 partitions in the fstab file. This is the discard option.
In addition, for a partition on an SSD disk it is worth adding the noatime or realtime and nodiratime options - these are options to reduce the write load, then access dates for folders and files will not be updated.
You can also add the commit option and specify values of, say, 60 seconds - write operations will be delayed and will be performed on one partition once every 60 seconds. But please note that this option should be added only if your computer is connected via a UPS (UPS), or you are performing operations on a laptop.
Thus, the fstab line could look, for example, like this:
UUID=aeade6fd-2b24-4e59-bc8c / ext4 noatime,discard,errors=remount-ro,commit=60 0 1
You can also run the TRIM command manually on Linux:
sudo fstrim / -v
In this example, the command is applied to the root file system.
How to check your SSD drive for support of the TRIM command
The use of the ATA TRIM command does not happen automatically in all cases; in some situations, the execution of this command on the OS side must be explicitly enabled.
First you need to make sure that your SSD drive supports this command. However, all new disks support it. This check can be done with any modern disk program. For example, in Linux this can be done using the console command:
hdparm -I /dev/sda | grep -i trim
Where is sda
your SSD drive. The command output should contain the line "TRIM supported".
In Windows, this can be done using a program from the manufacturer of your SSD drive; usually all manufacturers have such utilities. Or through a disk test program such as HD Tune or SSD Life.
How to TRIM on NTFS partitions
With Windows 7, 8, 10 operating systems installed, you don’t have to do anything. It is enough that we check the inclusion for the TRIM function. Windows will then automatically issue TRIM commands for disk operations such as:
- Deleting files.
- Quickly format NTFS disk partitions.
- Removing NTFS partitions.
In Windows 8 and 10, it is possible to run the TRIM command on an entire NTFS partition. On the "Tools" tab in the disk properties, you need to open the Disk Optimizer. This is the new name for the defragmenter in Windows.
For NTFS partitions in the Optimizer on an SSD disk, we will have access to the “Optimize disk” command. Executing this command will cause Windows to send a Trim command to the SSD disk for absolutely all free blocks on this disk. That is, trimization will be performed on the entire free disk partition, partitioned in NTFS.
Also in Windows 7, 8, 10 we can “trimize” the entire NTFS partition. In order to do this, you need to quickly format this partition. You just need to remember and not forget that this action completely destroys all data in the partition.
The latest (from 2020) versions of ntfs-3g drivers (ntfs drivers for Linux) have the added TRIM function. Now we can trim the NTFS partition from Linux. Team:
fstrim -v /media/ntfs/
where /media/ntfs/ is the mounted NTFS partition.
How to disable TRIM
Disabling TRIM is as easy as turning it on. This can also be done through the command line - you need to enter the command disabledeletenotify 1. The message NTFS DisableDeleteNotify = 1 should appear, which means that the function is disabled.
However, it is difficult to imagine a situation where such an operation would be required. After all, this function is designed to optimize and speed up the operation of the SSD drive. In addition, it greatly prolongs his life. Therefore, when disabling it, be prepared that the computer’s performance will noticeably decrease and the life of the drive will be greatly reduced.
The methods listed here to enable and disable TRIM work on Windows versions 7, 8, and 10. However, many computers use older XP and Vista. They do not have built-in tools for correctly connecting an SSD, but the situation is not hopeless. You just have to find and install additional software, for example, Intel SSD Toolbox. Share in the comments if you had problems identifying the SSD disk, and whether the TRIM function turned on immediately after connection. Indicate the Windows version and disk model - this information will probably be interesting and useful to many readers.
How to Trim on Windows XP and Windows Vista
As mentioned above, Windows XP and Windows Vista do not support TRIM. If you need to “trim” an SSD drive used in these operating systems, then there are the following options:
Program from the SSD disk manufacturer, if available.
Connect this drive to a computer with Windows 8 or Windows 10 installed. Using the Disk Optimizer, NTFS partitions are optimized on the desired SSD drive. Remember that the SSD drive must be connected not via USB, but via SATA.
Booting a computer from a flash drive with a new Linux distribution (starting from 2020). The NTFS partitions are mounted and the fstrim command is executed.
Although you can avoid doing TRIM at all on these operating systems. We can leave 20-30% of the disk capacity unallocated and this will be enough to support normal recording speed. Unallocated, that is, not assigned to any section.
What is TRIM
Electronic (SSD) disks have a difference from magnetic-mechanical (HDD) disks, which affects the recording speed. In HDD drives, recording is performed “on top” of old data. Disk blocks that previously contained data and then that data was deleted are simply marked as free. And when you need to write, the HDD controller immediately writes new data to these free blocks.
But when using flash memory, blocks that previously contained some information must be cleared before being written. This leads to the fact that when writing to previously used blocks, the writing speed drops significantly, because the controller needs to prepare them for writing (clear them).
The problem is that operating systems traditionally do not work with the file system in such a way that deleting files clears the contents of the blocks on the disk. After all, there was no need for this on HDDs.
Therefore, when using SSD drives, the effect of “garbage collector degradation” occurs. And this subroutine processes all sectors from the list.
The garbage collector runs when the disk is idle. That is, when the operating system does not send requests to read or write data. Therefore, some time passes from the moment the TRIM command is received until these sectors are actually deleted.
If there are many sectors in the trimerization queue, cleaning them may take a long time. For example, if you quickly format an entire partition, TRIM of that size can take a long time.
However, there is no need to sit and wait for the process to end. Even if the disk is turned off, queue processing will resume after it is turned on.
Deleted data and its recovery
If you use Trim, you can forget about restoring deleted data. If you delete a file, then all its data on SSD drives will be completely destroyed.
So how does Trim affect recording speed?
You need to understand that the use or absence of the Trim function will not directly affect the recording speeds on SSD drives. The only factor that will affect this is the presence of a sufficient number of empty flash memory blocks. That is, those blocks that are completely cleared by the disk controller and prepared for writing new data to them.
Simply put, write speeds depend on the amount of free space on the SSD drive. If your disk is almost completely occupied, then the recording speeds will drop even if you use Trim. And if you have at least 20-30% of the SSD disk capacity left without partitioning (unallocated disk space), then you can do without using the Trim function. The SSD disk controller will use unused space for partitions in order to equalize the write speed.
The Trim function has the useful properties that it really makes it possible to maintain the highest possible recording speed, but only under two conditions:
- The full capacity of the SSD disk is allocated for partitions.
- The file system partitions are filled to no more than 70-80% of their capacity.
What is this TRIM function for SSDs?
Solid-state drives offer significant improvements in read and write speeds compared to traditional hard drives, which require the physical disk to be rotated and the read head moved to retrieve information. But the operating features of SSDs require additional commands to prevent excessively rapid wear and speed degradation. This is where the TRIM command comes into play.
TRIM is a special command with which the operating system tells the SSD controller (TRIM does not apply to regular hard drives) which blocks of information are no longer needed and can be cleared accordingly. This is due to the design principle of SSDs. The information on the disk is divided into blocks, and the blocks into “pages”. To write new information into a previously used location, the disk must first completely clear the page and then put new information into it. This negatively impacts the performance and speed of your drive and also accelerates wear and tear. After using the TRIM command, information will be written to memory cells immediately and without any performance hitches, since the operating system knows exactly where the information that you delete or move is located.
It is worth noting that for maximum performance of your drive, it is recommended to use AHCI mode. TRIM for SSD can work with IDE, but there may be some limitations, plus the drive is slower. If your SATA controller operates in IDE mode, we advise you to enable AHCI in Windows 10 as soon as possible.
Also keep in mind that the TRIM command is not available for external SSDs because it is bound to the SATA standard. Since the external SSD is connected via USB and not SATA, TRIM is not available for removable media. The only exception is SSD with Thunderbolt 3 interface.
Additional Information
Finally, some additional information that you may find useful.
- Using new NVMe SSDs as a boot drive on older systems with Legacy BIOS (for any OS)
- Today, external solid-state drives have appeared and the question of enabling TRIM sometimes concerns them too. In most cases, TRIM cannot be enabled for external SSDs connected via USB, because This is a SATA command that is not transmitted over USB (but there is information online about separate USB controllers for external drives that support TRIM). For SSDs connected via Thunderbolt, TRIM support is possible (depending on the specific drive).
- Windows XP and Windows Vista do not have built-in support for TRIM, but it can be enabled using Intel SSD Toolbox (older versions, specifically for these operating systems), older versions of Samsung Magician (you need to manually enable performance optimization in the program) with XP/Vista support, also There is a way to enable TRIM using the 0&0 Defrag program (search the Internet specifically in the context of your OS version).
In fact, today we will talk not only about drives that have been used for some time, because the problem of low performance can affect even an SSD just brought from the store. Of course, you can't fool physics - over time, all solid-state drives will lose performance. But the reason for this may not only be the problem of the SSD itself. Ensuring competent interaction of components and software in the system is not an entirely simple task for ordinary users who do not want (or who simply do not need) to understand the topic at least a little and listen to the advice of people competent in this regard. For some, it’s easier to reinstall the operating system or add some dubious “tweakers” to the list of applications used. But think about it - for example, deleting a file, which is simple from our point of view, consists of a fairly large number of stages in which several participants are involved at once. And, if at least one of them performed the task incorrectly, then this affects the performance of the disk. What are these stages? By whom or what are they performed? How to ensure stable operation? We’ll figure all this out today. Simple and clear so that everyone can understand it. And then it will become clear that treating the symptoms of poor SSD performance will not help.
Let’s explain it on our fingers, there are just 20 of them...
When you create a file, the operating system sends a write command to the address of a specific logical block. When you delete data from a disk, those blocks are marked as free. In this case, the data will remain on the disk until the controller wants to overwrite it. Before us is a part of memory in which there are files A and B of different sizes, occupying, respectively, a different number of blocks. First we delete file B, and then write file C to our disk. To visualize the situation when TRIM does not work, we will add a simple illustration in which the following states are indicated:
- Availability of files A and B.
- Deleting file B with our own hands.
- A certain period of inactivity. Note that the data blocks marked for cleaning remain with the data in them.
- Write file C, but first delete file B from the cells.
For example, if you imagine (just imagine, yes) that a data block in the form of a square is 1 MB, then at stage 4 the controller first clears two data blocks with file B marked for deletion and only then writes file C. If a couple of megabytes of space - There are still little things, but when actively working with the drive, such blocks can add up to gigabytes, which will already noticeably affect the time it takes to complete write operations.
Now what happens if TRIM works. Again in stages:
- Availability of files A and B.
- Deleting file B with our own hands.
- A certain period of inactivity during which blocks marked for deletion with file B are cleared.
- Writing file C without any delays to the area where file B was.
That is, the logic of work is completely different. Let's repeat what we've covered - at the moment we delete file B, the TRIM command is sent, and since the SSD is idle quite often, it happily deletes unnecessary blocks almost immediately. And the moment we want to write file C, it is immediately written to disk, and does not wait until the garbage blocks are cleared for it.
TrimSSD for other different OS
You can also enable Trim in Windows XP or Vista, but this will require specialized software: Intel SSD Toolbox, Samsung Magician or 0&0 Defrag, where the desired option is activated manually.
Owners of Apple computers usually do not worry about Trim working with native SSDs. But if you decide to install a third-party device, problems may arise. Especially with older OS versions.
But with the advent of Mac OS X 10.11 El Capitan, it became possible to connect Trim. You need to launch Terminal and activate the command
sudo trimforce enable
using the administrator password. The main thing here is to be persistent to the end, despite the system’s warning.
In Linux versions 2.6.33 and higher, trim support is automatic. But if you want to manage this process manually, then check the compatibility of the file systems (Ext4 or Btrfs required). Next you will need to make changes via fstab gksudo gedit /etc/fstab. You just need to enter the discard command in the parameter line for each Ext4 partition:
UUID=[NUMS-AND-LETTERS] / ext4 discard, errors=remount-ro 0 1.
Then we save and reboot the PC. To be honest, this method involves making adjustments to the operation of the system and is associated with certain risks.
I still hope, my dear readers, that the system will perform trim processing on your ssds without additional settings.
The TRIM command is important for maintaining the performance of SSD drives over their lifetime. The essence of the command comes down to clearing data from unused memory cells so that further write operations are performed at the same speed without first deleting existing data (when the user simply deletes data, the cells are simply marked as unused, but remain filled with data).
TRIM support for SSDs is enabled by default in Windows 10, 8, and Windows 7 (as are many other SSD optimization features, see Setting up an SSD for Windows 10), however, in some cases this may not be the case. This guide details how to check if the feature is enabled, as well as how to enable TRIM in Windows if the command's support is disabled and additional support for older OSes and external SSDs.
Note: Some materials report that for TRIM to work, the SSD must be in AHCI mode, not IDE. In fact, the IDE emulation mode included in the BIOS/UEFI (namely, IDE emulation is used on modern motherboards) does not interfere with the operation of TRIM, however, in some cases there may be restrictions (may not work on certain IDE controller drivers), moreover , in AHCI mode your drive will run faster, so just in case, make sure that the drive is running in AHCI mode and preferably switch it to this mode, if it is not, see How to enable AHCI mode in Windows 10.

