When you develop a website, you need to check it for compatibility with different versions of Internet Explorer. On the other hand, you may simply end up on a page that is not compatible with the latest version of Microsoft's browser. In such cases, Internet Explorer 9 Compatibility Mode will help you.
If you come to a page that is not displayed correctly, then first try turning on compatibility mode (most often this helps, example in Figure 1).
Figure 1 - Site not compatible with Internet Explorer 9 (standard view on the left, compatibility mode on the right)
When you visit a site that does not explicitly indicate that it is compatible with Internet Explorer 9, a button appears in the address bar. Click this button to enable compatibility mode (the page will refresh after clicking this button). To turn off compatibility mode, click this button again. After this, the site will always be displayed in compatibility mode, and the button will look like this.
If the site developers update the site and explicitly indicate that the site is compatible with Internet Explorer 9, the compatibility mode will automatically turn off. To view compatibility mode options, click - Tools
— string
Compatibility view mode parameters
.
If you want to delete a site, select the site in the list of Web sites added to viewing in Compatibility mode
and click the
Delete
.
Figure 2 - Compatibility View Options
To add a site to the list, enter the site URL in the Add this site line
and click
Add
.
If you want to always work in Compatibility View (for example, you work only on a local network where websites were designed with IE 8 or 7 in mind), then check the Show all websites in Compatibility View
.
The Display intranet sites in Compatibility View
option is checked by default and instructs the browser to open enterprise sites in IE7 compatibility view.
If you want to enable compatibility mode not for the eighth version of the browser, then click and the developer panel will appear at the bottom of the window (Figure 2).
Figure 3 - Developer panel
Select Document Mode
and select the desired browser version from the drop-down list.
In order for the browser to be recognized on sites as a different version, click Browser Mode
and select the desired version.
The Internet Explorer 9 team promised that IE users would be able to browse the entire Internet. I think they succeeded.
It is not displayed very correctly. This is due to the fact that with each new version of the browser, the appearance of the pages changed slightly. As a result, the web page began to look, to put it mildly, unusual. To correct the situation, the developers integrated an additional function into the Internet browser, called Compatibility Mode.
Enabling Compatibility Mode
If the site is not compatible with internet explorer 11, then a special button appears in the address bar.
For some web pages this function is necessary, for others it is unnecessary. For example, if you enable Compatibility View on google.com, updated Google Maps will most likely not work correctly. Other sites, on the contrary, will be displayed incorrectly if this function is disabled.
So, first, let's look at how to activate it. We go from the browser to the desired page on the network and click Service. There is an item here that allows you to change compatibility mode settings. We click on it. The web page address will be written in the line where it is proposed to add the site to the list viewed in compatibility mode. Click on the Add button, after which the browser will correctly display the resource.
It is not always possible to find the Service section right away. Therefore, I will describe several options for opening this menu.
Right-clicking at the top of an open browser will activate the context menu. In it we mark the command line. After this, a menu with sections will appear at the top, where you will find Service. Another way is to do the same thing, however, click on Menu Bar. In both cases, the browser settings will change, and the panel with these tools will remain at the top of internet explorer.
If you want the menu to appear temporarily, you can press Alt on your keyboard. In addition, you can open the window you need by clicking on the Alt, e, p buttons. In this case, the Russian language must be turned on, since e and p are not Latin, but Russian letters. If you were unable to do this for some reason, you can always install another browser.
Method 1: Enable compatibility in file properties
To implement this method, we need to get into the properties of the program file (or shortcut).
- Right-click on the desired file and select “Properties” from the list that opens.
- Switch to the “Compatibility” tab. Check the box next to the “Compatibility Mode” option. Below we open the list, in which we click on the desired version of the operating system with which our program should work without problems.
Note: To disable compatibility mode, simply uncheck the box next to the corresponding item.
- If the program that we want to run in compatibility mode, for example, with the XP system, is quite old, we can lower the screen resolution, and also enable low color mode and disable full screen optimization.
- When everything is ready, all we have to do is click the OK button.
Turning off compatibility mode
Those who want to turn off the compatibility mode feature in internet explorer 11 should first go to the desktop. After this, launch the browser. In an open Internet browser, press Alt to open the menu bar or use the other methods above.
Go to Tools, where we select Delete browser history. Check the box next to Journal and click Delete. You can select from a list of individual pages for which you do not want to use this feature.
Configuring Internet Explorer 11 or 10 to enable compatibility mode
Before you move on to enabling compatibility mode in IE 11 or 10 browsers, you will need to perform one small step, or rather, enable the display of the “menu”.
To do this, click anywhere at the very top of the browser with the right mouse button and check the box next to the line: “menu bar”.
Now there will be a new line in which you will have access to many customization options.
Also note that if the page is incompatible with the internet explorer 11 browser, a button appears in the address bar (on the right side), by clicking on which the browser will automatically switch to displaying sites as it was in older versions.
Disabling list updates
It should be noted that the list of compatibility sites is automatically updated. This function can be quite useful, since the addresses of resources that were developed for older versions of the browser, using Adobe Flash Player, etc. are entered here. But you can always disable updates.
To do this, you need to go to the Service section of the Internet browser. In it we select Function parameters. Next, uncheck the box next to the line that says download updated lists from the Microsoft website. Close the browser.
It can be noted that compatibility mode is a quite useful feature. Therefore, there is no need to rush to turn it off. This should only be done if, due to its activation, the page does not load correctly. However, such a situation is extremely rare. Much more often, everything happens the other way around, and the site is displayed better when the mode is turned on.
Internet Explorer is, perhaps, the only browser that absolutely all Windows users have had to deal with at least once in their lives: it’s not for nothing that Microsoft supplies it with every version of the operating system completely free of charge. At the same time, of course, this software product is far from ideal in its characteristics, but there is still hope for the best. Taking a closer look at the updated IE 11, it’s easy to notice that the latest development looks much better than earlier versions: you have a brand new interface and improved web page loading speed.
But some sites are still displayed incorrectly: either the images are stretched, or the text is scattered chaotically across the entire field, or the control menu moves from the usual point A to point B. In principle, the way out of this situation is simple - just reconfigure the mode in Internet Explorer 11 compatibility so that the problem resolves itself. But what configuration options can be offered?
How to set up your browser?
In principle, there are not many ways to configure compatibility mode in Internet Explorer 11: just enable or disable the corresponding parameter for the site. Another question is when and how does each of these options apply to Windows?
With the first part of it, everything seems to be clear - we enable / disable it in the event that the site elements are not displayed at all or loaded incorrectly. Accordingly, if compatibility mode was enabled for the site, you need to disable it for the problem to disappear and vice versa. As for the second part of the question, everything is somewhat more complicated here.
How to turn off compatibility mode on Windows 10
Compatibility mode can be turned on or off. The need to turn it off may arise with a system update when Microsoft implements codes from older systems, so running the game on a PC is not required. Or maybe you just stopped using a certain application, so this service is no longer needed and can be disabled.
To unpin from the PC program, go to the compatibility properties, as shown above, uncheck the “Compatibility Mode” item and save the changes with the OK button.
In the compatibility properties, uncheck the corresponding box and click OK
To turn off the service you will have to do a little more steps. However, this way you can disable compatibility mode for all applications on your computer at once.
Complete stop of the service
There are two ways to disable the Compatibility Mode service:
- using the command line;
- through the services interface.
In most cases I use a list of services to work with. In my opinion, this is more convenient because you can read the description of the service and understand the scope of its responsibility. This helps you make a more informed decision whether to turn it off or not.
- Open the Start menu, go to the Administrative Tools directory and launch Services. The service management tool is launched through the Administrative Tools item in the Start menu.
- In the list, find the item “Program Compatibility Assistant Service” and double-click on it.
Double-click on the line “Program Compatibility Assistant Service” - In the “General” tab, change the startup type parameter to “Disabled” and save with OK.
In the service properties, set the startup type to “Disabled” and click OK
- Reboot the computer to start Windows with the updated configuration.
Stopping a service via the command line
Like most processes and tasks, you can disable a service not only in the corresponding interface, but also through the Command Line terminal.
- Press the Win+X key combination and select “Command Prompt (Administrator)” from the drop-down menu.
Press the key combination Win+X and launch the command line in the drop-down menu
- In the terminal, enter the command net stop pcaSvc and launch it with the Enter key.
To stop the Compatibility Assistant Service, enter the command net stop pcaSvc
- If this service needs to be started again, enter the command net start pcaSvc.
Start the Compatibility Assistant Service with the command net start pcaSvc
Disabling the mode using the Group Policy Editor
The service only helps and directs the Program Compatibility Assistant utility; the program itself can also be disabled in the Local Group Policy Editor:
- In the search, enter gpedit.msc and click on the best match.
Enter gpedit.msc in the search bar and select the best match
- In the dialog box on the left, open the item “User Configuration\Administrative Templates\Windows Components\Application Compatibility”.
In the left menu, go sequentially to the items “User Configuration\Administrative Templates\Windows Components\Application Compatibility”
- Double-click on the “Disable assistant” setting, then in the properties set the “Enabled” option and save the changes with the OK button.
In the properties of the “Disable assistant” item, set the switch to the “Enabled” position
- Reboot the computer.
How to connect parameters?
Based on the experience of using previous versions of the standard Windows browser, it is easy to guess that you can enable compatibility mode in Internet Explorer 11 by adjusting the viewing options in the “Tools” section. The only catch is that finding it the first time is not so easy, because in the 11th version the standard file menu is hidden and, in order to “reanimate” it, you will have to use one of the available tricks, namely:
One way or another, after the “Viewing Options” window appears, to enable compatibility mode in the standard Windows browser, first check the boxes next to two parameters - “Display sites...” and “Use compatibility lists...”, and then indicate the address of the web portal with which problems arise. problems loading, and click the “Add” button:
What's the result? Less than 2 minutes - and the compatibility mode in the 11th version of IE is turned on!
What is compatibility mode and why is it needed?
Compatibility mode (PC) is a special technology that was developed and implemented in Windows Vista, and continues to exist in all subsequent operating systems. PC allows you to smooth out some of the rough edges in the operation of applications if their developers do not correct their codes for new operating systems in time. That is, old programs and games often stop working in new versions of Windows, and compatibility mode allows you to use the environment of previous OSes when running these applications.
A new feature has been added to Windows 10 for PC: after a program failure, the system itself offers to launch a tool to enable compatibility between the application and the OS. However, this does not always work, so it is better to use manual activation.
How to disable the option?
If the site stops functioning normally due to the compatibility mode enabled in IE 11, you will have to resort to one of the methods to cancel this parameter. First of all, you can arm yourself with the reverse method, i.e., turn it on and turn it off. In this case, to configure the combined mode, open the “Tools” menu, select the “Viewing Options...” item in it, and then find in the list of sites added to the exception the one with which problems are encountered when viewing, click on it with the mouse and click the “Delete” button ":
If the problematic site is not in the list, it is very likely that it is included in the standard Windows lists. In this case, to solve the problem with loading it, you will need to uncheck the “Use lists...” item in the “Viewing options...” box.
In addition, clearing the browser history for Windows, that is, deleting the history of sites viewed in it, will help solve the problem of disabling the parameter. To do this, with Internet Explorer open in version 11, press Alt, then click the “Tools” tab in the menu that appears and select the appropriate task from the proposed list. Next, check the box next to “Journal” and click the “Delete” button:
That's all the difficulties! Can you handle it?
Each major update of the Internet Explorer Internet browser, along with a significant improvement in the browser, also leads to various kinds of inconsistencies with the standards used in the previous version. Internet Explorer 9 is no exception, but in this version of the browser, manufacturers have provided the ability to switch page viewing to compatibility mode with previous versions.
You will need
- Internet Explorer 9.
Instructions
- Launch Internet Explorer. If there is no shortcut for this program on your desktop, then open the main OS menu and enter the name of the application in the search query field. However, three letters int will be enough for a link to launch a web browser to appear in the first line of search results. Click it.
- Expand the “Services” section in the browser menu. If the menu is not visible in the application window, press the Alt key. It will appear below the window title. In the “Tools” section, select the most complexly formulated item - “Compatibility View Options”.
- Check the box next to “Display all websites in Compatibility View mode” when the Compatibility View settings window appears on the screen. In this way, you will enable the most “hard” version of compatibility mode - the browser will use it for all pages, even those that do not need it.
- If you set it to o, compatibility mode will be enabled only for those sites that are known to Microsoft to be incompatible with this version of the browser.
- You can also create your own list of sites to which this mode should be applied, adding to it all the pages you encounter that are displayed with distortions. You can do this using the field below “Add this website” and the “Add” button.
- Click the "Close" button in the dialog box to allow Internet Explorer to start using the settings you changed.
- There is another, simpler option to enable compatibility mode at the right time. When the browser opens the next page, it itself tries to evaluate its compatibility. If, in his opinion, this mode is required for normal display, an icon with a stylized image of a page torn in half appears in the address bar. Left-click on this icon and the web browser will activate compatibility mode and also change the icon's colors from white and gray to cyan.
- When Internet Explorer detects a web page that is incompatible with the current version of the browser, a special Compatibility View button appears in the address bar. To see it, you need to call the main system menu by clicking the “Start” button and go to “All Programs”. Launch Internet Explorer and go to the desired Internet page. Determine the current state of compatibility mode - the active state of the mode is indicated by a colored button, the disabled state is indicated by a schematic button. To turn off the active state of compatibility mode, simply press the colored button.
- Open the Tools menu in the top toolbar of Internet Explorer and select Compatibility View Options. Uncheck the box next to “Display all nodes in Compatibility View” in the dialog box that opens and confirm saving your changes by clicking OK.
- An alternative method for disabling the presentation of pages in compatibility mode is to use a meta element, which is the server response header of the same name, X-UA-Compatible, with the value IE=edge: meta tag http-equiv=»X-UA-Compatible» content=»IE =edge" / tag. Please note that the value IE=edge forces the last possible mode of operation of the browser, regardless of its current version. Thus, the presentation of Internet pages in backward compatibility mode will be disabled programmatically. In Internet Explorer version 8, edge mode will only display pages at that version level; in version 9, it will display pages at the next level. It is recommended that use of this mode be limited to test web pages and other non-production purposes, as the effects of page misrendering are not fully understood.
Compatibility mode can be useful when viewing web pages designed for earlier versions of Internet Explorer. Disabling this mode does not require special preparation or additional software.
Instructions
Compatibility mode when creating new documents
See also: “How to convert a Word document to Excel”
We have previously described the conditions under which compatibility mode starts. But sometimes it happens that it is activated even at the moment of creating a new document.
This may happen due to the fact that the program defaults to saving files in older version formats, for example, Excel 97-2003 (xls). To fix this, you need to set XLSX as the default format.
- Open the “File” menu.
- In the list on the left, click on the “Options” section at the very bottom of the window.
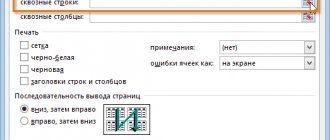
- In the displayed program parameters, go to the “Save” subsection. On the right side of the window, find the “Save files in the following format” option, click on the current option and select “Excel workbook” from the list provided. Then click OK.
- We confirm the change of format to XLSX (Office Open XML), including for all available MS Office applications that support this format, by clicking OK.
- Now all new documents will be created and saved with full functionality supported by the current version of the program.