Here we select the “Boot Mode” or “OS Mode Selection” parameter, and switch it from the “UEFI OS” position (possibly “UEFI Boot”) to the “CSM Boot” position (possibly “UEFI and Legacy OS” or “CMS OS”) .
For the changes to take effect, press F10 and confirm saving the changes by selecting “Yes”. Reboot. Now we can load any operating system onto our laptop.
⇑ Up
How to disable Secure Boot and UEFI on an HP laptop
Sometimes things are not so obvious. For example, on some HP Pavillion laptop models, you need to perform several additional operations to disable Secure Boot.
When booting the laptop, press the F10 key (possibly ESC, then F10) and enter the UEFI-BIOS. We go to the “System Configuration” section, find the “Boot Options” subsection and go into it.
Find the “Secure Boot” option and switch it to the “Disabled” position. On the contrary, we switch the “Legacy support” compatibility mode parameter with other operating systems to the “Enabled” position.
We respond to the warning with “Yes”.
For the changes to take effect, press F10 and confirm saving these changes by selecting “Yes”. Reboot your computer. After the reboot, a warning window appears with the warning “A change to the operating system secure boot mode is pending...”. In English, we are asked to enter code 8721 on the laptop keyboard (in your case, the code will, of course, be different) and press Enter. After this, changes in the UEFI-BIOS settings will be saved and the laptop will reboot again.
When you turn on your HP laptop, press the ESC key and you will be taken to the start menu. In it, select “F9 Boot Device Options” and, going to the boot menu, select the installation flash drive (already connected) or the installation DVD with the operating system distribution.
⇑ Up
Disable option on Hewlett-Packard devices
Read also: 5 Tips for setting up the Windows page file (7/8/10)
This operation may require some additional steps on some HP notebook models.
One such model is the HP Pavilion.
HP laptop BIOS
Initially, you should start the laptop and at the very beginning of boot (as soon as the very first characters appear on the monitor screen), press and hold the Esc button for a while.
After this, the “Startup Menu” , which contains boot options.
Next, you need to use the F10 button to get to the BIOS settings window.
Having entered it, you have to select the “System Configuration” located at the top of the window, which you should navigate to using the arrow buttons.
By pressing Enter you will be taken to the settings window for this item, in which you need to select the “Secure Boot” .
To disable it, set the value opposite it to [Disabled].
After this, go to the item “Legacy support” , which is responsible for compatibility with other operating systems.
Set it to the [Enabled] state, since this function is disabled by default.
The system will issue a warning for your actions, which you must ignore and select “Yes” .
Next, press the Enter button, after which a standard reboot occurs.
During this process, a window will open warning you that the operating system's secure boot mode has been changed.
To complete the settings, you will be asked to enter a four-digit code and press the Enter key.
After this, the computer will continue to reboot, and all existing BIOS UEFI changes will take effect.
When you start it again, you need to hold down Esc on the keyboard, which will allow you to enter the boot menu.
Here you will need to select the option to launch the operating system - hard drive, CD-Rom or bootable flash drive.
back to menu ↑ back to menu ↑
How to disable Secure Boot and UEFI on an Asus laptop
(Aptio Setup Utility)
When booting the laptop, press the DELETE key and enter the UEFI-BIOS. We go to the “Security” section and, having found the “Secure Boot” parameter, switch it to the “Disabled” position.
Then go to the “Boot” section and, having found the “Fast Boot” parameter, switch it to the “Disabled” position.
For the changes to take effect, press F10 and confirm saving the changes by selecting “Yes”. Restarting the laptop. We enter the UEFI-BIOS again. We go to the “Boot” section and, having found the “Launch CSM” parameter, switch it to the “Enabled” position.
Press F10 again and confirm saving the changes by selecting “Yes”. Reboot. When you turn on the Asus laptop, press the ESC key and get to the boot menu. In it, select the installation flash drive (already connected) or the installation DVD with the operating system.
⇑ Up
Solution
Now you will learn how to resolve the “Secure boot violation invalid signature detected” error. This is done extremely simply. But I advise you to take special care when reading this instruction, since we will be working with BIOS.
- First you need to go to SETUP before downloading. Usually, to do this, it is enough to press one of the keys after turning on the laptop: Del or F. There may be another button (or a combination of them), which is indicated on the screen in the first seconds of startup.
- Now you need to find the “SecureBoot” item among the options and set it to “Disabled”.
- For UEFI, you must additionally specify a different OS Type. Windows users, select “Other...” from the list.
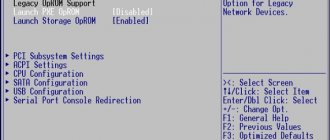
- Also, I recommend enabling CSM (Enable CSM), if there is a similar option in the list of parameters.
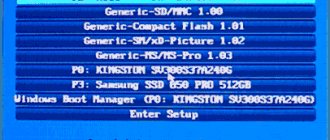
Here are a couple of screenshots that will help you navigate the situation:
Now we check whether the “Invalid signature detected” problem in Windows 10 has been resolved.
How to disable Secure Boot and UEFI on a Samsung laptop
(Aptio Setup Utility)
When booting the laptop, press the F2 key and enter the UEFI-BIOS. Go to the “Boot” section and find the “Secure Boot” parameter.
Switch it to the "Disabled" position.
At the warning that the computer may boot with an error, press Enter.
In the same section below, the “OS Mode Selection” parameter will appear.
Switch it to the “CMS OS” or “UEFI and Legacy OS” position.
A warning will appear again about the possibility of the next boot of the laptop with an error. Press Enter. For the changes to take effect, press the F10 key and confirm saving the changes by selecting “Yes”. Restarting the laptop. Now we can load any operating system onto our laptop; if that doesn’t work, please contact ComprayExpress.
⇑ Up
How to disable Secure Boot and UEFI on an Acer Aspire laptop
(InsydeH20 Setup Utility)
Press the F2 key when booting the laptop and enter the UEFI-BIOS. Here we go to the “Main” section and, having found the “F12 Boot Menu” parameter, switch it to the “Enabled” position. With this action, we allowed the laptop boot menu to appear when pressing the F12 key.
Next, go to the “Security” section and, having found the “Set Supervisor Password” parameter, press the Enter key. In the top field, set the password (we will reset it later) and press Enter. In the lower field, enter the same password and press Enter again.
At the “Changes have been saved” message, press the Enter key again.
Next, go to the “Boot” section and, having found the “Boot Mode” parameter, switch it from the “UEFI” position to the “Legacy” position.
For the changes to take effect, press the F10 key and confirm saving the changes by selecting “Yes”. Restarting the laptop. Since it makes sense to remove the password we previously set (the ability to disable/enable “Secure Boot” will remain), again using F2 we enter the UEFI-BIOS, go to the “Security” section and, having found the “Set Supervisor Password” parameter, press the Enter key . In the top field, enter the password we previously set and press Enter. In the second and third fields, do not enter anything, just press Enter.
At the “Changes have been saved” message, press Enter again. That's all! The password has been reset, but the ability to disable/enable Secure Boot remains. For the changes to take effect, press the F10 key and confirm saving the changes by selecting “Yes”. Reboot. Now we can load any operating system onto our laptop.
⇑ Up
On a desktop computer:
How to disable Secure Boot and UEFI on Asus motherboard
When booting the laptop, press the DELETE key (possibly F2) and enter the UEFI-BIOS. Press F7 to go to “Advanced Mode”.
We go to the “Boot” section, find the “Secure Boot” subsection there and go into it.
Switch the "Secure Boot" option to "Other OS".
Next, return to the root of the “Boot” section and go to the “CSM (Compatibility Support Module)” subsection.
Switch the "Launch CSM" option to "Enabled".
In the additional options that open, select “Boot Device Control” and switch to the “Legacy OpROM only” or “UEFI and Legacy OpROM” position.
Go to the “Boot from Storage Devices” parameter and switch it to the “Legacy OpROM first” or “Both, Legacy OpROM first” position.
With these steps we were able to disable Secure Boot and enable advanced boot mode. For the changes to take effect, press the F10 key and confirm saving the changes by selecting “Yes”. Reboot. Now we can load any operating system onto our computer.
⇑ Up
conclusions
From this article you learned how to disable secure boot in bios uefi. In most cases, Secure Boot is a useful feature, but for users who want to install/boot Linux or old Windows, it becomes a hindrance. The option is easy to disable, but it is better not to do this unless absolutely necessary.
If you find an error, please select a piece of text and press Ctrl+Enter.
Related posts:
No related photos.
Rate this article:
( 1 ratings, average: 5.00 out of 5)
Tweet Pin It
about the author
immkg
How to disable Secure Boot and UEFI on Asrock motherboard
When booting the computer, press the DELETE key (possibly F2) and enter the UEFI-BIOS. Go to the “Security” section and, having found the “Secure Boot” parameter, switch it to the “Disabled” position.
For the changes to take effect, press the F10 key and confirm saving the changes by selecting “Yes”. Reboot. Now you can load any operating system onto your PC.
⇑ Up
How to disable Secure Boot and UEFI on a Gigabyte motherboard
Press the DELETE key when booting the PC and enter the UEFI-BIOS. We go to the “BIOS Features” section and, having found the “Windows 8 Features” parameter, switch it to the “Other OS” position.
Then switch the “Boot Mode Selection” parameter to the “Legacy only” or “UEFI and Legacy” position. And finally, switch the “Other PCI Device ROM Priority” parameter to the “Legacy OpROM” position.
To save the changes, press the F10 key and confirm saving the changes by selecting “Yes”. Reboot. Now we can load any operating system onto our computer.
Reasons for appearance
Most often this “defect” pops up:
- after installing Windows 10/8 OS updates or as a result of installing a second operating system;
- as a result of scanning disks using antiviruses after a serious virus attack;
- if in your Windows settings you have allowed the use of drivers from unverified sources (without a digital signature);
- when you connect an additional HDD drive;
- as a result of an unsuccessful BIOS update/reset.
How to disable Secure Boot and UEFI on MSI motherboard
⇑ Up
When booting the PC, press the DELETE key and go to the UEFI-BIOS. Here we go to the “SETTINGS” section, go to the “Boot” subsection, and having found the “Boot Mode Select” parameter, switch it to the “Legacy + UEFI” position.
For the changes to take effect, press the F10 key and confirm saving the changes by selecting “Yes”. Reboot. Now we can load any operating system onto our computer.
Write in the comments if these instructions helped you solve the problem with installing the operating system on your personal computer or laptop.
What is UEFI?
UEFI (Unified Extensible Firmware Interface, a unified interface that supports firmware extensions) is a software and hardware solution that replaced the usual BIOS (basic input/output system).
Through the interface, distributed in the form of one or more files, the user can:
- Manage low-level functions of hardware components. Doing this in an already loaded operating system is either not possible, or is fundamentally more difficult, and in the BIOS, due to the confusion of the menu and the predominant absence of the Russian language in the firmware, it is also quite difficult.
- Enable or disable booting the OS from certain media.
- Get additional information about the software and hardware configuration of your device, including finding out the model of the laptop and its individual components.
UEFI
Thus, UEFI, like the BIOS it replaced, serves as an “intermediary” between low-level hardware firmware and the operating system; Without using one of these interfaces, the user will either not be able to launch the OS at all, or will end up with a non-configurable machine that works with much less efficiency.
The first modifications of UEFI, then simply EFI, appeared in the early 1990s. A truly "unified" version was released by Intel in late 2000 as version 1.02. The current version 2.6 was released sixteen years later; Despite the active development of the interface, it is not yet possible to enable UEFI on all computers - developers face many unsolved problems, primarily related to compatibility issues.
Important: despite the fact that each computer and laptop manufacturer develops and implements its own version of UEFI, the principles of operation of the software and hardware combination are the same - not only for different equipment, but also for different operating systems, including Windows, Linux and MacOS.