Broken or disconnected data cable
Always check the connections between the motherboard and HDD for integrity of contacts. A bent, pinched or crushed cable can cause damage to wires hidden by insulation. Such cables must be replaced.
For SATA drives, 1 meter cables are recommended.
Recommended cable length 1 m for SATA drives
For ATA drives, UDMA cables with a maximum length of 45 cm are recommended. They have colored connections to help you navigate when connecting.
Recommended cable length 45 cm for ATA drives
Connector usage:
- blue – for connecting the motherboard;
- gray – for connecting with connected devices;
- black – for connecting to master devices.
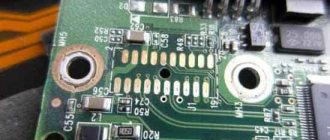
Jumper problems
When using a Sata 3.0 Gb/s HDD and a controller on a 1.5 Gb/s motherboard at the same time, there may be a problem where the drive will not be detected in the BIOS or will cause the OS to lock
Jumpers are special sockets that allow you to connect equipment via special wires and cables.
The hard drive has a sufficient number of jumpers, so they must be checked.
To do this, you don’t need to be a professional: a violation of the structure of the jumper or its absence is visible to the naked eye. A broken jumper prevents the BIOS from sending a software signal to the hardware.
With a broken jumper, it is possible that the BIOS sees the hard drive. This situation indicates that the hard drive is working, but is not transmitting signals, so you should carefully examine each jumper. They are located at the base of the connection to the hard drive through special wires, as well as on the base of the motherboard, where you connect the hard drive.
If you find a distorted, scratched or missing jumper on a brand new hard drive, then you should contact the store where you purchased the equipment to replace it. If you find a defective jumper on the motherboard, you need to contact a specialized service, where they will solve this problem for you. The same option is suitable if a defective jumper has formed on your outdated hard drive.
The disk does not spin
The problem occurs when the drive does not receive enough power to operate. This can be checked by the following steps:
- Turn off your computer.
- Open the computer case and disconnect the data cable and hard drive. This will stop all power saving commands.
- Connect the drive using a data cable and restart your computer.
- Check to see if the disk has started to rotate.
- If not, try unplugging and reconnecting the computer and hard drive's power cord, repeating until the hard drive spins up.
- If the drive still won't spin, try repeating these steps with another PC.
- Or connect a drive in a SATA-USB enclosure or similar device.
- If the disk does not rotate after completing all these steps, you must contact the manufacturer.
The hard drive does not spin, we are looking for problems
A hard drive may not spin for a variety of reasons, but one of the most common is physical damage. If the hard drive has recently been formatted, or if it has suffered water damage, this could be the source of the problem.
Asus laptops do not see the hard drive. Automatic entry into BIOS at startup
28 437
Sometimes this is solved very simply, sometimes you have to tinker.
We have accumulated all possible reasons in one article and will try to understand the cause of this problem.
Let's do it using the X540Y model as an example.
Content
Symptoms
Tip #1. Enable CMI, disable Security Boot.
Tip #2. Reset the BIOS settings correctly (there are nuances!)
Tip #2.5 If someone has already completed Load Manufacture Defaults. What to do?
Tip #3. Set IDE instead of AHCI in BIOS
Tip #4. Update BIOS
Tip #5. Roll back BIOS (downgrade)
Tip #6. Check the cable, reset the BIOS or battery
Tip #7. Check HDD
Tip #8. If the hard drive is detected normally in another laptop
Symptoms:
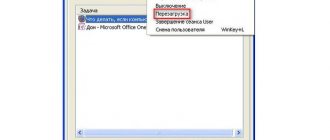
1. The system does not boot. At startup it automatically enters the BIOS. Rebooting simply repeats the process
2. The hard drive is not detected in the boot section (you can’t select anything at all)
3. There was no mechanical damage to the laptop (did not drop, did not flood)
Tip #1. Enable CMI, disable Security Boot.
First, let's try changing some settings in the BIOS, especially activating the Launch CSM function - this is required for previous generation operating systems that do not support the UEFI boot loader (Windows 7 does not support it either). You can enable it only by disabling the Security Boot section. But first things first.
To enable CSM, you must first disable the Security Boot item. To do this, go to the Security item in the main BIOS menu and set Disabled to Secure Boot Control
Next, go back to the Boot menu and set Enabled to the Launch CSM item. The lower sub-item can be left Disable (Launch PxE OpROM)
After the manipulations have been done - press F10, or go to Save and Exit and save the settings - the computer will reboot. If the system still does not boot, check the Boot Option Priorities section (you can see it in the screenshot above) - if the hard drive is not detected there, dig further
Tip #2. Reset the BIOS settings correctly (there are nuances!)
ASUS laptops have one very harmful function called Load Optimaze Defaults (in some models Load Manufacture Defaults) after which SATA hard drives are no longer detected. Do not reset settings in this way. Only reset using the Load User Defaults method, if you have one in your BIOS. If not, don’t reset the settings at all.
Do not do it this way:
Tip #2.5 If someone has already completed Load Manufacture Defaults. What to do?
If someone did reset the settings in an unnecessary way, then try booting from the installation flash drive and installing Windows again (or restoring the previous one). In theory, during installation the system should detect your disk if everything is fine with it.
In order for the hard drive to be detected, you will need to install SATA drivers. If your disk is not detected during installation, then there are two options - either go to tip #8, or try installing SATA drivers, as the system asks.
Tip #3. Set IDE instead of AHCI in BIOS
Try changing the AHCI parameter (the mechanism used to connect storage devices via the SATA protocol) to standard IDE. This can be done in the BIOS in the Advaned - SATA Configuration menu
It also happens that there is no choice - all new laptops use only AHCI, so you may not have an IDE - this is possible.
Tip #4. Update BIOS
In our model (X540Y), the BIOS is called Aptio Setup Utility. To get into it you need to press F2 when loading, but we don’t need this, because The laptop automatically goes there without our help.
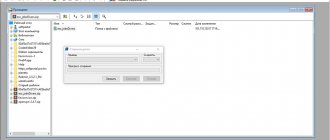
To update the BIOS, use the built-in Easy Flash utility. To do this, simply download the latest BIOS version to any flash drive (the file system on the flash drive must be NTFS) and select Start Easy Flash in the Advanced of your BIOS.
For Asus laptops, all the latest BIOS firmware can be found at asus.com/in/support/Download-Center/
In the utility window, use the arrows to select the desired file and press Enter
If your BIOS does not require updates or the one you are installing is older than the current version, the utility will display a corresponding message.
Tip #5. Roll back BIOS (downgrade)
In some cases, on the contrary, it is recommended to roll back the BIOS version - not all updates are equally useful. And since inexperienced technicians, first of all, try to update/flash/change settings in the BIOS - this advice is very relevant. However, the same Easy Flash simply does not allow you to do this - the utility will not allow you to install the old version, so you will have to reflash it in a different way.
Tip #6. Check the cable, reset the BIOS or battery
If your laptop has a “tablet” BIOS, that’s very good. You can remove it for 5-10 minutes to hard reset the BIOS settings. In our case, it is not there. Some models do not have a separate battery. It also happens that you cannot get the battery unless you disassemble the laptop - this is a feature of budget Asus laptops. In them, the battery is placed inside the case, and not outside, like in “adult” models.
Disconnect the battery
Let's start disassembling it. With ASUS X540Y this is done quite easily. Unscrew all the bolts on the back of the case
Next, on the front panel, you need to use something thin to pry off the latches on the cover on which the keyboard is mounted, along the entire perimeter
Be careful when removing the cover - do not yank it. It comes with a cable for the keyboard and touchpad - first lift them up a little and disconnect them.
Attention!
The battery itself is located inside, above the motherboard - you just need to pry it at the places where it connects to the motherboard (there is room to get into it with a screwdriver or something) to pull it out.
This is what it looks like without the battery and protective film
Keep the laptop with the battery disconnected for 10-15 minutes, insert it back and check.
Checking the cable
The SATA channels on the X540Y model are connected to the motherboard with a special cable - it can also be checked for prevention, although it usually sits firmly in its place - it is unlikely that anything can happen to it if the laptop has not been dropped or flooded.
Tip #7. Check HDD
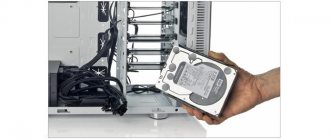
Checking the HDD is quite simple if you have a SATA to USB adapter in your arsenal. First you need to remove the hard drive. We looked at how to disassemble a laptop in the previous tip. Here we just need to unscrew the fastening bar and the hard drive is in our hands.
We check it simply - connect it via an adapter to another laptop or computer.
“My Computer” should identify all local drives, in addition to yours, that were present on the HDD.
An alarm bell will be the fact that the hard drive is not detected, or it takes a very, very long time - this means that there may be problems with the file system or, even worse, bad sectors. In this case, you need to have your hard drive checked by specialists, or try installing another, known working HDD into your laptop
Tip #8. If the hard drive is detected normally in another laptop
It is likely that the problem lies in the laptop hardware - for some reason the SATA channels do not work. You need to check the south bridge, this is especially true for the SIS 968 model - they very often “fly” at the most inopportune moment. Chipset (motherboard) diagnostics required
Failed hard drive
Hard drives are mechanical devices, and like all mechanical devices, they can fail unexpectedly. Main reasons:
Firmware or manufacturer errors (factory defects)
All reputable hard drive manufacturers thoroughly test their products before selling them to consumers. But even with modern testing methods, defective hard drives still sometimes make it onto the market. Most manufacturing defects appear within the first year of use, so it is recommended that you never trust a brand new hard drive with critical data and keep backups somewhere else up to date.
Overheat
Hard drive overheating
Most hard drives are designed to operate at temperatures between 5 and 50 degrees Celsius, and some newer hard drives can operate up to 60 degrees Celsius. Although overheating does not usually cause a crash, it often leads to data corruption and read errors. It is important that your computer or laptop is well ventilated, especially during the summer months. Thermal paste should be used between the processor fan heatsinks.
Electronic fault
Electronic hard drive failure
Inside every hard drive there are many sensitive electronic components. A sudden power failure preceded by a momentary power surge can cause these components to malfunction, rendering the entire hard drive useless. High quality surge protection is by far the best way to protect against electronic hard drive failure.
File corruption
Unethical shutdown of the PC, accidental closing of running applications, use of malicious or dubious software, and power surges are factors that contribute to the corruption of system files. The solution is to always use the standard method of shutting down your PC, ending running programs before closing the system.
Mechanical failure
Mechanical failure using viruses
Cause. A hard drive contains moving parts that can degrade over time and eventually lead to mechanical damage to the hard drive. A virus attack can erase hard drive data, alter the performance of the hard drive, or cause damage to system files, etc., which ultimately leads to mechanical failure. For example, rootkits become active when the system starts and disrupt the system at the BIOS level. Although operating systems starting from Windows 8/Windows 8.1 have the ability to detect this malicious program and remove it using UEFI (Unified Extensible Firmware Interface) technology.
Advice! General measures that can increase the life of a hard drive are updating the system regularly or weekly, running the latest copy of an antivirus program, replacing the hard drive after 3-4 years of use, etc.
Incorrect BIOS options setting
Often the BIOS does not see the hard drive due to incorrect settings. This may be due to several reasons:
- Power outages
- Viruses in the operating system
- Connecting new components to the motherboard
- Human factor
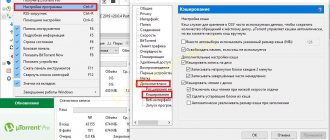
To perform diagnostics when you turn on your computer, you need to go to the BIOS menu. To get into the BIOS settings, you must press the F2 or Del keys at the very beginning of booting the computer, depending on the motherboard manufacturer. Typically, keyboard shortcuts are specified when the system starts. When entering the BIOS, we check whether the functionality for detecting the hard drive is enabled. To do this, select Integrated Peripherals from the menu and find the Onboard IDE Controller section. Press Enter and see that opposite this section there are two inscriptions Enabled (enabled) and Disabled (disabled). We check that it is Enabled. Then we save the configuration and reboot.
If this action does not help, then you can try resetting the BIOS settings. To do this, turn off the computer or laptop, disassemble it and then look for a round silver battery on the system board. We take it out and wait about 30 minutes. Then we insert it back and try to start the computer again.
Did the article help you? Thank you! Your vote has been counted.
How to view a hard drive in BIOS: instructions for preliminary steps
You may be interested in: How to connect Yandex.Disk as a network one in stationary Windows systems and Android mobile OS?
So, first you need to enter the interface of the primary input/output system, which, in fact, is the BIOS (as well as its improved modification UEFI). On stationary PC-class terminals, the Del key is usually used for this, which must be pressed when the start screen appears when turning on the computer.
You may be interested in: “Media Get” does not download files: causes of problems and methods for eliminating them
As a rule, a special line will appear either at the bottom or in the middle of the window indicating the login method (Press Del to enter BIOS Setup or something like that).
With laptops, the situation is somewhat more complicated, since each manufacturer independently sets the keys or combinations thereof used for entry. Most often, function buttons are used (F2, F12, F9), sometimes combinations based on the Fn key can be used, and on some models the primary system call buttons can even be placed on the main keyboard panel (for example, the ASSIST button on Sony VAIO line of laptops). In general, it is best to immediately pay attention to the line describing the login method, which was described above, or read the technical documentation for the laptop.
How to turn on a hard drive in the BIOS and then check the operation of the drive?
When you install a new hard drive on your computer, the drive is not always detected by the system. You connect it, check it in the list of devices - but the disk is not there. In such a situation, you should think about how to enable the hard drive in the BIOS.
The fact is that for a new drive, certain settings may not be configured in the BIOS. In order for the drive to appear, you need to set up the correct system configuration. For this:
- Turn on the computer's power;
- Before the OS starts loading, a screen will appear on the monitor where you can launch the BIOS. Typically, to perform this operation, you need to press the "DEL", "F2" or "F11" key;
- Having entered the BIOS, press the line “MAIN”, then the “Enter” button;
- In the menu that opens, you will see all the drives and disks connected to the PC. Select the desired line and click on it;
- If you do not find it, point to the “SATA” number to which you connected, and then select “AVTO”. The disk search will begin;
- When the system detects it, select "save end exit". The computer will restart;
- And now you will be able to find the hard drive by clicking “Start”, then “My Computer”.
The disk is detected in the BIOS, but the system does not see it
Things are somewhat different when Windows 7/10 does not see the hard drive, but it is perfectly detected by the BIOS. If it is a system drive, Windows will naturally not boot, and it is important to understand what exactly is causing the problem. These could be problems with the disk itself, incorrect BIOS settings, or damage to the operating system. The latter is important to exclude. To do this, try to access the hard drive data by booting from a LiveCD or flash drive.
If the disk is visible in the built-in LiveCD file manager, most likely there is something wrong with the operating system itself. In other cases, the first thing to do is go into the BIOS and see if your boot priorities are set correctly. By the way, the Operating System not found error may indicate a lost priority. In Ami BIOS you can do this on the Boot tab - Boot Device Priority, and in Award BIOS - in the Advanced BIOS Features - First Boot Device section.
Also in the Edward BIOS you need to make sure that in the Standard CMOS Features section the mode for the hard drive is set to Auto.
All of the above is true for additional (second) disks. If everything is fine with the BIOS settings, but the computer does not see the second hard drive, check the following points:
– By opening the Disk Management utility through the Start menu, find your disk in the list and make sure that it is initialized. If not, right-click on it, initialize it, and then create a new volume on the disk.
– Disk space is not allocated. Again, create a new volume.
– The drive letter is not assigned. Assign a free letter to it, otherwise it will not be displayed in Explorer.
– The file system of the media is defined as RAW. Format the disk or perform a file system recovery with the command chkdsk [drive letter]: /f . Alternatively, you can use special utilities like TestDisk for this.
– Disk drivers are damaged or not installed. Open Device Manager, look for your second drive under Disk Devices, and see if it has a yellow sign. If checked, this may indicate that the necessary drivers are missing. Download drivers from the official website of the disk manufacturer and install them.
The case when the computer does not see the hard drive when installing Windows 7/10 deserves special attention. This problem is quite common on laptops with caching SSDs, SATA drives and RAID arrays. Its main reason is the lack of specific drivers that allow working with such configurations. It doesn’t matter, you can download drivers from the official website of the manufacturer of your laptop model or motherboard. The names of such drivers usually contain the words "SATA", "Intel RST" or "RAID".
Copy the driver to the USB flash drive from which you are installing Windows and boot from it. When an empty window appears for selecting a partition to install the system, click “Download”, specify the path to the copied driver and install it.
If the system is installed from an optical disk, the driver file is also copied to a flash drive, which must be connected to the laptop/computer before turning it on, otherwise the portable media will not be recognized. After installing the driver, the disk should appear in the installation wizard window.
Physical malfunction or manufacturing defect
In case of various damages, the performance of conventional magnetic disks (HDD) is quickly disrupted, and it is no longer recognized correctly. This is usually caused by a shake, fall or blow. In this case, the internal mechanics partially fail (magnetic heads stick, motor bearings jam, or the magnetic plates themselves are damaged). In this case, it must only be repaired professionally.
It also cannot be said about severe overheating, as a result of which the electronics board fails. Which also requires the intervention of a specialist.
If the problem is observed with a completely new HDD, it does not show any signs of life, most likely you have encountered a defect. The best solution would be to return it to the store while the warranty is valid. Since if you repair it yourself, you may not be able to take it back.
If you were unable to solve the problem yourself using our advice, we recommend that you contact qualified specialists for quick troubleshooting.