12/12/2018 windows
Among the errors that prevent the installation of Windows 10 on a computer or laptop and are often incomprehensible to a novice user is a message that “We were unable to create a new or find an existing partition. See the installer log files for more information." (Or We couldn't create a new partition or locate an existing one in English versions of the system). Most often, the error appears when installing the system on a new disk (HDD or SSD) or after preliminary steps to format, convert between GPT and MBR and change the partition structure on the disk.
This instruction contains information about why such an error occurs, and, of course, about ways to correct it in various situations: when there is no important data on the system partition or disk, or in cases where such data exists and needs to be saved. Similar errors when installing the OS and ways to solve them (which may also appear after some methods offered on the Internet to fix the problem described here): The disk contains an MBR partition table, The selected disk has a GPT partition style, Error “Windows cannot be installed on this disk " (in contexts other than GPT and MBR).
Cause of the error "We were unable to create a new partition or find an existing partition"
The main reason for the inability to install Windows 10 with the specified message that a new partition cannot be created is the existing partition structure on the hard drive or SSD, which prevents the creation of the necessary system partitions with the bootloader and recovery environment.
If it’s not entirely clear from what’s described what exactly is happening, I’ll try to explain it differently.
- The error occurs in two situations. First option: on the only HDD or SSD on which the system is installed, there are only partitions that you created manually, in diskpart (or using third-party programs, for example, Acronis tools), and they occupy the entire disk space (for example, one partition for the entire disk, if it was previously used for data storage, was a second drive on the computer, or was just purchased and formatted). At the same time, the problem manifests itself when booting in EFI mode and installing on a GPT disk. Second option: there is more than one physical disk on the computer (or the flash drive is defined as a local disk), you install the system on Disk 1, and Disk 0, which is located in front of it, contains some of its own partitions that cannot be used as a system partition (and system partitions are always written to Disk 0 by the installer).
- In this situation, the Windows 10 setup program has “nowhere” to create system partitions (which can be seen in the next screenshot), and previously created system partitions are also missing (since the disk was not previously system partitioned or, if it was, it was reformatted without taking into account the need for space for system partitions). partitions) - this is how “We were unable to create a new or find an existing partition” is interpreted.
This explanation alone may be enough for a more experienced user to understand the essence of the problem and fix it. And for novice users, several solutions are described below.
Attention: the following solutions assume that you are installing a single OS (and not, for example, Windows 10 after installing Linux), and, in addition, the disk on which you are installing is designated as Disk 0 (if this is not the case when you have multiple drives on a PC, change the order of hard drives and SSDs in BIOS/UEFI so that the target drive comes first, or simply switch SATA cables).
A few important notes:
- If in the installation program Disk 0 is not the disk (we are talking about a physical HDD) on which you plan to install the system (i.e. you are installing it on Disk 1), but, for example, a disk with data, then you can search in the BIOS/ UEFI parameters that control the order of hard drives in the system (not the same as boot order) and set the drive on which the OS should be installed first. This alone may be enough to solve the problem. In different BIOS versions, the parameters may be located in different places, most often in a separate Hard Disk Drive Priority subsection on the Boot configuration tab (but can also be in the SATA configuration). If you cannot find such a parameter, you can simply swap the cables between the two disks, this will change their order.
- Sometimes when installing Windows from a flash drive or external hard drive, they are displayed as Disk 0. In this case, try setting the boot not from the flash drive, but from the first hard drive in the BIOS (provided that the OS is not installed on it). The boot will still occur from an external drive, but now we will have the required hard drive under Disk 0.
Correcting an error on a drive with important data
The impossibility of creating a new system partition on a disk that previously served to store user data requires proper partitioning - the system partition must have a volume sufficient for the successful installation of Windows. We recommend that beginners use utilities from third-party developers for this, where the disk preparation process is almost completely automated, so the chances of making a mistake are minimal. More advanced users can use standard Windows tools. The main thing is to understand what you are doing. Let's briefly consider both methods.
Using the OS diskpart command
The Windows diskpart utility is a standard operating system tool for preparing drive partitions. It will also help when the warning message “Could not create a new system partition or find an existing one” appears. So, you have a disk on which data loss is extremely undesirable for you. You can use diskpart to solve the problem, although the order of the partitions will be non-standard, but it will work. If you ever need to reinstall your system, you'll have to take into account the atypical current Windows configuration. So, we bring to your attention step-by-step instructions:
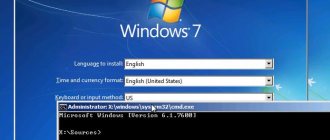
- launch the OS installer, after loading, call the command line to launch diskpart (key combination Shift+F10, on some computers – Shift+Fn+F10);
- run the disk partitioner (command diskpart + “Enter”);
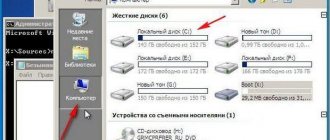
- the next command is “list volume”, the number of volumes in the system will be displayed, we need to remember the leading digit (if there are several labeled volumes);
- We type “select volume #volume_number” on the command line, the necessary condition is that the specified volume has at least 700 MB of free space;
- exit the command line (command exit);
- in the Windows installation window, select the volume on which the operating system will be installed; the error should not appear, and the installation process will continue.
But in this case, all BCD files, along with the Boot and Recovery directories, as well as the Windows boot manager (bootmgr file), will be located on the last volume. A standard installation places all of these components on disk 0.
Using third party software
To create a system partition, it is better to use not a built-in utility, but specialized programs that are not universal (unlike diskpart), but do their job very well. They will save you from the inconvenience associated with non-standard placement of system files, and you will not have to reassign anything. For example, consider the Minitool Partition Wizard utility (which has a bootable version) - it is considered one of the best in its class. If the bootloader fails to find/create a new system partition, it will do everything without having to type any commands. The utility is available for download in ISO image format, and if you want to use a removable media such as a flash drive to run it, you will have to use the appropriate program for this, specifying MBR for BIOS or GPT for UEFI, and FAT32 as the file system type. Rufus is considered a good utility for creating a bootable flash drive.
So, the sequence of actions:
- run the utility image, confirm by pressing “Enter;
- select the volume located first in the list (if there are several of them), click “Move/Resize” to set the partition size;
- we indicate in the “Unlocate Space Before” field the value of 700 MB - this volume will be sufficient for the needs of the bootloader;
- We confirm the operation in this and then in the main window of the utility.
That's it, now you can start the Windows installation procedure again - the error should not appear. The main thing is not to make a mistake again at the stage of specifying the partition for installing the OS, otherwise nothing will work again.
If you acted according to the instructions, but still could not avoid the error, ask questions in the comments to the article, we will be happy to help you solve the problem.
Correcting an error when important data is missing on a disk (partition)
The first way to fix the problem involves one of two options:
- The disk on which you plan to install Windows 10 does not contain important data and everything must be deleted (or has already been deleted).
- There is more than one partition on the disk and the first one does not contain important data that needs to be saved, but the partition size is sufficient for installing the system.
In these situations the solution will be very simple (the data from the first partition will be deleted):
- In the installer, select the partition on which you are trying to install Windows 10 (usually Disk 0 partition 1).
- Click "Delete". It’s even better to delete all partitions from Disk 0 (provided that we install the system on it and there is no important data).
- Highlight "Unallocated space on disk 0" and click Next. Confirm the creation of system partitions; if prompted, the installation will continue. If it doesn't work, restart your computer, start the installation again, and run the installation again into unallocated space.
As you can see, everything is quite simple and in most cases no command line actions using diskpart (removing partitions or cleaning the disk using the clean command) are required. Attention: the installation program must create system partitions on disk 0, not 1, etc.
In conclusion, there is a video instruction on how to fix the installation error using the method described above, and then additional methods for solving the problem.
How to fix an error if the disk is missing important user data
If you are not afraid of losing important data, since you took care of transferring it to removable media in advance, the problem of the message “The installation program was unable to create a new (detect an existing) partition” can be solved relatively simply and quickly:
- during the stage of selecting a hard drive partition, feel free to select any suitable one and delete it, then click the “Continue” button;
- The installation program will prompt you to create a new partition, indicating the appropriate size, agree, after which the installation process will continue as normal.
IMPORTANT. If there are several disks installed on your computer, when creating a partition it must be on “Disk 0”, otherwise problems are inevitable.
Some features of the work
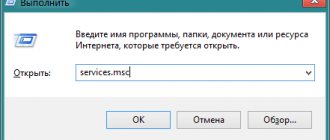
External HDD uses the FAT32 file system. What to do? Press “Win+R”, then enter the command “diskmgmt.msc” to go to the disk management utility. All disk partitions will be displayed. Format it.
The program does not see the flash drive
When working, a message appears that the USB drive was not found. This error is relevant for Windows 7/10 32/64 bit. What to do? Download the previous version of the utility, for example, 10.0.14393.0 Some flash drives are detected as a drive, but are not recognized as a hard drive. Format it to FAT32 via the command line. This is described in detail in the article: “How to format a hard drive? 4 clear ways!
Checking the device for errors
Open it in a new window. Next, select Command Prompt with administrator rights. In the latest versions of the OS, Power Shell will be written instead of the command line. Type “File” - “Launch Power Shell”. Next, enter the command CHKDSK /G (specify the drive letter). Next, we agree to unlock (write “Y”, press the “Enter” key). We are waiting for the work to finish. The utility will check the disk, correct errors automatically, or indicate possible causes of the problem.
Media Creation Tool won't launch
The failure occurs due to incorrect recognition of the utility by the security system, which blocks suspicious activity. Disable your antivirus. For example, if Smart Security is installed, right-click its icon and disable the antivirus.
Insufficient permissions to run
Open the utility with administrator rights. Right-click on the downloaded file and select the appropriate item.
Clearing temporary files
In the address bar of Explorer, write: %TEMP%. Next, press “Enter”. A folder will open where temporary files of the software that was running are located. Delete all its contents, restart your PC. How can I make it easier? Use special software. Read more about this in the article: “How Wise Registry Cleaner works.”
Troubleshooting Windows installation using the diskpart command
So, if you decide to work with diskpart, then run the Windows OS installer using a bootable USB flash drive or DVD. If you encounter the error message in question, close Setup and click on the Repair button, select Advanced Tools, and then run the Command prompt.
With Command Prompt open, type start diskpart and press enter.
Then type list disk and press enter. You will see a list of all hard drives connected to your computer. Determine the drive letter that is needed to install the system, and enter the following at the command line:
select disk X (instead of X, enter the desired drive letter)
Now type the following commands one by one, remembering to press “Enter” after each of them and replace X with the desired drive letter:
disk X clean disk X create partition primary disk X active disk X format fs=ntfs quick disk X assign
After entering all these commands, click Exit and try to start the installation process again. If the error is repeated, then move on.
Make the section active. Repeat the steps in the previous section, enter the command line, again type start diskpart, and try to set the active partition on which you want to install Windows OS.
To do this, type:
List disk - and press enter.
You will see a list of all drives. Find the disk you need to install and type:
Select disk X (instead of X, enter the letter of the desired drive)
Then enter:
List partition
and press enter, after which a list of available partitions will appear. Select the partition on which you want to install Windows OS and enter:
select partition 1 - (instead of 1, enter the number of the partition you need).
Then enter
active
and press enter. After that, type exit, exit the command line and try to start the installation process again.
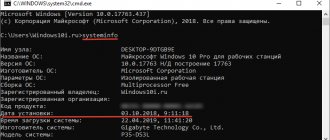
Screenshot of working with the diskpart tool