What is QEMU?
It is no exaggeration to say that virtualization is a technology that is in great demand today. Today, a search for the word virtualization produces approximately 22 million results. For example, in just one month, EMC Corporation announced the launch of its VMware division on the securities market, Citrix System announced plans to purchase XenSource, and many new companies appeared in the virtualization segment. In what turns out to be a colossal market, new niches are constantly being discovered. But with all the talk about initial public offerings and acquisitions in the virtualization space these days, it's easy to forget about some of the other virtualization technologies that already exist.
This article will introduce one of the more interesting virtualization applications that is not on the front pages - QEMU. QEMU is an application that can be used for many purposes. It can be used to virtualize a guest operating system or as a full-featured machine emulator that runs operating systems designed for the host system processor or other processor architectures.
QEMU 4.2.
QEMU 4.2 is released with many improvements for Linux virtualization.
There are many changes to the software that will be completed by the end of 2020. Here are some highlights of the leading open source emulator update:
- Support for Intel AVX-512 BFloat16 (BF16) extensions.
- In the latest updates of all processor models, TSX (Transactional Synchronization Extensions) extensions are disabled by default. This is due to the recent TSX Async Abort / Zombieload Variant Two vulnerability.
- Best performance for Tiny Code Generator (TCG) emulation of ARM cores.
- Another utility performance improvement may appear in the recent Gcrypt and Nettle libraries. QEMU now uses the XTS library's own encryption mode. As a result, there is a significant performance increase for AES-XTS encryption
- LUKS block driver now supports Falloc
- Support on ARM
- ASpeed AST2600 model support.
- Arm SVE (Scalable Vector Extensions) is now supported by KVM guests
QEMU 4.0 - launched only in April 2020, and v. is already actively being developed. 5.0 to change v. 4.2.
At the time of writing, not much is known, but we will still list which functions the emphasis is on support:
- VirtIO IOMMU devices,
- XIVE for POWER KVM guests
- real time clock ioctl
Based on the four-month release rate, QEMU 5.0 will most likely be released in April 2020.
A Brief Introduction to Virtualization Technology
Let's start with a brief introduction to virtualization technology to lay the groundwork for looking at QEMU.
In this article, virtualization refers to platform virtualization. For physical hardware, the monitoring program may be the host operating system or the hypervisor (see Figure 1). In some cases, the host operating system itself is the hypervisor. Guest operating systems “live” on the hypervisor. In some cases, guest operating systems run on the same processor as the host program, but in other cases the platforms may be different (for example, a PowerPC guest running on an x86 platform).
Figure 1. Basic platform virtualization architecture
Click to see larger image
There are many ways to implement virtualization, but three main methods are the most common. The first is called native (or full) virtualization. In this embodiment, the hypervisor implements basic isolation elements by separating the physical hardware from the guest operating system. This approach was first demonstrated in 1966 with the IBM® CP-40 virtual machine/virtual memory operating system and is now used in VMware ESX Server.
Another popular virtualization method is called paravirtualization. In the case of paravirtualization, the control program implements the hypervisor application program interface (API), which is used by the guest operating system. Paravirtualization is used by Xen and Linux Kernel-based Virtual Machine (KVM).
A third useful method is called emulation. Emulation, as the name suggests, virtualizes the guest platform by completely simulating the hardware environment. Emulation comes in different forms, even within the same application. Examples of virtualization through emulation are QEMU and Bochs.
About QEMU
QEMU is open source software (FOSS) developed by Fabrice Bellard and licensed under the GPL. The utility supports a wide range of operating systems, including Windows and MacOS. Bochs, PearPC.
The product is similar to VirtualBox and VMware, but is initially a command-based tool, unlike the two mentioned. To get near hardware hardware speed in a virtualization environment, you can use it with KVM.
QEMU simulates a computer system, including the central processing unit and other peripheral devices. This makes it easier to test programs written for different platforms. In addition, it can be used to virtualize several different virtual machines on the same host.
The main part of the product is released under LGPL, while the system mode simulation is released under GPL.
Advantages of QEMU software
- Several architectures are supported by default.
- Simulation of IA-32 (x86), AMD 64, MIPS R4000, Sun SPARC sun3 and PowerPC (PReP and Power Macintosh) computers
- Scalability to configure new command sets
- Open source, resulting in fast simulation
- On x86 architecture, which supports hardware virtualization, you can use KVM for acceleration using spare memory, which is faster than VMware ESX.
- Simulation speed has been increased, some programs even run in real time
- Programs that can run Linux on other platforms
- Stores and restores operating state (for example, running programs)
- Virtual network card
Disadvantages of QEMU
- Inadequate support for Microsoft Windows and some host operating systems.
- Support for less common architectures
- If you are not using kqemu or KVM accelerator, its simulation speed will be slower than other virtual programs such as VMware.
- It is difficult to install and use other simulation software such as VirtualBox.
Official website of QEMU
QEMU architecture
Let's look at how QEMU provides emulation. This section describes the two modes of operation of QEMU, as well as some interesting aspects of the QEMU dynamic translator.
Basic QEMU Operations
QEMU supports two emulation modes: user mode [User-mode] and system mode [System-mode]. Custom emulation mode allows a process created on one processor to run on another (dynamically translating instructions for the receiving processor and converting Linux system calls). System emulation mode allows you to emulate the entire system, including the processor and various peripherals.
When emulating x86 code on an x86 host system, you can achieve near-native efficiency using something called the QEMU accelerator. It allows emulated code to be executed directly on the host CPU (on Linux via a kernel module).
But what makes QEMU really interesting from a technical point of view is its fast and compact dynamic translator. A dynamic translator allows execution-time translation of target (guest) processor instructions into host CPU instructions to provide emulation. This can be done by brute force (simply replacing instructions from one processor with others), but this is not always easy to do, and in some cases one instruction may require multiple instructions or even changes in their order for the architecture being translated.
QEMU provides dynamic translation by converting target instructions into micro-operations. These micro-ops are elements of C code that are compiled into objects. Then the main translator comes into play. It maps target instructions to micro-operations for dynamic translation. This approach is not only effective, but also ensures portability.
The QEMU dynamic translator also caches blocks of translated code to reduce translator overhead. When a block of target code is encountered for the first time, it is translated and stored as a translated block. The QEMU cache stores recently translated blocks in a 16 MB buffer. QEMU can even support self-modifying code by invalidating translated blocks in the cache.
You can learn more about the details of the internal structure of QEMU and its dynamic translator in an interesting article by Fabrice Bellard (author of QEMU), presented in the Resources section.
Supported peripherals
Using QEMU as a personal computer emulator provides support for a variety of peripheral devices. Naturally, this includes standard peripherals - a hardware video adapter (VGA) emulator, PS/2 mice and keyboards, an IDE interface for hard drives, a CD-ROM interface and floppy drive emulation. In addition, QEMU has the ability to emulate NE2000 network adapters (PCI), serial ports, numerous sound cards and the PCI Universal Host Controller Interface (UHCI) Universal Serial Bus (USB) controller (with a virtual USB hub). It also supports up to 255 processors with symmetric multiprocessing (SMP) support.
In addition to standard PC and ISA PC (no PCI bus), QEMU can emulate other non-PC hardware platforms such as Versatile APM baseboards (using the 926E) and Malta million instructions per second (MIPS) based boards. Work is currently underway to implement support for a number of other platforms, including the Power Macintosh G3 (Blue & White) and Sun 4u.
- Redirect the virtual serial port to the host char device dev. The default device is "vc" in graphical mode, and "stdio" in non-graphical mode. This option can be used multiple times to simulate up to four serial ports. Use "-serial none" to disable all serial ports. The available character devices are: “vc” - virtual console. “pty” - [linux only] - pseudo TTY (new PTYs are allocated automatically). “none”—there is no selected device. NULL" is an empty device. “/dev/XXX” - [linux only] - use host tty, i.e. /dev/ttyS0. The parameters of the host serial port are set according to the parameters of the emulated one. “/dev/parportN” - [linux only, parallel port only] - use the host parallel port N. Currently, vj;tn only uses the SPP parallel port. "file:filename" - write output to a file. The characters cannot be read. "stdio" - [UNIX only] - standard input/output. "pipe:filename" is a named pipe filename. "COMn" - [Windows only] - Use host serial port n. “udp:[remote_host]:remote_port[@[src_ip]:src_port]” is an implementation of the UDP network console. When remote_host or src_ip are not defined, they default to 0.0.0.0. When the specified src_port is not in use, a random port is automatically selected. If you just want a simple read-only console, you can use "netcat" or "nc" by running qemu c: "-serial udp::4555" and nc as: "nc -u -l -p 4555". At any given time, qemu writes something to the port, so it will be shown in the network console session. If you plan to send characters back via the network console, or you want to stop and start qemu multiple times, you should have qemu use the same source port each time, using something like -serial udp:: [email protected]" for qemu. Another approach is to use a patched version of netcat, which can listen to a TCP port and send and receive characters over udp. If you have a patched version of netcat that enables remote telnet echo, and single character transmission, then you can use the following options to force netcat forwarding to the allowed telnet port 5555 to access the qemu port.
| "Qemu Options:" -serial udp:: [email protected] "netcat options:" -u -P 4555 -L 0 . 0 . 0 . 0 : 4556 -t -p 5555 -I -T “telnet options:” localhost 5555 |
“tcp:[host]:port[,server][,nowait][,nodelay]” — the TCP network console has two operating modes. It can send serial I/O to a specific location, or wait for a connection from a specific location. By default, the TCP network console is sent to host on port. If you use the QEMU server option, it causes the client application to wait for a socket connection to the port before continuing, unless the "nowait" option is specified. The "nodelay" option disables the Nagle buffering algorithm. If host is omitted, 0.0.0.0 is assumed. At this time, only TCP connections are accepted. You can use a "telnet" connection for the appropriate character device.
| "An example of sending a tcp console to 192 . 168 . 0 . 2 port 4444 "-serial tcp: 192 . 168 . 0 . 2 : 4444 “An example of listening and waiting on port 4444 , for a connection” -serial tcp:: 4444 ,server “An example of not waiting and listening on ip 192 . 168 . 0 . 100 port 4444 » -serial tcp: 192 . 168 . 0 . 100 : 4444 ,server,nowait |
“telnet:host:port[,server][,nowait][,nodelay]” — Instead of a raw TCP socket, a connection via the telnet protocol is used. The option works the same as if you specify "-serial tcp". The difference is that the port acts as a server or client, using telnet negotiation options. This also allows you to send a MAGIC_SYSRQ sequence if you are using telnet support for sending a break sequence. Typically, in a UNIX telnet client, you do this with Control-], and then type "send break" followed by pressing the Enter key. “unix:path[,server][,nowait]” - UNIX domain socket is used in place of the tcp socket. The option works the same as if you specify "-serial tcp", except that the UNIX domain socket path is used for the connection.
Building and installing QEMU
Building and installing QEMU is very easy using standard GNU tools. After downloading and unzipping the QEMU distribution, you need to run configure, make, and then make install (see Listing 1).
Listing 1. Building the QEMU emulator
$ wget https://fabrice.bellard.free.fr/qemu/qemu-0.9.0.tar.gz $ tar xfvz qemu-0.9.0.tar.gz $ cd qemu-0.9.0 $ ./configure $ make $ make install $
This process not only creates a bootable qemu image for the current target architecture, but also images for other architectures, including ARM, MIPS, PowerPC, 68k, and SPARC. After this, you can download the Linux kernel already built for various target architectures.
If the guest and host operating systems are targeting the same architecture, then you can increase the speed to close to native using the QEMU accelerator (KQEMU). KQEMU is a driver (kernel module for Linux) that allows user and kernel code to run directly on the host CPU. Building the QEMU accelerator is as simple as building QEMU itself (see Listing 2).
Listing 2. Assembling the QEMU accelerator
$ wget https://fabrice.bellard.free.fr/qemu/kqemu-1.3.0pre11.tar.gz $ tar xvfz kqemu-1.3.0pre11.tar.gz $ cd kqemu-1.3.0pre11 $ ./configure $ make $ make install
KQEMU can be compiled and installed on a variety of operating systems, including Microsoft® Windows®, FreeBSD® and Linux. After building the QEMU accelerator, you need to install it on Linux using the following command:
$ insmod kqemu.ko $
How to install QEMU on Windows
You can download the emulator installation file from the official website www.qemu.org/download/#windows ,
There are 32-bit and 64-bit editions, select the latest version.
QEMU is installed as a regular program in the Program Files\qemu , but you can choose another location.
We perform the installation with the default parameters, you don’t need to change anything, just click “Next” .
Using QEMU
Now let's look at using QEMU to virtualize another machine in a typical GNU/Linux desktop environment. Emulating another machine is like getting started with a new computer you just bought. The first step is to install the operating system. A new computer, of course, must have space to install the operating system, so a hard drive is necessary.
QEMU provides a special command for creating a hard disk called qemu-img. This utility creates images in various formats, but the best (for qemu) is called qcow (or qemu copy-on-write). The advantage of this format is that the emulated disk image does not necessarily have to occupy a physical file of the same size. In other words, the format allows gaps, which allows the disk image to be more compact. For example, a blank 4GB disk image will only take 16KB.
For quemu-img, you must specify an operation (create to create a new disk image), format (qcow to format a qemu image), size, and name of the disk image. The following example emulates a machine for a small Linux distribution intended to run on Flash. So, let's create a 128 MB disk image:
$ qemu-img create -f qcow disk.img 128M Formating 'disk.img', fmt=qcow, size=131072 kB $
It is important to remember that if you plan to install a general-purpose operating system such as Windows, Linux or FreeBSD, you will need a much larger disk. The result of the performed operation - the disk.img file - will contain an emulated disk with a size of 128 MB.
Now that the hard drive is created, you can install a new operating system on it. To demonstrate this process, I'm using a small Linux distribution called cfLinux, designed for use as a small embedded Linux system in devices such as gateways, wireless access points, firewalls, and routers. This distribution can be downloaded in ISO format using wget:
wget ftp://ftp.cflinux.fu/pub/cflinux/iso/cflinux-1.0.iso
ISO images are a widely used CD-ROM format (also known as the ISO 9660 file system).
Now we have an emulated disk (disk.img) and a CD-ROM from which we can install the operating system. The next step is to install the system on your hard drive. This is done very simply using qemu:
$ qemu -hda disk.img -cdrom /root/cflinux-1.0.iso -boot d $
When using qemu, the hard disk image is specified using the hda option, and the CD (the file where the image is located) is specified using the cdrom option. The boot option allows you to boot from a CD-ROM. Argument d specifies boot from CD-ROM, a specifies boot from floppy disk, c specifies boot from hard drive (default), and n specifies boot from network. If the command is entered correctly, a new QEMU window will appear with the emulated machine (see Figure 2).
Figure 2. Preparing to install cfLinux on an emulated disk in QEMU
Click to see larger image
By following the installation instructions from the CD-ROM, it is easy to complete the installation from the ISO image to the emulated hard drive. Installation requires a reboot. At this point you can end the emulation (Ctrl-C in the qemu window). You can now boot your freshly installed operating system using the following command:
$ qemu -hda disk.img $
This command simply emulates a standard PC (default option) with a hard drive represented by the disk.img image file. The Linux image booting from the emulated hard drive will result in the QEMU window shown in Figure 3.
Figure 3. Booting a freshly installed cfLinux from an emulated hard drive
Click to see larger image
As you can see, everything is very simple. In this case, the same sequence of actions can be used to install and download any types of operating systems (Linux, Windows distributions and others).
Installing QEMU
Installation information is available on the official website, in the Download QEMU section. Those who use Windows will need to download the installation file (depending on the level of their system).
The command to install QEMU on Linux is as follows (using Ubuntu as an example):
# apt-get install qemu
Everything is quite simple, since QEMU is in the official Ubuntu repositories.
To explore all the features of QEMU, you should refer to the official documentation.
Command to create the image:
# qemu-img create myimage.img mysize
- myimage.img — name of the disk image file;
- mysize — size in kilobytes (for size in megabytes add M at the end, in gigabytes - G: 10G);
- if you need to specify the format (qcow2 is the format that is used by QEMU by default), then you need to use the -f switch:
# qemu-img create -f qcow2 myimage.img 10G
More information about the qemu-img command can be found here.
Command to start the system:
# qemu-system-x86_64 -hda myimage.img -boot d -cdrom ~/downloads/ubuntu-17.04-server-amd64.iso -m 640
In this case:
- the hard drive is connected as -hda (other possible options: -hdb, -hdc, -hdd);
- if you specify -boot d, the boot will start from the CD-ROM (otherwise, from the hard drive);
- -cdrom specifies that the file will be used as a CD-ROM image (so you cannot use the -cdrom and -hdc switches at the same time);
- at the end the amount of RAM that will be allocated to the machine is indicated.
After this, the new system will be installed, which can then be launched with the command:
# qemu -hda myimage.img -m 640
To enable KVM support, you need to add -enable-kvm at the end.
Other emulators
While QEMU is a great emulation environment, other programs are also worth exploring. Wine, an open-source implementation of the Windows API, allows you to run Windows applications without the Windows operating system itself. But, as the abbreviation Wine explains, Wine is not an emulator (Wine - Wine Is Not an Emulator). Instead of emulation, Wine implements a set of APIs that allow x86 applications to run. Therefore, applications running in Wine feel good.
The Bochs emulator is similar to QEMU. Bochs is a computer emulator that allows you to emulate not only Intel® i386™, i486™, Pentium®, Pentium Pro and Advanced Micro Devices AMD64 processors, but also common PC peripherals such as disks, memory, display and network devices. Bochs can be used to emulate Linux, DOS and Windows 95/98/XP/2000/NT® operating systems.
general description
The application is a virtual tool for emulating platforms, architectures and a variety of axes.
The virtual machine has extensive compatibility, thanks to which QEMU works with a variety of PC peripherals and hardware. Virtualization can take place both at the central processor level and at the software level. The environment interacts with the desired operating system; you just need to specify the amount of system resources. The software emulates both 32-bit and 64-bit processor systems ARM, PowerPC, SPARC, MIPS. If you choose the appropriate distribution, you can install anything on QEMU. This could be a Linux desktop OS or an Android mobile OS.
The entire process does not require BIOS setup. And the software does not require the installation of additional extensions and drivers. The software interface is designed as a command line. Therefore, the user must be able to work with console commands. QEMU finds its purpose among developers of cross-platform software that requires preliminary diagnostics and beta testing in different OSes and on different processor architectures. In this area of application, the program is a unique and effective solution. You can also test Linux images and builds.
Thanks to the open source code, the application can be easily modified and modified to suit your purposes. QEMU has advanced support and recognizes USB 3.0 and any other connected devices. The environment has high performance and there are practically no system failures. The program stands out with its advantages among problematic analogues. The speed of the software is high and in general the application does not lag.
Moving on
Using QEMU as a computer emulator allows you to experiment with a variety of operating systems without having to have a spare machine. For example, with ReactOS, an open-source Windows XP-compatible operating system (emulated in Figure 4).
ReactOS strives for binary compatibility with Windows XP, so that ReactOS can run Windows XP applications. The Resources section provides links to resources that provide information about current application compatibility.
Figure 4. Emulation of a standard PC with ReactOS
Click to see larger image
An image of QEMU with ReactOS and many other operating systems can be found on the Free Operating Systems Zoo (see Resources for more information). These operating systems are available as Live CD images, floppies, or disks (qcow format). QEMU is a great way to try new operating systems without having to spend time installing them.
Resources for download
- this content in PDF
Related topics
- “System emulation with QEMU (EN)” is the original of this article.
- The article "QEMU, a Fast and Portable Dynamic Translator (EN)" (PDF) by Fabrice Bellard describes the internals of the QEMU dynamic translator.
- The article "Virtual Linux" talks about other principles of Linux virtualization.
- "Learn About the Linux Kernel Virtual Machine (KVM)" explores the Linux KVM architecture and how its integration with the kernel can change the way you use Linux.
- QEMU emulator and QEMU accelerator on Fabrice Bellard's website. There you can also find documentation, API and information about the current stage of development of QEMU.
- Information about cfLinux (EN); The author uses this small distribution to demonstrate installing Linux on a QEMU machine.
- From the Free Operating Systems Zoo (EN) website you can download ready-made system images to save time. On this site you can find images of many operating systems from standard Linux distributions to exotic operating systems (Plan 9, OpenSolaris, MINUX, ReactOS, Darwin, MenuetOS and others). After downloading any disk image, it is ready to run.
- ReactOS is an open-source, binary-compatible Windows operating system that allows you to run many Windows applications.
- Wine allows you to run Windows applications on non-Windows operating systems such as Linux.
- Bochs, like QEMU, also allows you to fully emulate the system.
- The Linux section of developerWorks contains a wealth of resources for Linux developers, as well as the most popular articles and tutorials.
1) KVM
KVM (Kernel-based Virtual Machine) is a hypervisor (VMM – Virtual Machine Manager) running as a module on Linux OS.
A hypervisor is needed in order to run some software in a non-existent (virtual) environment and at the same time hide from this software the real physical hardware on which this software runs. The hypervisor acts as a “spacer” between the physical hardware (host) and the virtual OS (guest). Since KVM is a standard module of the Linux kernel, it receives all the required goodies from the kernel (memory management, scheduler, etc.). And accordingly, in the end, all these benefits go to the guests (since the guests work on a hypervisor that runs on/in the Linux OS kernel).
KVM is very fast, but by itself it is not enough to run a virtual OS, because... This requires I/O emulation. For I/O (CPU, disks, network, video, PCI, USB, serial ports, etc.) KVM uses QEMU.
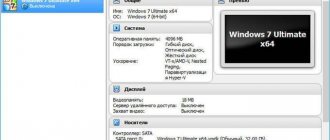
Stage I.
1. Download QEMU for PC: qemu_0.13.0_windows.zip [19.7 Mb]
2. On drive C, create the QEMU folder and unpack all the files and the downloaded archive there.
3. Launch the command editor, to do this, simultaneously press the Flag + R buttons on the keyboard. Launch the console with cmd and press Enter. Using the cd command, go to the created folder (type cd c:\QEMU and press Enter). Please note that you should not close this window until the entire process is completed, because it will be needed more than once.
4. Next, we need to create a hard disk image (to do this, type the command qemu-img create -f raw disk.img 2000M and press Enter) Where:
disk.img - name of the hard drive 2000M - size of the hard drive in megabytes (you can set any size, the main thing is that Windows OS fits on it.)
5. Now you need to find any installation disk with Windows XP and create an image (.iso) and rename it image.iso (I won’t describe how to create images here, for those who
knows how to do it, they will do it themselves, for those who don’t know how, there are links above to ready-made images).
6. Copy the resulting image.iso to the c:\QEMU folder
7. Now that everything is prepared, launch QEMU (to do this, type the command qemu.exe -m 1024 -boot d -cdrom image.iso -hda disk.img ) Where: -m 1024 - the amount of RAM that will be available to QEMU - boot d - indicates booting from cd-rom -cdrom image.iso - installation disk itself -hda disk.img - image of the created hard disk[/spoiler]
8. Now install XP the same way you do on a PC.
The Windows image is now complete.
We transfer the created disk.img from the C:\QEMU folder to the tablet to any folder (for now).
Launch and installation
Launch virt-manager and create a new virtual machine from local storage.
Specify the path to the Windows installation iso image.
Next, in the 3rd and 4th steps you will select the number of CPUs, the amount of RAM and the size of disk space, after which in the 5th step you should select additional configurations before setting up.
The additional settings window is needed in order to perform a feint with the ears. Its purpose is to add a virtual flopper with drivers from the virtio-win kit. This will make it possible to change the type of hard drive: remove a disk with an IDE bus and add the same one, but with a VirtIO bus. More details in the RedHat docs.
We register the driver /usr/share/virtio-win/virtio-win.vfd and add a virtual floppy disk. Then go to the [Bus] tab Disk No. and perform a feint with replacing the disk bus: remove it from the IDE and add it from VirtIO.
I almost forgot to say what this trick is for. Experts say that with the VirtIO bus, disk performance is significantly higher.
In principle, we can already begin the installation, but we forgot to add the CD-ROM with the virtio-win drivers, and they will come in handy when the device manager flashes yellow question mark icons.
Well, now you can start the installation.
Okay, we started the installation. What if Windows Installer asks you to change the drive
?
Because of this, I had to interrupt a couple of times and start the whole carousel again, but this will not happen to you. (qemu) change ide1-cd0 /tmp/windows_8.1_x64_disk2.iso