Introduction
This article will talk about Inno Setup - a convenient tool for packaging applications for OS Windows.
Why Inno Setup? “Today, Inno Setup competes and even surpasses many commercial installers in its feature set and stability,” says the developer’s official website. Indeed, this tool is quite simple to learn and powerful in its capabilities.
At the moment, the developers of Inno Setup state as key features:
- support for all versions of Windows starting from 2000;
- support for both 64-bit and 32-bit installations;
- built-in Pascal script processor for more flexible configuration;
- the ability to take an application and all the files that are needed for its operation and pack them into one compact .exe file;
- Inno Setup supports several data compression modes. If necessary, built-in compression can be disabled and third-party archivers can be used;
- allows you to add registry keys during installation, launch additional applications during, before and after installation;
- the ability to delete registry keys and all traces of program activity, and flexibly customize the uninstaller.
Guide to Creating Your Own Windows 8 Installation Build
Introduction
Today I want to talk about how to create your own Windows 8 installation image, with all updates, programs and user settings installed.
Using such an assembly automates the work of the system administrator in installing and configuring the operating system. This is especially true for those cases when it is necessary to install the same set of programs on a large number of computers. The guide will also be useful for those who simply want to create their own Windows 8 installation image with a set of programs and drivers used by it. This guide covers the issues of preparing such an assembly, creating a bootable flash drive and writing the resulting assembly to a flash drive. Also, the resulting image can later be installed on any number of computers on the corporate network using Web Deployment Services (WDS), but this is the topic of the next tutorial.
The text is designed for beginners, so sometimes the simplest things are explained and illustrated.
Resources
We will need the following artifacts as we work:
Windows 8 installation disk image in ISO format
I made my choice in favor of Windows 8 Enterprise x64.
I'll explain why. The choice of the Enterprise edition is due to the maximum functionality that this edition provides.
But in principle, for home use it is possible to use the Professional edition, if desired.
Hardware platform x64. The choice of the 64-bit version of the system is determined by several critical factors. 1. For a 32-bit system (x86), only 3.24 GB of RAM address space is available. Today, 4 GB is not so much. And many new laptops and desktop PCs are sold with 6GB or more memory. Therefore, the choice is clear in favor of the 64-bit system, which does not have such restrictions. You can read more about the differences between Windows 8 editions on the Microsoft website.
2. The image we receive will most likely be larger than 4GB in size. My installation image with a “gentlemanly” set of programs (including MS Office 2013) takes up 7.5 GB. When installing a 32-bit version of Windows, if the image size takes up more than 4GB, an error will be displayed. When using the 64-bit installation, there are no such problems. Those who want to create their own build based on a 32-bit Windows installation image, keep this fact in mind. In this case, the size of the deployed distribution kit with all installed programs should occupy approximately 12 GB, and then in the future, when it is compressed into the final installation image, its size will not exceed 4 GB.
90-day evaluation versions of Windows 8 can be downloaded from the Microsoft website or official versions available for MSDN subscribers.
Virtual Machine Manager VirtualBox
I use a virtual machine to install the initial system image and further configure programs, since this is the most convenient and fastest method that significantly saves time. You can download VirutualBox on the official Oracle VM VirtualBox website. The installation package of the virtual machine manager itself, the current version is VirtualBox 4.2.12 for Windows hosts x86/amd64 And if you wish, you can download the VirtualBox 4.2.12 Oracle VM VirtualBox Extension Pack All supported platforms
Imagex utility
Using this utility, we will create the final image of our assembly, suitable for installation on other computers. This utility is included in the Windows Assessment and Deployment Kit (ADK) for Windows 8 (abbreviated as WAIK for Windows 8). The kit takes up more than 2.5 GB. In this case, only the Imagex utility will be enough for us; you can download it from this link imagex.zip (~590 Kb)
RDS Boot KIT and Recovery DiskSuite
This is a very powerful designer that allows you to create a bootable flash drive, on which, if desired, you can simultaneously place various resuscitators such as HirensBootCD, LiveCD, Kaspersky Rescue Disk, etc., as well as operating system distributions - WinXP, Win7 and Win8.
The main thing is that there is enough space on the flash drive. At the moment there are no analogues to it either in RuNet or in the “decaying” West :). You need to download the latest version of the RDS Boot KIT designer from the site https://disksuite.ru/ and, if desired, the Recovery DiskSuite itself, which includes iso images of various resuscitators and distributions. I prefer to use my own verified images rather than those that come with Recovery DiskSuite. Just in case, I provide a link to the version of the constructor, the work with which is described in the RDS Boot KIT.zip manual.
Flash drive 8Gb or more
An 8Gb flash drive is the minimum, but the rule here is that the bigger, the better. This volume, by the way, may not be enough if many programs are installed. I purchased a 32Gb volume, but now I understand that 64Gb was needed to accommodate more of my own builds of distributions of other versions of Windows.
~50Gb of free space on HDD, at least
One of the advantages of using a virtual machine is that you can create snapshots of the state of the virtual machine, and later return to any of these snapshots.
A kind of time machine. I took pictures after going through each step of creating my own build. And if I made a mistake somewhere, I went back to the previous picture and took it without mistakes. But the price for this convenience is the additional hard drive space required for taking pictures. If you download all the full distributions, and do not skimp on snapshots of the state of the virtual machine, then it is advisable to have about 100GB of free space on your hard drive.
Stages of work
1. Preparatory stage
.
Installing and configuring the virtual machine manager. Creating and configuring the virtual machine itself; 2. Installing Windows
on a virtual machine and switching the Windows installation to audit mode;
3. Working in audit mode
.
At this stage, it is necessary to update the system, install and configure programs, the system and the user profile. After completing these steps, you should exit the audit mode and switch Windows to normal installation mode; 4. Preparing the final image
of your own Windows installation assembly;
5. Write your own installation assembly
to a USB flash drive.
#1. Preparatory stage
1. Install VirutualBox following the steps of the installation wizard.
After installation, launch the virtual machine manager, go to the settings File->Settings and configure it in accordance with the following presentation: (At the moment Slidershare is buggy, I’m giving it a link to this presentation on GoogleDrive) Setting up the virtual machine manager First, we set the boot order by specifying the device CD/DVD-ROM as the first device on which the boot record will be searched and from which the boot will be carried out. Next, we connect the previously mentioned installation image of Windows 8 Enterprise x64 to the CD/DVD-ROM drive of the virtual machine. And on the third slide we connect a flash drive to our virtual machine, which must first be connected to our main computer. In the future, we will have to work with it from a virtual machine. Its name may differ from what is shown in the screenshot. This depends on the flash drive model.
2. Create a new virtual machine, following the instructions of the wizard. The process of creating a VM and setting its parameters can be seen in the following presentation.
Virtual machine creation settings
RAM must be allocated to the virtual machine depending on the amount of RAM available for the main system; the more we allocate, the faster the virtual machine will work. But it is advisable to leave at least 2GB of RAM for the main system. For example, I have 12GB, I allocate 6GB to a virtual machine, and leave 6GB to the main system.
#2. Windows installation
1. After creating the virtual machine, we launch it, Windows installation will automatically begin, then during the installation process you need to select parameters, as shown in the following presentation.
Installing Windows Once the files are copied and the installation is complete, an automatic reboot will occur and the initial system setup screen (Personalization) will appear, where we need to select the color and name of the computer. Here it is advisable to create a snapshot of the virtual machine so that in the future we can return to this state at any time, or copy it to a new virtual machine so as not to waste extra time on installing the system. To do this, go to the virtual machine manager window and click the command buttons indicated in the screenshot below. I named the resulting snapshot “Windows installed.”
Next, we need to put the Windows installation into audit mode. To do this, we return to the virtual machine window on the initial settings screen (Personalization), we must press the key combination Ctrl+Shift+F3.
The virtual machine reboots and the Windows installation goes into audit mode, and the system is logged in under the built-in Administrator account.
#3. Working in audit mode
Audit mode is used to add customizations to Windows installation images.
In this mode, you can install applications, add device drivers, and check the operation of the installation. When you log in to your desktop, the System Preparation Program dialog box will appear.
This window will appear every time you log in to your desktop after rebooting the system while it is in audit mode. It should be closed.
#2.1 Installing updates
It is recommended to install the latest updates first.
It is assumed that the computer on which the virtual machine is running is connected to the Internet. To do this, we will need to enable automatic updates and install them. Press the key combination Win (Windows flag) + X and select -> Control Panel\System and Security\Window Update. The process of searching, downloading and installing updates is shown in the following presentation. After downloading each portion of available updates, you must shut down the system to install them. Installing Windows updates You must search for and install updates several times, since some updates appear only after the previous ones have been installed. Until we see a message stating that there are no more current updates, as in the screenshot below:
The process of searching and installing updates is quite lengthy and takes a lot of time; the good news is that it will only need to be done once, since now all the necessary updates will be included in our build.
After installing all the necessary updates, I advise you to take another snapshot of the virtual machine, I called it “Windows updated”.
#2.2 Installing applications
The next step is to install the applications we need, configure the system and user profile.
I will not dwell on this in detail, since everyone has their own preferred set of programs, and installing them is no different from installing them in normal Windows mode. If any application needs to reboot the system, then you can do this any number of times.
After installing the necessary programs, setting up the system and user profile, it is recommended to update the system again, and after that I advise you to delete temporary files and correct registry errors using a utility like CCleaner.
Here I recommend creating another snapshot of the state of the virtual machine, and calling it “Before generalization”
#2.3 Generalization of Windows and transition to normal installation mode
Next, we will need to generalize the system, which includes cleaning the system, removing the binding to the equipment and transferring the Windows installation to normal mode.
Before proceeding with this, we will need to prepare a Windows automatic installation answer file, in which we will indicate that during generalization we will need to copy the Administrator profile data to the default profile, on the basis of which user profiles of our assembly will be created in the future.
To do this, create a file in Notepad called CopyProfile.xml, into which you will need to insert the following text:
true 1
Or you can download the finished file here CopyProfile.xml
This file must be written to our flash drive. And connect this flash drive to the virtual machine, as shown in the following screenshot, which shows the lower right corner of the virtual machine window.
Right-click on the USB device icon and select our flash drive from the drop-down menu. After connecting the flash drive, go to Windows Explorer and see what letter is assigned to it. Let's remember it. My flash drive is connected under the letter E:\
Next, you should launch the command line: press the Win+R key combination, type cmd in the command line, and then click OK, as shown in the following screenshot.
A window for executing console commands will open, in which you need to run the Sysprep utility with the following parameters:
%systemroot%\system32\sysprep\sysprep.exe /generalize /oobe /shutdown /unattend:E:\CopyProfile.xml
Where instead of the letter E in the parameter /unattend:E:\CopyProfile.xml you must specify the letter assigned to the flash drive connected to the virtual machine.
Next comes the generalization process, after which the virtual machine turns off on its own.
If you believe the documentation from Microsoft, then you can now begin to remove the image, but you should not do this (both believe the documentation and remove the image. Trust but verify), since a full copy of the administrator profile to the default profile does not occur. Therefore, you will have to take a leap of faith and copy this profile.
To do this, turn on the virtual machine again and wait for Windows to load until the initial user profile setup dialog (Personalization) appears. As the download progresses, the equipment will be installed and rebooted. Following the steps of the wizard, we create a user, thereby completing the Windows installation as shown in the following presentation
Configuring User Personalization Options
We wait until the setup is completed until the user profile is created, after which the system boots in normal mode, ready for work. Now we need to enable the built-in Administrator account and log into the system under it. Press Win+X again and select “Computer Management” from the drop-down menu. Next we follow the path: Utilities -> Local users and groups -> Users. Select Administrator from the list of users. Right click -> Properties. Uncheck the Disable account checkbox. Click OK.
Next, we need to log in with the Administrator account we just enabled. Press the key combination Right Ctrl+Del (or in the virtual machine window menu, select “Machine” -> “Send Ctrl+Alt+Del”), and select “Exit”. We log into the system as Administrator and open the user management list as in the previous step. This time, we need to delete the user we created earlier. Select it in the list, right-click to open the drop-down menu and select Delete. You will be prompted twice to confirm deletion, and twice you agree to delete this user.
Open the console window again and run the sysprep utility with the following parameters:
%systemroot%\system32\sysprep\sysprep.exe /generalize /oobe /shutdown
When finished, the virtual machine will shut down. Now you are ready to capture the final Windows installation image. You should take another snapshot of the virtual machine. And call it “Before removing the image.”
#4. Preparing the final Windows installation image
At this point, we need to create an install.wim file that will contain our Windows installation assembly. To do this, turn on the virtual machine. Here you need to be careful and efficient. Immediately after turning on, within 5 seconds, the message “Press any key to boot from CD or DVD...” will appear, which tells us that we need to press any key to boot the Windows installation from a virtual CD/DVD drive. You need to have time to press any key; if you suddenly don’t have time, you can close the virtual machine by restoring a snapshot of the previous state.
If you managed to click in time, the Windows 8 installation program will load from the virtual DVD. We wait until the welcome window appears and press the key combination Shift+F10
A window for entering console commands will open. Now we again need to connect our flash drive to the virtual machine, since this is where we will write the image of our Windows build.
An important note - the flash drive must be formatted in NTFS format, since unlike FAT32, in this file system format the restrictions on the maximum file size of 4Gb are removed, and most likely the image we receive will occupy more than 7GB. To format a flash drive, you need to select it in the main system explorer, right-click to open the drop-down menu, select “Format...”, and configure the parameters in accordance with those shown in the screenshot
Also, you need to write the imagex.exe utility onto the flash drive; I gave a link to the archive with this utility at the beginning of this article.
After connecting the flash drive to the virtual machine, you need to determine the drive letters on which the Windows we configured are located and the letter of the flash drive we connected. If we do everything as written in this guide, then the disk with the Windows we configured will be located on the D:\ drive, and the flash drive we connected under the letter F:\ The easiest way to check this is by going to the desired drive, entering the command d: and pressing the Enter key , and then running the dir command, which will show the contents of the disk.
You should also check drive F:
To remove the image, you need to enter the command in the console
F:\imagex\x64\imagex.exe /capture D: F:\install.wim /flags “Enterprise” “Windows 8 Enterprise” “My Windows 8 Build” /compress maximum
You can read more about Imagex on the Microsoft website at this link - Imagex utility.
F:\imagex\x64\imagex.exe – path to the imageX utility /capture D: – parameter indicating that it is necessary to capture partition D: F:\install.wim – specify the path to the saved WIM file into which the image will be captured section D:. /flags “Enterprise” is a flag indicating the edition of Windows 8. “Windows 8 Enterprise” is the name of the image. “My Windows 8 Build” - (optional) description of the image /compress maximum - type of file compression in the image. The /compress parameter allows values of maximum (maximum compression), fast (fast compression), and none (no compression). If the parameter is not specified, fast compression is used. Maximum compression reduces the image size, but capture takes longer than fast compression. The speed of image decompression is practically independent of the compression type.
Capturing an image is a rather lengthy process and takes a long time, from one to 4 hours. Depending on the power of the computer, the RAM allocated for the virtual machine, and the size of the assembly itself.
After we finish removing the image, we will create an install.wim file on the flash drive. You can turn off the virtual machine; we won’t need it anymore. The install.wim file should be copied to the hard drive of the main computer; we will work with it in the next step, when we will create a bootable USB flash drive, having previously formatted it.
#5. Creating a bootable flash drive with your own build of Windows
To create a bootable flash drive with our own assembly, we need the RDS Boot KIT designer from the site https://disksuite.ru/
In detail, I will not dwell on the nuances of the work of this designer, with its help you can make a very powerful tool for diagnostics, resuscitation and recovery of the software part any computer and fit it all on one flash drive.
We are directly interested in creating bootable media and writing the Windows installation assembly we created earlier onto it.
We create a folder on the hard drive, I called it RDS, download the designer into it, and launch it. At the first launch, the directory structure of the designer is created, and at this point the designer completes its work, with a message that it is necessary to place the corresponding ISO images in the directories intended for this.
Now you need to place the ISO installation image of Windows 8, from which we previously installed Windows on a virtual machine, in the designer folder along the path: RDS\Windows8\x64
We launch the designer again and follow its instructions. First, it indicates the drive letter assigned to the flash drive we are going to work with, and it is imperative to put a colon after the letter. We agree to format and select NTFS as the file system, after which we agree to copy the Windows8 distribution and wait for the designer to finish working.
Now we have a ready-made bootable USB flash drive. You should replace the standard file of the standard Windows assembly with the one we created earlier. To do this, on the flash drive along the Windows8\x64 path, replace the install.wim file with the one we created earlier in step #4. And there is one more point. Next to the Install.wim file on the flash drive there is a Windows automatic installation response file called AutoUnattend.xml. It must be replaced with one created by us.
To do this, create a file in Notepad called AutoUnattend.xml and insert the following text into it:
ru-RU en-US;ru-RU ru-RU ru-RU ru-RU true 32 1280 800 en-US;ru-RU ru-RU ru-RU ru-RU true false false false false 1 false Central Asia Standard Time
Or you can download a ready-made file from this link AutoUnattend.xml
That's all, we have a ready-made bootable USB flash drive with our own Windows installation image. Which will significantly save time on Windows deployment.
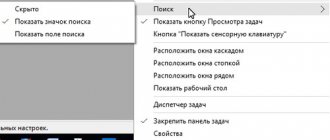
First meeting
You can download the stable version of Inno Setup Compiler for free from the official website. There you can also find FAQ and documentation in English and third-party libraries that simplify the process of creating Inno Setup Script (.iss).
The classic Inno Setup Compiler application has a Help section where you can find FAQs, sample scripts, and documentation.
When starting the program for the first time, the user is greeted with a dialog that offers to look at examples, create your first Inno Setup Script (.iss) using the Script Wizard, or open an existing .iss script.
You can use the Inno Setup Script Wizard to create the installation file.
The wizard will ask you to fill in:
- application information,
- preferred installation paths,
- files that will make up the final distribution,
- are shortcuts needed, and if so, where,
- license agreement,
- documents with instructions,
- name and location for the final distribution,
- password, if required,
- select the languages that the installer should support.
After the wizard has collected all the necessary information, it will offer to compile the resulting script. The folder that was selected for the final distribution will contain a file ready for installation.
How to make one project to create installations for several applications
Background / Examples
Let's consider a situation where you are developing several applications and for each program you need to create an installation package. Creating a separate project in the CreateInstall installer for each application takes extra time, especially if the installation scenarios are almost the same. Also, if you want to make the same changes to each installation script, you will have to manually edit each project to do this.
How to solve this problem? The CreateInstall installer has an excellent tool for solving this problem. Let's take a closer look at the Multi Build feature using a small example. Let's say there are three My Applications. Super Application, Best Application. You need to make one project that can be used to create installations of all these applications.
All application files are located in the c:\Applications\My Application, c:\Applications\Super Application and c:\Applications\Best Application directories. Launched files myapp.exe, superapp.exe, bestapp.exe. It is also necessary to automatically obtain the version from VERSION_INFO of these files. During the installation process, you need to show the corresponding license file, unpack the files into the desired directory and create a shortcut for the application. Also, Best Application requires a message to be displayed during the installation process.
Step 1. Create a simple project and go to the Project - Preprocessor section and see the Multiassembly list. Our three applications have a different application name and executable file name. Therefore, we just need to add two variables appname and exename and fill three columns with the corresponding values.
Defining Variables
Step 2 . Go to the Project - Output page and define the name of the file to be launched as $exename$-setup.exe. That is, we will have our own installation file for each application. For example, for My Application there will be myapp-setup.exe. Next, open the Project - Program Information page and set the following parameters:
Program name: $appname$ Version: C:\Applications\$appname$\$exename$.exe Application name: $appname$
Step 3 . Open the Script tab and specify the license file in the Dialog - License command as C:\Applications\$appname$\license.txt. Now let's edit the Installation files command. Let's add there the path to the application files c:\Applications\$appname$\*.*. During the process of creating the installation, we will pack files from the corresponding directory. Let's also add a shortcut to the Shortcuts [List] command
Shortcut name: $appname$ File name: $exename$.exe
Step 4 . Our task is to display a message in the Best Application installation. Basically, this step is added to explain in more detail how to exclude certain commands for different installations. Insert the command Source code with the ifdef statement. If the condition is not met, then the internal code will not be taken into account when creating the installation.
ifdef "$exename$" == "bestapp" { $body$ }
Then, within this command, we can add any actions we need.
Step 5 . We have finished creating the project. Now let's look at how to create settings for each application. If you simply run the create installation for this project, it will create an installation for the first My Application.
Creating installations from the CreateInstall installer
Select the Installation menu item and then the Multiassembly sub-item. In the window that opens, you can start creating an installation for a specific application or create installations for all applications.
Creating an installation from the program
Creating installations from the command line of the CreateInstall installer
As you know, you can start creating installations from the command line using the cicmd.exe program. In this case, you must use the -m parameter , where i is the application number
to create the My Application installation
cicmd.exe -m1 “c:\projects\multi-build-installer.ci”
to create the Best Application installation
cicmd.exe -m3 “c:\projects\multi-build-installer.ci”
see also
- How to create multiple installations from one project
Eonza automation software is a free, open source cross-platform program for easy creation and management of scripts.
Flags
Most sections support the Flags parameter. This parameter is a set of additional options. Multiple flags can be used on one line, separated by spaces. Basically, each section has its own specific flags.
[Registry]
- uninsdeletevalue – deletes key values during uninstallation;
- deletekey – allows you to delete an existing key with all its child keys, parameters and values before creating a new key;
- deletevalue – allows you to delete an existing parameter of the same type and with the same name before creating a new parameter in the key;
- expandstringtype – if the type of the existing registry value is not string or expandsz (i.e. not REG_SZ or REG_EXPAND_SZ), then it will be replaced with a string parameter with the specified value, and if the type of the existing parameter is string or expandsz, only its value will be replaced, but the type will remain;
- uninsclearvalue – when deleting an application, the parameter in the registry will be set to an empty string (with type REG_SZ);
- uninsdeletekey – when deleting an application, deletes the registry key with all its child keys, parameters and values;
- uninsdeletekeyifempty – when deleting an application, the registry key will be deleted only if it is empty;
- uninsdeletevalue – when deleting an application, the registry value and its value will be deleted;
- dontcreatekey – used in situations where, during installation, an existing parameter in a registry key should be replaced with a new one, and if the key or parameter does not exist, neither the key nor the parameter should be created;
- createvalueifdoesntexist – the installer will create a parameter with the specified value in the registry key only if it does not exist. Does not apply with the deletevalue flag.
[Dirs]
- deleteafterinstall – tells the installer to create the folder, but after successful installation or, if the installation is interrupted, to delete it if it is empty. If the folder contains files, this flag will not delete it;
- uninsalwaysuninstall – tells the uninstaller to always try to delete the folder (if it is empty), even if it already existed before installing the application;
- uninsneveruninstall – tells the uninstaller not to delete the folder when uninstalling a program – usually when uninstalling a program, the uninstaller deletes all folders that were created by the installer during installation (if they are empty).
[Files]
- ignoreversion – install a file that may already be installed on the user's computer and has a later creation date, i.e. is newer (in this case the installer will leave the existing file by default);
- promptifolder - By default, when an installed file has an older version number than an existing file, the installer will not replace the existing file. When this flag is used, the installer will ask the user whether the file should be replaced;
- allowunsafefiles – disables automatic checking by compilers for unsafe files. It is strongly recommended NOT to use this flag unless you are sure you know what you are doing;
- comparetimestamp - Using this flag is not recommended except as a last resort because it has an inherent problem: NTFS partitions store timestamps in UTC (unlike FAT partitions). The time will shift whenever the user changes their system's time zone or when daylight saving time changes. This can create a situation where files are replaced when not needed or not replaced when needed;
- confirmoverwrite – always prompt the user for confirmation before replacing an existing file;
- onlyifdestfileexists – the file should replace a file with the same name already installed on the user’s computer, and if there is no such file on the user’s system, then it should not be installed at all. This flag is useful when you create an installer to update (update) a program already installed by the user. But you should remember that the user can rename some program files, and then the update will not be installed, even if the user has installed the program;
- onlyifdoesntexist – install the file only if it does not already exist;
- overwritereadonly – always overwrite a file marked with the “read-only” attribute. Without this flag, the installer will ask the user whether the existing read-only file should be overwritten;
- replacesameversion – if the already installed and installed files have the same version, by default the installer will not replace the already installed file. If an installed file needs to be replaced (which is recommended), this flag is used;
- nocompression – if you set the nocompression flag to an individual file, the installer will not compress only the specified file.
[INI]
- uninsdeleteentry – used to ensure that when deleting a program, a specific key in a given section is deleted;
- uninsdeletesection – indicates that when deleting a program, the specified section with all its keys and their values should be deleted;
- uninsdeletesectionifempty – used to ensure that when deleting a program, only the empty section is deleted;
- createkeyifdoesntexist – a key with the given name will be created only if it did not exist before installation.
[Run]
- shellexec – used for files that are not executable (.exe or .com) or command files (.bat or .cmd). With this flag, the file will be launched using the default program for its type (for example, the ReadMe.txt file will be displayed on the Notepad page). The shellexec flag does not determine whether the program has executed or not, so it should be combined with the nowait flags (the installer will not wait until the launched file is executed and will immediately move on to the next section parameter) or waituntilidle (in this case, the installation will pause so that the user was able to enter the necessary data);
- postinstall - used to allow the user to select which files he wants to run and which not. Using the Description parameter, you can specify a comment for each of the files submitted for execution. If it is not specified, the installer will use the standard comment;
- unchecked – by default, a file marked with this flag will not be selected;
- hidewizard – the installer window will be hidden while the program is running;
- unhidden – the executing program (or file) will run in a minimized window. You should not use this flag for a program that will require user interaction (for example, the user will have to enter some data);
- runmaximized – the program (file) will run in a maximized window;
- runminimized – the program (file) will run in a minimized window;
- skipifnotsilent – tells the installer not to run the file during a normal (not accelerated) installation;
- skipifsilent – tells the installer not to run the file during fast and very fast installation;
- skipifdoesntexist – do not generate an error message if the file being launched does not exist.
Creating an installer
2.4. Creating an installer using NSIS and EclipseNSIS programs
Let's create a separate project for the installer; to do this, call the project wizard from the menu “ File->New->Project->General Project ”. Enter the project name “com.berdaflex.filearranger.installer” and click the “ Finish ” button.
Let's create a template installation script using the EclipseNSIS wizard; to do this, call the wizard from the menu “ File->New->Other->EclipseNSIS->NSIS Script ”. From the list of available templates, select the classic installer “ Classic Installer ”.
Figure 5.6. Selecting the classic installer
In the next wizard window, enter the basic attributes of the installed installer:
- Application Name: “Berdaflex File Arranger”;
- Application Version: “0.1”;
- Publisher Name: “Berdaflex Software Systems”;
- Installer File: “FileArrangerSetup.exe”.
We will also indicate icons for installing and uninstalling the program, which gives a modern look to the installer.
One of the important points when creating an installer is to specify the compression level “ Compressor ” used for the created installation file. Compression allows you to reduce the size of the installer, which is important for distributing programs over the Internet. Available archiver options are zlip, bzip2 and lzma. The highest compression ratio can be achieved with the “ SetCompressor /SOLID lzma ” mode, but this comes at the cost of longer time spent creating the installer and installing it.
Figure 5.7. Entering basic project attributes
The next page of the wizard prompts you to specify the program installation path and menu group. Let's leave the default values. In this case, the installation is carried out in the standard “ Program Files ” directory in the “ Berdaflex File Arranger ” folder. Berdaflex File Arranger group will be created in the menu .
The NSIS Installer Builder contains multi-language resources to display information in different languages. Let's select support for Russian and English languages from the list. If you enable the “Allow user to Select Language” checkbox, then when you start the installer you will be prompted to select the desired installation language, otherwise the language will be determined by the operating system settings.
Figure 5.8. Selecting installation path, menu group and supported languages
Next, the wizard prompts you to specify a license file, a download progress picture, a background image and sound files. We will only indicate the license file for now.
Figure 5.9. Configuring installer display parameters
The most crucial moment is to specify the list of files, folders and shortcuts that will be included in the installer. The next page of the wizard is intended for this. As content, we will select the contents of the catalog that we previously generated with the Product Creation Wizard.
Figure 5.10. Selecting content for installation
The final stage will be to indicate the preferred parameters for the installer's behavior.
Figure 5.11. Selecting installer behavior parameters
The result of the wizard will be a configuration file for creating an installer with the NSIS program (by default the file should have the .nsi extension). Open this file with the EclipseNSIS editor. We have access to syntax highlighting, section navigation, as well as a panel with buttons for the most used operations for compiling, testing the installer, calling a help file, etc.
Figure 5.12. EclipseNSIS Script Editor
It is possible to create your own dialogs to configure various installer parameters (by default, these files should have the .ini extension). The editor allows you to switch between the visual and text editor by pressing the F12 key.
Figure 5.13. Visual dialog editor EclipseNSIS
The NSIS installer creation program includes a large number of example scripts, on the basis of which you can implement a variety of behavior logic and appearance of the created installer.
Constants
Most entries in a script can contain constants. These are predefined strings enclosed in curly braces {}. The installer or uninstaller converts the constants to their literal values, depending on the user's choice and system configuration.
Below is a list of constants used in Inno Setup:
- {app} – installation folder that the user selects on the “Select Destination” page of the wizard;
- {win} – Windows OS directory. "C:\WINDOWS";
- {sys} – Windows system folder. On 64-bit Windows, by default, the System32 path returned by this constant is mapped to the directory containing 32-bit system files, just as on 32-bit Windows. (This can be overridden by enabling 64-bit mode.);
- {syswow64} is the actual directory where the 32-bit system files are located. On 32-bit Windows, 32-bit system files are in "System32" or "System" rather than in a separate SysWOW64 directory, so this constant will refer to the same directory as {sys}. It is not recommended to use this constant unless there is a specific need to obtain the name of the actual directory where the 32-bit system files are located;
- {sd} – points to the root folder of the drive where Windows is installed, usually “C:”. This directory constant is equivalent to the SystemDrive environment variable;
- {pf} – path to the Program Files directory;
- {cf} – path to the Common Files directory;
- {tmp} – temporary directory used by the installer or uninstaller. This is not the value of the user's TEMP environment variable. This is a subdirectory of the user's temporary directory that is created during installation or uninstallation at startup (with a name like "C:\WINDOWS\TEMP\IS-xxxxx.tmp"). All files and subdirectories in this directory are deleted when installation or uninstallation completes;
- {fonts} – font directory. Typically called "FONTS" in the Windows directory;
- {dao} – DAO. This is equivalent to {cf}\Microsoft Shared\DAO;
- {dotnet11} is the 32-bit root of the .NET Framework version 1.1. If an attempt is made to access this constant on a system without the .NET Framework version 1.1. an exception will be thrown;
- {dotnet20} – root directory of .NET Framework version 2.0-3.5. {dotnet20} is equivalent to {dotnet2032} unless the installation is in 64-bit mode, in which case it is equivalent to {dotnet2064};
- {dotnet2032} – 32-bit root directory of the .NET Framework version 2.0-3.5;
- {dotnet2064} – Windows 64-bit only: .NET Framework version 2.0-3.5 64-bit root directory;
- {dotnet40} – .NET Framework version 4.0 and later. {dotnet40} is equivalent to {dotnet4032} unless the installation is in 64-bit mode, in which case it is equivalent to {dotnet4064};
- {dotnet4032} – 32-bit .NET Framework version 4.0 and later;
- {dotnet4064} - Windows 64-bit only: 64-bit .NET Framework version 4.0 and later;
- {group} is the path to the Start folder selected by the user on the Select Folder page of the Start Menu of the Settings menu. This folder is created in the All Users profile unless the user installing the application does not have administrative rights, in which case it is created in the user profile;
- {localappdata} – path to the local Application Data folder;
- {userappdata} & {commonappdata} – path to the Application Data folder;
- {usercf} – path to the directory of shared files of the current user. Only Windows 7 and later support {usercf}; if used in previous versions of Windows, it is moved to the same directory as {localappdata}\Programs\Common;
- {userdesktop} & {commondesktop} – path to the desktop folder;
- {userdocs} & {commondocs} – path to the “My Documents” folder;
- {userfavorites} & {commonfavorites} – path to the “Favorites” folder;
- {userpf} – path to the Program Files directory of the current user. Only Windows 7 and later support {userpf}; if used in previous versions of Windows, it will be moved to the same directory as {localappdata}\Programs;
- {olddata} – allows you to expand an existing registry value if its ValueType is string, expandsz, or multisz.
Creating offline installers - Tarma InstallMate 9.95.0.7518
Tarma InstallMate
is a convenient program for creating stand-alone installers compatible with any Windows 32/64-bit operating systems or server platforms, with full customization of all installation actions and dialogs. The program has a beautiful design and easy-to-use interface, which allows even beginners to quickly get used to it. With Tarma InstallMate, professionals can create installers with a wide range of settings.
System requirements:
Windows XP and Server 2003 (including R2) Windows Vista and Server 2008 Windows 7 and Server 2008 R2 Windows 8 and 8.1, as well as Server 2012 and Server 2012 R2 Windows 10 and Server 2016-2019
Torrent Creating offline installers - Tarma InstallMate 9.95.0.7518 in detail:
Meet
Tarma Installmate
, a powerful software for creating installation packages from Australian developers. With its help, you can create your own offline installers that work on all versions of Windows of all bit levels, including server operating systems. After launching the program, you will be presented with its interface with very detailed settings for your future installer, starting from its capacity and compatibility with various platforms and ending with the appearance of the installer itself (icons, pictures, messages, etc.). Compared with analogues, Installmate is something average between Installshield and Advanced Installer in terms of features. The developers claim that InstallMate has a unique feature - completely isolated installations for each user. The most important difference in InstallMate when installing to the current user's profile and installing to the "current user" profile of other installers is this: In most installers, installing to the current user's profile only installs shortcuts for the current user; the rest of the product is installed system-wide. Unprivileged users cannot install these products at all. In InstallMate, such installations are completely isolated from each other, and also isolated from any All Users profile. Unprivileged users can install the product for themselves. Additionally, most other installers cannot handle multiple, mutually isolated installations of the same product for different users on the same system, and they also cannot handle installations on behalf of unprivileged users. Beyond subtlety and detailed configuration of almost every function of the future installer, the program supports a very wide selection of prerequisites (conditions or requirements of components, for example, various NET assemblies, etc.).
Treatment procedure
1. From the Rus folder, copy the Tin file with replacement along the path C:\Program Files\InstallMate 9\BinX64 2. Copy Patch-Tarma.InstallMate.9.x to the root of the program along the path C:\Program Files\InstallMate 9 and run from Admin's name.
3.Copy the contents from the Keygen folder to the root of the program C:\Program Files\InstallMate 9 and run it as Administrator, the generated key is automatically copied to the clipboard, you just have to paste it into the registration field. Note:
Russifier for the x64 version of the program, author of the Russifier
Sher
Screenshots Creating offline installers - Tarma InstallMate 9.95.0.7518 torrent:
Download Creating offline installers - Tarma InstallMate 9.95.0.7518 via torrent:
Let's get started with the CreateInstall installer
Let's say you have an application and you want to create an installation that allows users to install your program on their computers. Here we will look at the simplest option, in which you need to install the program in a directory specified by the user and create shortcuts. In addition, an uninstaller must be included in the installation so that the user can later remove the installed application. We will create a project in the full version of the CreateInstall installer , but we will use only the basic features of the installer, which are also available in the free version. You can start creating an installation at any stage of the project and check what you get.
Let's start by running the CreateInstall installer and creating a new project there. In the project creation window, you can specify the name of the program, the source directory of the program files, and the option to add an uninstaller to your installation. All these parameters are optional; you can always specify or change them later in the project settings. Let's just specify the program name My Application and o (Include Uninstaller). After we click on the OK button, a new project will be created and you will see three tabs: Project, Install Script, Uninstall Script.
Creating a new project
Let's go to the Install Script tab, where our installation script is located. On the left you see a list of all the commands that can be used in the installation script. By default, commands are divided into groups, but they can also be viewed as a general list. If some commands are not available for your version of CreateInstall, they will be grayed out. In the full version you can use all commands. Commands are added to the script by double-clicking the mouse or by clicking on the Add button located above the list.
The installation script itself is located in the middle panel. The list of commands is presented in the form of a tree, since some commands can contain others. Commands can be copied, pasted, deleted, and also disabled and enabled (if a command is disabled, it is shown in gray). On the right are all parameters for the current script command. The Uninstall Script tab is organized in a similar way, in which the uninstallation script is edited. Thus, you can fully control not only the installation script, but also the program removal script from the user's computer. Your installation will only execute the commands and in the order specified in your script.
The Project tab contains several pages with general settings for your project. For example, on the first Output page you can specify the name of the installation file and the directory where it will be written (by default, installations are created in the c:\setups folder). Let's set the file name to my-setup.exe. To create the first installation, we will not go through all the project parameters; you can do it yourself. Each command and page has a Help link in the top right corner that takes you to the relevant help.
Project-Output
Now let's move on to changing the installation script on the Install Script tab. Most importantly, we need to specify the necessary application files to install. Find the already added Installation Files command in the list of commands and indicate the directory with your program there. Create a directory c:\My Application and copy a few files there. We will indicate this directory as the source directory with the files that need to be included in the installation.
Setup files
Right now you can create and receive a ready-made installation for the My Application program. By default, the option to add uninstall is enabled when creating a new project. Let's say we want to create a shortcut for our program, myapp.exe, that we are installing. We go to the Shortcus[List] command in the installation script and add one element there with the name of the My Application shortcut and the launch file myapp.exe.
Shortcuts
Our project is ready. Let's start creating our installation and check the result. After running the my-setup.exe installation, you should see a script similar to this. Welcome dialog box Path selection dialog box Installation dialog box Success dialog box
Now you can check the operation of the uninstaller. Go to the Start menu - All Programs - My Application and run Uninstall. You can also start uninstalling the application in Control Panel - Add or Remove Programs.
As you can see, creating a simple installation did not take us much time and did not require a large number of actions or lengthy study. CreateInstall offers a huge selection of commands for your installations and unlimited flexibility when creating installation scripts, but at the same time, our installer does not require additional knowledge and effort from you to create simple installations. You can start working even with the free version and you will not need to relearn or additionally convert your projects when moving to more advanced versions of CreateInstall.
see also
- Introduction
- Comparison of installers
Eonza automation software is a free, open source cross-platform program for easy creation and management of scripts.