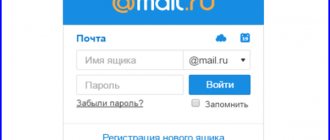
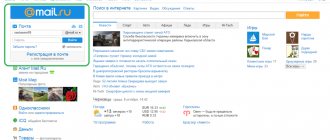
Quick login to Yandex mail
Yandex.Mail is one of the most popular free email services.
There you can freely register and get an address that ends with @yandex.ru. The Yandex mail service is convenient, easy to use and always available on your computer, tablet or smartphone - all you need is Internet access. If your email is on Yandex, then you need to log in to its website every day. An easy login to mail is provided by the “Login” start page - just add the address mail.yandex.ru , and set the “Login” page itself (address) as the start page in the browser.
Home page Login
Login to your email will always be at hand; you can get there with just one click:
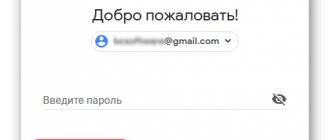
When you first log in to Yandex.Mail, you will need to provide your login (mail address) and password. If you have already indicated (entered) them, then your mailbox with letters will simply open, and you can work with them.
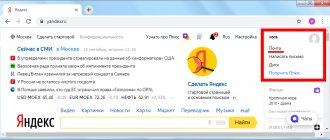
And, of course, if you already have a mailbox on Yandex, you can always get there from the Yandex main page (link in the upper right corner).
Mozilla Thunderbird
Mozilla Thunderbird, unlike Microsoft Outlook and The Bat, is completely free. You can download it from the link: thunderbird.net/ru.
After starting the program, a window will open to set up your account.
Configuration via IMAP protocol
1. Specify IMAP in the mailbox settings via the website:
- Log in to your Yandex mail
- – All settings – Mail programs
- Check the box “From the imap.yandex.ru server using the IMAP protocol.”
Read more about this in the section about Microsoft Outlook (see above).
2. Enter your name, email and password. Click the Continue button.
3. In the next window, click on the “Done” button.
By default, Mozilla will download the desired configuration from the server, but if you wish, you can change it by clicking on “Manual Configuration”.
4. A Yandex page will open, where you need to re-enter your username and password.
Then allow the application to access the mailbox by clicking on “Allow”.
Configuration via POP3 protocol
1. Specify POP3 in the address parameters:
- Log in to your email on the website yandex.ru
- – All settings – Mail programs
- Check the boxes for “From the pop.yandex.ru server via POP3 protocol”, “Inbox”, “Sent”, “Spam”, “Drafts”.
You can read more in the section about Microsoft Outlook (see above).
2. Enter your name, email address and password. Click Continue.
3. Click on the “Manual setup” button.
- In the “Incoming” item, change the protocol to POP3.
- Server name: pop.yandex.ru and smtp.yandex.ru
- Ports: 995 for incoming mail and 465 for outgoing mail.
- Encryption type: SSL/TLS.
Click "Done".
By default, the program configures the storage of letters on the server for 14 days. You can change this option by going to the Options tab and the Server Options section.
Registration in Yandex mail
To register with Yandex.Mail (get your address), you can open the Yandex.Mail website through the Vhod.ru start page, as we just described, or simply open Yandex and click “Create a mailbox” in the upper right corner. Whichever method you use, a simple registration procedure will begin. You will need to come up with a mailbox name (your address, at the end of which there will be @yandex.ru , for example: [email protected] ) and a password, which must be remembered and kept secret. You will also need to provide basic personal information.
Please note that you can enter your phone number - this is very useful if you need to restore access to your mail in the future (for example, if you forget your password). Indicate the number that you use and that you always have with you. If you do not indicate the number, then instead you will be asked to assign a secret question, the answer to which only you know (this is necessary in order to protect against hacking).
Setting up the IMAP protocol in an email client
When working with this protocol, incoming messages will be saved on the server and the user’s computer. At the same time, letters will be available from any device. To configure, do the following:
- First, go to the Yandex mail settings and select “All settings”.
In the window shown, click "Email Programs".
Check the box next to the first option, “Via IMAP.”
Then launch your email program (the example will use Microsoft Outlook) and create an account.
From the entry creation menu, select Manual Setup.
Oh and click Next.
In the recording parameters, specify your name and mailing address. Then in "Server Details" set:
Record type: IMAP Outgoing mail server: smtp.yandex.ru Incoming mail server: imap.yandex.ru
Open "Other Settings" go to the "Advanced" section and specify the following values:
SMTP server: 465 IMAP server: 993 encryption: SSL
In the last “Login” form, write down the name and password for the entry. Then click “Next”. As a result, all letters will be synchronized and available on your computer. The described protocol is not the only one, but it is the most popular and is often used when automatically configuring email programs. We are glad that we were able to help you solve the problem. Describe what didn't work for you. Our specialists will try to answer as quickly as possible.
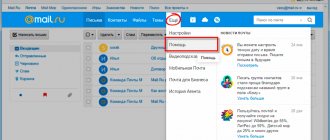
How to log into Yandex mail via VK, Odnoklassniki, Facebook...?
Having opened the Yandex website, you will see the entrance to your mail in the corner, and there are buttons for logging in through VK, Facebook, Odnoklassniki and other sites. In our picture they are highlighted - first comes VK, then Facebook, then Twitter. If you click on the ellipsis, you will be able to log in through other sites, including Odnoklassniki:
And if you have already opened the Yandex.Mail website, then you will see similar buttons just below the “Login” and “Registration” buttons. That is, for example, if you want to log into your mail via VK, then you do not need to click “Registration”, but immediately click the button with the letter “B”:
Instructions for creating an account if you don’t have one
If an account has not yet been created, then to register Yandex mail you just need to take a few simple steps:
- First, you need to log into the Yandex portal, then pay attention to the upper right corner, where it will say “Create mail” , and click on the button.
- Next, the user will have to fill out a form - enter a first name, last name, come up with a login (if the entered login is already taken by someone else, a corresponding notification will appear on the screen), as well as a password. Special attention should be paid to choosing a password for your mailbox. It is not recommended to choose simple passwords (qwerty, ytsuken and the like), otherwise it will not be difficult for attackers to take over your account. It is advisable to choose a password that will consist of 8 characters - numbers, uppercase and lowercase letters of the Latin alphabet, #, %, & and others.
registration in Yandex mail
- The next step is to enter your phone number. The need for this action is due to the fact that if you lose your password (and, as a result, access to your mailbox), it can be easily recovered. If the user does not have an available number, he will be asked to select any “secret question” and enter the answer to it.
How to use Yandex.Mail
So, if you have already registered and you have a mailbox. What to do next?
How can I view the letter?
When you log into Yandex.Mail (for example, via ), you will be taken to your Inbox. These are the letters that came to you. These may include letters from people, mailings, advertising, etc. The screen shows how many unread letters you have and how many letters there are in this folder. For example, “Inbox 2 / 99” means that you have 2 new letters, and there are 99 in total in the folder.
The most recent letters are shown at the top, the older ones are shown below. New letters are highlighted in bold. To open a letter and read it, just click on it! To go back, tap on "Inbox" or swipe back if you're reading emails on your phone.
How to reply to a letter?
Open the email you want to respond to. There will be an empty field at the bottom (you need to scroll to the end if the letter is long), where you can immediately write a response. When everything is ready, click “Reply”.
Another option is to click the “Reply” button. With this method, the message you are replying to will be quoted in the reply window. You can simply write an answer, or you can respond to individual parts of the letter, inserting your answers between the lines. When you finish answering, click the “Submit” button. The letter will go to the recipient, and a copy will appear in the “Sent” folder. You can always open it and see what, to whom and when he replied.
How to write and send a letter?
Click the “Write” button. Where the “To” field is empty, enter the recipient’s address (for example, [email protected] ). It is also advisable to briefly indicate the subject so that the recipient immediately understands what the letter is about. Write your letter below. When everything is ready, click “Submit”. As in the case of replying to an incoming letter, your letter will be sent to the address, and its copy will be in the “Sent” folder.
There is one more question!
Look at the help for Yandex.Mail - most likely there is an answer there.
Yandex.Mail - setting up email programs
Today, the choice of email programs is quite large, since many users appreciate their simplicity and ease of use. Let's discuss the most popular ones.
Microsoft Outlook
If you plan to work with this program, then first you should make sure that the use of the IMAP (or POP3) protocol is enabled in the settings of your Yandex email account. Let's look at how to start interacting with Microsoft Outlook using the IMAP protocol:
- Open the program by selecting it from the Start or desktop.
- After reading the greeting, click Next .
- In the Account Setup , when asked if you want to connect to an email account, the default answer is highlighted in positive. Leave the checkbox in place and continue working.
- In the window that opens, place a checkmark in the “Manual configuration or additional server types” .
- Select a service, oh.
- Enter your account settings, user information, and server information. Then you need to click on the button “Other settings” .
- Go to the “Outgoing mail server” and activate the “SMTP server requires authentication” - put the checkbox on the first option.
- Go to the Advanced and specify the following information: numeric parameters for ports (IMAP: 993, SMTP: 465) and encryption type (SSL).
- Ready!
- Synchronize the program with the server by clicking the “Send and receive mail - all folders” .
Mozilla Thunderbird
Mozilla's email client is well-deservedly popular thanks to its diverse toolkit, which is available absolutely free. Setting up an email program is not difficult - let’s follow the sequence of actions in practice:
- Launch your email client by finding the icon of a petrel hugging a letter on your desktop or in the Start .
- Enter your personal information in the “Set up your existing email account” .
- In the window that appears, click “Manual setup” .
- Fill in the fields indicating server names, ports, connection type. Then click on the “Test” . If no errors are found, click Finish .
- To download folders and letters to your email client, click “Receive” .
- Right-click on the email address name in the upper left corner. From the drop-down menu, select Options .
- In the form that appears, click “Server Settings” and pay attention to the block regarding deleting messages. Make sure that when you delete the email, it will be moved to the Deleted Items in your mailbox.
The Bat!
Many people choose The Bat! email program, as it allows you to maintain the confidentiality of correspondence, and also significantly saves time due to its well-thought-out interface and the ability to work with an unlimited number of email boxes. Let's look at how to set up Yandex mail using The Bat! client:
- Launch the program by clicking on the bat icon on the desktop. Or select it from the Start .
- Enter the data in the “Create a new mailbox” “Name” field , enter your name, in the “Email address” and “Password” , enter your e-mail address at Yandex mail and the password to log into it. Select the protocol from the drop-down list - IMAP or POP . Everything, the main thing is done, you can click the “Next” .
- In the “Incoming Mail” , you should set up your account in accordance with the instructions presented above.
- Set up "Outgoing mail" .
- Click “Finish” in the “Account Information” .
- Synchronize your account with the server to see the folder structure. You should move the cursor to the name of the email box (top left) and right-click on it. A menu will appear in which you need to select “Update folder tree” .
- Restart the program for the changes to be applied.
The instructions are elementary, so an ordinary PC user can set up the program without any problems. If there is a need to work with several email accounts at once, the problem can be solved simply and quickly. Select the “Mailbox” , and then select “New mailbox” and repeat the procedure for filling out the data.
What to do if Yandex.Mail does not open?
First of all, use the “Login” start page to log in to your mail. Perhaps you are entering somewhere in the wrong place - the start page will help with this.
If the email says that the password is not suitable, most likely you are entering the password incorrectly. Even if everything seems right. Maybe capital letters are included? Or is the language wrong? Check and try again.
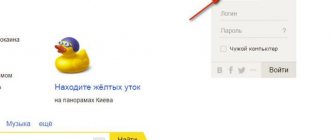
If you forgot your password or it doesn’t work, use access recovery - open the Yandex.Mail login page and click on the “Remember password” link.
Adding an SPF record on your DNS servers
Go to the DNS section https://connect.yandex.ru/portal/admin/customization/dns in Yandex Connect and copy the following entry:
@ TXT v=spf1 ip4:0.0.0.0 include:_spf.yandex.net ~all
Instead of 0.0.0.0, specify the IPv4 address of your server from which you are going to send letters via PHP mail() . You can specify several IPv4 addresses separated by a space, and if you have IPv6, you can also specify them like this: ip6: here is your IPv6 address. Example entry - ip4:IP-1 ip4:IP-2 ip4:IP-3 ip6:IP-1 ip6:IP-2 ip6:IP-3
Let's look at the values in the SPF record: v=spf1 - means the SPF version, you must specify it. There are no other versions. include - points to hosts allowed by the SPF record of the specified domain. ~all - “soft” rejection (the letter will be accepted, but may be marked as spam if there is a “rude” mailing or the person has previously marked letters from the sender as spam). -all - reject sending emails from servers not listed in ip4 or ip6. +all - send all messages. ?all - neutral attitude. all - sets rules on what to do with messages that were sent from unspecified servers.
Place the text entry on the DNS servers of your domain. This entry is necessary for the correct delivery of your letters to inboxes and not to spam. With SPF, the recipient's mail server can check whether the sender's domain is spoofed.
If you use Yandex DNS servers, you will not have to add an SPF record.
How to create Yandex mail
Yandex is one of the best email services in the world. Fast, reliable, easy to operate. It has built-in protection against spam and viruses, works 24 hours a day, seven days a week. Anyone can register an email account in this system for free!
| Advantages | Flaws |
| ✔ Fast sending and receiving letters ✔ Protection against viruses and spam ✔ User-friendly interface ✔ Free access to Yandex services: Disk, Money, Mail for a domain ✔ There is a mobile application | ✘ Sometimes it takes a long time to load |
Now I will show you with an example how to create a Yandex email. To do this, you will need to register on the website yandex.ru. First, let's look at how to do this on a computer, and then on a mobile device - phone and tablet.
Registration on a computer
1. Open the website yandex.ru.
2. In the upper right corner there is a small rectangle with a “Login to mail” button. Just above there is a link “Create an email” - click on it.
3. A new page will load. On the right side there will be a registration form. Fill it out and you will have your own personal mailbox.
The picture below shows an example of filling out the form. You will need to indicate your data there. Next, I will tell you in detail about each point.
First name and last name. Here you need to type your real name and real last name. This information will only be shown in the user's personal account. You can send letters using any other data. I talk about how to do this below.
On a note. You can also indicate a fictitious first/last name in these lines - no one will check. But it’s better to print the truth, because this information is needed to restore access to mail.
For example, you created a mailbox in Yandex and have been using it for several years. And then suddenly something happened to the computer: a system failure, a virus. And it so happened that it was impossible to get into the mail.
In this case, you will need to restore access. And for this, the support service may require you to indicate your first and last name from the registration form. If you invented them at the stage of creating the box, problems with recovery may arise. In the worst case scenario, you will never see this email again.
Create a username. Here you need to type the name for your future box.
The login must consist of Latin letters (English) - Russian cannot be used. It is also allowed to add numbers and a period or hyphen to it. For example, ivan.pertov, slava-ivanov1990
The login is the main part of the email address. It is unique - it will belong only to you and no other person will be able to get the same name.
But since many people use Yandex mail, most simple logins are already taken. And it’s not always possible to quickly find a free option. Therefore, the system helps with the choice - it suggests names available for registration.
I'll show you with an example. Let's say I came up with the name umnik for my mail. When you print it in the “Login” field, the system prompts that this name is already taken by someone. But, at the same time, Yandex offers other, free options.
The system selects them automatically, taking the first and last name as a basis. You can select any of them - just click on it. If the login is suitable, a green check mark will appear at the end of the line.
Example:
The name of your mailbox and the address that will be assigned to it depend on your login. I recommend that you take your time and devote enough time to this, because the selected login cannot be changed later!
The shorter and simpler the login, the better. Ideally, it should be sonorous and consist only of letters - without numbers or punctuation marks.
Create a password. Here you need to print the letters/numbers of the English alphabet (at least six) with which you will open your box. You could say that the password is the key to the mail.
During printing, dots will appear instead of the typed characters. This was done on purpose so that no one could accidentally spy on it. You can see the password by clicking on the eye icon at the end of the line.
Remember this password, or better yet, write it down in a safe place and don’t show it to anyone. After all, knowing it, a person will be able to open an email account, read letters and even correspond on your behalf.
Repeat password. In this field you need to type the password for the mailbox again - the same one you just typed.
If you accidentally type it with an error, Yandex will notify you about it.
Cell phone number. Here you need to enter your mobile number. This is necessary so that if you lose access to your mail, you can always restore it.
The number must be entered in international format and after entering, click on the “Get code” button. For example, 79001112233
A free SMS message with a code will be sent to your phone. This code must be entered in a special field.
If you don’t have a mobile number or for some reason you don’t want to indicate it, then click on the words “I don’t have a phone” under this field.
Then you will need to answer a security question. This is an alternative to a phone number in case you lose access to mail.
Click on the inscription “Security question” and select from the list one that seems difficult enough (so that it cannot be picked up). And type YOUR answer to it in the bottom field.
Example:
Registering is the last step in receiving Yandex email. Click on this button when all fields are completed.
A small window will appear. In it, the system will inform you that it will open a new mailbox for you only if you accept the user agreement and agree with the privacy policy. To complete registration, click “I Accept.”
If you entered something incorrectly when filling out the form, nothing will happen after you click on the “Register” button. This means that you need to carefully review the questionnaire and correct the error - it will be highlighted in red.
Immediately after registration, your Yandex personal account will open - this is your new email.
An additional window may appear asking you to configure the box. Close it by clicking on the cross in the upper right corner. I'll tell you how to set up email later.
Pay attention to the upper right corner of the mail - your login is written there. If you click on it, the full name of the email box will be displayed. Be sure to write it down - after all, this is your email address.
The address consists of the login chosen during registration, the @ sign (dog) and the name of the mail site - yandex.ru. This entire address, without spaces and without a period at the end, is what you need to give to people so that they can send you a letter.
Note: the email box starts working immediately after creation. As soon as your personal account has opened, you can already send and receive letters.
IMPORTANT! The email is created once - no need to register again. To log into this mailbox, simply enter your username and password in the login form (see below).
Register on your phone or tablet
Registering a new mailbox via a phone or tablet occurs in almost the same way as in the computer version. You need to fill out a short form: indicate your last name/first name, select a login and password.
If you have already filled out the form (for example, on a computer), then you do not need to register again. Just log in to your email using your username and password. Read on to find out how to do this.
Now I will show you how to register in Yandex via a phone or tablet. Any application for launching websites is suitable for this: Google Chrome, Mozilla Firefox, Opera, Safari, etc.
1. Open the program in which you browse websites on your mobile phone. In the top line, type mail.yandex.ru and go to this address.
2. Click on the “Create account” button.
3. Fill out all fields of the form:
- Name;
- Surname;
- Login;
- Create a password;
- Cell phone number.
Filling example:
I told you more about filling out each field in the instructions just above.
4. Click the “Register” button and then “I Accept”. Immediately after this, your new Yandex mail will open.
Now you have an email account that will work on any other device, including your computer.
Profile design
Once registration is complete, you can use the Quick Mail Setup feature. It consists of 6 steps. Using hints, it helps the user to quickly enable and configure the main options.
Note. You can skip steps in the additional panel. They are optional for completion and activation. To move to the next section, click the “Next” button in the lower right corner.
Step #1
To use your mailbox on your phone, enter your number in the field. Click get. To view and download the mobile application, click the “Android” or “iOS” icon (depending on the type of device you are using).
Step #2
If you plan to receive a large amount of correspondence, create color labels with message categories (Work, Promotions, Friends, etc.):
- check the box;
- type the name of the category in the line;
- in the drop-down menu (on the right side) assign a color to it.
Step #3
To save yourself the hassle of checking messages in every existing mailbox, forward all messages received to them to a Yandex Mail email:
- click the “Yes, there is” button;
- enter a different email address and password to log in;
- click "Connect".
Step #4
If you wish, you can customize information about the sender (about yourself):
1. “Send emails from an address”: select an alternative email address from the drop-down list. Short name “ya” or one of the regional domains (.by - Belarus, .ua - Ukraine, .kz - Kazakhstan).
2. “Your name”: enter your first and last name. When sending a letter via email, the service will automatically place this data in the “From” field.
3. “Your signature”: will be added to the body of the message (at the bottom of the letter).
4. “Your photo”: click “Upload photo” to upload an avatar to the service profile.
Advice! To take an instant photo for Ava using your webcam, click the “take a photo” link under the button.
Step #5
In the tiled menu, click the mouse to select the theme you like (graphic design) to design your account.
Step #6
The final step. To go to your profile, click “Done”, and to view and change options, click “Settings” (link at the top of the window).
Mailbox registration options
To create a personal email on Yandex, you need to register in the system: get an account. It will allow you to use all Yandex services (mail, maps, music, disk, market).
When you create an account, you simultaneously register your email. Make it more convenient from a computer or laptop. Registration is possible through the mobile application. We will consider all possible options.
From computer
To create an email on Yandex, go to the link https://passport.yandex.ua/registration. A form will open for you to fill out.
You will need to enter:
- first name, last name;
- invented login (your name in the Yandex system);
- password.
If you wish, you can link the mailbox to your mobile phone number. When you register, change your password or restore it, you will receive a message with confirmation codes.
When creating an email, you don’t have to specify a phone number; in this case, we’ll look at how to register below.
So, you entered your full name. All that remains is to come up with a login. It is important that it be unique. The system will tell you if the name is taken and offer free options. You yourself can add (remove) numbers or letters. After registration, you will not be able to change your login, remember this.
An equally important step when creating an account is the password. It must contain Latin lowercase and uppercase letters; so-called non-printable characters (# _ question and exclamation marks) are acceptable. Do not create obvious passwords from your or your loved ones’ date of birth, names or pet names. A simple sequence of numbers from the 12345 series will not work either. If you cannot come up with a strong password yourself, use the system hint. Then repeat the invented or generated password in the next column.
Enter your phone number and click “Register”. After which you will receive an SMS code. You will enter it in a special column in the window that appears.
Via phone and tablet
The Yandex mobile application allows you to create an account using your phone number. It can be installed on phones with IOS, Android, and Windows Phone operating systems.
To create mail on your Android mobile, do the following:
Go to Google Play, download the Yandex mail mobile application.
- Go into it and select “Create Yandex mail”.
- In the window that appears, enter your mobile phone number.
- Click next.
- Enter the code from the SMS message.
- Fill in your personal information
- Create a username and password.
- Click "Register".
The procedure for creating mail on an iPhone is similar to that described above.
Without phone number
If you don’t want to enter your mobile number, click on the words “I don’t have a phone.” The system will prompt you to choose a security question or come up with your own.
You need to remember the answer, it will be useful to restore access if you forget your password.
After you select a security question, the procedure is as follows:
- Write your answer in the appropriate field.
- Then enter the characters from the image.
- Click register.
Then accept the terms of the user agreement by clicking on the appropriate button. All registrations are completed.
Verification
Yandex offers. You can connect it free of charge for personal use (you have your own website), for an organization or a portal. To connect to the service, follow the link https://connect.yandex.ru/pdd/.
- Enter the domain name in the appropriate cell in the registration window.
- Click Connect for free.
- Select a domain from the list.
- Then a window will open with a selection of verification options.
- Go through it.
Additional Helpful Tips
1. To prevent your mailbox from being hacked, it is important to come up with a correct and clever password. How to do it? If the service indicates to you that the password you entered is too simple, listen to this and come up with a new one. Avoid using common combinations, names and words. It is also not advisable to use your own date of birth, first or last name. A correctly composed password should consist of:
– Latin lowercase and capital letters; – numbers; – various punctuation marks.
In order not to forget the combination, many people do this: they type a Russian phrase on an English keyboard. This will make the password really difficult for the system, but it will be easy for you to remember.
For the safety and security of your account, it is recommended to change your password from time to time - not every day, but at least once a month.
2. You can create a separate mailing address to use it only for work, for example, or to communicate with one person to whom you do not want to give your other contacts. Or specifically for registering on different sites where you need to enter your email address. Using your personal mailbox everywhere is very imprudent and inconvenient.
3. After you have created a mailbox on Yandex, you can save any of your files on Yandex. Disk. This is a very convenient service that most business people prefer to use.
4. If you wish, you can make your phone number an additional login after registration. To do this, you will simply need to go to the “Phone Numbers” section and opposite your mobile number, check the box next to the “Make the number an additional login” column.
If you have any other questions, you can contact the service's technical support service.