Method 1: flashing firmware via Fastboot mode
Fastboot mode allows you to interact directly with the boot partition. Therefore, for most Android devices, the main method of installing TWRP recovery is flashing the firmware via Fastboot.
The algorithm of actions is quite simple:
1) Place the TWRP file in the folder with ADB and Fastboot.
2) Next, connect the device in the appropriate mode to the PC.
3) In the command line, check that the connection is correct using the fastboot devices command.
4) If the serial number is displayed, then enter fastboot flash recovery recovery.img
5) One second, and the modified recovery is flashed.
For detailed installation, see the example of Xiaomi Redmi 3 and Xiaomi Mi5.
Among the disadvantages of this method, it is important to note that an unlocked bootloader is required. While the lock is active, you will not be able to install TWRP. It is also necessary to clarify the availability of such recovery for your model and the preferred installation method. Perhaps in your case, other, more convenient installation methods are available.
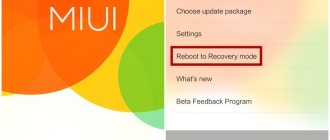
↑ Installing TWRP, step-by-step instructions
- Download the files for the firmware recovery_installer.zip [969.25 Kb] (downloads: 624)
, create a folder on the desktop and unpack the files into the folder. - Connect your smartphone to your computer using the original USB cable
. - Download the Recovery file from the official TWRP website
by selecting your phone model and save it in the same directory as the extracted files. Be sure to rename it to recovery.img so it looks like the picture below. - Turn off your smartphone.
- Press and hold the volume down “-” key and the power key at the same time. This will enter Fastboot
- Double-click the install.bat
to start the installation. The installation will take place automatically. After which you will enter automatic Recovery mode. - TWRP Recovery is now installed on your Xiaomi. You can always get into Recovery by holding down the volume up “+” key and the power key at the same time.
Method 2: Install TWRP via Flashify or Rashr
You can do without a computer and the long procedure of unlocking the bootloader if root rights are available on the device.
To get root, you should use Framaroot or 360 root programs. If there is a vulnerability in the firmware, the program will take advantage of the security hole and install root. More often, devices with Android version no higher than 4.4-5.0 are susceptible to hacking.
After obtaining root rights, you need to install the Superuser or SuperSU program to grant rights to the Flashify or Rashr programs. Both tools allow you to flash recovery, as well as make a system backup.
Installation algorithm
- Download and place TWRP in the device memory.
- Open Flashify or Rashr, provide root if required.
- Make backup copies of all available partitions. The Rashr utility offers more backup options.
- Choose to install TWRP locally.
- Agree to the terms and confirm the action.
Important! Do not use recovery offered within programs. Since there is no guarantee that the correct version will be installed, which will not disrupt the functionality of your device.
For detailed installation via the Flashify program, see the example of the Xaiomi Mi4c smartphone.
TWRP Features
If we compare it with the recovery utility that is installed by default, then TWRP recovery is much more powerful. This program provides the process of creating full system backups. With her participation, software and firmware are installed.
Factory recovery does not have such functionality. TWRP is installed on the internal memory of the gadget, instead of a little functional, standard recovery. If your device won't boot, in most cases TWRP will allow you to perform a successful system recovery process.
Main advantages of TWRP:
- Installation of factory system updates, patches, and various additions.
- Installation of unofficial kernels, work with custom firmware is supported.
- Pairs with a PC using the USB connector.
- For your current firmware, the utility can create a backup of the entire system or individually of the system, applications, etc.
- Quick recovery from a previously created backup.
- There are options for clearing battery statistics, cache, and factory settings.
- Formatting microSD, creating partitions.
- Working with files.
- Entering terminal commands.
Method 3: Install TWRP through the official application
Important! The method is relevant for devices with an unlocked bootloader.
TWRP developers have a mobile application that allows you to select the correct version of the “partition” and then install it. The method is in many ways similar to the previous one, but there is no possibility of saving the system. But you won’t be able to confuse and install the wrong TWRP. In addition, the “Official TWRP App” software will notify you when a new recovery version has been released.
Installation algorithm
- Download the Official TWRP App.
- In the program, click on the TWRP Flash button.
- The next window will ask you to grant root rights.
- If you grant root access, the program will offer to install TWRP to the recovery or BOOT partition.
Important! TWRP is installed in the recovery partition. If you select Boot, the smartphone will not boot.
- If there is a TWRP file in the device’s memory, click on the S elect a file to flash . Otherwise, download TWRP from the site. To do this, click on the Select a device . Then enter the model. The application will find and display the latest available recovery version. After selection, the program will inform you that it will open the recovery page in the browser. All you have to do is download and save the file.
- After downloading TWRP, return to the program, where select S elect a file to flash . Specify the downloaded TWRP file.
- Next, click on the Flash to recovery . Confirm the action, after which the installation will begin.
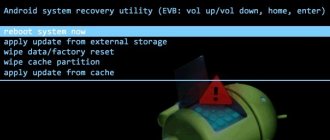
Special ways to log into Recovery
Some Android mobile devices have specific instructions for accessing the Recovery menu. For example, in some Lenovo models you need to uncheck the “Fast boot the next time you turn on” item in the settings.
Login to Recovery on Lenovo
And also press and hold all physical keys at once. Sometimes when the logo appears, you need to immediately press the Power button.
On Sony smartphones, the Recovery menu also needs to be called up in a non-standard way in some cases.
Login to Recovery on Sony
So, the smartphone needs to be turned off, then turned on. And when the logo appears, tap on the logo or hold down one of the volume buttons. It also depends on what buttons are on the body of a particular device. Only after applying these recommendations can you install TWRP Recovery on your Android smartphone.
Method 4: using the QFIL program
The QFIL utility, which is included in the QPTS toolkit, is designed for flashing devices on the Snapdragon platform. In some devices, together with the system image, QFIL allows you to flash TWRP.
Algorithm of actions:
- Copy TWRP recovery to the firmware folder. Agree to replace the file.
- Launch QFIL and configure the connection.
- Select the firmware file, specify the location of additional files.
- To install the image, click on the “Download” button.
The firmware will be installed, and with it TWRP recovery.
The installation process is described in detail using the Lenovo a6010 as an example.
Installing CWM or TWRP Recovery
Depending on which manufacturer produced your smartphone or tablet, in the future it will depend on how to install custom recovery. In other words, the whole point is that there is no one specific way to install TWRP or CWM!
Installing CWM or TWRP Recovery on Samsung
For Samsung devices, installation occurs using firmware via Odin (if the recovery has an IMG extension, then it must be packaged in a TAR archive).
How is Recovery installed?
- Download Recovery;
- Installing drivers:
- If your Samsung is from mid-2020 and newer, disable OEM locking
Download the program for Odin firmware; Switch to Download mode (see video below); We connect Samsung to the PC and sew.
Read more in the article - Samsung Firmware.
Installing Recovery on HTC, Sony, Google Pixel, Nexus and others
For most models from such manufacturers as:
- HTC
- Sony
- Google Pixel
- Google Nexus
- Xiaomi
- Huawei
The Recovery installation procedure is the same and can be done using a utility called FASTBOOT .
But for most of you, you will face an obstacle in the form of a closed bootloader.
Open Bootloader
In some brands of Android smartphones and tablets such as HTC, Huawei, Nexus, Sony, you must first unlock the Bootloader before installing CWM or TWRP Recovery. This is necessary because with the Bootloader closed, the device is closed for writing and it will not be possible to make any changes!
- For HTC you need to initially unlock the Bootloader
- For Huawei you need to initially unlock the Bootloader
- For Nexus you need to initially unlock the Bootloader
- For Sony, you need to initially unlock the Bootloader
- For Xiaomi, you need to initially unlock the Bootloader
- For Motorola, you must first unlock the Bootloader
Flashing TWRP or CWM recovery
After you unlock the device, we move on to the final stage (there is a video example below)!
Move the downloaded recovery to the Adb and flash it using the fastboot utility:
fastboot flash recovery Imja_file.img
(whereImja_file.img is the name of the file to be flashed):
Or you can use the proprietary ADB RUN with which you can very easily install Recovery:
Video example of installing Recovery on Sony, HTC, Nexus
Below is a video where you can see the process of installing Recovery using the proprietary ADB RUN program. The process is written for HTC, but the only differences from other manufacturers are in the method of unlocking Bootloader, all other actions are completely identical!
Installing Recovery for devices on Mediatek chips (Lenovo, “Chinese”)
On most devices, chips from Mediatek are installed for a small price; such devices are often called Chinese; I also install these chips on inexpensive models from Lenovo, Miezu, Xiaomi.
- Computer;
- Smartphone or tablet based on Mediatek (MTK) chip;
- Program for firmware SP Flash Tool;
- Installed driver;
- Undamaged MicroUSB cable;
- Recovery file that you personally found on the Internet for your Android device;
- Scatter file is previously prepared (taken from the firmware) or created by you manually.
Method 5: Using SP Flash Tool
The SP Flash Tool program works similarly to QFIL, but flashes devices on the MediaTek platform. The program also allows you to install recovery.
Algorithm of actions:
- Download TWRP recovery.
- If a scatter file was included with the downloaded file, specify the location of the file in the SP Flash Tool. If the scatter file is missing, extract the file from the firmware for your device, and in the Flash Tool, specify the location and path to recovery. How to do this is described in detail here.
3. If you are using Flash Tool version 3, check the box next to DA DL ALL WITH Cheksum .
4. Click on the Download , then connect the switched off device. Wait until the installation is complete.
For a detailed installation process, see the example of Lenovo a328.
Method 6: Installation from system applications
Programs such as Rom ToolBox, ROM Installer and the like offer to install TWRP or other recovery directly from the application. This installation method is outdated and irrelevant. Applications do not always correctly select the correct custom recovery, which is why owners get bricked. Therefore, do not use such harvester applications to install custom recovery.
The Flashify and Rashr applications also offer to install the recommended recovery, which is not worth doing. Use Flashify and Rashr only to flash the TWRP package that you downloaded personally from the official website. Do not use the recovery version that is inside the program.
Transferring applications using system tools
Modern versions of Android support transferring software to a memory card without downloading additional programs, since they have a moving function built into the firmware.
Before transferring applications to a card in a Xiaomi, Samsung or Huawei phone, you should insert a flash card into the slot. Further actions will depend on the brand of the smartphone. For example, in Huawei phones, the procedure for moving programs is quite simple and the algorithm of actions is as follows:
- Go to “Settings” and open the “Applications” tab.
- Find the required application (not system) in the list that opens and click on its icon.
- Click “Change” and set o in the window that appears.
On Samsung phones, you should also first go to “Settings”. The software should then be moved in stages:
Conclusion
The main way to install TWRP is through Fastboot mode. This type of installation is reliable and safe. For devices on the Mediatek platform, Flash Tool is used mainly. If you have root rights, installation is available via Flashify or Rashr. The QFIL utility is used primarily when installing on devices before 2014. Other methods are less relevant and reliable.
Leave comments with your wishes and suggestions for improving the article. Also share the article via social networking buttons to help your friends and acquaintances install TWRP correctly.
Post Views: 1,449
TWRP menu options
Once you open the utility, you will see an interface like the one in the screenshot below.
Now let's take a closer look at each menu.
Here you can install firmware (miui, cyanogenmod, etc.), patches (interface changes, root rights). Click on “Install” to go to the file manager to select the desired folder with the existing data.
To install the firmware patch (ZIP update), simply click on the file. A menu will appear asking you to confirm the archive update operation.
We perform updates by swiping to the right.
The window that appears will have the following icons:
- Add More Zips – installation of an additional update to the ZIP archive.
- Clear Zip Queue - Cancels a previously completed ZIP update.
Various resets are performed in Android sections. The default wipe is available in /cache and /data.
The Advanced Wipe option is responsible for activating additional functionality.
Section for creating slices (backups) of the current state of the Android gadget. The user has the ability to configure which specific partitions need to be saved.
To compress the backup, select the “enable compression” option; validation is available to activate “skip MD5 generation during backup”.
You can find backups along the path SdCard/TWRP/BACKUPS. From there they are available for copying to a PC so that if a problem occurs, you can restore the device again.
It is possible to restore from previously created copies in TWRP.
You can disconnect or connect partitions to Android. This may be required to use different patches that require partition mounting. In this menu you can also connect a gadget in the form of a flash drive; for this, use the “Mount USB Storage (USB OTG)” option.
Settings from different sections of the menu are combined here:
- Interface language.
- Specify screen brightness, time zone, etc.
- Backup verification.
- Skip verification.
- Option to format the selected partition.
- For ZIP updates, perform signature verification.
- Fix Permsissions – work with installing files, installing directories, granting access rights.
- Copy Logo to SD – publishing errors of actions performed on micro SD.
- Partition Sd Card – in order to transfer programs, you can divide the memory card into the necessary sections.
- Terminal Comand – terminal function.
- File Manager is a regular file manager.
- ADB SIDELOAD – performing a sideload with a computer.
- Reload Theme – starts reloading the TWRP theme.
- Download/Bootloader – starts a reboot in Bootloader mode.
- System – just perform a reboot (the normal Android operating mode is launched).
- Recovery – a reverse reboot is performed by the user in the recovery menu.