09/03/2015 windows | for beginners | programs
Windows 10 comes pre-installed with a set of standard applications (programs for the new interface), such as OneNote, calendar and mail, weather, maps and others. However, not all of them can be easily removed: they can be removed from the Start menu, but they are not removed from the “All applications” list, just as there is no “Delete” item in the context menu (for those applications that you installed yourself, such item available). See also: Uninstall Windows 10 programs.
However, uninstalling standard Windows 10 applications is possible using PowerShell commands, which will be demonstrated step by step below. First, about removing built-in programs one by one, and then about how to remove all applications for the new interface (your programs will not be affected) at once. See also: Quickly remove built-in Windows 10 applications using Bulk Crap Uninstaller.
Uninstalling a Single Windows 10 App
First, launch Windows PowerShell, to do this, start typing “powershell” in the search bar in the taskbar, and when the corresponding program is found, right-click on it and select “Run as administrator.”
To remove built-in programs, two built-in PowerShell commands will be used - Get-AppxPackage and Remove-AppxPackage; more on how to use them for this purpose below.
If you type Get-AppxPackage in PowerShell and press Enter, you'll get a complete list of all installed applications (this means only the apps for the new interface, not the standard Windows programs that you can uninstall through Control Panel). However, after entering such a command, the list will not be very convenient for analysis, so I recommend using the following version of the same command: Get-AppxPackage | Select Name, PackageFullName
In this case, we will receive a list of all installed programs that is easy to view, with the short name of the program displayed on the left side and the full name on the right side. It is the full name (PackageFullName) that must be used to remove each of the installed applications.
To remove a specific application, use the command Get-AppxPackage PackageFullName | Remove-AppxPackage
However, instead of writing the full application name, you can use the asterisk character, which replaces any other characters. For example, to remove the People application, we can run the command: Get-AppxPackage *people* | Remove-AppxPackage (in all cases, you can also use the short name from the left side of the table, surrounded by asterisks).
When executing the described commands, applications are removed only for the current user. If you need to remove it for all Windows 10 users, then use the allusers parameter as follows: Get-AppxPackage -allusers PackageFullName | Remove-AppxPackage
Here is a list of application names that you are likely to want to remove (I provide short names that can be used with asterisks at the beginning and end to remove a specific program, as shown above):
- people - People application
- communicationsapps - Calendar and Mail
- zunevideo – Cinema and TV
- 3dbuilder - 3D Builder
- skypeapp - download Skype
- solitaire - Microsoft Solitaire Collection
- officehub - download or improve Office
- xbox - XBOX application
- photos - Photos
- maps — Maps
- calculator — Calculator
- camera — Camera
- alarms — Alarms and clocks
- onenote - OneNote
- bing - Applications News, sports, weather, finance (all at once)
- soundrecorder - Voice recording
- windowsphone - Phone Manager
How to remove built-in applications in Windows 10
PowerShell
This is not a very convenient method, but you will not need the help of third-party tools. Before using it, we recommend that you go to the “Applications and Features” section and see which built-in UWP applications can still be removed using Windows. For example, “ are available for deletion, but “Messages” and “Photos” are not. We remove the available ones using standard tools, and remove the rest via PowerShell. Start the console as an administrator and run the following command to get started:
Get-AppxPackage | Select Name, PackageFullName > “$env:userprofile/Desktop/MyApps.log”
As a result, a text file MyApps.log will be created on the desktop. Containing a list of all built-in applications, or rather, their short and full names. This data is quite enough to delete. Let's say: You want to uninstall the built-in Weather application. Find it in the list, copy its full name and form the following command in PowerShell, where PackageFullName is the full name of the application to be removed:
Remove-AppxPackage PackageFullNam
Press "Enter" and the built-in application will be removed. Be careful, all applications in the list have English names, and their names are preceded by “Microsoft”. The PackageFullName includes the short name, version, and ID. For example, the same Weather application has the short name Microsoft.BingWeather and the full name Microsoft.BingWeather_4.21.2492.0_x86__8wekyb3d8bbwe. This way, you can remove any built-in UWP application, with the exception of some system ones, such as Cortana and Edge, which are an important part of Windows 10.
Debotnet
To remove built-in applications, you can also use an automated tool - the Debotnet utility. It is a set of scripts for managing the security functions of Windows 10. You need to run the utility and select “bloatware” from the menu. Mark unnecessary universal applications in the list and click the “Run” button. The selected applications will be removed silently. Debotnet supports batch uninstallation, including removal of applications such as Windows Store.
CCleaner
The popular cleaner CCleaner does an excellent job of uninstalling pre-installed UWP programs. In this program you need to switch to the “Tools” section. In the “Remove programs” item, there is a list of all applications - both desktop and universal. Select the application with the mouse, click “Uninstall” and confirm the action.
O&O AppBuster
More convenient and functional in terms of uninstalling integrated UWP programs is the specialized portable utility O&O AppBuster. The tool's capabilities include sorting staff programs into groups. Resetting them to their default state, obtaining information about them, creating system restore points and installing already deleted UWP programs. Let's see how to remove built-in applications in Windows 10 using it.
After launching the program, mark the applications you no longer need in the list and click “Remove”. A window will appear in which you will be asked to indicate whether you want to delete applications only for the current user or all users. A tougher “Machine” mode is also available. In which applications are completely removed from the computer. Confirm the uninstallation by clicking “OK”. After which the selected applications will be deleted.
Note: If the program you need is not in the list, select System Apps from the View drop-down menu.
10AppsManager
A simple portable tool. Allowing you to remove 34 built-in Windows 10 applications individually or all at once. To uninstall the selected program, just click on its icon with the mouse. Next, confirm the action. To remove all supported programs, click “Remove All”. Unfortunately, 10AppsManager does not mark deleted applications in any way. To avoid confusion, their names will have to be either written down or remembered.
Windows 10 Default App Remover
A utility similar to the previous tool, only with an even simpler and more minimalistic interface. It offers the choice of removing 23 UWP programs, including the Windows Store. Requires confirmation before starting the uninstallation procedure. As with 10AppsManager, Windows 10 Default App Remover does not mark uninstalled apps.
W.P.D.
Last on our list of tools is the WPD tweaker. It is designed to manage security and privacy features in Windows 10. Additional features of the utility include removing pre-installed applications. After launching the program, select the “Applications” module in the main window, select unnecessary applications with the mouse and click “Remove selected”. That's all, the built-in software will be removed for all users.
How to remove all standard applications
If you need to remove all existing built-in applications, you can use the Get-AppxPackage | Remove-AppxPackage without any additional parameters (although you can also use the allusers parameter, as demonstrated earlier, to remove all applications for all users).
However, in this case, I recommend being careful, since the list of standard applications also includes the Windows 10 store and some system applications that ensure the correct operation of all others. During the uninstallation process, you may receive error messages, but the applications will still be uninstalled (except for the Edge browser and some system applications).
Uninstalling games through Programs and Features
This method allows you to remove an application that was not installed from the Microsoft Store (Windows Store). Removal through Programs and Features is suitable for applications and games installed from a DVD, flash drive or other external media.
- Press the Windows on your keyboard or in the lower left corner of the screen.
- Go to Settings . On the Settings page, enter Programs and Features .
- Open Programs and Features, click on the desired application in the list of available programs.
- At the top of the screen, click on the inscription “Delete/Change” . Some apps also have a Restore button. It allows you to restore damaged or missing files without reinstalling if a game or application does not start or does not work correctly.
- Select Uninstall and follow the onscreen instructions to uninstall the application.
This removal method is recommended for use because it erases all program files and data about it without leaving “garbage” in the system. If you choose to restore the program, you will need to insert the disk or external media from which the installation was performed.
Standard Windows 10 functionality
There are two more ways to remove an unnecessary application in Windows 10 if the methods described above for some reason are not suitable or do not help. In the first case, you will have to go to Settings, in the second - add the application to the main screen, and then remove it from the context menu.
Uninstall via the options menu:
- Press the Windows on your keyboard or home screen.
- Go to Settings .
- Open the System .
- Go to the Applications and Features .
- Find the program you want to remove and click on the Remove .
- Follow the instructions on the screen and wait until the program is uninstalled.
Removing from the main screen:
- Add an application to the home screen (RMB -> Advanced -> Pin to taskbar).
- Right-click on the application icon on the main screen and select Delete .
- Follow the onscreen instructions to complete the process.
All these methods work only with those applications that the user himself has installed. There is a problem with pre-installed applications in Windows 10; you need to remove them according to separate instructions.
Removing pre-installed Windows 10 apps
The hardest thing about Windows 10 is to get rid of the system pre-installed applications. These are built-in universal programs that are present in every system build initially and are part of it itself: Calculator, Mail, Calendar. At the same time, other built-in programs are removed without problems: Skype, Tips, News, Weather.
Removing built-in programs is done using PowerShell :
- Run PowerShell as an administrator using the Win+X or search results.
- Enter the command Get-AppxPackage *program* | Remove-AppxPackage , where instead of program is the name of the application to be removed.
Each “uninstallable” application in Windows 10 has its own name, which must be pasted into PowerShell:
- 3D Builder - *3dbuilder*
- Calculator — *calculator*
- Camera - *camera*
- Maps - *maps*
- OneNote - *onenote*
- Paint 3D - *mspaint*
- View 3D - *3dviewer*
- Xbox - *xbox*
- Alarms and clocks - *alarms*
- Voice recording – *soundrecorder*
- Cinema and T – *zunevideo*
- People - *people*
- Music Groove - *zunemusic*
- Mail and Calendar - *communicationsapps*
- Messages - *messaging*
- Photos – *photos*
Various error messages may appear while PowerShell is running. This is normal, “uninstallable” system apps will still be removed from the device.
Removing stock Windows 10 applications can damage the system and cause problems with other applications. Before removing pre-installed programs, you should make a system restore point. This will allow you to rollback all changes made if something goes wrong.
How to restore (or reinstall) all built-in applications
If the results of the previous steps did not please you, then you can also reinstall all built-in Windows 10 applications using the PowerShell command:
Get-AppxPackage -allusers | foreach {Add-AppxPackage -register "$($_.InstallLocation)\appxmanifest.xml" -DisableDevelopmentMode}
Well, in conclusion, about where the shortcuts for programs from the “All Programs” list are stored, otherwise I had to answer several times already: press the Windows + R keys and enter: shell:appsfolder then click OK and you will be taken to that very folder.
PowerShell
Removing pre-installed software is not provided in either the new or classic system control panels. You can perform this operation using built-in Windows tools only using the command line shell. Before following the steps below, our experts recommend creating a restore point so you can return to your original state.
Call the extended Start menu with the keyboard shortcut “Win + X”. Launch the default PowerShell in elevated privilege mode.
To get a list of pre-installed applications, use the “Get-AppxPackage” cmdlet. For each program, it displays a list of one and a half dozen parameters. It only takes two to remove. At the prompt, type the command with filtering options “Get-AppxPackage | Select Name, PackageFullName". Press the Enter key on the PC keyboard to start its execution.
We get a list in the PowerShell window, divided into two columns. The first contains a short name, the second - the full name.
We copy the resulting list of programs into the text editor Notepad. In it you can pre-edit commands by substituting the name of the packages.
The following screenshot shows an example of uninstalling the Maps app. At the prompt, type “Get-AppxPackage -allusers Microsoft.WindowsMaps | Remove-AppxPackage". The "-allusers" option is optional and can be omitted. With its help, the application is deleted for all registered users of the system. The name “Microsoft.WindowsMaps” is taken from the “Name” column of the list obtained earlier. It can be shortened by removing the company name and surrounding it with asterisks on both sides. The command in this case will look like: “Get-AppxPackage -allusers *WindowsMaps* | Remove-AppxPackage".
The Remote-ApppxPackage cmdlet can be used separately to remove programs. In this case, you need to enter a long name taken from the “PackageFullName” column. The following screenshot shows an example of uninstalling the Your Phone app.
O&O AppBuster is a free utility for uninstalling Windows 10 applications
A small free program called O&O AppBuster allows you to remove built-in Windows 10 applications from both Microsoft and third-party developers, and, if necessary, reinstall those that are included with the OS.
Learn more about using the utility and its capabilities in the review Removing built-in Windows 10 applications in O&O AppBuster.
Remove unwanted apps with Remove Windows 10 Bloat
User matthewjberger posted code on GitHub for a batch file with a “.bat” extension that removes pre-installed Windows 10 apps, as well as OneDrive, OneNote, WindowsPhone, 3D Builder and other system components.
Follow these steps:
- Follow the link to the page: https://gist.github.com/matthewjberger/2f4295887d6cb5738fa34e597f457b7f.
- Click on the "Download ZIP" button.
- Unzip the archive on your computer.
- The folder contains the file “Remove-Windows10-Bloat” with the extension “bat”.
- Right-click on the “Remove-Windows10-Bloat.bat” file and select “Run as administrator” from the context menu.
- The Command Prompt window will begin uninstalling Windows applications and components. Wait until the operation completes.
- In the command line interpreter window you will see the message: “To continue, press any key...”.
- Press any keyboard key, Explorer will restart, and then the Command Prompt will close.
- Restart your computer.
Uninstalling an application in System Settings
See also: “How to rename a user folder in Windows 10”
The first method is implemented through system parameters.
- Right-click on the Start menu icon (or use the Win+X keyboard shortcut) and select “Settings”. You can also use the Win+I hotkeys.
- A window with parameters will open, in which we click on the “Applications” section.
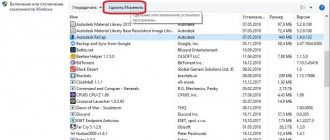
- In the new window, in the list on the left, click on the “Applications and Features” subsection, after which a list of programs installed on the computer will be displayed on the right side of the window. All that remains to be done is to select the unnecessary one and click on the “Delete” button.
- After confirming the action by clicking on another “Delete” button that appears, the application will be removed from the system.
However, for many applications built into the top ten, such a button will be inactive, which means that they cannot be removed so easily.
In such cases, you will have to use another method.
By the way, it will probably be more familiar and convenient for some users to remove programs through the Control Panel, in the “Programs and Features” section.
Here everything is presented in a more familiar form, to which we are already accustomed when working in earlier versions of the OS.
List of applications available for removal
And now, as promised, I provide a list of ready-made commands for removing unnecessary built-in applications. Removing them does not cause system crashes (well... it shouldn't). Search by scrolling the mouse or using the keyboard shortcut Ctrl + F
3D Builder get-appxpackage *3dbuilder* | remove-appxpackage
Alarms and clocks get-appxpackage *alarms* | remove-appxpackage
Mail and Calendar get-appxpackage *communicationsapps* | remove-appxpackage
Calculator get-appxpackage *calculator* | remove-appxpackage
Camera get-appxpackage *camera* | remove-appxpackage
Feedback Center get-appxpackage *feedback* | remove-appxpackage
Get Office get-appxpackage *officehub* | remove-appxpackage
Tips get-appxpackage *getstarted* | remove-appxpackage
Skype get-appxpackage *skypeapp* | remove-appxpackage
Music Groove get-appxpackage *zunemusic* | remove-appxpackage
Groove Music and Movies and TV (together) get-appxpackage *zune* | remove-appxpackage
Maps get-appxpackage *maps* | remove-appxpackage
Microsoft Solitaire Collection get-appxpackage *solitaire* | remove-appxpackage
Wallet get-appxpackage *wallet* | remove-appxpackage
Microsoft Wi-Fi get-appxpackage *connectivitystore* | remove-appxpackage
Money get-appxpackage *bingfinance* | remove-appxpackage
Money, News, Sports and Weather at once: get-appxpackage *bing* | remove-appxpackage
Cinema and TV get-appxpackage *zunevideo* | remove-appxpackage
News get-appxpackage *bingnews* | remove-appxpackage
OneNote get-appxpackage *onenote* | remove-appxpackage
Paint 3D get-appxpackage *mspaint* | remove-appxpackage
People get-appxpackage *people* | remove-appxpackage
Phone get-appxpackage *commsphone* | remove-appxpackage
Photos get-appxpackage *photos* | remove-appxpackage
Sports get-appxpackage *bingsports* | remove-appxpackage
Sticky Notes get-appxpackage *sticky* | remove-appxpackage
View 3D get-appxpackage *3d* | remove-appxpackage
Voice recording get-appxpackage *soundrecorder* | remove-appxpackage
Weather get-appxpackage *bingweather* | remove-appxpackage
Store get-appxpackage *windowsstore* | remove-appxpackage
Xbox get-appxpackage *xbox* | remove-appxpackage
Cortana ( but better not ) get-appxpackage -name “Microsoft.Windows.Cortana” | remove-appxpackage
If you don't find something, copy the name from the column on the right and paste it into the command. But I repeat, it’s better to think twice than to try to restore what was done later. And in case of errors, do not forget to add the -allusers for settings for other accounts. But that is not all. If you are rejected and/or do not want these programs back, read on.
Delete an app via Microsoft Store
The updated Microsoft Store, which replaced the Windows Store after rebranding, is a convenient tool for downloading and deleting games. If the program was downloaded through the application store, you should delete it in the same way.
Before deleting any applications (Skype, iTunes, games), you should remember that when you reinstall (restore) the saved data and game information may disappear. You should have backup copies of important data.
To remove an application from the Microsoft (Windows) Store:
- Press the Windows
on your keyboard or click on the Windows icon in the lower left corner of the home screen. - Select All applications
and find the game/program you want to remove. - The Add/Remove Programs window will open. Follow the instructions on the screen.
The removed application may be required again. To reinstall you need:
- Go to the Microsoft Store.
- Go to Profile
by clicking on the icon in the upper right corner of the screen. - Go to the My Library
. - Find the game or program you need in the list of available downloads.
- To download, click on the arrow icon to the right of the application name.
Once deleted, the application information and settings will be reset. Game progress may also be reset if there is no synchronization with the game server.
