What is a virtual machine?
Virtual machines are programs that create a software environment that simulates the desired hardware. An operating system can be installed into this environment and can then be fully used. We call such systems guest systems, while the main system installed on the computer is called the host.
Previously, virtual machines did all the work themselves, at the software level, and it is clear that all this worked very slowly. But then processors began to support hardware virtualization, which significantly speeds up the operation of the guest operating system. These are technologies such as AMD-V from AMD or Intel VT-x from Intel. However, these technologies may be disabled by default in the BIOS.
In addition to virtual machines that completely emulate the operation of a computer, virtualization for Linux includes containers, for example, LXC or OpenVZ. Next we will look at virtual machines for Linux that you can use to install your systems.
Virtual machines for Linux vs Dual Boot mode
Earlier, we already talked about how you can install Linux next to Windows 10 on one device. This is done very simply. But what should you do if you want to run Windows directly in the Linux environment and at the same time have everything run smoothly and quickly? Let's figure it out. The so-called virtual machines for Linux will help us with this.
Are you running Linux - perhaps Linux Mint or Ubuntu - alongside Windows? Or do you have two or more Linux distributions installed on your computer? How does this all work for you? For some, this dynamic works well and quite quickly. For others, rebooting may be a problem.
Rebooting time, selecting a different OS on the GRUB bootloader screen, and then booting can be problematic. This is especially true on systems where Linux is installed next to Windows.
On slower systems or systems with many applications trying to run when Windows boots, you may wait 5-15 minutes before you can start working. Install an antivirus solution and you'll boot even slower. But this applies to older devices, because on new ones everything works very quickly.
However, running your second OS in a virtual machine may solve this problem. Linux virtual machines are very useful in many situations and can greatly improve productivity.
VirtualBox
VirtualBox is a universal Linux virtualization software that supports other operating systems, including Windows and MacOS. You can install almost any system here, except, of course, systems designed for devices on an ARM chip. All installed virtual machines are stored in files that contain disk images. This makes it very easy to back them up or transfer them to another computer by simply copying the machine file.
VirtualBox supports both 32 and 64 bit systems and you can install not only a Linux distribution, but also Windows or even MacOS. All systems will work perfectly. When creating a virtual machine, you can select a guest OS profile, which will automatically set the correct memory, processor and video card parameters.
In addition to virtualization itself, VirtualBox also supports additional functions, such as recording video from the virtual machine screen, creating system snapshots for quick recovery, and creating a virtual network between multiple machines. In addition, if you install guest OS add-ons, you can set up a shared clipboard between the host and guest systems, transfer files between them, or even integrate guest system program windows into the main one.
We can say that this is the best virtual machine for Linux, it offers all the necessary features, and at the same time is quite easy to use.
Installing Linux on a VirtualBox virtual machine
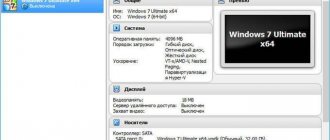
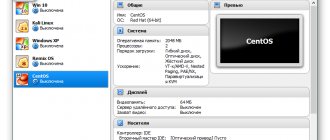
VirtualBox (Oracle VM VirtualBox) is a free virtualization software for Microsoft Windows, Linux, FreeBSD, Mac OS X, Solaris/OpenSolaris, ReactOS, DOS and others. After the release of the first publicly available version of VirtualBox in 2007, in a relatively short time, this software product became one of the most popular virtualization packages due to not only being free, but also highly reliable, easy to use, support for many national languages, and a good help system (at the time of writing articles - only in English) and cross-platform.To put it simply, VirtualBox is a set of application programs, system services and drivers that emulate new computer hardware in the operating system environment where VirtualBox runs. On a virtual computer (virtual machine, abbreviated as VM) created in its environment, you can install almost any operating system (guest OS) and use it in parallel with the main one. So, for example, on a real Windows computer you can install a virtual machine (VM) with a Linux operating system and use both operating systems simultaneously. In addition, you can configure interaction between these systems over a local network, data exchange through removable media, shared folders, etc. Also, the current state of the virtual machine (and the state of the operating system installed on it) can be recorded, and, if necessary, in any point in time - perform a full rollback to this state.
This article discusses an example of installing and configuring VirtualBox in a Windows 7 environment and installing Linux Mageia on a new virtual machine.
Installing Oracle VM Virtualbox on Windows 7
The latest version of VirtualBox for a specific operating system can be downloaded from the project download page.
The VirtualBox installer for Windows operating systems is an executable file that, in Windows 7, must be run as an administrator. The standard software installation will begin:
During the further installation of VirtualBox, a warning will be issued:
This means that when installing VirtualBox network drivers, current network connections will be reset and a temporary disconnection from the network will occur. If, for example, in parallel with the installation, data is being exchanged with a network drive, it will fail with an error. If you are not working on the network, then briefly disabling the adapters will not have any effect, and you should allow the installation to continue by clicking Yes
. Otherwise, you need to shut down the network resources first. Also, Windows security may request confirmation to allow the installation of new software:
You need to check the box “Always trust Oracle Corporation software” and click the Install
.
After the installation is complete, the main VirtualBox software module will launch:
Installing Linux on an Oracle VM Virtualbox virtual machine
The process of installing Linux or any other OS consists of two parts:
— creation of a virtual machine for the guest operating system selected for installation.
— determining the source with the installation distribution and starting the installation process.
The process of installing a new OS on a virtual machine is practically no different from installing on a real one - you boot the VM from the installation disk and then follow the instructions of the installer. The boot source is determined by the virtual machine settings (By default, the boot order is as follows - floppy disk, CD-ROM, hard drive, Network).
When you launch VirtualBox for the first time, the main program window is displayed with a welcome message and an active “Create” button to create a new VM:
In general, for a general acquaintance with the guest operating system, which will be Linux Mageia, no mandatory settings are required. You can immediately start creating a virtual machine - click the Create
. After which the process of creating a new virtual machine will start and you will need to determine its main parameters:
— name of the virtual machine. In accordance with it, a directory with virtual machine files will be created. By default, this is a subdirectory in “C:\Users\User\VirtualBox VMs\”
.
— the type of operating system that will be installed on the virtual machine. In this case - Linux
— OS version. In this case, Mageia is a fork (branches) of Linux Mandriva. We choose - Mandriva.
The remaining requested parameters can be left by default, since they are already selected based on the hardware configuration of the real machine and in accordance with the type and version of the operating system installed on the virtual machine. But if necessary, you can, for example, increase the amount of RAM allocated to the VM, the size and type of disk.
Here is an example of allocating 1024 MB of RAM to a virtual machine, instead of the recommended 512 MB. When allocating memory, you need to take into account its actual size and the minimum requirements of the guest OS. If you have difficulty selecting this item, use the values recommended by the program. Improper memory allocation between the real and virtual machines can result in poor performance for both.
A virtual machine's hard disk (virtual hard disk) can be created as either dynamic or fixed. A dynamic disk is created not for the entire specified volume, but for a part of it, and increases as needed during its installation or operation, which allows saving space on the real hard drive. From the point of view of maximum performance of the guest operating system, it is better to choose a fixed virtual hard disk.
Physically, a virtual hard disk is a file on a real file system. This file can be presented in several formats:
Choosing a format different from the recommended one makes sense if you plan to use a virtual machine created using VirtualBox in the environment of other virtualization software products (VMWare, MS Virtual PC, QEMU).
Most of the settings that are defined during the creation of a new virtual machine can be changed after its creation is complete:
The Configure button has become active on the toolbar
.
Fine-tuning a virtual machine is a separate topic, and at the stage of getting to know the guest operating system there is no particular need for them. Therefore, you can immediately start launching the VM - click the Launch
.
At startup you will see a message about using Automatic Keyboard Capture.
When switching to a virtual machine window, keyboard input will be performed for it, and not for real applications. By default, right Ctrl is used to switch keyboard input between real and virtual machine windows.
Since the guest system is not yet installed, you will need to boot from the installation disk. You can use a regular CD/DVD drive with pre-prepared bootable installation media, or an image of this disk. VirtualBox allows you to connect an image file to a virtual machine as a virtual drive with media. In most cases, the contents of installation disks are downloaded as image files in ISO-9660 format (files with the extension iso
). VirtualBox allows you to do without burning the image to a CD, and connect such a file directly to the virtual machine as a virtual drive with installed media based on the contents of the iso image.
Image file Mageia-2-i586-DVD.iso
will be connected as a virtual drive with the Mageia-2 installation disk.
Clicking Continue
will boot from the virtual drive and display the Mageia bootloader menu
To continue the installation, select Install Mageia 2
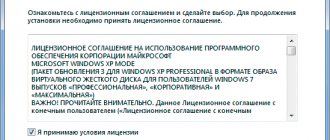
. During the installation process, you can select the language to use, you need to confirm your acceptance of the license agreement, select the language for the installed system (usually Europe - Russian) and the keyboard layout. Then the disk is partitioned, partitions are formatted, additional installation sources are identified, and the user is asked to select a graphical desktop environment.
The choice of graphical environment is determined, as a rule, by personal preferences and the purpose of the installed system. The default environment is KDE
(short for
K Desktop Environment
).
The most common graphical desktops on Linux are Gnome
and
KDE
. Externally, they are similar in many ways, but it is believed that KDE is a more promising and convenient, as well as more complex to configure, and more demanding on hardware, graphical environment. You can start getting acquainted with Linux in the KDE environment. Later, after installing the system, you can change the environment or even refuse to launch the graphical shell, for example, by changing the system run level.
Once the graphical environment has been determined, Mageia installation will begin. The installation progress is accompanied by comments and the name of the current stage is highlighted on the left side of the screen. It should be noted that Linux Mageia, as a branch of Linux Mandriva, is very similar to its predecessor, is well Russified and is one of the most understandable Linux distributions, so installing the system, as a rule, does not cause any difficulties even when you first get acquainted with it.
During the installation process, you will need to set a password for the system administrator ( root
), at least one regular user name and password, and display settings. Finally, once the installation is complete, a summary of the installed major components and hardware is displayed.
All customizable settings can be changed after installation is complete. If you wish and have Internet access, you can also download and install Mageia updates.
After completing the Linux installation, it is advisable to perform some steps that can greatly simplify the development of the new OS in the future. An extremely useful feature of VirtualBox is the ability to save the current state of the virtual machine (the ability to create VM snapshots) and return it to the state at the time the snapshot was taken. However, this feature is not a feature of VirtualBox, and almost all virtualization systems provide the ability to create snapshots of the system and restore the virtual machine from the snapshot. There can be many snapshots, and restoring the state of a virtual machine can be performed using any of them. For those cases when the system is rendered inoperative (due to incorrect configuration settings, for example), the presence of snapshots allows you to literally bring the virtual machine back to life with just one click. For a novice Linux user, the ability to rollback a virtual machine like this can save a significant amount of time and nerves. It is advisable to take a snapshot of the newly installed “clean” system before changing Linux settings. A picture is taken through the Virtualbox menu “Machine” - “Take a picture” or “Host + T” (right CTRL + T). To manage snapshots of the selected vehicle, use the “Pictures” button displayed in the upper right corner of the screen.
Installed with default settings, the system is usually ready to use for most home users. In general, the KDE graphical environment is intuitive, and in many ways similar to the Desktop of the Windows family of operating systems. Some differences, however, are significant. In Linux, you can simultaneously use 4 virtual desktops and so-called “rooms” - a means of grouping similar applications. The user has the ability to create a separate work environment for each desktop, and switch between them as needed by clicking on the icon in the taskbar. As for rooms, at the moment this tool is at the stage of development and, moreover, for a novice Linux user, it is of no practical interest.
In the lower left corner there is an application launch button with the Mageia logo, the purpose of which is the same as the Start button on the Windows desktop. The menu called up when you press the button consists of three parts:
— Latest apps
. Links to recently used applications.
— All applications
. Here are links to launch all applications installed on the system for a given user.
— Actions
. A link to execute a separate command, a “Favorites” folder, links to recently opened documents and applications.
To change system settings, parameters common to all users, install and uninstall applications, use the Mageia Control Center (Mageia Control Center)
.
When running it, you will need to have administrative privileges - enter the root
:
A virtual machine can be integrated into an existing local network, providing access to its resources in the same way as to the resources of a real machine. However, some settings need to be changed in this case. And this is not so much about changing the security settings of the installed operating system, but about providing network access to its network resources. The simplest and most effective way to solve this problem is to change the network settings so that the virtual machine has an IP address from the range of the real local network, and in the VirtualBox connection type settings for the virtual network adapter, instead of the address translation (NAT) mode, the network bridge mode is used :
In this mode, all network frames created in the virtual environment will be directly broadcast to the real adapter. All that remains is to assign an IP address from the local network range to the virtual adapter, either automatically if there is a DHCP server, or manually. This can be done using the Mageia Control Center, under Network and Internet
—
Network center
. Select the network adapter and click the “Configure” button:
Other network services can, if necessary, be installed using the Mageia Control Center - section "Manage Programs" and allow network access to them through the settings in the section "Security" - "Setting up a personal firewall"
If you want to help develop the project, you can use the “Share” button for your social network
Top of page | To the main page of the site.
VMWare
Unlike VirtualBox, which is open source, it is a commercial product, the full version of which costs money. But for home use there is a simplified version that is completely free to use.
VMWare has almost all the same features as VirtualBox, in some tests it performs better than the first option, but overall their performance is the same. It is also possible to organize a network between virtual machines, combine the clipboard and transfer files, but there is no video recording.
A notable feature of VMWare is that for some systems, automatic installation scripts have been developed and are already ready, which allow you to install the system automatically and without specifying too many parameters. This can be very convenient in some situations.
More theory and information
First, a few words about virtualization in general. What is it and what is it eaten with, and how does it work.
Everyone, I think, knows that a computer has certain capacities that are not always used to 100% of their capabilities and, in a sense, are idle, i.e. remain free (unused) until a task comes along where these resources can be used.
So, from these unused resources you can, so to speak, bite off a piece in order to imitate the so-called virtual computer (machine). We choose how much RAM we want to use, how much processor power, how much free disk space and, voila, with the help of a virtualizer (special program) we get, so to speak, a computer within a computer with the configuration we set.
The resulting virtual computer turns on, turns off, reboots, boots in exactly the same way, you can install an operating system and programs in it. In short, it has almost all the same properties as a real one - the only difference is that it does not take up space in the apartment and is, in fact, software, not hardware.
We can say that a virtual machine is a resource shell for the guest OS installed in it (in the sense that it (the virtual operating system) is installed inside an already existing one and is therefore called a guest).
In general, my words may not look entirely clear, and therefore I suggest you move on to practice and, I think, everything will immediately become obvious to you 
Qemu
If you want to run not the usual x86 operating system, but a system for ARM devices, for example, Android, Raspbian or RISC OS, then the two previous Linux virtual machines will not help you. Only Qemu can handle this task.
Qemu is short for Quick Emulator. This is a very easy to configure console utility, but it allows you to do many interesting things at the VirtualBox level, you can run any operating systems, including ARM, you can install the OS on a real hard drive or to a file, use hardware acceleration and even automatically download some distributions via the Internet.
Despite its name, it is a very powerful tool for working with virtualization on Linux; to install Qemu on Ubuntu, run:
sudo apt install qemu qemu-kvm libvirt-bin
Creating a virtual machine in VirtualBox
You have already seen the main window of the program, so now we need to click the “Create” button:
The next window will prompt you to select the operating system, its type and name (at your discretion):
But we will go further and click on the “Expert Mode” button in order to immediately set the amount of RAM in order to understand how much our system will consume.
In order not to suffer too much (remember that we are biting off real resources?), I recommend sticking to about a quarter (give or take) of the total computer memory:
The next stage, which will undoubtedly appear after you click the “Create” button, will ask you what kind of virtual hard disk you would like to have. Here and now I will not describe the types and nuances, I simply recommend, for starters, making the disk fixed (if space allows) in size, say, 64 GB and VDI format:
If you are interested in learning about other formats, as well as why you chose this particular size, format (fixed) and other nuances, then feel free to ask them in the comments.
In the upper right corner you can select the place where the disk of this very disk will be located, so I recommend placing it where you have enough space, resource, speed and everything else, i.e. a virtual disk, as you remember, occupies quite physical place:
The machine itself, formally, has been created for the sim, but it still needs to be configured and, as in the case of a real computer, the operating system must be installed on it, which, in our case, is Linux Mint.
Let's get started.
KVM
KVM or fully Kernel-based Virtual Machine (kernel-based virtual machine) is a kernel-level implementation of a virtualization platform that provides additional capabilities to Qemu and very high speed by running directly in the kernel.
All this means that KVM is faster and more stable than VirtualBox, but KVM is much more difficult to configure and maintain. KVM technology is a very popular solution for hosting virtual machines, including on many servers on the Internet.
To start using KVM, you first need to check whether your hardware supports hardware acceleration; to do this, use the cpu-checker utility. If everything is supported then you can proceed to install KVM:
sudo apt-get install qemu-kvm libvirt-bin virtinst bridge-utils virt-manager
Once installed, you will be able to access kvm virtual machines using the virtual machine manager that will appear in the menu. Other Linux virtualization systems, such as XEN, are also managed using this manager.
Downloading and installing VirtualBox
You can download the above from the developer’s website or from this link.
First, which is logical, we need to install the virtualizer; to do this, run the downloaded .exe file, after unpacking the archive. The installation is typical and simple and I will not dwell on it, fortunately it consists of the points “Next-next” and again “Next”.
It is possible that at one stage you will be asked to install a network interface or some other driver. Agree:
After launch, it would be very logical to launch the VirtualBox virtualizer using the appropriate shortcut. The program at the time of updating the article will look something like this:
Now let’s move on to the initial setup and use of this wonderful miracle, but first of all I must tell you something that you must understand here and further.
XEN
This is another virtualization platform for Linux that is very similar to KVM. But there are some differences. Like KVM, it supports hardware acceleration, many architectures, including ARM, as well as running various guest systems, including Windows. But the main difference is that KVM is built into the Linux kernel by default, and for Xen to work you need a specially built kernel that supports it.
Among other features of Xen, it can be noted that the system will work quite quickly even without hardware acceleration if you run Linux. Otherwise, these Linux virtualization systems,
Setting up Bridged Network.
By default, all created virtual machines will be on the default KVM network, which is behind NAT. It can be removed:
# virsh net-destroy default# virsh net-undefine default# service libvirtd restart
A list of all networks for KVM can be obtained with the command:
# net-list —all
In order for the created virtual machines to be on the same network, you need to configure a network bridge.
Let's make sure the bridge module is loaded:
# modinfo bridge
If not, then we will download:
# modprobe bridge
Ubuntu/Debian.
Install the bridge-utils package and edit the network interface settings:
# apt install bridge-utils# cat /etc/network/interfaces
For static addresses:
iface ens3 inet manualauto br0iface br0 inet static address 10.1.1.76 netmask 255.255.255.0 gateway 10.1.1.1 dns-nameservers 10.10.12.2 10.10.12.3 dns-search domain.com bridge_ports ens3 bridge_stp off bridge_fd 0 bridge_maxwait 0
For DHCP:
iface ens3 inet manualauto br0iface br0 inet dhcp bridge_ports ens3 bridge_stp off bridge_fd 0 bridge_maxwait 0
We reboot the interface and reload the daemon:
# ifdown br0 && ifup br0# systemctl restart networking
Centos.
# yum install bridge-utils -y
For configuration, you can use the text-graphical interface of the network manager:
# nmtui
or correct the interface configuration manually. Here is the config of the interface to which the bridge will be connected as follows:
# cat /etc/sysconfig/network-scripts/ifcfg-eno1HWADDR=00:25:90:5B:22:10TYPE=EthernetBOOTPROTO=noneUUID=59eddc7c-c439-33bf-beca-5222a4a0331eDEVICE=»eno1″ONBOOT=yesNM_CONTROLLED="no "BRIDGE=br0
The bridge itself:
# cat /etc/sysconfig/network-scripts/ifcfg-br0
For static addresses:
DEVICE=»br0″BOOTPROTO=»static»IPADDR=»10.1.1.76″NETMASK=»255.255.255.0″GATEWAY=»10.1.1.76″DNS1=10.1.1.2DNS2=10.1.1.3ONBOOT=»yes»TYPE=»Bridge »
For DHCP:
DEVICE= “br0″ONBOOT=yesTYPE=”Bridge”BOOTPROTO=”dhcp”ONBOOT=”yes”
If the interface is not managed by the network manager, you should add the line:
NM_CONTROLLED="no"
We reboot the interface and reload the daemon:
# ifdown br0 && ifup br0# systemctl restart networking
conclusions
In this article, we looked at the best virtual machines for Linux. As you can see, virtualization on Linux is developing very quickly and there are quite a lot of solutions that you could use on your system. What virtual machine or virtualization system are you using? Write in the comments!
Related posts:
- Which is better Virtualbox or Vmware
What will we use?
For all of the above, we will need, in fact, a computer, a virtualizer program, as well as a downloaded image (if you still have a CD/DVD, then of course that will do) with a Linux or Windows installation distribution.
If we talk about virtualizers:
- In fact, there are a great many virtualization programs, both paid and free. It just so happened that my (and many) choice fell on VirtualBox, which I have been using almost all my life, and therefore in this article we will talk about it;
If we talk about Linux distributions:
- In general, the choice of distribution is a matter of taste for everyone. There are a lot of debates on this topic on the Internet, even though all Linux users represent a kind of anti-Windows community;
- In my case, the choice fell on Linux Mint. Beginners can try Ubuntu. There are many options for every taste - choose yours and go ahead.
That is, at the moment you should have downloaded the Linux Mint distribution kit, the VirtualBox virtualizer and the computer, in fact, before your eyes.
But let's take things in order.
Preparing to install KVM
Well, we’ll start with preparation; first you need to make sure that your processor supports hardware virtualization. To do this, run the command:
grep -Eoc '(vmx|svm)' /proc/cpuinfo
If your processor supports hardware virtualization, you will see a number that will be greater than zero. And if the output is zero (0), it will mean that your processor does not support hardware virtualization. That is, this command should display the number of cores of your processor.
It is also possible that you need to enable hardware virtualization in the BIOS. To check whether the virtualization option is enabled in the BIOS, let's install the “kvm-ok” utility:
sudo apt update sudo apt install cpu-checker
After installation, you need to run kvm-ok with the command:
kvm-ok
If virtualization is enabled in the BIOS, you will receive something like the following output:
INFO: /dev/kvm exists KVM acceleration can be used
And if virtualization is disabled, you need to enable it; in this case, it is recommended to refer to the documentation for the motherboard if you do not know how to enable it yourself.