Recommendations
If you are reinstalling Windows on an old computer, I recommend backing up your files and settings. Prepare everything you need to install Windows in advance.
If you purchased Windows on DVD and your computer or laptop has a DVD drive, then you do not need this article, skip to the next article, “Setting up the BIOS.”
What is it and where to get it
Essentially it's just a CD with operating system installation files. This is not a ready-made OS, but after unpacking and installing them on your computer, it is ready to go.
A ready-made CD can be purchased at the store, or you can burn Windows 7 to a disc yourself from an operating system image downloaded from the Internet.
- LiveJournal
- Blogger
Selecting boot media
If you have a Windows installation disk, but your computer or laptop does not have a DVD drive, then you will need a computer with a DVD drive to create a bootable USB flash drive from the installation disk. Proceed to the "Creating a disk image" section. Sandisk Cruzer If you received Windows as an image file, you need to create a boot disk or flash drive. If your computer or laptop has a DVD drive, it is easier and more reliable to use a DVD. Prepare 2-3 blank DVD-R 16x discs and proceed to the “Creating a bootable disc” section.
If your computer or laptop does not have a DVD drive or you are too lazy to go to the store to buy discs, then take a flash drive with a capacity of 4 GB or more and proceed to the section “Creating a bootable flash drive.”
Installing and activating the UltraIso application
Before burning the image, users need to install the program on their personal computer. The process is standard, just follow the Windows Installer instructions:
- Unzip the downloaded file using an archiver such as WinRar.
- Launch the exe file.
- Allow me to make changes to the operating system.
- Click Next.
- Carefully read all clauses of the user license agreement. Check the box next to “I agree.”
- Specify the directory where the application will be installed and the name of the folder in the Start menu.
- Click "Next" and begin the installation.
- Once the UltraIso program is installed, it must be launched.
- Now the application needs to be activated for it to work smoothly. Click on the button to enter the registration code.
- Open the text file from the archive.
- Copy any username and password into the appropriate fields in the registration window and click “Ok”.
The following describes how to burn an image using the installed and activated program.
Creating a disk image
We use the Daemon Tools program to create an image file from the Windows installation disk, which will later be needed to create a bootable USB flash drive. You can download it at the end of the article in the “Links” section.
3.1. Installing Daemon Tools
Installing the program is quite simple. Run the installation file and click Next several times.
3.2. Creating an image in Daemon Tools
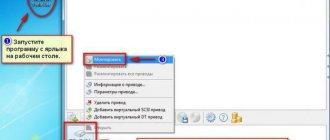
Insert the Windows installation disc into your DVD drive and close the AutoPlay window if it appears. Find the “DAEMON Tools Lite” shortcut on your desktop or START menu and launch the program. Click on the floppy disk icon “Create a disk image.”
Make sure that the drive you inserted the Windows installation disc into is selected. The drive letter in Windows Explorer and in the program window must match.
Uncheck the “Add to Image Catalog” option and click on the button with three dots “…” to select a folder to save the image file. Please note that it can take up to 3.5 GB.
I recommend saving the image file on a separate disk partition (for example, “D”). In the “File name” column, enter, for example, “Windows_7” so that you can later understand what kind of file it is. I recommend not using Russian letters and spaces in the title. In the “File type” column, be sure to select “Standard ISO images (*.iso)” and click “Save”.
Check that everything is correct and click “Start”.
The image creation process takes only 3-5 minutes. At the end the message “Image creation completed” should appear. Click the “Close” button and exit the main program by clicking on the cross.
If an error message appears or the process is stuck in place, either the installation disc or the DVD drive is damaged. Try wiping the drive with a dry, soft cloth and try again, or use another computer.
UltraIso program
The most commonly used program for working with images and creating bootable USB flash drives and disks with Windows is the UltraIso utility. It allows you to work with ISO files directly, editing their contents without first unzipping. Users can open any image in this program and work with it as with a regular folder in Windows Explorer.
To download the UltraIso utility, you will need to go to the fan site https://ultraiso-club.ru/. Next, you need to click on the “Download UltraIso” button in the center of the screen. Enter the captcha and the download process will begin.
Creating a boot disk
We need the Astroburn program to burn an image file to a DVD. You can download it below in the “Links” section. If you plan to use a USB flash drive to install Windows, skip this section.
4.1. Installing Astroburn
Installing the program is quite simple. Run the installation file and click Next several times.
4.2. Burning a disc in Astroburn
Insert a blank disc into your DVD drive and close the AutoPlay window if it appears. Find the Astroburn Lite shortcut on your desktop or START menu and launch the program. Switch to the “Image” tab and click on the icon to the right of the “Path to image file” field.
Find where the Windows image file is located on your disk, select it with the left mouse button and click “Open”. For example, all my disk images are located on drive “D” in the “ISO” folder.
Double-check that you have selected the correct file and that the “Check” checkbox next to the DVD drive name is selected. This will ensure that the disc was recorded without errors and that the Windows installation process will not be interrupted unexpectedly. I also recommend setting the recording speed to 8.0x, this is optimal for 16x DVD-R discs. Click "Start Recording".
The process of burning a disc along with checking takes up to 10 minutes. When you finish recording, close the program. If an error message appears or the process is frozen, it means either you got a bad disk or the DVD drive is worn out.
Try recording again on a new disc, if it doesn’t work, then use another computer.
Burn a bootable disc using the free ImgBurn program
There are many programs for burning discs, among which Nero (which, by the way, is paid) seems to be the most famous. However, we will start with the completely free and at the same time excellent program ImgBurn.
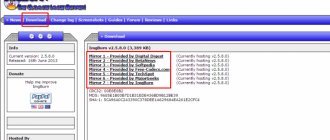
You can download the ImgBurn disc burning program from the official website https://www.imgburn.com/index.php?act=download (note that to download you should use links like Mirror -
Provided by
, and not the big green Download button) . You can also download the Russian language for ImgBurn on the site.
Install the program, and during installation, refuse two additional programs that will try to install (you will need to be careful and uncheck the boxes).
After launching ImgBurn, you will see a simple main window in which we are interested in the Write image file to disk item.
After selecting this item, in the Source field you should specify the path to the boot disk image, in the Destination field select the device to record, and on the right indicate the recording speed and, best of all, select the lowest possible.
Then click the button to start recording and wait until the process finishes.
Creating a bootable USB flash drive
5.1. Methods for creating bootable flash drives
There are many ways and programs for creating bootable flash drives, from manually writing commands on the command line to using Linux bootloaders. The disadvantage of the command line is that it is difficult for beginners and prone to errors. The disadvantage of Linux bootloaders is that such flash drives do not boot on all computers.
There is also an official program from Microsoft for creating bootable flash drives “Windows USB/DVD Download Tool”. It is very easy to use and flash drives recorded with it can be loaded on most computers. But this program has a number of limitations. For example, to use it in Windows XP, you need to additionally install several more cumbersome add-ons (.NET Framework 2.0 and Image Mastering API v2), and in order to create a bootable USB flash drive for installing Windows 7 x64 in Windows 7 x32, you need to copy it to the folder with the program additional file or fiddling with the command line. There are other problems with the program.
Therefore, I decided to give you just one, but simple and reliable way to create bootable flash drives that are suitable for any operating systems and computers, using the Rufus program.
5.2. Using Rufus
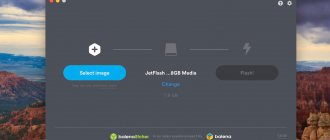
The Rufus program is designed to create bootable flash drives for installing various operating systems, including Windows XP, 7, 8, 8.1, 10. It does not require installation and can be run on any operating system from Windows XP to Windows 10, regardless of bitness .
You can download this program in the “Links” section. Next, you will need any computer with Windows installed and a flash drive with a capacity of at least 4 GB. Transcend JetFlash 790 8Gb Insert the flash drive into your computer and if there are valuable files on it, copy them to your hard drive. Immediately after creating a bootable USB flash drive or when you have finished installing Windows, you can return them back.
It is not necessary to clean and format the flash drive, just run the Rufus program and make sure that the flash drive is selected in the “Device” field.
Next, the first thing we do is select the Windows image file, since after selecting it, the previous settings may be lost. Select “ISO image” and click the button next to this field, as shown in the screenshot below.
Find where the Windows image file is located on your disk, select it with the left mouse button and click “Open”. For example, my previously created image is located on drive “D”.
Now you need to select the type of boot partition (MBR or GPT) and computer motherboard firmware (BIOS or UEFI) on which Windows will be installed. It's not as difficult as it sounds
MBR is a simpler and more reliable type of boot partition, but does not support hard drives larger than 2 TB. If you don't have a 3TB or larger drive, I recommend using this type of partition to avoid some possible problems in the future.
GPT is a more advanced type of boot partition that supports very large disks. If you have a hard drive with a capacity of 3 TB or more, then use this type of partition, otherwise the computer will only see about 2.3 TB. In other cases, I do not recommend GPT markup, as there are various problems with it.
The motherboard firmware can be BIOS or UEFI. This can be found in the manual or on the website of the motherboard or laptop manufacturer, as well as visually when entering the Setup boot program. To do this, you need to hold down the “Delete”, “F2”, “F10” or “Esc” button immediately after turning on the computer. You can read which button to press in the messages that appear immediately after turning on the computer.
In text form.
In graphical form.
If you do not have time to read, then click the “Pause” button to pause the download. You can continue loading by pressing any key, including the one intended to enter Setup.
If the Setup program looks like the picture below, then this is a classic BIOS.
If it’s like in the next picture, then it’s UEFI.
So, if you have a classic BIOS, then select “MBR for computers with BIOS or UEFI” in the “Partition scheme and system interface type” field. This is the most universal option and the flash drive can be used for installation on different computers, both with BIOS and UEFI.
If you have determined for sure that you have UEFI and the disk size does not exceed 2 TB, then select “MBR for computers with a UEFI interface.” If you have UEFI and a disk of 3 TB or more, then select “GPT for computers with a UEFI interface.”
Next you need to select “File system”. If in the previous step you selected “MBR for computers with BIOS or UEFI,” then select NTFS. If the second or third item is with UEFI, then select FAT32, since UEFI does not work with NTFS.
We leave the cluster size at default, and in the “Volume Label” field you can write, for example, “Windows7 x32” (or x64) so that you can later determine what’s on this flash drive.
Double-check all settings and the correct image selection. The selected disk image is displayed at the very bottom of the program. Instead of the name of the flash drive, it may be written “CD_ROM”; the drive letter must match the flash drive.
Click on the “Start” button and confirm the destruction of your flash drive along with your computer
Wait for the recording to finish, this can take from 3 to 20 minutes depending on the size of the image and the speed of the flash drive and should end with the green bar completely filling and the word “Ready” at the bottom of the program.
After that, you can add any files to the bootable flash drive and use it like a regular flash drive. If it is working properly, this will not affect its operation as an installation disk. But perform a safe removal of the flash drive using the system tray icon.
5.3. Possible problems and solutions
Problems can arise due to a bad flash drive, a bad USB extension cable, a damaged or incompletely downloaded image file from the Internet, or the computer itself on which the recording takes place.
Possible solutions:
- formatting and checking the flash drive for bad blocks (there is a checkmark in the Rufus program)
- inserting a flash drive into the rear USB port of the computer
- checking the checksum of a Windows image (for example, with the Hash Calculator program)
- burning a flash drive on another computer
- replacing a flash drive with another one
As for checking the checksum of an image, usually the site where you download the image has its checksum (or hash). The checksum also needs to be calculated for the downloaded file using a special Hash Calculator program, which you can download below in the “Links” section. If the calculated checksum matches the one indicated on the website, then the file was downloaded without damage. If the hashes do not match, then the file is damaged and must be downloaded again. Otherwise, errors may occur during the disc burning or Windows installation process.
Windows USB/DVD Download Tool
In my opinion, the easiest way to burn a disc is using a Microsoft program called Windows USB/DVD Download Tool, although it was designed for Windows 7, it works well with Windows 10. You can download the program on this website () or on the official website Microsoft ( go to website ).
Download the program.
Select Installation
Click the download link
Run Windows7-USB-DVD-Download-Tool-Installer-en-US.exe and install the program.
Program installation
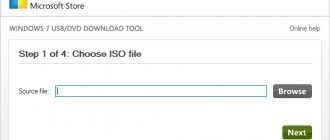
We launch the program and select the previously saved Windows.iso and click the “Next” button.
Click Browse to select the iso image
Select iso image
After selecting iso, click NEXT
We see the “Start over” selection window - we return to choosing an image, “USB device” - recording to a flash drive, “DVD” - recording to a DVD disc. Let's try burning the installation disc to DVD.
Select the DVD button
We install a “blank” DVD disc into the drive, press the “Begin burning” button to burn.
Click the “Begin burning” button
Burning an image to DVD
Disc burning complete
Burning is complete, you can use the disc to install Windows.
To burn the installation disk to a flash drive, return to the program window with a choice between USB and DVD.
Press the USB device button
If there are several flash devices on the computer, select the device to burn the disc and click the “Begin copying” button.
Selecting a recording device
Next, there will be two warning windows stating that all data on the selected media will be destroyed; if we agree to the deletion of data, the program will format the device and begin recording the disc.
Data Deletion Warning
Another warning about destruction
Recording to device
Recording is complete and the device is ready for use.
Recording complete
Windows installation disc
What is a Windows 7 installation or boot disk for? What's the difference?
As is already clear, the media created may be required both for reinstallation and for restoring a faulty OS. However, often some users have a slightly incorrect understanding of both terms. The most important difference is that regular boot disks are intended solely for starting a recovery environment, and what system you installed is absolutely not important.
Such media does not contain OS installation files, so they cannot be used to install Windows. A striking example of this is LiveCD. But distributions recorded on removable media contain both system installation files and recovery tools located in a special section, but presented exclusively in the form of Windows tools, and not software products from third-party developers.
Burning an ISO image to a DVD disc
You can use many programs to burn a bootable disk; we will look at just a few of them. How to create a bootable Windows 7 disk using Nero? How to correctly create an ISO image in Nero?
To burn a disc, you must perform the following operations:
- insert the DVD disc into your DVD-RW drive;
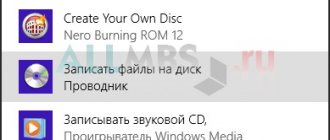
- launch the Nero Burning ROM program;
- select “Open” and specify the location of your Windows 7 image;
- in the menu that opens, you need to make sure that the DVD disc type is selected, and that the boxes next to the “Record”, “Finalize disc” and “Check recording” options are checked. data".
- Recording should be performed at minimum speed to avoid burning errors.
- If any errors appear in the log while recording or verifying files, it means that the recording was not completed correctly. You should burn to another disc. If you used a DVD-RW, you can erase it by opening the “Recorder”
and selecting
“Erase rewritable disc” .
