When buying a TV in a store, quite often sellers offer an unusual service - checking for dead pixels. It is not free, but given the general cost of TV, many decide to do it. Another compelling argument in favor of carrying it out is that such a defect is not considered a warranty case, so testing at home will not yield anything. The test must be carried out in the store and immediately buy another device. However, if you first figure out how to check your TV for dead pixels, you can do everything yourself, for free and quite quickly.
- In conclusion
What is a dead pixel?
First you need to understand what a pixel is on a TV screen or computer monitor. A pixel is a kind of grid of cells that form an image. Each pixel consists of three subpixels - red, green and blue. Each color is controlled by a separate transistor, which at a certain point in time turns it on or off, thereby creating the picture that we see.
Even the simplest display consists of at least six million subpixels, and in 4K displays the number can reach up to 37 million. Such a number of transistors can fail, then any of them, when it needs to turn on, turns off - and vice versa. A dot appears on the screen that stands out noticeably - this is a dead pixel.
Checking 4K TVs
Before you go to the store, you should prepare thoroughly. You need to have a flash drive with you on which videos and pictures are recorded in 4K resolution. When watching videos in this format, you should pay attention to the following nuances:
- Defective pixels. This defect only appears under certain conditions. If a pixel is completely broken, it is easy to see with the naked eye, but a partial defect is not so easy to notice. Each dot is formed from three components of different colors (red, green and blue). If one of the pixels starts to work incorrectly, then one of the points is displayed in the wrong color. If the screen diagonal is about 50 inches, the “saboteur” can be identified using test pictures or 4K videos. TV checking in this case is performed as follows: content with patterns, stripes or evenly alternating figures is displayed on the screen. If there are elements that are not functioning correctly, they will stand out in the general row.
- Testing illumination uniformity. Filling it with black will help here. If illuminated spots appear on different parts of the screen or white marks on a black background, then the TV is defective. Most manufacturers do not consider uneven backlighting to be a serious defect, so it is not grounds for returning the TV.
- Presence of colored spots. Particular attention should be paid to the white color fill. The defect appears as green or pink areas on a white background. Experts also recommend checking your TV for banding. This flaw is easily recognized by the appearing stripes of other colors. It is easier to find when watching videos that show homogeneous areas as the camera moves.
Not all high-resolution TVs allow you to view 4K video. When purchasing a receiver, you should pay attention to whether it has a sticker with the inscription “Ultra HD”. It is also worth finding out what standard it meets. The TV must reproduce content with a resolution of at least 3840 by 2160 pixels, and the minimum frame rate is 60 units per second.
Types of defects and how many are allowed
The permissible number of dead pixels on a new TV is strictly regulated by the international standard ISO 13406-2. The document is quite voluminous; it describes in detail all aspects of the screen’s operation. Moreover, it distinguishes 3 categories of damaged points:
- Open ones - constantly glow white and cannot be restored.
- Closed - non-working pixels, always glow black, can be repaired, but in a service center.
- Colored - the failure lies in the control transistor, as a result the pixel glows in one of the following colors - blue, red, green.
Using special software, you can deal with the problem at home. The Samsung company, and many other well-known companies, divide the TV they produce into four classes. Most produced TVs belong to the second class. First class devices should have no defective points at all.
Which pixels are considered dead and where do they come from?
The image on the LCD screens of monitors, TV and mobile devices consists of tiny colored dots - pixels. Each pixel in turn consists of three smaller particles - subpixels of red, blue and green colors. The glow of subpixels in different combinations allows the pixel to take on any color depending on what command the video processor sends to it.
Subpixels consist of a layer of liquid crystals in cells driven by thin film transistors. The change in color of subpixels is due to a change in the position of the crystals under the influence of current or the polarity of the electric field. Dead pixels appear in cases where the crystals of one cell of an LCD screen cease to perceive control signals or the thin-film transistors themselves cease to “control” them correctly. Defects arise both during the manufacturing process of liquid crystal matrices and during operation.
Types of dead pixels
According to the ISO 13406-2 standard, the type of defect is determined by the color and behavior of the point. There are the following types of dead pixels:
- Actually broken, dead or defective - those whose brightness is always constant.
- Hot - the glow of these points is not directly dependent on the control signal.
- Dependent - the color of such pixels is influenced more by the environment than by the control signal.
- Stuck - always on.
Based on the malfunction, there are 4 more types of dead pixels:
- Type 1. Constantly burning white. The most noticeable. Usually associated with a factory defect in the transistor. As a rule, they cannot be restored using software.
- Type 2. Constantly non-burning (black). Visible only against a light background. The reason for their appearance is usually also a factory defect or repair - turning off the white pixel transistors at the factory. As a rule, they are not restored.
- Type 3. With subpixel defects (color). Of all the screen faults that can be repaired using software, this one can be overcome most often.
- Type 4. Group - several defects of any type in a 5x5 pixel square.
Display quality classes
Depending on the number and types of faulty pixels, LCD monitor and TV screens are divided into 4 quality classes.
- The 1st class screen does not contain defective dots.
- A class 2 screen can contain a maximum of 2 faulty pixels of the first and second types per million, or 5 of the third type.
- A class 3 screen can contain up to 5 faulty pixels of the first type per million, up to 15 of the second type and up to 50 of the third type.
- A Class 4 screen can have up to 150 defective dots per million.
Stores sell products with LCD matrices of the first three classes.
Why not a warranty case?
In general, a certain number of dead pixels is allowed. This is explained by the fact that the matrices are characterized by rather complex and labor-intensive production. Few manufacturers are able to provide it. However, the defect can be identified when the TV is in a fully assembled state. If manufacturers weed out all products with defects, even minor ones, then the cost of TVs will increase significantly. Therefore, a balanced decision was made:
- all companies that produce TVs maintain production at the proper level, but do not increase the cost;
- Buyers accept the presence of dead pixels but have the right to test the display before purchasing.
There is no deception; the buyer has every right to check the purchased device. If he didn’t do this, he can only be offended by himself.
External inspection upon purchase
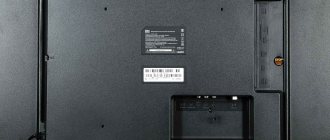
First, check the packaging for various damages (dents, tears); if there were any blows to the packaging during transportation, then the TV was damaged. Then check the presence of all correctly filled out documents, such as a passport for the device, a warranty card. The coupon must be filled out correctly by the seller (warranty period, date of sale, stamp), the serial number in the coupon must match the number on the TV.
Check the external condition of the TV and remote control. Look for scuffs, chips, cracks, etc. The screws on the back of the TV should not show signs of tampering, otherwise your TV has already been sold and repaired.
By the model name, serial number and product code you can find out where and when this TV was made and for which country.
Even more detailed information such as operating time and number of starts can be found in the service menu. But it’s better not to enter this menu yourself if you don’t know what it is. It is intended for specialists and the store is not obligated to include it for you. Incorrect operation of the service menu can lead to complete inoperability of the TV. To enter this menu, you need to enter a certain set of characters, which depends on the brand and model of the device.
After this, you can turn on the TV and check its operation, the correct operation of the remote control, and work with external sources (USB flash drives, players, etc.). You can take your own flash drive and pre-record high-resolution videos and pictures on it to check for dead pixels.
How to check yourself
The test runs quite quickly. Moreover, such an option is provided by law. If the seller refuses to carry it out or insists on a paid inspection, it is better to go to another store to make the purchase.
For the test you will need a regular flash drive, it will need white, black, green, etc. You need to start checking after the TV has been running for several minutes, since defects only appear on a heated matrix.
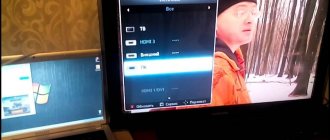
To begin checking for dead pixels on your TV upon purchase, ask the seller to insert a pre-prepared flash drive into the TV. After that, display the images on the screen. So, on a white screen, dark pixels will be clearly visible, and on a black screen, you can see white dots.
Special testing programs are also available. There are quite a few of them, but the most commonly used are:
- Free application for computer on Windows 7,8,10. The website also contains detailed verification instructions, which is very convenient.
- A site that has 9 color pictures that can be opened in full screen on both your TV/computer and your mobile phone.
- Another program with many settings and high-resolution images for tests.
- The easiest site to use. Everything is very simple, there are names of the pictures, you click on each of them and make it full screen.
In terms of application, the second application is simpler, and it was designed specifically for testing LCD screens. Illuminates any area of the display in the desired shade. As a result, all defects can be quickly detected.
If you don’t know how to check your TV using these programs, use the instructions on how to connect your laptop to your TV. By doing this, you will be able to transfer the image from your computer to your TV screen.
How to check your TV for dead pixels yourself
The buyer in the salon can independently test the matrix for defects. This procedure is provided for at the legislative level. If a sales consultant refuses the opportunity for inspection and insists on paying for the inspection service, it is better to refuse to purchase at this outlet.
To carry out the test, you need to prepare a flash drive in advance by uploading monochromatic pictures of black, white, green, blue, red onto it, or 4K videos for testing TV that can show the operation of the LED panel:
Before testing, the TV must work for several minutes, since defects appear only on a warm screen. If there is a defect on the screen, it will be noticeable during inspection.
When buying a smart TV, you can do without a flash drive; just install a tester application (among the popular programs for Android: Dead Pixel Detector & Fixer, Screen Check, Dead Pixel Test), or go to a website that provides such services (for example, Dead Pixel Buddy , which presents 9 high-resolution color images, or LCD DeadPixelTest, where the pictures are conveniently located via links).
You can also use a laptop:
- connect your TV to it via an HDMI cable;
- open a website or application (for example, Dead Pixel Tester, available for free for Windows 7,8,10);
- look at pictures and videos to determine the presence of burnt zones.
How to recover
But what to do if the TV has already been purchased and during the testing process a dead pixel was discovered; we’ll figure out what to do in such a situation further. As the TV is used, pixels may also become damaged. Let us immediately note that only colored dots can be brought back to normal. However, their serviceability is only a temporary phenomenon. Within a few days the defect will appear again.
Using software
We use software. Applications are used for this; there are both free and paid ones.
- The program is paid, but the developers claim that after launching it, you can eliminate up to 90% of all defects on the screen in a few minutes.
- A video in which colors change at high speed over the course of 12 hours. It is recommended to turn it on at night, but you should not look at the screen as there is a risk of causing an epileptic attack.
- A universal program that can be installed on both a computer and a smartphone. The website has detailed video instructions for installation and configuration.
- A website where you can start the setup online. You can manually indicate the damaged area of the screen and start treatment.
Manual method
We make physical efforts. In this case, you need to gently massage the damaged area with a cotton swab or a pencil eraser. To do this, we find all the defective points, turn off the TV and carry out circular movements in the right place. However, even if you do everything correctly, you may not achieve the desired result, but it is quite possible to damage neighboring elements.
How to remove points manually
Programs for restoring dead pixels on monitors and TVs
So, you have found dead pixels. What to do next? If it is a subpixel defect (color dots), then in about 60-70% of cases the problem can be solved.
There are 2 methods of dealing with this scourge: mechanical and software. The first is to gently rub the affected area of the screen by hand with a Q-tip or soft-tip stylus until the dot begins to change color. The second, software method, involves launching special recovery utilities. A fast, rhythmic change of colors in the area of the defect “revitalizes” stuck pixels and makes them glow as expected.
To speed up and enhance the effect, both methods can be combined. On average, exposure lasts 20-120 minutes, but sometimes longer. Some screens recover very quickly, others only after 1-2 days of continuous changing of the color background.
Bad Crystal
Bad Crystal is a paid English-language application with documentation in Russian. It does not have a trial version, so even for a one-time use you will have to pay $9.99-19.99 depending on the distribution (Mobile, Primary and Ultimate).
Using the program is easy. After launching it, a window with flickering dots appears on the screen. It should be aimed at the problem area and left for a while until the defect is eliminated. The maximum duration of continuous operation of Bad Crystal should not exceed 72 hours.
Undead Pixel
Undead Pixel is a free utility for repairing dead pixels on Windows computer monitors. Also in English, but intuitive and simple. The left half of its window contains buttons for running tests to localize the defect, the right half (Undead pixel) launches the recovery tool.
When you press the Start button, a flickering square of 1x1 or 5x5 pixels appears on the screen, which should be dragged to the problem area and left there until it is fixed. The “Flash windows” option determines the number of such squares, “Flash size” their size, and “Flash interval” the flickering frequency.
JScreenFix web service
JScreenFix is a free web service that can help you fix the problem of dead pixels without installing applications. It can be run on any device that has Internet access.
Using the service is extremely easy. After clicking the “Launch JScreenFix” button, a box with colored dots appears in your browser window, as in the screenshot above. Just drag it over the defective area and wait 10-20 minutes.
Pixel Repair
Pixel Repair is a Windows application that does not require installation on your computer. Like all the others, it is English-language, but no more difficult to use than Undead Pixel. The left half of its window contains buttons for running tests to determine the location of the defect, and the right half contains recovery tools.
Before starting recovery, select the Color mode and determine the switching speed (Speed). To start the process, click “Go!” And then, as you already know, all that remains is to place the flickering square on the fault area and wait for the result.
Other articles on the site
- How to calibrate and set up a monitor at home
- How to connect a second, third... tenth monitor to one computer
- How to test a video card for stability and performance
- 8 Best Hard Drive Cloning Software