Why are fields needed and what are they?
Margins in a text document are spaces, empty spaces below, above, left and right from the edge of the sheet to the text.
By default, the standard borders in Word are 2 cm at the bottom and top, 3 cm on the left and 1.5 cm on the right. A wide white stripe on the left side of the sheet allows for binding. The remaining spaces are needed so that the content is not cut off when printing and the text looks neat.
If we are writing something for ourselves, then most likely we will not pay attention to the edges of the text, especially if we do not plan to print the file. But official documents and student work are prepared according to certain rules and requirements, and here you can’t do without special tools.
Most often, the settings apply to the entire text, but there are exceptions when you need to set your own restrictions for different sections. A special case is mirror fields, we will also talk about them today.
Changing page margins in Word is a common mistake
For some reason, many users of this program do the exact opposite.
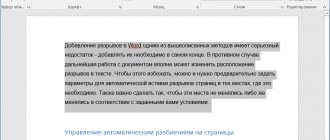
First, they create a new document, fill it completely with text, pictures, etc., and only then begin to change the fields. No need to do that! The fact is that in a ready-made Word document, changing page margins most often leads to a violation of the structure of the document, that is, the contents of the pages are rearranged to fit the new fields. If the document is complex, then the distortions can be quite significant (this is especially true for documents with pictures and tables). Of course, if your document contains a couple of lines of simple text, then there will be nothing wrong. However, I always recommend setting the margin size before anything else.
Setting Word page margins after filling out the document itself comes, in my opinion, from elementary laziness. The user does not want to go into settings, so the field sizes remain as they are, that is, by default. I see similar problems in 1C courses - half the trouble is due to laziness and unwillingness to do everything carefully!
Meanwhile, the default margin size of a Word document is quite decent. If your document contains many pages, you can reduce the number of pages by reducing the margin size!
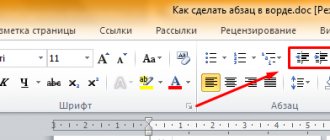
Setting up indents
I use Office 2020 and will show all the actions using an example. If you have an earlier version, then it's okay, page settings in Word 2020 and 2013 look exactly the same. If you have a text editor installed in 2007 or 2010, then you will also find the necessary settings without any problems. But in the 2003 version, the interface is significantly different from modern ones, but don’t worry, you can also customize the borders at your discretion. I will talk about this separately.
So, open the file that needs to be edited and go to the “Layout” menu item in the editor of 2013 or later versions. If you are using the 2007 or 2010 version of the program, then you need to go to the “Page Layout” section.
Now open the “Fields” tool. There are several ready-made options in the list that opens:
- ordinary,
- narrow,
- average,
- wide,
- mirrored
Next to each type are written the specific values of the spaces on the left, right, top and bottom of the sheet.
In the mirror version, the top and bottom parts remain unchanged, but the left and right parts are swapped every other sheet to create a magazine or book spread that has internal and external borders.
If we enable this option, then on the first page there will be an indentation of 3.18 cm on the left, and 2.54 cm on the right. On the second page they will switch places: on the left there will be 2.54 cm, and on the right - 3.18 cm.
Correct document formatting
To give expressiveness to material in Word, borders are used. Such a tool can be added both to the page and to printed material or to certain parts of it, including graphic objects.
Formatting is applied to all sides or to one side of all sheets of the document, to marked pages, only to the first page, or to all pages other than the first page.
Borders come in different styles, colors, and graphic presentations.
You can add a border in Word using the button of the same name on the “Page Layout” tab, and you can set the scope - for the page or the entire document
Thanks to this assistant, the user can easily select a separate part of the document from the general information. Moreover, it is absolutely easy to use, even if there was no need for it before.
Different Formatting Methods
In Word, as previously noted, special tools can be used to designate virtually any part and object of a text document. Let's look at what main design methods exist and what each of them is used for:
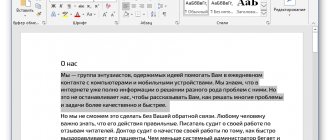
- Design of figures, tables and text parts. To add borders in Word to the listed elements, you must first select them. On the control panel, in the “Background” section, select the “Page Borders” button (Photo 1), after which you need to open the corresponding section in the dialog box, and then select the most appropriate view in the “Type” field. Style, color and width can also be changed in this window. To design individual sides of the selected part, you need to click on the “other” line in the “Type” section, after which you should mark the desired sides in the sample. To set the exact location of paragraph lines relative to the entire printed material, you must click on the “Apply to” section, where you select the “Paragraph” option. In the same way, you can specify the table or its specific cell that needs to be highlighted.
- Selecting pages. To add, you need to go through the control panel to the “Borders” section. After the “Page” tab opens in the dialog box, in the already familiar field, you will need to select the desired type of formatting. To design only individual sides of the sheet, click the “other” command in the “Type” group, after which in “Sample” you can set the desired borders in the desired location. You can decorate a sheet of paper in Word with artistic frames by selecting the design you like in the “Drawing” section. To apply a design to a single page, you must use the list in the “Apply to” field. And to specify the required position, you should use the “Parameters” command.
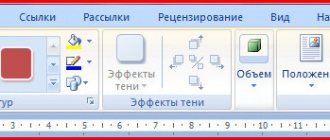
- Design of graphic objects. To select any images, they must first be placed on the canvas. You should click the section on the “Insert” toolbar, where in the “Illustrations” command you will need to select the “New Canvas” button (Photo 2). By right-clicking on the canvas, you will need to select the “Format” field in the context menu that appears. In the appropriate sections you can change the color, type and thickness of lines.
These are the main formatting options in Word for both the whole document and its individual components. Moreover, the specified boundaries can be changed or deleted at any time.
Today we will learn how to make borders in Word.
Arbitrary boundaries
If the proposed indents do not suit you, then you can set your own personal parameters. To do this, go to the same item on the toolbar and go to the very bottom of the context menu.
In the window that opens, we can change each indent separately, increase it, decrease it, or remove it completely. If you want to get rid of empty spaces on the sheet, then set all parameters to 0 cm, but keep in mind that when printing, the program will insist on at least minimal margins so that the text is not cut off.
The editor also allows you to additionally set the location and size of the binding, and apply settings to the entire document or its individual sections.
Microsoft Word and the rules of Russian office work: six useful settings
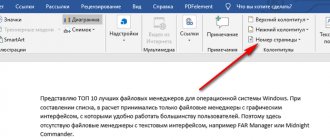
The ribbon displays the Header and Footer Tools - Design tab. On the Header and Footer Tools - Design contextual ribbon tab, in the Options group, select the Custom header and footer for first page check box. The number on the first page will disappear, but if you increase the number of pages, you can easily make sure that it appears on subsequent pages. Close the mode of working with headers and footers by clicking the Close header and footers window button at the right edge of the contextual tab Working with headers and footers - Designer. If your instructions do not fix only the position of the number, but also its design, change the style of the header and footer. However, you will notice that the Quick Styles gallery on the Home tab does not display secondary styles, which include header and footer designs. This means you need to get to where a more complete list of styles is visible.
Printing Settings
You don’t have to change the appearance of the pages while working on the text, but do this immediately before printing the document. But in this case, there is a risk that the appearance of the sheets will change, as well as their number will increase or decrease.
Go to the menu item “File”, “Print”.
In the window that appears, we find the settings we need and change them at our discretion.
How to make a frame around the edges of a page in Word?
To make a frame around the edges of the page in Word, one minute is enough. Just as when creating a frame around the text, we call up the “Page Borders” settings window:
- Select the text you want to frame
- Click on the “Page Layout” tab
- Next “Page Borders”
- In the window that appears, select .
- Customize at your own discretion
- We apply it depending on the need: to the entire document (then all pages of the document will be in a frame) or to one page. Experiment.
- Save by clicking “OK”
How to make a beautiful frame in Word?
With the same success, in addition to classic frames, you can use more beautiful, interesting frame options in Word. They are called graphic due to the small drawings that will frame the page. Of course, such frames are not for official documents, but for thematic cases they are perfect. To make a beautiful frame in Word, we also go to the “Page Borders” parameters, in the window that appears, we remain on the “Page” tab. At the bottom there will be a “Drawing”, where in the corresponding field you select the frame you like.
That's it, friends. We hope everything worked out for you. If you have questions or suggestions, write in the comments below the article. Good luck!
Home » Lessons and articles » Software
Hi all! This lesson focuses on one feature in Microsoft Word, namely adding borders. And answers our reader’s question.
Below you'll learn how to add Word borders for individual text and the entire document. The lesson is simple and therefore short.
1. Open Microsoft Word.
2. Go to the Page Layout tab.
Note: In Word 2013, you must select the Design tab.
3. Under Page Background, select Page Borders.
4. In the window that opens, you can select the type, color, thickness and configure other parameters of the borders, then click OK.
For example, a red thick border:
Or a border with a pattern:
In the same window, on the “Border” tab, you can select the borders for individual text (selected), and on the “Fill” tab, select the background color for the text.
Date: 10/07/2016 Author/Translator: Linchak