How to create an invisible table in Word
If you need words, letters or numbers to appear in certain places on a sheet in a Microsoft Word document, then it is better to use a table rather than spaces or tabs.
First create it, fill it with the necessary data, and then you can make the borders invisible. As a result, it turns out that the necessary words are written in different parts of the sheet. I have already told you how to make a table in Word, and you can read the article by following the link. In this article we will look at how to make a table in Word have invisible lines. It is convenient to use it if you are creating content in a document, or for non-standard design, for example, a children's game, connect the dots with lines.
I will show everything in Word 2010, but if you have Word 2007, 2013 or 2020 installed, then do the same.
Making borders invisible
Let's take this example. Here the text is written vertically. I wrote how to make vertical text in Word, and this is another way.
Select the cells completely by clicking on the four arrows pointing in different directions in the upper left corner.
Next, go to the “Working with Tables” tab – “Design” and in the “Table Styles” group, click on the arrow on the “Borders” button. Select "All Borders" from the drop-down option.
After this, unnecessary lines on the page will be removed.
Everything can be done a little differently. Select it by clicking on the arrows at the top left. Then right-click on any cell. A context menu will appear. Click on the small arrow next to the "Borders" button.
From the drop-down list, select “All boundaries”, and you will also get the desired result.
How to make a table invisible in Word by removing borders
- To do this, you need to find a small square in the upper left corner of the table. It will appear as soon as you hover your cursor over it. Left-click and the entire table will be highlighted.
- Once the entire table is selected, find the “Designer” section in the program header and go to it.
- On the right side of the work area you will see the “Borders” field. Click on the small triangle next to it.
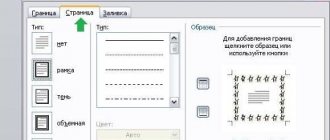
- A pop-up list will present many options for framing the table. You can make it enclosed in dotted lines, bold lines, even diagonals. At this time, select “No Border”.
- You will get a completely invisible table, although the text formatting will be done in cells. You can change these settings at any time, or cancel them using the blue arrows in the main section of the Word program.
Creating an invisible table for content
Now let's look at what to do if you have content in a document. To begin, insert the table on the desired sheet. A link to a detailed article on how to do it is given at the beginning.
Open the “Insert” tab, click on the “Table” button and select the appropriate number of rows and columns – “2x5”. "2" are columns. The first will contain the title of the section, the second will contain the page number. "5" are lines. Here indicate the number of points you have in your content.
Complete the content points and their corresponding pages, and move the center line to the right.
Now select it completely - click on the image of the four arrows. Open the Design tab, click the arrow on the Borders button and select All Borders.
After this, the lines will disappear. To make it easier to work with the content, you can click on the “Borders” button again and select “Display grid” from the list.
The lines will be shown as blue dotted lines on the sheet. They won't print when printed, so feel free to work with them.
Align table horizontally in Word
You can easily align a table to the left, center, or right edge of the page in your document.
The only caveat here is that the table cannot be set to the full width of the page if you want to use these alignment options. Full width is the default state when creating a new table, so if you have a table that doesn't need to be large, you'll need to change this setting.
The easiest way to do this is to click anywhere on the table to focus on it, and then hover your mouse over the bottom right corner of the table. When you place your mouse pointer on a corner, it will turn into a double arrow. Then you can click and hold the right mouse button to change the size to the size you need.
Now that the table is no longer full width, you can adjust the page alignment. Right-click anywhere in the table and select Table Properties from the context menu that appears.
In the Table Properties window that opens, you can choose left, center, right alignment by clicking these options in the Alignment section. While you're here, note that you can also optimize the width of the table by selecting the "Width" option and then specifying exactly how much you want it to be. This gives you a little more control than just changing the size with the bear as we showed earlier.
If you align your table to the left side of the page, you can also adjust the space from the left margin using the Left Indent box on the right.
How to remove an invisible table
This question can be understood in different ways. If you need to delete it, then read the article: how to delete a table in Word. If you just want to display all the lines, then let's look at how to make it visible.
Select it using the four arrows at the top left and go to the familiar “Design” tab. Click the arrow next to the Borders button, then All Borders to display the lines.
You can also remove the table itself with transparent borders, but leave its content. Select it and open the “Layout” tab. In the “Data” group, click on the “Convert to Text” button.
In the next window, select the separator you want to use to separate the data of one cell from another in the worksheet and click OK.
As a result, you will get plain text that is no longer divided into cells.
As you can see, drawing an invisible table in Word is not difficult. And what data to fill it in depends on your document: add content, vertical text or numbers.
How to make a table invisible in word
The multifunctional text editor MS Word has in its arsenal a fairly large set of functions and ample opportunities for working not only with text, but also with tables. You can learn more about how to create tables, how to work with them and change them in accordance with certain requirements from the material posted on our website.
So, as you can already understand by reading our articles, we have written quite a lot about tables in MS Word, providing answers to many pressing questions. However, we have not yet answered one of the equally common questions: how to make a transparent table in Word? This is exactly what we will talk about today.
Our task is to hide, but not delete, the borders of the table, that is, to make them transparent, invisible, unnoticeable when printing, while leaving all the contents of the cells, like the cells themselves, in their places.
Important:
Before you start hiding table borders, you need to enable the grid display option in MS Word, otherwise working with the table will become very difficult. You can do this as follows.
Making table borders invisible
Our task is to hide, but not delete, the borders of the table, that is, to make them transparent, invisible, unnoticeable when printing, while leaving all the contents of the cells, like the cells themselves, in their places.
Important:
Before you start hiding table borders, you need to enable the grid display option in MS Word, otherwise working with the table will become very difficult. You can do this as follows.
Enabling the grid
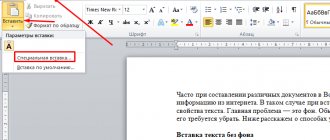
1. In the “Home”
(
“Format”
in MS Word 2003 or
“Page Layout”
in MS Word 2007 - 2010) in the
“Paragraph”
, click on the
“Borders”
.
2. Select “Display grid”
.
Having done this, we can safely move on to the description of how to make an invisible table in Word.
Hiding all table borders
1. Select the table using the mouse.
2. Right-click on the selected field and select “Table Properties”
.
3. In the window that opens, click the “Borders and Shading”
.
4. In the next window in the “Type”
select the first item
“No”
.
In the “Apply to”
, set the
“table”
. Click the
“OK”
in each of the two open dialog boxes.
5. After you complete the steps described above, the table border will turn from a solid line of the same color into a pale dotted line, which, although it helps to navigate the rows and columns and cells of the table, is not printed.
Hiding some table borders or some cell borders
1. Select the part of the table whose borders you want to hide.
2. In the “Designer”
in the
“Framing”
, click on the
“Borders”
and select the desired option to hide the borders.
3. The borders in the table fragment you selected or the cells you selected will be hidden. If necessary, repeat the same action for another fragment of the table or individual cells.
Lesson: How to continue a table in Word
4. Press the “ESC”
to exit table mode.
Hide a specific border or specific borders in a table
If necessary, you can always hide specific borders in the table without bothering with selecting a separate fragment or fragments. This method is especially good to use when you need to hide not only one specific border, but also several borders located in different places of the table, at a time.
1. Click anywhere in the table to display the main tab “Working with tables”
.
2. Go to the “Design”
, in the
Border
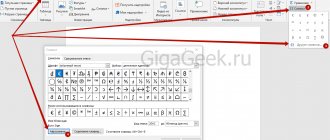
, select the
Border Styles
and select the white (that is, invisible) line.
Note:
In earlier versions of Word, to hide/remove individual table borders, you need to go to the
“Layout”
,
“Working with Tables”
and select the
“Line Style”
“No Borders”
option in the expanded menu .
3. The cursor pointer will change to a brush. Just click it in the place or places where you want to remove the borders.
Note:
If you click with such a brush on the end of any of the outer borders of the table, it will disappear completely. The internal borders surrounding the cells will be deleted individually.
4. Press “ESC” to exit table mode.
Lesson: How to merge table cells in Word
We'll finish here, because now you know even more about tables in MS Word and know how to hide their borders, making them completely invisible. We wish you success and only positive results in the further development of this advanced program for working with documents.
We are glad that we were able to help you solve the problem.
Ask your question in the comments, describing the essence of the problem in detail. Our specialists will try to answer as quickly as possible.
Hello, friends! In today’s “Crib Sheet,” as promised, we begin formatting tables in Word 2020. And we’ll start with questions about their boundaries. Anyone who has already read knows that when creating a table using any of the five methods described there, frames are added by default. It's clear... Otherwise, what kind of table will it be? Another question is that these external and internal dividing lines do not always suit us. Now we will look at how to change the borders of tables in Word at your discretion. We will learn how to make the frames and internal lines of tables bold, choosing the desired line thickness, colored, and invisible.
For the convenience of my visitors, I have divided this article into small subsections that answer one specific question regarding the design of borders/frames for Word tables. The result is a kind of FAQ that will be easier for you, friends, to navigate.
Basic parameters for changing faces
Before changing anything, we strongly recommend that you display the grid, otherwise you will simply lose your plate on the sheet. To do this, select it by clicking on the cross that appears in the upper left part, and there find the “Borders” field. In the drop-down menu there is an option to “show grid”. Let's select it. Now the lines of your table are replaced with a dotted line, which will not be visible when printed, but will provide convenient work with diagrams and cells.
Let's move on to the main thing - turning your circuit into “invisible”. You can change these parameters in the same menu that we introduced above. A drop-down menu lists all the changes you can apply. Among them you will find the “No Borders” option, which will completely remove them from the table.
Changing Individual Face Settings
For deeper customization, when selecting a plate, pay attention to the toolbar, in which the “Designer” area will appear. By going there and then opening the “Framing” (Word 2013) or “Drawing Borders” (Word 2010) window on the right side, you will be able to hide certain edges (for example, only the right or left), adjust their thickness and color.
The first adjustable option will be “Type”, among which you will see: “Frame”, “All”, “Grid” and “Other”.
The following function will allow you to customize the type, color and width of a specific line. You have the opportunity to make the frames one simple line, a dotted line with different intervals, several lines, or both bold and simple, etc. A little lower, you can change the color of the borders and their width.
How to create an invisible table in Word
If you need words, letters or numbers to appear in certain places on a sheet in a Microsoft Word document, then it is better to use a table rather than spaces or tabs. First create it, fill it with the necessary data, and then you can make the borders invisible. As a result, it turns out that the necessary words are written in different parts of the sheet.
I have already told you how to make a table in Word, and you can read the article by following the link. In this article we will look at how to make a table in Word have invisible lines. It is convenient to use it if you are creating content in a document, or for non-standard design, for example, a children's game, connect the dots with lines.
I will show everything in Word 2010, but if you have Word 2007, 2013 or 2020 installed, then do the same.
Making borders invisible
Let's take this example. Here the text is written vertically. I wrote how to make vertical text in Word, and this is another way.
Select the cells completely by clicking on the four arrows pointing in different directions in the upper left corner.
Next, go to the “Working with Tables” tab – “Design” and in the “Table Styles” group, click on the arrow on the “Borders” button. Select "All Borders" from the drop-down option.
After this, unnecessary lines on the page will be removed.
Everything can be done a little differently. Select it by clicking on the arrows at the top left. Then right-click on any cell. A context menu will appear. Click on the small arrow next to the "Borders" button.
From the drop-down list, select “All boundaries”, and you will also get the desired result.
How to make table borders in Word using the “Table Styles” collection
We click on the table with the left mouse button, and the “Working with tables” panel opens. We go to its “Design” tab. On the left in the “Table Style Options” window, for ease of perception of tabular data, we can set the necessary selection of rows or rows, their alternation, color and fill intensity. You can highlight with color or lines the row/column of headings or summaries (see Fig. 1).
After this, open the next window “Table Styles”. Here Word provides us with a large number of templates with different combinations of fill and frames (see Fig. 2).
And if you also want to modify the selected template somehow, then click on the line “Change table style”. This line is hidden at the very bottom of all table templates. When you click on it, a window opens in which you can change the thickness and color of the lines, remove/add fill to individual cells (see Fig. 3).
You, friends, also have the opportunity to see how all these operations are carried out with your own eyes. Video at your service.