How to install MSI Afterburner on your computer
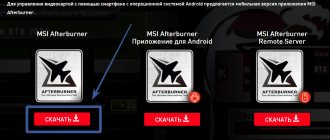
To get started, you will need MSI Afterburner itself. Download it from the official website (link) and install it on your computer. The installation process for MSI Afterburner is straightforward and no different from installing any other program. Just run the installation file and click on the “Next” button.
On one of the screens, the installer will ask you to select which programs to install. Here the checkboxes opposite both MSI Afterburner and RivaTuner Statistics Server should be selected. Since to enable monitoring in games we will need both of these programs.
After the installation of MSI Afterburner is completed, the RivaTuner Statistics Server installer window will appear.
In this installer, we also click on the “Next” button until this program is also installed.
Go!
First, we actually need to install and launch MSI Afterburner itself. Why exactly this one - well, probably because I’m used to it, and it’s also very multifunctional: monitoring and overclocking, and it’s completely free. So, we run it, we get something like this:
Due to different themes, the program may look a little different, but for our purposes this is not a big deal. Because we need a single button - the settings gear. Here she is:
A window with settings will pop up. We need the “monitoring” tab, click
In the tab at the top there will be a window with the names of indicators that can be displayed for monitoring. Scroll the slider to the very bottom and see the name “frame time”. That's what we need
We put a checkmark to the left of it, after which the settings under the window with the slider are activated. We put a checkmark there just below in the item “Show in Overlay Screen Display” and select “Text + graph” from the drop-down list on the right
MSI Afterburner Monitoring Settings
After the installation is complete, launch the MSI Afterburner program. The appearance of this program may differ depending on what version you have. Therefore, do not be surprised if your MSI Afterburner does not look like the screenshot below.
In order to enable monitoring in games, you need to go to the MSI Afterburner settings. To do this, click on the button with the image of a gear.
How to use MSI Afterburner
If you run the utility, a rather futuristic window with an interesting design appears. The cover – the appearance, by the way, can be changed in the future if this one seems inconvenient. Before using MSI Afterburner, you need the program to properly detect your existing video card. Its name and driver version are displayed in the central part of the window, at the bottom. There is also a button with a gear icon - these are settings, go there. On the "Basic" tab there is a list of video cards, and the current one should be selected. The rest of the settings can be left as default, but you need to pay attention to the “Unlock voltage control” item - the checkbox must be turned on. The fact is that as the frequency increases, the voltage must be lowered for stability and to avoid overheating, and the program will be able to do this if you enable this item.
If you want the new video card settings to start working when you turn on the computer, you can enable the “Run with Windows” checkbox. But it’s better to do this after all the settings have been checked and the video card is working stably. Otherwise, there may be a situation when the system boots, the image immediately gets spoiled, and you can only get to the settings when you boot into “Safe Mode.” If the utility has correctly identified the video card, you can try to manage it.
How to enable monitoring in MSI Afterburner
In the MSI Afterburner settings window, open the “Monitoring” tab. All settings related to monitoring in games are concentrated here.
On the “Monitoring” tab there is a list of parameters that can be monitored directly during the game.
In this list, you need to select the parameters that you need and enable the “Show in OED” option for them. To do this, you need to select one of the parameters with the mouse and check the box next to this option.
After enabling the “Show in OED” option, you can choose how to monitor this parameter. In the drop-down list you can select “Text”, “Graph” or “Combo”.
As a result, next to the parameter for which you have enabled monitoring, there should be an inscription “in the OED”.
If the “Show in OED” option is inactive and cannot be clicked, this means that this parameter is disabled. To enable the ability to monitor this parameter, check the box on the left side of the list.
Once the monitoring of all the necessary parameters is enabled, save the settings of the MSI Afterburner program by clicking on the “OK” button.
MSI AfterBurner - instructions for use.
MSI Afterburner is a fairly popular program among overclockers for fine-tuning and monitoring a video card. MSI Afterburner is a program from the creator of Riva Tuner - Alexey Nikolaychuk aka Unwinder. At first glance, MSI Afterburner seems like a very simple program, but that’s just the first thing. With deeper acquaintance, the opinion about the program changes. This note is made to make the program easier to use.
MSI Afterburner - instructions for use. Part one: Installation Download the program and install it. After installing it, you will have MSI Afterburner, and MSI afterburner on screen display server. Part two: Initial setup. 1) Launch Afterburner and go to the Settings menu: 2) scroll all the way to the right and go to the User Interface menu. We change the language to Russian. 3) Disable hints if you don’t need them in the same menu:
4) Go to the first tab “Basic”: Where: a) Synchronization of settings for two GPUs - for those who have SLI, Cross tandems. b) Download from Windows. If you need the program to always load from Windows, check the box c) minimize the program to Tray - this is so that when closed the program will continue to work, but will be in the Tray. d) Voltage release – ATTENTION! BE CAREFUL WITH THE VOLTAGE, too much voltage can cause GPU DEATH. e) Enabling voltage monitoring in the monitor window f) Force constant voltage - when you enable this option, your voltage will not change in 2D and 3D modes.
5) After making changes, do not forget to click OK.
6) Go to the Cooler tab - check the box in the menu to enable software user mode.
We study the graph and set the curve that suits you. It is advisable to stick a lot of transitions - it will be better to customize. 7) go to the Monitoring tab: A) you can adjust the data reading period. The default is 1000ms. B) Monitoring can be recorded in a log. This has virtually no effect on performance, so anyone interested can safely install it, indicating the location where it will be saved.
Setting up active monitoring schedules: A) Click the checkboxes next to the indicators you are interested in. I advise everyone everywhere to be sure to check the box next to the “GPU load” item. Monitoring this parameter will help you determine how well the processor matches your video card. If the video card in the game is constantly underloaded (load 50 - 90%), it means that the processor either needs to be overclocked (if it is not already overclocked), or it needs to be changed to a more powerful one, or if the FPS suits you, you can turn down the graphics settings. B) so that everything you marked is reflected on the monitor during the game, click on the item you are interested in - for example, “GPU load”, and at the bottom, check the box “show in overlay screen display”:
This way you can add indicators that interest you to the overlay. I advise you to add GPU loading there. It is very convenient to monitor the GPU load in games where you do not have enough processor. I think this figure will surprise many.
Next, so that statistics are always displayed on the display, go to the program: MSI afterburner on screen display server This program is responsible for displaying monitoring indicators on the screen while applications are running. In order for the program to start itself, put ON next to the Start with Windows inscription: I also circled in white circles the items that you can adjust the font size, color, and location on the screen.
This completes the real-time monitoring setup. Now the parameters that you specified will be displayed on your screen.
9) Go back to MSI Afterburner, in Settings, and go to the “OED” tab. Everything in it is in Russian and I think everything is clear.
10) go to the “screenshot capture” tab. Everything is simple in it too. Choose the location where they will be saved and the format.
Part three: Cooler speed, application of overclocking, disabling frequency synchronization of the shader unit and GPU for Geforce:
Where:
1) ON/OFF frequency synchronization 2) In order for the graph that you drew for your cooler to work, you need to click on the User Define button in the MSI AB window (number 2 on the screen). And to control the speed of the cooler directly by setting the revolutions, in the FAN SpeeD window, press the AUTO button, then set the speed as a percentage on the scale. 3) In order for overclocking to be enabled after a reboot, press the button marked in Figure 3. DON’T FORGET to press Apply or OK when making changes
Part four: creating and using overclocking profiles.
1) to create a profile we will need to set the desired frequencies. 2) Unlock saving profiles by pressing button 1. After pressing, the lock should open and the Save button should light up (marked 2 in the figure). 3) Press the SAVE button and save the profile in one of the five squares that will start blinking. 4) We create as many profiles as you need. And click on the lock - so that no one leaves 5) Go to the Settings menu and scroll down to the “Profiles” tab. In it we select profiles for 2D and 3D. Click OK.
DON'T FORGET to click Apply or OK when making changes.
I immediately apologize for the large screenshots, and the crooked text, I don’t have time to trim them. I described all the functions of MSI AB as best I could and as time allowed. This instruction should help novice overclockers and experienced comrades in using all the functions of this program. I recommend that everyone display the GPU load in Overlay, because very often people on the forum ask whether this or that processor is enough to unlock the potential of the video card.
PS: 1) Questions like: “at what frequencies should I drive the card, and what voltage should I set?” ask in special forums IN THE CONFERENCE Overclockers.ru. I won't answer them. 2) I won’t give advice on MSI AB either, because everything is described in the instructions, you just need to read everything to the end. 3) Screenshots are on Radical.ru because I have very little space on my personal pages. More precisely, 1.5 MB. 4) monitor the GPU load in real time - this gives a lot of information about the games and what they are missing. 5) Good luck to everyone in using this simple but very functional utility.
Tomatoes and gingerbread here: https://forums.overclockers.ru/viewtopic.php?p=7757826#p7757826
Let's figure it out
Temperature hysteresis in MSI Afterburner is the difference between temperature A, at which a change in fan speed occurred, and B, at which the next change should occur.
In simple words - for example, the temperature of the video card (GPU) rose to 65 degrees. The fan began to spin faster. Now the fan will change the temperature only if it changes by more than 5 degrees. It is the last value that is the temperature hysteresis, the value of which can be changed.
MSI Afterburner Properties, Cooler tab. The Cooler speed update period (in ms) option allows you to specify the temperature check interval in milliseconds to change the number of fan revolutions. 1000 milliseconds equals 1 second. For example, setting 5000 means checking the temperature change once every 5 seconds to adjust the fan operation.
Please note that high temperatures of the video card/processor reduce the operating life. The solution is to think about cooling, replace coolers, clean radiators. The radical and best option is to install water cooling (plus noiselessness).
Appearance:
Perhaps it's just a design theme. On the one hand it is impressive. On the other hand, overclocking a video card is a serious matter and requires some experience. Therefore, the appearance could have been made simpler and more serious (my opinion).
On the Cooler tab at the bottom there is a checkbox - Force cooler speed update at each period. It was not possible to find out the exact meaning of the checkbox; the description is the same everywhere - for better compatibility of software fan control with some problematic drivers.
FPS monitor
FPS monitor is a program specially designed for system monitoring in games. FPS monitor can display detailed system information directly on the screen on top of any game. In this case, information can be displayed both in text form and in the form of graphs.
System monitoring in the FPS monitor program can include a variety of parameters. For example, you can use it to track:
- current FPS, minimum FPS, average FPS, and frame time;
- temperature and load of the graphics processor, its clock frequency and the rotation speed of the coolers on the video card;
- temperature, load and clock speed of the central processor for each core, rotation speed of the cooler on the central processor;
- loading RAM;
- Internet using;
A distinctive feature of FPS monitor is that this program allows you to configure the placement of system monitoring on the screen. System monitoring can be placed anywhere on the screen, and it can also be divided into several parts and placed in different places.
The big advantage of FPS monitor over MSI Afterburner is that this program does not require any configuration. In order to use system monitoring, you just need to launch the FPS monitor program, and then start the game.
It should be noted that, unlike MSI Afterburner, the FPS monitor program is paid. But, it costs only 350 rubles and can be used in demo mode. The only limitation of the demo mode is the message asking you to activate the program.
Download FPS monitor
MSI Afterburner - a program for setting up a video card cooler
If you need to configure a video card cooler, then the easiest option is to use the MSI Afterburner program. This program is based on RivaTuner and includes a huge number of functions for working with video cards.
A detailed listing of all the features of MSI Afterburner can take a lot of time, so we will only list the most basic and popular ones:
- Graphics chip power management;
- Energy management;
- Controlling the clock frequency of the graphics chip and video memory;
- Controlling video card coolers;
- Saving settings to profiles;
- Monitoring video card and system parameters in games;
- Capture screenshots and videos;
At the same time, the MSI Afterburner program allows you to manage both video cards from NVIDIA and video cards from AMD. All models are supported, starting from NVIDIA GeForce 8X00 and AMD Radeon 3000. It should also be noted that the program has no connection to the manufacturer. Therefore, you can use it with video cards from all manufacturers, not just MSI.
You can download the program either on the MSI website or on the Guru3d website (Beta version).
Monitoring
If you downloaded MSI Afterburner for free, then you can monitor your hardware parameters even in games. Run the program on a 32- or 64-bit (“Windows” 64-bit is used if the amount of RAM is more than 4 gigabytes) version of Windows 7, then go to the settings section, select “Monitoring”. In the “Active monitoring graphs” menu, select any graph and check the box next to “Show in Overlay Screen Display”. Similarly, select all the charts you need (there are about 10 charts in total).
Download MSI Afterburner from the official website, follow the steps listed, go to the “OED” section. In the hotkey menu, customize their configuration to your liking.