3D printing technology has improved significantly over the past decade. And now it is taking more and more sectors of the economy by storm. So far, it has been successfully used in various fields, ranging from medicine and manufacturing to socio-cultural sectors.
However, 3D modeling is not easy to master. Sometimes it becomes frustrating to work with 3D modeling tools, and if you are a beginner, designing and printing a simple structure can take days or even weeks.
Below, you'll find easy-to-use 3D printing tools that feature innovative designs, extraordinary capabilities, and seamless integration with your computer hardware. We have provided all the information about the qualification level and where you can download them.
Sculptris
Price: Free Platform: Windows / macOS
Sculptris is a virtual sculpting tool that mainly focuses on the concept of clay sculpting. This would be a great choice if your project revolves around creating statues or characters from comics and video games.
Even though the tool is designed for beginners, it still contains many incredible features that make 3D sculpting very easy. For example, in Sculpt mode you can edit mesh geometry with simple brush strokes. In paint mode, you can easily paint textures (with brushes) wrapped onto the surface of the mesh.
Sculptris regularly analyzes the model's surface to ensure details are projected correctly and automatically adds polygons when necessary.
Overall, it provides an impressive gateway to the world of 3D. You can create basic models and then enhance them in other advanced programs such as ZBrush. In fact, Sculptris is made compatible with ZBrush, so users can import their work into advanced 3D tools when they're ready to take their designs to the next level.
Wings 3D
Price: Free Platform: Windows / macOS / Linux
Wings 3D is an open source program that uses an internal data structure to store coordinates and adjacency data. There are four different selection modes for changing the model's geometry: Edge, Vertex, Face and Body. Each has its own set of mesh tools that offer both basic and advanced functionality.
Standard tools (such as move, scale, rotate, bevel, bridge, cut and weld), virtual mirror (for symmetrical modeling) and smooth preview make it easy to create a 3D model.
Although it doesn't support animation, you can use it to create mid-range polygon models and add textures and materials using AutoUV renderers and OpenGL renderers. You can then export the file to external rendering programs such as YafRay and POV-Ray.
Programs for 3D printer
In recent years, 3D printing has become increasingly popular and accessible to ordinary users. Prices for devices and materials are becoming cheaper, and a lot of useful software is appearing on the Internet that allows you to perform 3D printing. Representatives of software of this kind will be discussed in our article. We have selected a list of multifunctional programs designed to help the user set up all 3D printing processes.
Repetier-Host
First on our list is Repetier-Host. It is equipped with all the necessary tools and functions so that the user can carry out all the preparation processes and the printing itself, using only it. The main window contains several important tabs in which the model is loaded, printer parameters are set, slicing is started, and printing is started.
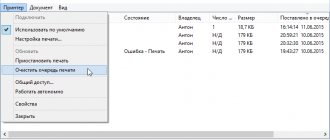
Repetier-Host allows you to control the printer directly during processing using virtual buttons. In addition, it is important to note that cutting in this program can be carried out by one of three built-in algorithms. Each of them builds its own unique instructions. After cutting, you will receive a G-code, available for editing, if suddenly some parameters were set incorrectly or the generation itself was not entirely correct.
CraftWare
The main task of CraftWare is to perform cutting of the loaded model. After launch, you are immediately transferred to a convenient working environment with a three-dimensional area where all manipulations with the models are carried out. The representative in question does not have a large number of settings that would be useful when using certain printer models; there are only the most basic cutting parameters.
One of the features of CraftWare is the ability to monitor the printing process and configure supports, which is done through the corresponding window. The disadvantages are the lack of a device setup wizard and the inability to select printer firmware. The advantages include a convenient, intuitive interface and built-in support mode.
3D Slash
As is known, printing of three-dimensional models is carried out using a ready-made object, previously created in special software. CraftWare is one such simple 3D model creation program. It is suitable only for beginners in this business, since it was developed specifically for them. It does not have heavy functions or tools that would allow you to create a complex realistic model.
All actions here are performed by changing the appearance of the original figure, such as a cube. It consists of many parts. By removing or adding elements, the user creates his own object. At the end of the creative process, all that remains is to save the finished model in a suitable format and move on to the next stages of preparation for 3D printing.
Slic3r
If you are new to 3D printing and have never worked with special software, then Slic3r will be one of the best options for you. It allows you to prepare the figure for cutting by setting the necessary parameters through the settings wizard, after which it will be automatically completed. It is the settings wizard and almost automated operation that make this software so easy to use.
You can configure the parameters of the table, nozzle, plastic filament, printing and printer firmware. After completing the configuration, all that remains is to load the model and start the conversion process. Upon completion, you can export the code to any location on your computer and use it in other programs.
KISSlicer
Another representative on our list of software for 3D printers is KISSlicer, which allows you to quickly cut the selected shape. Like the program above, there is a built-in settings wizard. Different windows display printer, media, print style, and support options. Each configuration can be saved as a separate profile, so you don’t have to enter everything manually next time.
In addition to the standard settings, KISSlicer allows each user to configure additional slicing parameters, which include many useful details. The conversion process does not last long, and after it all that remains is to save the G-code and start printing using different software. KISSlicer is distributed for a fee, but a trial version is available for download on the official website.
Cura
Cura provides users with a unique algorithm for creating G-code for free, and all actions are performed within the shell of this program. Here you can configure the parameters of devices and materials, add an unlimited number of objects to one project and perform the cutting itself.
Cura has a large number of supported plugins that you just need to install and start working with them. These extensions allow you to change G-code settings, customize printing in more detail, and apply additional printer configurations.
3D printing is not complete without the use of software. In our article, we tried to select for you some of the best representatives of such software, used at different stages of preparing a model for printing.
We are glad that we were able to help you solve the problem. Add the Lumpics.ru website to your bookmarks and we will be useful to you. Thank the author and share the article on social networks.
Describe what didn't work for you. Our specialists will try to answer as quickly as possible.
Did this article help you?
NO
Vectary
Price: Free/Premium version starts at $9 per month Platform: Web browser
Vectary provides a simple and intuitive way to get started with creating 3D and AR (augmented reality) content. It comes with a large, fast-growing library of free scenes and models, so you don't have to spend a lot of time speeding up your 3D work.
There are a variety of high-quality pre-lit and pre-lit scenes for product shots, abstract graphic backgrounds, and a wide range of fully textured materials ranging from wood and fabric to frosted glass and pavement.
Vectary also features viewport navigation, subdivision modeling, composition abstractions, lightning, and rendering. All of them are tuned to optimize your creative expression. You can create your first short with simple drag and drop and get realistic results in minutes.
Slic3R
Price: Free Platform: Windows / macOS / Linux
Slic3r is an open source 3D engine that generates G code from 3D CAD files (OBJ, STL, AMF and 3MF). It is capable of processing complex models, generating fill patterns, and estimating G-code printing time.
The software is equipped with many configuration options that allow users to customize and have complete control over their projects. You can integrate Slic3r with server applications or use it from the shell (via a powerful command line interface).
Users may choose to print thicker infill to benefit from the low perimeter layer height while still keeping print time within the required quantity. Slic3r will control the print speed to ensure each layer gets enough time to cool before applying the next layer.
PrusaSlicer
Price: free Platform: Windows | macOS | Linux
PrusaSlicer comes from a forked version of Slic3r. It has everything you need to create a 3D object: an intuitive interface, convenient keyboard shortcuts, and various controls that make it easy to scale, rotate, cut, and move objects.
When installing the software, you will find several modes to customize settings depending on your skill level. With the built-in Support Enforcer, you can selectively apply supports to individual objects. You can even choose the layer height for each part of the object individually.
PrusaSlicer automatically takes care of anti-aliasing so your output looks its best and print times remain acceptable. It can be used to cut the model for both FDM (fused deposition modeling) and resin printers.
OnShape
Price: from $1,500 per year per user | Free for teachers and students Platform: Web browser | iOS | Android
OnShape is an all-in-one product development platform that brings all your stakeholders together in a single, secure cloud workspace. It makes extensive use of cloud computing, with CPU-intensive processing and rendering performed on internet servers.
It is specifically designed for professional users who need version control and better collaboration capabilities. Team members can manage projects without keeping copies or tracks of different versions of files. Perhaps the most impressive feature of this tool is its ability to help executives make better business decisions through real-time analytics.
This tool has proven its effectiveness in many industries, including 3D printing, mechanical equipment, machine parts, medical devices, consumer electronics, industrial equipment.
Although the standard version costs $1,500 per year, it is free for teachers and students. If you're a hobbyist, you can also use it for free for non-commercial projects in a public, open source working environment.
PTC Creo
Price: 30-day trial | $2,390 for one year license Platform: Windows
Creo is a suite of CAD applications specifically designed to solve the problems organizations face when creating, analyzing, and sharing information with downstream partners. It is developed by Parametric Technology Corporation, an American software development company headquartered in Boston, Massachusetts.
Creo introduces a new Generative Topology Optimization extension that lets you create high-quality designs that perform better in the real world. It also contains tools for direct 3D modeling, 2D orthographic images, technical illustrations, schematic design, and finite element analysis and modeling.
The premium version includes production processing, Modeler options, topology optimization, metal printing, tolerance analysis and more. Overall, this is a great tool for power users and small businesses.
Method 3: SketchUp
Many users know SketchUp as a tool for modeling houses, but the functionality of the software is much broader, so it can be used as a tool for working with models in preparation for 3D printing. SketchUp is on our list today because it is easy to import ready-made free models for editing and further saving in the desired format. Let's look at all aspects of managing this software one by one.
Step 1: First launch and working with models
First, we suggest that you familiarize yourself with the basic principle of interaction with SketchUp in order to understand exactly how to add and manage models. Next, we will leave a link to training materials if you want to study this solution in more detail.
- After installing and launching SketchUp, you need to click on the “Login” button to connect your user account. If you have started the trial period, then from this moment the countdown of days begins until it ends.
- When the "Welcome to SketchUp" window appears, click on "Simple" to go to the workspace.
- Drawing figures in this program is carried out in exactly the same way as in other similar solutions. Hover over the “Draw” section and select a custom shape.
- After that, it is placed on the workspace and its size is edited at the same time.
- The remaining buttons on the top panels perform modifier options and are responsible for performing other actions.
As we said before, the SketchUp developers provide a wide variety of training materials on how to interact with this application, not only in text format, but also as videos on YouTube. You can get acquainted with all this on the official website using the link below.
Go to SketchUp documentation
Step 2: Loading the finished model
Not all users want to independently create models that will be sent to print in the future. In such cases, you can download a ready-made project, edit it, and only then export it in a suitable format. To do this, use the official resource from the SketchUp developers.
Go to download models for SketchUp
- Use the link above to go to the main page of the site to search for models. There, confirm the license agreement to start using it.
- Next, we suggest using the built-in category search function to quickly find a suitable model.
- Find an option in the list, and also pay attention to additional filters.
- After selecting the model, all that remains is to click on “Download”.
- Run the resulting file through SketchUp.
- Review the model and edit it if necessary.
Step 3: Export the finished project
Finally, all that remains is to export the finished project for further printing on your existing device. You already know in what format you need to save the file, and this is done like this:
- Hover over the "File" - "Export" section and select "3D Model".
- In the Explorer window that appears, you are interested in the OBJ or STL format.
- After choosing the location and format, all that remains is to click on “Export”.
- The export operation will begin, the status of which you can monitor yourself.
- You will be informed of the results of the procedure and can proceed with the printing task.
You just learned about three different 3D modeling programs that are suitable for creating any job yourself for printing on a 3D printer. There are other similar solutions that allow you to save files in STL or OBJ format. We recommend that you familiarize yourself with their list in situations where the solutions described above do not suit you for some reason.
Read more: Programs for 3D modeling
Rhinoceros 3D
Price: 90-day free trial / $995 one-time fee Platform: Windows / macOS
Rhinoceros is a versatile 3D modeler that uses NURB (mathematical model) to allow users to manipulate points, curves, surfaces, meshes and solids the way they want. There are literally no restrictions on complexity, extent, or size outside of your hardware.
It has an extremely detailed interface that can display countless viewports, perspective working views, floating views, clipping planes, two-point perspective, and 3D stereo viewing modes. Built-in enhancement tools ensure that the 3D models used throughout the process are of the highest possible quality.
When it comes to drafting and rendering, the software facilitates the development of 2D and 3D drawings for every discipline in every notation and visual style. You will be able to control the rendering, change shadows and lights quite quickly.
64-bit support and expanded support for graphics coprocessors allowed Rhinoceros to work with large point clouds. The latest version is compatible with hundreds of different CAD, rendering and animation products.
Method 2: Autodesk Fusion 360
The following program, called Autodesk Fusion 360, is available for free private use for a year, so it is quite suitable for mastering and creating simple models in order to print them in the future on existing equipment. We decided to make the introduction to this software the same as with Blender, so we created a step-by-step division.
Step 1: Preparatory Steps
In Autodesk Fusion 360, you don't have to manually activate toolbars or select any unusual options. The user just needs to make sure that the project metrics are correct and, if necessary, change the properties of the view sides, which happens like this:
- After downloading and installing Autodesk Fusion 360 from the official website, the first launch should occur. No initial windows will be displayed, so a new project will be created automatically. Pay attention to the “Browser” section, which is located on the left under the main panels. Here, select "Document Settings" to expand this section.
- Proceed to edit the “Units” file if the standard value in millimeters does not suit you.
- In the block displayed on the right, select the optimal unit of measurement, which you will have to follow throughout the entire time you interact with the project.
- After that, check out the “Named Views” and “Origin” sections. Here you can rename each side to suit your personal preferences and customize the display of the axes in the workspace.
- To complete the configuration, make sure that the “Design” space is selected, because this is where the initial creation of all objects occurs.
Step 2: Designing a Model for Printing
If you are faced with the need to manually develop a model using Autodesk Fusion 360, you will have to study this program for a long time, or at least familiarize yourself with the basics. Let's first take a look at a simple example of adding shapes and editing their size.
- Open the Create list and see the available shapes and objects. As you can see, all the main figures are present here. Just click on one of them to proceed to adding.
- Additionally, take a look at the other elements on the top panel. The main space here is occupied by modifiers. The design of their icons makes it clear what they are responsible for. For example, the first modifier extrudes the sides, the second rounds them, and the third creates an indentation.
- After adding object shapes to the workspace, levers will appear, by moving which you can adjust the size of each side.
- When making adjustments, also look at the separate field with dimensions. You can edit it yourself by setting the required values.
We have already talked about the main features that must be followed when reviewing Blender, so we will not dwell on this again. Instead, we suggest learning the rest of the interaction with Autodesk Fusion 360 by reading the official documentation on the site in order to master the creation of not only primitives, but also objects of a much higher level of complexity.
Go to Autodesk Fusion 360 documentation
Step 3: Prepare to Print/Save Document
As part of this stage, we will talk about two different actions that are directly related to 3D printing. The first is to submit the job immediately through the software you are using. This option is suitable only in situations where the printer itself can be connected to a computer and communicates with such software.
- In the “File” menu, activate the “3D Print” item.
- A block with settings will appear on the right. Here you only need to select the output device itself, if necessary, enable preview and start the task.
However, now most standard printing devices still only support flash drives or operate exclusively through proprietary software, so the need to save an object arises much more often. This is done like this:
- In the same “File” pop-up menu, click on the “Export” button.
- Expand the "Type" list.
- Select “OBJ Files (*obj)” or “STL Files (*.stl)”.
- After that, set the save location and click on the blue “Export” button.
- Wait for the save to finish. This process will take literally a few minutes.
If such an export fails, you will need to save the project again. To do this, click on the special button or use the standard key combination Ctrl + S.
MeshLab
Price: free Platform: Windows | macOS | Linux
MeshLab is an open source program for editing and processing 3D triangular meshes. It contains many functions for checking, editing, texturing, rendering and transforming meshes.
With the visualization feature, you can graphically visualize the smallest details of a 3D model, control camera perspective, and use built-in canonical views. Move different grids into a common frame of reference, reconstruct the shape of any object, and easily control its scale, position, and orientation.
There are a variety of Photoshop-style filters for adjusting vertex and edge colors, such as brightness, contrast levels, gamma, saturation, sharpening, and smoothing. There are also additional filters for calculating volumetric occlusion and external occlusion and matching them to the color of vertices and edges.
MeshLab work can be exchanged with other popular third-party tools, including SketchFab, Autodesk, and Blender. This makes it easy to expand your project and work with multiple 3D programs.
MeshLab has been used for rapid prototyping in orthopedic surgery, benchtop manufacturing, and in many academic and research contexts such as surface reconstruction, cultural heritage, and microbiology.
3D printer software
The selection of software is carried out based on the available equipment. If a 3D scanner is available, specially developed modeling and equipment control programs are used. If you have Kinect, both paid and free software will do.
If you don’t have a scanner or Kinect, a camera will do, but in this case you’ll need programs from the Autodesk 123D Catch series. With their help, it is possible to both simulate structures and control equipment. Attention should be paid to the possibility of using the Russian language. You can download the software for free.
All software for creating three-dimensional objects are divided into three groups. The first includes those programs with the help of which modeling takes place.
Among them:
- Autodesk 3Ds Max
You can use it to depict anything. Mastering the program is not easy, but there are enough ways to do it. A beginner has free classes in the virtual space and community at his disposal. It is necessary to note that the license is in the public domain. When using it, you need to take into account that all models will be hollow. If there are holes, Autodesk 3Ds Max will not create the required 3D design when printing;
Autodesk 3ds Max software
- SolidWorks
The program is designed for high-precision modeling, therefore, working with it will require knowledge in the field of drawing and geometry. As a result of its application, filled objects will appear;
- Thinkcard
The program for creating a model on a 3D printer is distinguished by its cartoonish stylization, since it was created for the children's community, and the presence of a selection of ready-made 3D objects.
The second includes the software that powers the 3D printer. Preparing a 3D structure before printing is an important stage in creating a three-dimensional model:
- AutoDesk 3D Print Utility. This optional program can be downloaded for free. It is capable of correcting errors made during modeling and checking through calculations and visualization of the material.
- This is software characterized by a wide range of plugins and settings. It should also be noted that there is a high-speed slicer and the ability to download it for free. This universal control program allows you to change the temperature regime. Today Cura is the highest quality software.
- The software is developed for MakerBot brand 3D printers. Its advantages are a simple and convenient interface, as well as compatibility with similar equipment.
- Repetier host. 3D printer program in Russian for professionals. It is not recommended for beginners to work with it. It has many features and the ability to use third-party slicers.
The last step is to select software, the purpose of which will be to print the simulated and prepared object. The 3D printer control program Cura 15.02.1 is considered one of the most advanced. The Type 3 control program is also common, mainly due to the fact that work with this software is carried out in Russian.
MatterControl
Price: free Platform: Windows | macOS | Linux
MatterControl is a comprehensive software package that lets you design, slice and manage 3D prints. You can browse existing designs (by visiting Design Apps) or create objects from scratch using Design Tools.
MatterControl has advanced 3D design capabilities that make it easier to create quality models with greater complexity than traditional CAD tools. For example, it has real-time Z-offset modification and built-in controls for dual extrusion using powerful 64-bit processing.
If you have a dual extrusion 3D printer, the software makes it easy to select which extruder will print specific parts. Once the model is imported or created, you have the ability to remove or replace parts, align them to their origin, and tell the printer which extruder to use for certain areas of the design.
SolidWorks
Price: Available on request. Platform: Windows
SolidWorks is computer-aided engineering (CAE) and computer-aided design (CAD) software for Microsoft Windows. It is used by millions of designers and engineers in more than 100,000 companies.
Written in the Parasolid kernel, the software uses the parametric functional method to develop models and assemblies. It is quite easy to get to know and comes with a lot of functionality.
Although 3D sketches are available for professional users, most people start with a 2D sketch. A sketch contains geometry in the form of points, arcs, lines, conics, and splines. You can add dimensions (to define the location and size of the geometry) and relationships (to define attributes such as perpendicularity, parallelism, tangency, and concentricity).
The software automatically generates views from the solid model. You can easily add notes, dimensions, and tolerances to your drawing at any time. Your work is saved in the Microsoft Structured Storage file format, so you can open and edit it on other platforms from other providers.
Fusion 360
Price: 30-day free trial | $495 per year Platform: Windows / macOS
Fusion 360 is a cloud-based 3D CAD software developed by Autodesk. It handles the entire process of designing, testing and executing a 3D structure.
The software offers complete control over shape design and provides robust features for creating clean, highly detailed modes. This allows you to prototype and test designs before rapid production.
You can even digitally simulate your products to ensure they will withstand real-world conditions. The Static Stress and Shape Optimization options allow you to identify stresses caused by static loads on parts and identify unneeded areas in your design for easier weighing. This can significantly reduce the cost of prototyping.
Overall, Fusion's comprehensive set of modeling tools makes it one of the products of choice for designers, mechanical engineers and machinists.
Top 10 Best 3D Software for Beginners
Top 10 Best 3D Software for Beginners
3D printing can seem complicated to just a beginner, especially when it comes to using 3D software. This may make people give up on creating their finished STL files. To help you avoid such frustration in achieving your 3D printing , we have created the top 10 best programs for beginners. These programs will help you create complex designs and architectures that you can then use in your FDM or stereolithography 3D printers .
- TinkerCAD
Developed by Autodesk, this software is considered to be one of the simplest 3D applications that you can use when you start your CAD modeling journey.
One of the most popular 3D software in the industry, it is a free application that can be used in your web browser without even downloading it! It can also be used on smartphones and tablets thanks to the free application that has been developed for it. TinkerCAD's intuitive and easy-to-use platform has made it a popular choice for use in classrooms. With the ability to create designs from scratch (thanks to the ability to create using simple shapes), it also allows you to modify existing designs.
- Morphi
Developed by New York startup The Inventery, Morphi is a 3D software application specifically designed for use on tablets. The software allows you to create 3D models in a simple way and contains a complete library with a large number of decorative and functional models.
While the app itself is free, you'll have to pay to access the app's specific 3D models and tools. If you are interested in using this version in schools, Inventery has also developed a special version called "Morphi Edu" that costs $9.99. For Mac users, they recently opened up download options with a free 15-day trial before you start paying the $4.99 price.
- SelfCAD
Although SelfCAD is a new software introduced in early 2020, it is becoming increasingly popular for beginners and is one of the select programs used in US public schools. Based on SaaS, the software offers an easy-to-use platform that allows you to create, model, and slice, making it ideal for inexperienced users yet powerful enough for professional designers to develop complex models.
SelfCAD is an online, browser-based 3D software that is also available offline (no internet connection required once launched!).
One of our favorite applications for this software is that it gives you the ability to cut a model directly from the software and send it to a 3D printer . SelfCAD offers a free trial right on their website.
- 3DSlash
3DSlash was created in 2013 by inventor Silvain Huet, after his son inspired him with the video game Minecraft, a game where you have to survive using design and imagination in an open world built with small squares. Huet wanted to help the general public by providing them with an easy way to start 3D modeling, and thus 3Dslash was created.
3Dslash, like Minecraft, harnesses the power of small blocks that you can either remove or use to create the final object. The software offers a variety of tools to help shape your designs, including the ability to transform parts from reality to 3D with just an image that you simply upload and trace. With a resolution of up to 1/10mm, this program can render your subject quite accurately, allowing you to bring your creative realities to life!
- SketchUp
Sketchup was developed in 2000 by LastSoftware for use in architectural design. After being sold to Google in 2006 (thanks to the programs' ability to create buildings on Google Earth), it is now under the control of Trimble Navigation LLC, which continues to maintain its exemplary reputation.
Sketchup offers simple tools for a wide range of users: makers, architects, designers, engineers and builders. This program allows you to easily sketch your ideas into a 3D model. Before you start drawing your creation, you can choose a template depending on how you will be using it (for example, as a 3DP creator or as an architect for landscape and building design). Because of its versatility and easy-to-use platform, we couldn't help but add it to our list.
- Leopoly
Leopoly is an online 3D modeling tool developed by Hungarian startup Eponymous. Simple and easy to use, it offers various object modeling options such as:
- Library of available objects that can be customized in terms of color and text
- The user can select their model from a 3D gallery, which includes various files created by other users
- The program can start from 0 to sculpting and building various shapes that are offered on the platform.
- Last but not least, you can import the model directly if you have it as an STL or OBJ file.
- Sculprtis
With Sculprtis you can create your 3D models in just a few minutes without having to install any 3D software. Creating your model will be as easy as shaping an object using plasticine! This software starts out as a sphere which the user can then model as they wish by stretching, digging, smoothing, etc. This makes it an ideal tool when creating animated characters or video games! Sculptris is owned by Pixologic, the creator of Zbrush. While this is a good 3D software for beginners, it is a bit more advanced when it comes to 3D modeling.
- Fusion 360°
This Autodesk software allows you to create CAD and CAM models, making it an ideal software for industrial and mechanical design. Helping you from design to creating the final object, this software also allows you to modify all types of complex shapes. All your development processes are integrated into a single cloud platform that works on both Mac and PC. If you are a student or teacher, you are in luck because this software is provided to you for free. If not, don't worry! You can sign up for a monthly or annual subscription.
- Meshmixer
Making i.Materialise a TOP 25 list of most popular 3D modeling software, Meshmixer software is a free CAD software that is part of the Autodesk family of software. Meshmixer is not a typical CAD software because it does not allow you to create your product from the very beginning. Instead, this software helps you with animation, modeling, hole filling, cavities (with spare holes!), 3D surface stamping, and automatic repair of pre-existing models that you modify to create your own.
This software will help you create sculptural, defined objects; helping you every step of the way, showing you the changes that need to be made to your property to ensure quality. With a responsive interface and a variety of tools and features at your disposal, this is a great software for new 3D printing 3D printing software .
- Other options
For those who have never used 3D software, or those who have no idea how to create a model, there are tools that allow you to design a specific 3D model. Whether it's a romantic gift or just a charm, here are some sample programs for you:
- In addition to Autodesk software, this program allows you to download medallion models into which you can then insert photos.
- CandleCaster: an original idea that will help you create beautiful candle holders.
- Cookiecaster: A solution for creating cookie cutters from a model or photo.
- 3D Racers: Print 3D racing cars to create your own unique and original design!
- Terrain2STL: The ideal tool for printing topographic maps. You can select the desired option on the website.
- Printshop MakerBot: This is a 3D program that allows you to create and print various designs, such as 3D printed jewelry bracelets or even decorative items.
- Lithophane: From the photo you upload to the platform, you can get a Lithophane (engraved model), which you can only see if you hold it up to the light.
CATIA
Price: available upon request Platform: Windows / Unix
CATIA is probably the best 3D printing software for professional users. This means an automated 3D interactive application.
Developed in 1977 by the French company Dassault Systemes, CATIA provides a unique capability for modeling complex products. Over the years, it has evolved into more than a CAD software package: it is now a software package that includes computer-aided design and manufacturing capabilities.
The software has a fully loaded library with all the materials needed to develop projects at different scales. Unlike other 3D modeling tools of its kind, which require a powerful PC, CATIA can run on low-cost desktops and laptops.
It is used in many industries, including automotive, aerospace, defense, life sciences, consumer products and industrial equipment.
Review of 3D modeling and printing programs on a 3D printer.
Many 3D printer users sooner or later have a problem with the availability of virtual models for printing. Of course, simple 3D models, for example: a phone case, toys, chess pieces and home accessories can be downloaded from specialized websites. But it is not always possible to find the right one, and then you have to master special programs for 3D modeling.
Thanks to the 3D printing revolution and the availability of 3D printers, there are now many different programs and applications for creating 3D models. Gone are the days when special education, knowledge of technical English and a lot of time were required to create the simplest virtual, three-dimensional 3D model. There are many large professional modeling programs that specialists use to create 3D graphics and complex multi-layer virtual models. All of them are quite expensive, require a lot of time to study, and are demanding on the system capabilities of the computer and its components.
In our article, we decided to describe the most popular and prominent free and shareware programs and web applications for 3D modeling, which are ideal for home use. The programs can be used on inexpensive computers, some can be installed on a tablet or smartphone.
Thingiverse
The largest library of ready-made models optimized for 3D printing. On this site you can find about a million files, write to the author, and also upload your model if you want to share your work with everyone.
| Price | Difficulty to use | Link |
| For free | Easily | www.thingiverse.com |
Stlfinder
Another popular library of ready-made and optimized 3D models.
| Price | Difficulty to use | Link |
| For free | Easily | www.stlfinder.com |
3D Builder
3D Builder program from Microsoft for creating and editing 3D models for printing on a 3D printer. The program is entirely in Russian.
| Price | Difficulty to use | Link |
| For free | Easily | apps.microsoft.com |
SculptGL
The web application does not require installation and works from your browser. A distinctive feature of the program is a very convenient plasticine modeling simulator.
| Price | Difficulty to use | Link |
| For free | Easily | stephaneginier.com |
123 Sculpt
Create interesting and realistic 3D models on your tablet or smartphone with the 123 Sculpt program from Autodesk, and then print on your printer.
| Price | Difficulty to use | Link |
| Shareware | Easily | 123dapp.comsculptplus |
Meshmixer
Meshmixer is the main tool for 3D applications. Allows you to draw, mix, sculpt, and print your own 3D designs.
| Price | Difficulty to use | Link |
| For free | Difficult | 123dapp.commeshmixer |
Cookie Сaster
An easy free program to create 3D models in the shape of cookies. Make a funny model of a gingerbread hero and print it on your printer.
| Price | Difficulty to use | Link |
| For free | Easily | www.cookiecaster.com |
3D Slash
The new 3D modeling web application is reminiscent of the popular Minecraft. This application has several tools for creating and printing 3D models.
| Price | Difficulty to use | Link |
| For free | Easily | 3dslash.net |
Treebuild
Web application for creating 3D models and heroes in Minecraft style.
| Price | Difficulty to use | Link |
| For free | Easily | lubas.treebuild.com |
3Dponics
A program for creating accessories for hydroponics at home (a method of growing plants in artificial media without soil)
| Price | Difficulty to use | Link |
| For free | Easily | www.3dponics.com |
Tinkercad
The simplest serious program for 3D design and modeling around. The most popular modeling program for 3D printing.
| Price | Difficulty to use | Link |
| Shareware | Easily | tinkercad.com |
FormZ Edu
Great program to start exploring professional design with 3D modeling capabilities
| Price | Difficulty to use | Link |
| For free | Medium difficulty | www.formz.com |
Sketchup
Start by drawing lines and shapes. Click and drag lines to turn them into 3D shapes. Crop, copy, rotate and many tools for 3D modeling and printing.
| Price | Difficulty to use | Link |
| For free | Medium difficulty | www.sketchup.com |
FreeCAD
FreeCAD is a parametric 3D modeling program with a user-friendly interface that allows you to easily change the design, shape and size of your 3D model.
| Price | Difficulty to use | Link |
| For free | Easily | freecadweb.org |
3DTin
3DTin is a pioneer in browser-based 3D modeling. The simple user interface made it very easy to use and learn
| Price | Difficulty to use | Link |
| For free | Easily | 3dtin.com |
123D Design
The simplest way to translate your ideas into 3D models. 123D Design is a free, powerful yet simple tool for creating and printing on a 3D printer.
| Price | Difficulty to use | Link |
| For free | Easily | 123dapp.comdesign |
Tinkerplay
Tinkerplay allows you to create robots and various creatures, and then print them on a 3D printer.
| Price | Difficulty to use | Link |
| Shareware | Easily | 123dapp.comtinkerplay |
Robot Factory
A simple app that allows anyone to create awesome cartoon robots for 3D printing.
| Price | Difficulty to use | Link |
| For free | Easily | robotfactory.thinkerthing.com |
123D Catch
Turn your photos into realistic 3D models by uploading a series of photos from different angles, then 3D print them.
| Price | Difficulty to use | Link |
| Shareware | Easily | 123dapp.comcatch |
Cura
Price: free Platform: Windows | macOS | Linux
Cura is an open source application for slicing 3D printers. It is available under the LGPLv3 license, so you can integrate it with third-party CAD applications.
Like other 3D printing software, it splits the model file into multiple layers and generates printer-specific g-code. Its super clean interface and minimalist layout allows you to add any additional features or options you might need. You can then send this G-code to a printer to print the physical object.
Cura is compatible with almost all desktop 3D printers and supports common 3D formats including OBJ, STL, 3MF, X3D. It also works with image file formats such as PNG, JPG, GIF and BMP.
Program for 3D printers Cura 15.02.1
Cura is another of the available free G-code generation apps for 3D printers. It can also be used to control a 3D printer via a COM port, but I did not test this feature due to the lack of it in the relatively old BFB Rapman printer that I have, which can only print from a flash drive.
The first thing we see after launching Cura for the first time is the main application screen with basic settings:
The current version has support for the Russian language, which, however, is still partial:
In the Russian version, the main screen looks like this:
In the window on the right you can look at both the 3D view of the model and the generated trajectory in the “many layers” or “single layer” mode:
At the same time, in the “many layers” mode for some reason for code flavor
(
G-code type
) BFB and Mach3/LinuxCNC produces a gap between the blue and green layers.
For other code flavors,
trajectories in this gap are drawn with a smooth transition from yellow to green, which should probably symbolize the cooling of the layers.
Setting up a simple "top view" for program authors is probably too easy, and requires fiddling with the mouse to get roughly what you want. The keyboard can also be used - we use the arrows to rotate, and to move through layers in the path viewing mode, use the up/down arrows while holding down Shift or Control.
For code flavor
BFB and Mach3/LinuxCNC trajectory is shown as blue lines without thickness, including idle transitions,
For other G-code types, the color of the paths is different for outer/inner walls, fill and idle, and the path itself has a thickness:
However, at high magnification, instead of solid lines, we will see a uniform disgrace:
All settings have tooltips, which greatly helps you understand what's what. It’s a little confusing that the print speed is indicated in the basic
, and the remaining speeds are in the
advanced
:
Interesting tab “Extensions”:
The Tweak extension results in the following trajectory:
And in the real process it will look like this:
As a result, the robot will have an “antenna”. It is not clear whether these extensions can be used in real life, but there is no way to disable these applications back except to “clear your profile.”
On the last tab (which does not appear for all types of G-code) you can edit the start and end sections for your printer's G-code, which is taken from the corresponding ini file (see below)
The 3D printer settings look like this:
The most important thing is the type of G-code
(
code flavor
), which is offered to choose from the following options:
What these options are is indicated in the tooltip:
When setting up a new printer (or during the initial installation of the program), a wizard appears:
If you select the last item, then the following options will be offered:
The Custom option leaves very little chance:
But in other cases, printer profiles are located in the \resources\machine_profiles folder:
At first glance, the profiles look like they can be configured to do anything:
Cura allows you to read the following file types:
Availability of gcode
in the list of formats it is very pleasing, but the joy disappears when viewing layer by layer. Some layers are completely gone, some are left with only “horns and legs”, idle transitions:
Importing images allows you to get a relief image in which the height corresponds to the brightness:
STL files are read relatively quickly and correctly. However, one of the 35 test files, named, as luck would have it, sample
did not boot without producing any diagnostics.
STL processing occurs “on the fly” - after reading the file and whenever parameters are changed. For small files this is not a problem, but, for example, rotating an object like a skull at the desired angle to the horizon must be slow and sad.
Supports are generated automatically, of two types. There is only one option for internal filling: a square grid at an angle of 45 degrees to the axes.
Setting up for a specific BFB printer pleased me with a neatly laid out rake.
Firstly, when selecting the G-code type
BFB in a file with G-code, instead of the “correct” line ends 0x0D 0x0A, the result is 0x0D 0x0D 0x0A:
And the printer controller reacts to this in a very unique way - everything works except for the thread feed, which is set by command M108. You can combat this by reading and writing the file in any text editor, but you still had to think of that.
Secondly, I still don’t understand how and where Cura gets the value for the thread feed speed in this command.
If anyone is not entirely clear what this is: M108 S400 Set Extruder 1 speed to S value/10 = 40rpm
As a result, in order to achieve the “standard speed” of feed, it was necessary to set the fluidity coefficient (Flow%) to an abnormal value of 4250%. In the normal case, this is “the fluidity of the material, the amount of material extruded is multiplied by this coefficient” and usually should not be more than 150. As a result, the length of the fishing line and the weight of the model are calculated incorrectly. If we set the fluidity to 100%, then the weight of the robot in the example is calculated to be 4 grams. Real weighing showed 3.4
Yes, the “antenna” is bent, it looks like I didn’t enable the pause at height
.
Update
: the density of the material is set in the “program settings” (well, it’s logical), and by default the density of PLA is 1240 kg/m3, and for ABS you need to set it to 1040, and then the program will estimate the weight of the robot at 3 grams.
Update 2
: It should be added that Cura does not read “foreign” G-code, and for BFB
type G-code
the filling is not shown in the trajectory viewing mode.
What does Cura show?
What happens in reality (the contrast in the picture is turned up).