Creating a 3D model from photographs
Give Your Photos a New Life
Whether it's as a personalized gift or as decoration for a room at home, 3D printing a photo offers many opportunities to improve the world around us.
There are many options for 3D printing photos, and you don't have to be a professional 3D artist to do it. All you need are high-resolution photos and some 3D printing skills. And, most importantly, time.
Creating 3D models is the hardest and only part of the process, and there is usually no easy way to do it. You will have to learn and master several tricks well.
Learning to turn images into a 3D model
The duration of creating 3D models from photographs depends on their quantity. If you work with one image, the result will not be the same as compared to using several, since in this case a more detailed and accurate 3D model is guaranteed.
For one photo you will need:
1. Smoothie 3D, a free online platform,
2. an extrusion tool, which is available in many CAD programs,
3. AI tool
4. Lithophan.
Next, we will take a closer look at each of the four options provided before we begin to transform several photographs.
Single photo: Smoothie 3D
Smoothie 3D acts as a free online platform that is used to create 3D models from a single image. The software uses a single image to create an online digital model that represents what you would get using scanning or photogrammetry.
Unfortunately, this software is not effective when you need asymmetrical models with a lot of detail. In reality, Smoothie 3D requires a bit of "painting" (in the application) to turn these parts into textured 3D models. This process will take a little time if you are familiar with the nuances of the software interface.
Once the modeling stage is complete, you can either print it yourself or submit your design to a 3D printing service.
Smoothie-3D provides a simple solution and prints 3D photos as simply as possible. The best part is that no prior modeling experience is required, nor do you need to download any software onto your computer.
Photo: Extrusion Tool
This tool creates new geometry from faces, vertices, or edges. This helps create a third axis from your 2D file (image) based on some algorithms. You will gain new geometry, and your model will have volume.
In general, the specified tool is used in computer-aided design (CAD) software. So your main task is to choose the CAD tool that best suits you, be it a professional tool or something simpler.
Photography: Artificial Intelligence Tool
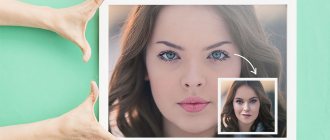
In September 2020, the world was introduced to an artificial intelligence-based tool that can turn a photo of your face into a 3D model. The tool was the result of research from two British universities that taught an artificial intelligence system to extrapolate a face from a single photo, feeding it multiple photos and corresponding 3D models.
It is possible to easily create 3D models using similar applications in today's digital world.
Photo: Litofan
Lithophan is an image that is “cut out” from a translucent material, thanks to which the backlight reveals the contents.
To create a lithophane, you first need to create a 3D model from your photo. Here are some tools you can use:
1. Image in lithophane (free and easily accessible)
2. PhotoToMesh
3. Cura (13.11 and above).
Once you have an STL file, you need to load it into a slicer program to split it into layers that will guide your printer. Then you can print.
It is recommended to use an SLA (Stereo Lithography) printer with high resolution compared to conventional FDM printers. As a rule of thumb, FDM printers produce thick layers that will affect the appearance of your image.
Trying to work with several photos
A good result can be obtained if you use several photographs. You can certainly use some of the same tools described above. However, if you are interested in a more detailed model, you should seek the services of a 3D designer, or start exploring the capabilities of tools such as Zbrush.
After all, there is a photogrammetry option that involves taking multiple photographs of your subject and collecting a series of points in space from the images. If you choose this route, be sure to take a lot of pictures of your subject from the highest possible angle. Next, you need to upload your personal photos into photogrammetry software to create a 3D file for printing.
You should also pay attention to the fact that you will need to have high quality images if you want to get a great rendering of your 3D model. Since 3D printing from photos largely depends on the quality of your photos.
Multiple Photos: Optimizing Your Photos
To optimize your photos, you will need the following:
1. High Definition Digital Camera: You need digital files, and you definitely need them in high quality.
2. Lighting device. Proper lighting is a direct key to improving your photography.
3. Tripod: will help stabilize your subject and camera as much as possible.
Below is a list of things to pay attention to when shooting:
1. Exposure.
2. Uniform lighting.
You can use several programs to edit photos:
1. Iphoto.
2. Adobe Lightroom.
3. Adobe Bridge.
Some photos: 3D modeling
If you have the opportunity, you should definitely take 30 to 40 pictures from different angles. Additionally, it is advisable to ensure that they are of high quality before loading them into your photogrammetry software. Below we provide a list of several examples of tools:
1. Acute 3D.
2. PhotoScan.
3. Recap.
The magic of 3D scanning is done through some algorithms. Once you have a good set of photos, most of the work is left to the software.
A few photos: Checking our created model
Of course, you can easily notice any problems with your model with the naked eye. Even if you don’t see anything like that, keep changing your viewing angles, because some flaws are difficult to detect at first glance. Carefully examine and study every structural detail.
Some imperfections can be easily corrected using the smoothing and sculpting tools. But if you start to notice that your model is too different from the original subject, you may need to take a new set of photos. This will likely be the best option to avoid possible frustrations when processing models. It is necessary to remember and understand the following - the more accurate your photographs, the better the result will be.
Free 3D Photo Maker - a program for creating 3D photos
The free program Free 3D Photo Maker is designed to create three-dimensional 3D images. Using the Free 3D Photo Maker program, from two initial photos, or from one photo, you can make one three-dimensional 3D photo.
The so-called 3D images are viewable through special stereo glasses. These stereo glasses have lenses of different colors in order to be able to see a three-dimensional image.
Images created in the Free 3D Photo Maker program can be viewed using the simplest anaglyph glasses. In most cases, such glasses have lenses of two colors - red and blue (the most common type of glasses).
You create a 3D photo in the Free 3D Photo Maker program, and after saving the image on your computer, you can see the three-dimensional stereo image created in the program, using anaglyph glasses.
Input image formats:
- RAW, PICT, BMP, RLE, ICO, JPEG, EMF, WMF, PNG, TARGA, GIF.
Output image formats:
- BMP, JPEG, PNG, TARGA, GIF, TIFF.
The Free 3D Photo Maker program for creating 3D photos can be downloaded from the official website of the software developer - DVDVideoSoft, which produces quite a lot of free programs.
After downloading, use the Free 3D Photo Maker installation wizard to install the program on your computer. The application will be installed in Russian.
After the installation of the program is completed, the “Information” window will open before opening the main window of the Free 3D Photo Maker program. This window will inform you that you will need special anaglyph (stereo) glasses to view the resulting image. You can activate the “Don’t show this message again” option and then click on the “OK” button.
After this, the main window of the Free 3D Photo Maker program will open.
Working with basic 3D tools.
In the toolbar, right-click (right-click) on the “3D Tool” icon , and in the menu that opens we see a set of tools for working with 3D objects. At the same time, in the top options bar, various settings for editing the 3D layer open. At any time you can return to the default values by clicking on the house icon in the options panel.
3D Portrait Wireframe and Distortion Tool
After that, you will have to go to the so-called displacement map and select the frame of the face shown in the photo.
Displacement Map and 3D Portrait Tool
Using a special scale, you can view the facial frame from a comfortable position.
Scale for rotating the head frame
Once you have chosen the viewing angle, you should apply a 3D mesh to the portrait. After this, you will need to change the size and shape of the frame so that it matches the facial features. Please note that you don't need to be as precise as possible in this process.
The main thing is to achieve the similarity of the 3D mesh with the head of the person depicted in the photograph. To do this, use the distortion tool, with which you can change the frame as you like. The placement of the eyes, the shape of the ears and lips - all this can be easily adjusted using the distortion tool.
Putting the frame on the head
Selecting the distortion tool
and start editing the head frame
The finished result
Creating a 3D photo from two images
In the Free 3D Photo Maker program window, first click on the "Open Left Image" button to add the first photo. Then click on the “Open right image” button to add a second photo to the program window.
The original images must have the same horizontal and vertical dimensions.
Using the "Swap" button you can swap photos.
You can also manage images from the context menu by clicking on the corresponding image and then selecting the context menu command.
After completing the settings, select a location to save the output file using the “Browse...” button, and then give the file a name.
Next, you will need to select an algorithm for converting the photo. You can select one of the proposed filters:
- Optimized anaglyph – color balance is maintained for better color rendition of the image.
- Red-cyan anaglyph is a standard filter for red-cyan glasses.
- Dark anaglyph – produces a darker image.
- Gray anaglyph – the output image will be in shades of gray.
- Yellow-blue anaglyph is a filter for yellow-blue glasses.
If you have regular red-cyan anaglyph glasses, then the following filters will suit you: “red-cyan anaglyph” and “optimized anaglyph”. You can determine experimentally which of the proposed filters is best for you.
After selecting a filter, to start the image conversion process, click on the “Create 3D!” button. If you have not cleared the checkbox next to the “Show image after conversion” item, after the photo is converted, the created image will be opened.
Next, the “Free 3D Photo Maker” program window will open with a warning that the conversion process has been successfully completed. You can click on the folder image in this window to open the saved image.
This is what a 3D photo looks like, processed using a filter for red-cyan glasses.