Insert plain text.
To start running, you first need to learn to walk.
In any business, you need to start with simple things, gradually moving on to complex actions. Agree, after all, we first learn letters and only then read, and not vice versa. Also here. First, we will master the simple functions of the program, and then we will write simple, standard text, and then beautiful and unique inscriptions.
And so we proceed to concrete actions.
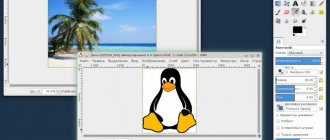
- Open Photoshop and load the image on which we will make the text.
- In the toolbar on the left side, find the capital letter T, click on it. If you right-click, you can select the text writing style: horizontal, vertical or mask text.
- When the cursor appears, click on the picture. At the same time, decide on the place where you will make the inscription.
- In the top toolbar you can select the font, size, alignment. And the text is ready.
I also recommend that you read an interesting article on how to make a transparent background.
If you want to add new fonts to your computer, then download them and add a folder on your computer called “Fonts”. You can enter it through Start and then to the Control Panel.
You can also change the color of the inscription. Click on the square and select the color you want. If you are not satisfied with the color choice, you can choose the shade yourself in the right window. Just move the circle to the desired location. And if you know the color code, then just indicate it.
Eternal classics or how to take a photo that everyone will like
Let's play idiots. I’ll tell you now, and you’ll pretend that this is new information for you. Photoshop can be found in the online version: https://editor.0lik.ru/ , download the hacked one to your computer or buy a licensed version.
What's next. Open the program, and then the image.
On the right side of the screen we find the letter “T” - horizontal text. Click on it. A menu will appear at the top allowing you to work with text. Here is the choice of font, size, alignment. Nothing new. You can work with these indicators in advance, to your taste and color, or edit them once the phrase appears in the picture.
Next comes color. You are given two ideal colors: black (active since it is on top) and white. With a small double-sided arrow in the corner you can switch these colors, and if you want to use another, just click on the active bar and select from the spectrum.
Be careful with flowers. Black and white are almost always winning. If you don’t understand combinations well, use them, don’t try to go crazy with purple, red and grey-brown.
The text is beautiful in contrast. Black looks better on a white or light background, and white on a dark background. I know smart people who believe that someone will peer at the image in order to find out what the author wanted to say. Be careful, this will never happen. You are fighting for the reader’s attention, and he is free to choose from 1000 offers. You must provide him with comfort and convenience if you want him to fall in love with your site or project.
Warp function.
Do you want your text to play out in a special way, to be positioned in an unusual way?
Then the warp function will help you. It is located in the top toolbar and is indicated by the letter T with an underlined arc. It's very easy to use. Select the inscription and right-click on this sign. A list of all effects will open: arc, arc, flag, fisheye and all possible options. Make your choice at your own discretion.
3D effect.
Do you like lettering with 3D effect? They are so voluminous and it seems that the inscription leaves a trace behind it. But this is very easy to do.
- Go to the dough layer, but don't select it.
- Click on 3D mode. It's in the top menu.
- Volumetric text is created using the “New Grayscale Mesh” menu.
- You can transform a layer using the New Structure from Layer option.
Also, with this function you can change both the color of the text itself and assign the color of its shadow, and also create a beautiful stroke, light, and its special location on the background. In general, there are many possibilities, the main thing is imagination. Try all the possibilities of the 3D effect.
Changing the font
We activate the tool with a hotkey or using the icon with the “T” symbol, which will allow you to write text in Photoshop.
By clicking the mouse in the work area (in the image), we get a new text layer in which we select the area for the font.
After entering the last letter, pay attention to the editing icons , there are fifteen of them in total. The first half changes the font and size, and the second half changes the location of the text in the area, its shape (deformation) and color. The demo version includes a tool for creating a 3D font.
Removing red eye from photos in Photoshop
Selecting the “ Editing ” tab from the drop-down list, select “ free transformation ”. With this tool you can:
- Rotate the selected font. You need to move the cursor to the corner of the selected area.
- Resize . It is enough to stretch the area with the Shift key held down.
- Expand horizontally . Move the cursor to any corner and wait for rounded arrows to appear.
- Add a reflection or shadow . The bottom layer is copied. This technique is good to use to reflect an inscription on any surface: from glass to water surface.
Using the text warp tool, the selected object is distorted, taking on a visual resemblance to a letter ribbon.
Lettering with gold effect.
As an example, let's do the practical part and create a beautiful gold lettering. To do this we will perform the following steps:
- Download a wooden background from the Internet
- Create a new document (file - create) in Photoshop with dimensions 1500*950.
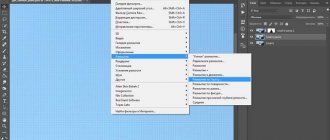
- Open the file tab and click on the line Place related. If the picture is too small or, on the contrary, large, then convert it. Press Enter. On the right side of the Layers window, right-click on the image and click on the Convert to Smart Object line.
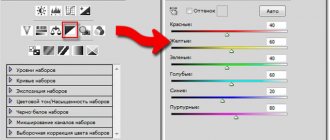
- The next step is to set the juiciness. To do this, open the Image tab in the top menu, go to Adjustments and click on juiciness. Set the juiciness parameter to -20
- In the top menu, find the Layers section, go to Layer Style and select Color Overlay. A window will open in which we enter the following parameter: blending mode – multiplication.
Working with text in Photoshop: tools
The main tool we are interested in is “Text”. In the English version - Type Tool. It is located in modern versions of Photoshop, in particular CS6, on the toolbar on the left. It is most often presented in 4 versions:
- for horizontal printing;
- for vertical placement of text;
- in the form of an additional tool “Text Mask” (Type Mask Tool) - horizontal;
- in the form of a vertical “Text Mask”.
If you select the tool in question in one modification or another, then the main window of the program interface will display various options for working with text - in particular, the font type, its size, style, etc.
Photoshop also allows you to set almost any available font color using a palette. Using this graphic editor, you can perform a wide variety of operations with text. So, for example, it can be aligned - to the right edge, center, left edge.
In order to insert text into the area of the edited image, you need to select the tool in question, move the mouse cursor to the place where the words should begin, and left-click. When the cursor starts blinking, you can enter text. Photoshop will fix the corresponding block inserted into the work area as a new layer.
The text placed on the image can be freely moved from one place to another. To do this, you need to move the mouse cursor some distance from the text block and wait until it changes its appearance to the one corresponding to the “Move” tool. After this, by holding down the left button, the user is able to change the position of the element in question.
Deleting text and the corresponding layer is carried out by pressing the Esc key.
The tool in question can also be used to place a large amount of text in the Photoshop work area. The fact is that by default the corresponding program component enters words one after another without hyphenation. And if there are too many of them, they will simply be displayed by Photoshop outside the work area.
In order for the user to be able to enter large text into the program, the corresponding tool must be used in a slightly different way. You need to select it, move the mouse cursor to the desired location, then press the left button and, without releasing it, “draw” a small diagonal on the screen. This will cause Photoshop to open a “modified” area for large text input. It can also be moved around the program workspace. It is permissible to set the desired font for text located in the “modified” area, change its color, size and other properties.
So, the main tool that will help us use beautiful fonts in Photoshop is “Text”. Let us now study some practical nuances of its application.
Practice using the “Text” tool
There are 2 main approaches to working with text blocks in Photoshop.
Firstly, you can carry out the necessary operations with fonts, and then rasterize them - that is, turn them into a graphic object. Editing the text in the corresponding block will then be unavailable.
Secondly, you can enable the option to turn the text into a smart object. This action does not imply rasterization - and therefore the corresponding block, even taking into account the effects that the user applies, can be edited later.
Many Photoshop lovers are especially attracted to the second scenario for using the program’s capabilities. This is understandable: it is not always the case that text, once placed in a picture, is necessarily preserved until the project is submitted in its original version.
In order to convert text into a smart object, you need to go to the layers panel, select the text one, right-click on it, and then select the “Convert to Smart Object” option.
Thanks to Photoshop's ability to edit text without rasterization, the user is able to use the widest range of effects for the corresponding blocks. Among the most common:
- letter smoothing;
- text stroke;
- applying a gradient to letters;
- placing a picture inside the text;
- writing text in a circle or in a “wave”.
Let's study these effects in more detail.
Letter smoothing
Smoothing text helps improve its perception and make the picture on which the corresponding block is placed more aesthetically pleasing. Photoshop allows you to use this effect in several ways at once. You can select the one you need in the list that opens in the lower right part of the text options window on the “Symbol” tab. A good option is to opt for “smooth” anti-aliasing or one adapted for Windows users.
Stroke
Outlining text can be done in different ways. Let's look at the simplest one.
First, create a new workspace, preferably on a white background. After that, select the “Text” tool and use it to place a word on the picture. Then you need to right-click on the layer corresponding to the text block and select “Blending Options” (in the English interface - Blending Options). In the window that opens, check the “Stroke” (or Stroke) box, then left-click on the corresponding tab.
A menu of stroke options will open. Here you can adjust its width, set its position, fill type, etc. After the necessary parameters are selected, click OK. The text that is placed in the Photoshop work area will have a stroke corresponding to the selected effects.
Applying a gradient to letters
In this case, the work will begin not with the text, but with creating a background for it. You need to create a new document in Photoshop, and then fill its background with a gradient using the appropriate tool located just below the “File” menu item. Let it be in the range from dark gray to light gray.
After this, you can enter the text using the appropriate tool. Then select the “Symbol” tab, in which we indicate the font color - preferably much lighter than the background, but not snow-white. After that, you can open the properties of the layer corresponding to the text block, and in the window that appears, experiment with the options in the Gradient Overlay and Drop Shadow tabs so that the appearance of the text best matches the background.
Placing a picture inside the text
This effect is among the most impressive. It allows you to overlay a picture on the text so that it is visible through it.
In order to use this effect, you first need to find a suitable picture and open it in Photoshop. It is advisable that it be a beautiful photograph - for aesthetics. Then you need to open a new background layer, which should be a copy of the original one. The most convenient way to do this is by pressing the Ctrl and J key combination.
The next step is to place another one between two identical layers. This time - empty. To place it under the second one - a copy of the first one, you need to make it active, press the Ctrl key, and then click on the button to create a new layer. As a result, it will be placed where it is needed - between the first and its copy.
It is advisable to fill the third layer with something. Let it be white.
The next step is the location of the text on the work area in which the picture will be placed. We know what tool needs to be used for this. The text should form another layer. It needs to be moved in the list of layers so that it is below the one on top.
The next step is the most important in terms of creating the effect in question. It is necessary to “etch” the text outline so that the image is placed inside it. Photoshop experts recommend doing it this way:
- you need to press the Alt key and, without releasing it, move the mouse cursor over the border between the first and second layers;
- After waiting for the cursor to change appearance, you must release the mouse button.
After this, text will appear in the Photoshop work area in which the picture will be placed.
How to create beautiful text in Photoshop?
- Select the T tool. Turn on CapsLk and write the text in the Big Bottom Cartoon font, while setting the parameters to 300 pt and Tracking to 75.
- Press Ctrl+J to duplicate the text layer.
- Let's return to the original layer. Go to Layers, then Layer Style and then Shadow. We set the parameters: opacity – 32%, offset – 11, size – 9.
- We make another copy and set the following parameters on it: opacity – 50%, offset – 36, size – 50.
- Go to the original text layer and make a copy. Right-click on the copy of the text and select Insert Style. On the original layer, fill it to 0.
- To add shine, you need to add bevel and embossing in the layers section (following the old route) with the parameters: size 3, suspension mode – linear light, shadow mode – darken the base, opacity – 15%.
- Add a contour: the contour is a semicircle, put a mark on the smoothing.
- We make the inner shadow with the following settings: blending mode – linear shader, opacity – 13%, offset – 0, size – 10.
- Next, we apply the pattern: pattern – choose the most suitable one among the available options, if there is no FDR Glitter Pattern 02; scale – 50%.
As a result, we should get the option that you see in the picture.
How to Add Font Decorations in Photoshop
Use the Text tool. Click on the document field to add a caption. Select a letter and the Glyph Panel will automatically find it. Scroll the page to see all available symbol options. To replace a letter, double-click on the glyph.
In the Glyphs panel, you can select Alternates for Selection in the Set Font Category section. In this case, you will see decoration options for the letter you selected. To apply an option, double-click on it.
For example, here are the options for the letter m. In the first case, it is a regular symbol, in the second - with a trail, in the third - with an additional element at the beginning. Decorated variants are good for words that begin or end with the letter m.
Here's how it works: Modern Mountain uses variations of a capital M and a lowercase n.
Not every font has glyphs and swirls. But if you work with Photoshop, there are probably some in your library that you can try this option with. Thanks to it, handwritten fonts in your works will look more beautiful and natural.
But keep in mind: It's easy to go overboard with decorations. A few extra characters can turn an elegant style into ridiculous kitsch. Therefore, you need to know when to stop and remember about appropriateness.
If you want to master fonts, colors, and illustrations like a pro, you can learn how to do it at GeekUniversity's Graphic Design Department. In just a year, practical teachers will upgrade you so that you can confidently start a career in your specialty.
Autumn is a great time to make long-term plans and start moving towards new goals!
If you want to master your dream profession, then from October 1 to October 11, 2020, we are giving you a 40% discount on almost all GeekBrains training . Good luck!
We are not reinventing the wheel...
You've probably seen lettering in various beautiful styles. For example, wood, marble, neon and other effects. Of course, you can create them from scratch, but there is a much simpler option. Download ready-made developments from the Internet.
To do this, open an Internet browser. Enter “Download text effects for Photoshop” into the search bar. Important! Indicate the version of your program in the search. This is done to ensure that the files are compatible.
Browse the proposed sites and choose the option that you like and suits. Download it. The main resolution of these files is psd, but sometimes they are formed into compressed folders in ZIP format or RAR libraries.
To use this material, take and insert a picture into the program and insert your text instead of the one that already exists.
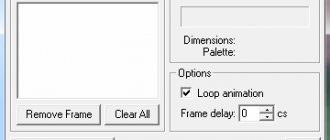
Effects overlay
When the form is ready, apply effects to the text: gradient fill and stroke. I used a yellow-orange gradient and a black stroke. You can choose any other colors you like.
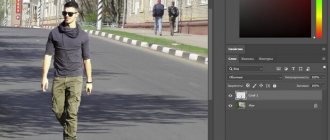
After this, on the duplicate layer lying below I will make a blue clipping, which will be slightly offset and create a shadow effect.
On another duplicate layer I will make a black stroke, and then a white one)) The main essence of this technique is to create a large number of strokes that match in color.
If there are holes between the letters, it is better to paint them over with the clipping color, otherwise it will look ugly.
To create volume for the letters, add an inner shadow with the “Overlay” blending mode. Then the shadow will not be black, but will fit into the overall style.