In this lesson you will learn everything about layers in Photoshop, learn how to create, rename, duplicate, group them, get acquainted with the settings of the layers panel and learn how to easily configure it for convenient use.
But first, let's figure out what a layer is in Photoshop . Layers in Photoshop are like sheets of paper for an artist; it is on them that all actions take place; without layers it would be impossible to use Adobe Photoshop. The only difference between layers and sheets of paper is that the picture is drawn on one sheet, but in Photoshop we can create layers in almost unlimited quantities, adding new effects and improving our digital picture by “layering” them on top of each other.
If we move away from the artistic theme and look for examples in cooking, then the layers can be compared to a sandwich, cake or layer pie - on each layer (cake) there are different ingredients that, as a whole, make up a single dish.
To manage layers, there is a layers panel ; commands from the main menu and hotkeys are also used.
How to create a layer
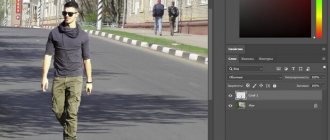
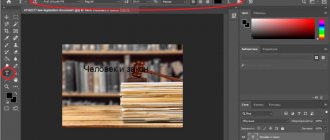
Let's first learn how to create layers. Create a new document File-Create ( File – New ) with a size of 1000x1000 pixels:
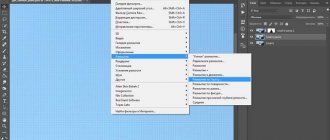
You can create a new layer in several ways: through the menu Layers-New-Layer ( Layer - New - Layer ), using the hotkey combination Shift + Ctrl + N , by clicking on the icon for creating a new layer in the layers panel (to activate the layers panel, you need to go in the Window - Layer menu :
A new blank layer has appeared in our working document:
Why clean, you ask? Because it does not contain any information, this is indicated by the gray squares located in a checkerboard pattern on the layer thumbnail - they indicate its transparency. Look also at the color of the document, white remains white. If we placed a new image in the document, it would also be considered and called a layer, but it would overlap the image. To make sure the layer is empty, let's fill it with some color, Edit-Fill.
The color we saw changed from white to green, the top layer covering the bottom. This is exactly the principle that layers work on. It is worth noting that the top layer does not always completely overlap the bottom one - it all depends on the content of the layer (it is completely filled or not), as well as on the layer blending modes .
If you hold down Ctrl key , the layer will be created below the active one:
Layer Masks
A mask is a halftone or full-color image that hides parts of the layer on which it is applied. For halftone masks, black, white, and gray represent the transparency of the mask. Black color indicates opaque areas of the mask (the layer is not visible through them); white - completely transparent areas of the mask, and through the gray layer it is partially visible. This kind of mask placed on top of a layer is called a layer mask. Please note that these designations are relative. If necessary, colors can be swapped. Then opaque areas will be shown in white, transparent areas in black. However, in order not to get confused with the notation yourself, it is better not to change the default.
Attention!
The mask is not applied to the background layer. Before creating a layer mask, you need to convert the background layer to a normal layer.
Photoshop allows you to work with several types of masks: raster, vector and clipping.
Raster layer masks
Raster masks are created based on the selected area. You need to select a fragment of the image, then at the bottom of the Layers palette click the add mask button. As a result, the part of the layer that is not included in the selection area will be hidden behind the mask (Fig. 8).
Rice. 8. Example of a raster layer mask
Once you create a layer mask in the Layers palette, its thumbnail will appear not only on the layer, but also in the Channels and Properties palettes. The Properties palette provides access to additional settings for mask parameters: density, feathering, edge refinement, and mask color inversion. Moreover, the properties palette allows you to work not only with raster masks, which are created based on a selection, but also with vector masks, created based on a vector path.
Vector layer masks
Creating a vector mask should begin by creating a path with any vector tool, for example Custom Shape. Moreover, you should draw the figure in the Path mode! After creating a vector shape, you must click the Mask button on the properties panel (Fig. 9).
Rice. 9. A vector path has been created
Comment
In addition to using the Mask button, you can, as in the case of a raster mask, click on the add mask button in the Layers palette, but while holding down the Ctrl key (in Mac OS - Command)!
Further customization of the mask occurs in the Properties palette (Fig. 10.
If desired, you can outline the outline, for example, with a brush, and place another layer under the layer with the mask (Fig. 11).
Rice. 10. The Density and Feather of the created vector mask have been changed
Rice. 11. The final collage created based on a vector layer mask
Clipping Masks
Unlike layer masks, a clipping mask is created not from a selection or vector path, but from an image on the layer. Then all layers above the clipping mask will be masked by this image. To create a clipping mask, you can execute the Create Clipping Mask command from the Layers palette menu or press the key combination Alt+Ctrl+G (on Mac OS - Option+Command+G). You can also hover your mouse pointer with the Alt key pressed (in Mac OS Option) over the border of two layers, and when the pointer changes to a square with a curved arrow, click the mouse. In either case, a clipping group consisting of two layers will be created. The image of the bottom layer of this pair will turn into a clipping mask, and a designation in the form of a curved arrow will appear on the top layer. The bottom layer is also called the base layer of the clipping group. So, in Fig. Image 12 of the dress is a clipping mask for the top layer with a photo of yellow roses.
Rice. 12. Example of a clipping mask
How to rename a layer
To rename a layer, double-click on its name in the layers panel , enter a new name and press Enter , or select the menu item Layers - Rename Layer :
How to duplicate/copy a layer
To duplicate a layer, press the keyboard shortcut Ctrl + J , or right-click on the layer in the layers panel and select Duplicate Layer:
By default, the word “copy” will be added to the name of the duplicated layer. Next we will look at how this can be disabled if necessary.
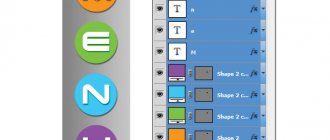
Changing thumbnail sizes and borders for layers
You probably noticed that there are strange pictures in the previous screenshot. Thanks to this parameter, we can configure the display of thumbnails (pictures) of the layer. Many people will really like this option, as the thumbnails become larger and much more readable. To set the size, simply set the checkbox to the desired position.
We can also customize the display of the thumbnail by selecting one of the options:
- Layer boundaries (the thumbnail will only show that all the extra empty space has been drawn; it will not be visible)
- Entire document (displays a thumbnail with empty pixels of the entire document area)
Well, friends, I hope these settings will make your work in Photoshop more comfortable and you will spend less time on routine and more time on creativity.
I’m curious, share your opinion in the comments, do you remove the “copy” label from the layer and do you remove it at all?
How to group layers
When a large number of layers accumulate in a working document, it becomes necessary to group them, this will help speed up the workflow and allow you to organize the layers. To group layers, select the desired layers in the layers panel using Ctrl or Shift keys and clicking the mouse (selecting layers is no different from selecting files in Explorer), then press Ctrl + G , or click on the group icon in the layers panel :
Renaming a group is identical to renaming a layer.
Other operations with layers
It will be useful to highlight some more actions with layers that can definitely be useful in practical activities.
- Blend options. This feature allows you to edit a layer, change its transparency, stroke, shadows and much more.
- Rasterize the layer. If you work with vector graphics or smart objects, then you may need this function to further work with them.
- Convert to Smart Object. Helps the user edit any objects without losing image quality.
You can use the Move tool to copy selections as you drag them within or between images, or you can copy and move selections using the Copy, Copy Combined, Cut, and Paste commands. Dragging with the Move tool saves memory because it doesn't use the clipboard, unlike the Copy, Copy Combined, Cut, and Paste commands.
Copy Copies the selected areas on the current layer. Copy Merged Data Creates a merged copy of all visible layers in the selected area. Paste Pastes the cut or copied selection to another part of the image or to another image as a new layer. If there is already a selection, the Paste command places the copied selection onto the current selection. If there is no current selection, the Paste command places the copied selection in the middle of the viewport. Paste In Pastes a cut or copied selection inside another selection in the same image or another. The original selection is pasted onto a new layer, and the border of the final selection is converted to a layer mask.
When a selection or layer is pasted between images of different resolutions, the pasted data maintains its pixel dimensions. This may result in the inserted fragment having incorrect proportions relative to the new image. Use the Image Size command to make the source and destination images the same resolution before copying and pasting, or use the Free Transform command to resize the pasted portion.
Depending on the color management settings and color profile of the file (or imported data), a message may appear indicating that the color information of the file (or imported data) is being processed.
How to merge layers
Merging/merging layers
At the end of a job or during the process, it is often necessary to merge layers.
In order to merge all visible layers into one, you need to press the key Shift + Ctrl + E or go to the Layers-Flatten image menu , this step will merge all the layers on the palette into one.
To merge a layer with the previous (underlying) one, press Ctrl + E or go to the Layers-Merge Down menu.
To create a fingerprint of all visible layers, you need to press the combination Shift + Ctrl + Alt + E or go to Select - Select all ( Select - Select all ), then to Edit - Copy merged data ( Edit - Copy Merged), then Edit - Paste ( Edit - Paste). This step will create a new layer on top of all layers, while all existing layers in the work will be preserved.
Managing layers in the layers panel and hotkeys
Duplicate a layer and copy the selection to a new layer
To duplicate an entire layer (there should be no selection in the document), or copy the selection to a new layer, press Ctrl+J.
If you want to copy the selection to a new layer so that this area is cut out on the layer from which you are copying, press Ctrl+Shift+J. This operation also doesn't work with the background layer:
Selecting all layers at once
To select all layers at once, press Ctrl+Alt+A. Note that this action selects all layers except the background layer.
Selecting all similar layers at once (except Photoshop CS6 and higher)
To select all similar layers at once, for example, all text layers or adjustment layers or shape layers, right-click (Win) on one of the layers, then select Select Similar Layers from the menu that appears.
Note. This option is missing in CS6 and will be missing in future versions because... Since CS6, layer search has appeared in the Photoshop Layers Panel.
Select multiple layers
To select multiple layers that are directly above or below each other, click on the top layer to select it, and then press and hold the Shift key while clicking on the bottom layer (or vice versa). This will select the top layer, bottom layer, and all layers in between:
There is another way to select multiple layers that are located directly above or below each other. To do this, click on the desired layer, press and hold the Shift+Alt keys and click on one of the square brackets ( [ or ] ). Clicking the left bracket ( [ ) will add the layer below the selected layer to the selection, and clicking again will add subsequent layers down the stack, while clicking the right square bracket ( ] ) will add layers in the same way, but this time up the stack.
To select multiple layers that are not directly adjacent to each other, hold down the Ctrl key and click on each layer you want to select in turn:
Quickly select top or bottom layer
To quickly select the top layer in the layers palette, press Shift+Alt+].
To quickly select the bottom layer (including the background), press Shift+Alt+[.
Move a layer's selection (activity) up or down the stack
To move the selection, hold down the Alt (Win) key and press the left and right bracket keys ( [ or ] ). The left square bracket moves the selection down, the right one moves the selection up.
Move the selected layer up or down the stack
To move a selected layer down the stack, hold down the Ctrl key and press the left square bracket key ( [ ).
To move the selected layer up, use the right square bracket ( [ ) while holding Ctrl.
Note that this does not work with the background layer, as it is locked from moving on the stack. Additionally, you won't be able to move any other layers below the Background layer.
Move the selected layer instantly up or down
To make the selected layer immediately at the top of the stack, press Shift + Ctrl +], respectively, so that it is at the bottom, press Shift + Ctrl +].
Again, none of these combinations work with the background layer.
Enable/disable visibility of layers
Most Photoshop users, to disable/enable the visibility of a layer, click on the corresponding icon located on the left in the layers panel (eye icon):
But not everyone knows that you can turn off all layers, except the one whose icon you click on, if you hold down the Alt key before clicking on the “eye”:
You can turn on all layers in the same way.
Another little trick that is unfamiliar to most Photoshop users. If only one layer in a stack of layers has visibility enabled, then you can move the visibility up or down using the keyboard shortcuts Alt+] and Alt+[, respectively. This is a great way to see exactly what is on each individual layer in a document.
And one more interesting point. The visibility of layers can be turned on/off one after another. To do this, you need to hover the cursor over the “eye” of the desired layer, hold down the left mouse button, and then drag the cursor up or down, depending on the need, while the layers over the icons of which the cursor was dragged will turn on/off:
Selecting the entire layer
To select the entire layer, not just the pixels it contains, press Ctrl+A.
Selecting all pixels contained in a layer
To do this, hold Ctrl and click on the layer preview icon.
Creating a new group from layers
Select the layers you want and then press Ctrl+G
To regroup, select the desired group and press Shift+Ctrl+G.
Merging layers
To merge a layer with the layer directly below it, press Ctrl+E.
To merge multiple layers, first select the layers you want to merge and then press Ctrl+E.
And another interesting usefulness that few people know about. You can merge two or more layers into a new layer, keeping the original layers, and the newly created one will appear above the selections . To do this, first select the layers you want to merge and then press Ctrl+Alt+E:
Note. This action does not work for the background layer
To merge all layers in the palette, press Shift+Ctrl+E.
To merge all layers on a separate layer and still keep the originals, first create a new empty layer above all other layers in the palette, and then press Shift+Ctrl+Alt+E. The pixels from all the layers will be combined into this empty layer, and the layers themselves will remain untouched.
Create Clipping Mask
To do this, press the combination Ctrl+Alt+G.
Changing blend modes
Changing blend modes using keyboard and mouse keys is described in detail here.
Changing a layer's opacity
To quickly change the opacity of a layer, first make sure you have the Move Tool selected; to select it, you can simply press the letter V on your keyboard, and then press the number key. The number "5" will correspond to 50% opacity, "8" will correspond to 80%, etc. If you need a more precise opacity value, like 25%, just quickly type “25.” For an opacity value of 100%, simply type "0".
Deleting a layer
There are two ways to delete layers.
First - just click on the desired layer to select it and press the Delete key
Second, drag the layer to the trash can icon in the lower right corner of the panel:
Well, that seems to be all for now.