Features offered
Pho.to allows you to edit photos, correct colors, retouch a portrait, or add effects such as morphing and converting images into animations. The editor is free and it is one of the few that offer truly great opportunities for creativity.
On the main page of the application at the top there are seven options for working: Photo effects, Face Retouching, Photo Editor, Correction, Cartoons, Postcards and Avatars.
How to quickly remove red eyes from a photo from a computer?
For this purpose, a number of programs are also used, including
- "PhotoMASTER";
- XnView;
- Movavi;
- "Home Photo Studio"
and others, but the most popular is, of course, Photoshop. The reason is the range of functions and the quality of their execution - the creation of images, drawings, gluing and editing of photographs is also done here by professionals. There are several ways to remove the red-eye effect from a photo, and at the same time you can also make other transformations to the image. However, if you do not need significant processing of the photo, you should not download Adobe Photoshop - any of the listed editors is quite suitable for editing.
In addition, photos uploaded to social networks can be conveniently improved on the spot: VK, Instagram, Facebook, Twitter are equipped with their own online service for correcting imperfections.
Photo effects
The “Photo Effects” tab contains a collection of ready-made templates. They are divided into categories and represent a set of ready-made effects for use.
If you select one of them, you will be prompted to upload your photo. Then the service will automatically apply the effects from the selected template. Keep in mind that most templates allow you to upload a portrait or photo of a person. Otherwise, a message will appear that the person was not found.
There are several hundred templates to choose from, so if you have the time and desire, it’s easy to choose the one that suits you best. In general, the tool was created for those who need instant results.
Shoot without red eye
You can do without a program that removes the unwanted effect altogether, if you immediately take a high-quality photo. Professionals do this by moving the flash away from the lens, redirecting it, or installing a diffuser. There are fewer options for those who take photos with a regular digital camera or smartphone camera, but it’s still worth a try.
So, sometimes changing the angle helps to remove the red-eye effect from a future photo: ask the person in the frame to look a little to the side, and not directly into the lens. Changing the angle of reflection will allow you not to expose that very redness.
The second option is to check the settings: some cameras are equipped with a “red-eye free” mode. If you activate it, before shooting, the pupils in the frame will narrow and let in less light, which, as we remember, creates an undesirable effect.
Armed with our tips - and, of course, a camera - you can create luxurious portraits.
Face retouching
The “Face Retouching” section of the site provides the opportunity to automatically retouch portraits and photographs with red eyes, which will make them more expressive and attractive, as well as correct many defects and whiten teeth.
You can use the same “Glamour” effect: the face will look more tanned, the contours will be weakened, and the background details will fade into oblivion.
Photo editor
The photo editor is the main section of the site. It currently offers a number of basic options that can be used to change the appearance of your photo. They offer very flexible editing as they can all be easily customized to suit your needs - photo effects, stickers, frames, text captions and other cool tricks.
In the middle of the screen there is a button to start editing; by clicking on it, a window appears asking you to upload a photo. You can take it both from Facebook and from your computer.
Immediately after loading the image, editing tools become available in the left panel. They are standard and offer the following options - Crop, Rotate, Exposure, Colors, Sharpening, Stickers, Text, Effects, Frames and Textures.
Each option can be edited using its own settings. For example, when you select a trim, a window pops up in which you need to specify its type and size. If you open the exposure, you can set the brightness, contrast and choose the correction of highlights or shadows.
In other words, the options are extensive and automatic. After applying any change, it is advisable to click the “Save” button available below, since accidentally closing the browser window will reset all results.
On the computer
It is usually more convenient to process photographs on a large monitor. Let's figure out how to make your shots more attractive - how to remove red-eye, what products will help you put on makeup or visually lose weight.
Pixlr
The Pixlr service https://pixlr.com/ allows you to do manual retouching from photos online. The user has two types of editor to choose from: Pixlr Editor, whose interface is very similar to Photoshop, it works with layers, and Pixlr Express - for quick processing. In the express version, you can upload an image from your computer, specify the image’s address on the Internet, or take a photo with a webcam.
The main functions are grouped in the bottom menu bar:
- Ajustment – basic processing (Heal: lighten or darken areas, Red Eye: remove red eyes, Liquefy: widen or narrow parts of the face, you can crop, rotate, change brightness and contrast).
- Effect – ready-made sets of effects, with additional varieties included in each category.
- Overlay – effects for the background.
- Borders – artistic frames.
- Stickers – add a sticker picture for decoration.
- Type – print the text using one of the presented artistic fonts; Cyrillic is not supported.
All changes made are clearly displayed on the frame, but for final application you must click Apply. If you do not like the result of working with a tool, cancel its action by selecting Cancel. Once processing is complete, the file can be saved to your computer.
Makeup.pho.to
The Makeup.pho.to service https://makeup.pho.to/ru/ corrects photographs automatically. Quick face retouching in Photoshop is available online on the website and completely free. You upload a photo from your computer or Facebook and start the process. The service recognizes the face, retouches lips, skin, smoothes wrinkles and removes glare, and whitens teeth. After looking at the result, you can cancel the action of any of these tools. To do this, uncheck the corresponding box in the field on the left and click “Apply”. To compare the image with the original, click “Original” at the top. On the “Effects” tab, you can change the photo style, color scheme, replace the background and lighting.
Makeup.pho.to is suitable for quick online retouching. The lack of manual settings limits its use - the service does not correctly recognize faces whose gaze is directed to the side.
Avatan
The Avantan project https://avatan.ru/ is a universal tool. All basic tools are available here: cropping, rotating, changing exposure, sharpening, colors. There are good sets of filters and effects to transform your frame. The Retouch tool is designed to enhance and change the appearance. You carry out all actions manually, with the ability to flexibly adjust parameters.
Quick skin retouching includes products to eliminate imperfections (pimples, blemishes, moles), wrinkles, highlights, blush and tan, and changing skin color. At each point, adjust the brush size and pressure to get a decent result without a mask effect. Eye retouching in Photoshop Avantan allows you to change the color and brightness of the iris - just select the desired area with a brush, then go through the colors to select the most suitable one. There are means of applying makeup - eyeliner and eyebrows, applying mascara and eye shadow. The function of removing red eye from photos is available.
With the help of Avantan, you can paint your lips, whiten your teeth and retouch your hair in Photoshop - change your color from brunette to blonde and vice versa. Or get plastic surgery - change the size of individual parts of the face, become thinner and visually lengthen your legs.
Avantan has one of the widest range of tools for changing your appearance. The Russified interface facilitates the process of mastering the tool.
Photocat
The Photocat project https://web.photocat.com/ offers manual retouching of personal photos. The tools are very similar to Avantan with a few exceptions. You can remove wrinkles and pimples, change skin tone, line your eyes and choose a new color. Eyebrow retouching and hair coloring are not implemented.
Correction
It is also an automatic tool that performs facial correction using special algorithms. In just a few seconds of processing, colors and saturation are improved, image defects are corrected, red-eye is removed, digital noise is eliminated, and sharpness is improved.
If you perform automatic processing, a window will appear with additional settings that can be edited manually. This option allows you to set more precise parameters, which has a positive effect on the quality of the photo. Uploading a photo is done in the same way as in other tabs.
How to remove red eyes in photos from Android or iOS?
You can process pictures directly on your phone. On iPhone and iPad, some elements of graphic processing do not even require installing an application: brightness, contrast, white balance, and sharpness can be changed in the built-in photo editor. Using it, you can remove the red-eye effect in a photo: just a couple of clicks - and the photo becomes clean, and the colors in it become natural.
For those for whom “native” functionality is not enough, special applications have been created:
- facetune;
- Pixtr;
- Photo Retouch;
- Visage Lab;
- MakeupPlus;
- Eye Color Changer Makeup;
- Photo Lab;
- YouCam Makeup
and others. They will help you get rid of the vampire look and generally bring beauty.
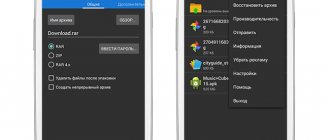
You can also remove red eyes from a photo from your phone on the Android platform - for example, through the application:
- PicsArt;
- Aviary;
- Line Camera;
- Pho.To Lab;
- Photo Editor.
Among the listed programs, PicsArt provides the most editing capabilities; at the same time, this program is also the most complex. Simpler analogues are Line Camera and Aviary.
Cartoons and animations
This section is created for those who like to have fun with photographs. Provides the opportunity to create a caricature in the form of cartoon graphics using special technologies. Thus, after processing, the number of colors is reduced, transitions are smoothed and sharp boundaries are drawn. This allows you to get a cartoon-like image.
The second possibility is to create animated images. You can apply effects such as morphing or changing facial expressions to any portrait, making the person’s face smiling, applying squint, etc. You can also change the face so that the person looks like a troll, an alien or another funny character. In addition, any part of the face can be made to move. The result can be saved in Gif format.
Then all that remains is to either save your work to your computer, or share it on social networks (on Facebook it is possible directly from the service).
Ready-made processing styles
The program has built-in artificial intelligence that analyzes the content of the photo and determines where the head, eyes, eyebrows, cheeks, nose and lips are in the photo. This, in turn, makes automatic retouching possible. By opening the tab of the same name, you will be taken to the catalog of ready-made processing styles. There are 14 options for you to choose from. Each performs a specific task to improve the photo - removes shine, redness, adds tan, whitens teeth, etc.
To remove small wrinkles in a photo, the “General Improvement”
,
“Effective Portrait”
and
“Smooth Skin”
. The latter performs only the task stated in its name. The first two additionally eliminate glare and make the skin matte.
Smooth out the skin in your photo with the touch of a button
Avatars
The “Avatars” section contains a collection of ready-made solutions for creating an avatar and allows you to animate one or more photos. For example, you can raise someone's eyebrows or make them smile.
Here you just need to fill in your image and, instead of manual adjustments, choose one of the selected options. And there are a lot of them here - collages, emotions, colorful filters, frames, adding animated particles and much more.
Among other tools, it is worth highlighting the combination of one photo with another. Again, you can't customize the animation itself, but you will have many effects available at your disposal. For example, the fire effect looks really beautiful.
Removing wrinkles in Photoshop
Wrinkles on the face and other parts of the body are an inevitable evil that will overtake everyone, be it a man or a woman.
This trouble can be dealt with in different ways, but today we’ll talk about how to remove (at least minimize) wrinkles from a photograph in Photoshop.
Let's open the photo in the program and analyze it.
We see that on the forehead, chin and neck there are large, as if separately located, wrinkles, and near the eyes there is a continuous carpet of small wrinkles.
We will remove large wrinkles with the Healing Brush , and small ones with the Patch Tool .
So, create a copy of the original layer using the keyboard shortcut CTRL + J and select the first tool.
We are working on a copy. Hold down the ALT and take a sample of clean skin with one click, then move the cursor to the area with the wrinkle and click again. The brush size should not be much larger than the defect being edited.
Using the same method and tool, we remove all large wrinkles from the neck, forehead and chin.
Now we move on to removing small wrinkles near the eyes. Select the Patch .
Using the tool, we outline the area with wrinkles and drag the resulting selection onto a clean area of skin.
We achieve approximately the following result:
The next step is to slightly even out the skin tone and remove very small wrinkles. Please note that since the lady is quite elderly, it will not be possible to remove all the wrinkles around the eyes without radical methods (reshaping or replacement).
Create a copy of the layer we are working with and go to the menu “Filter – Blur – Surface Blur” .
Filter settings can vary greatly depending on the size of the image, its quality, and the tasks at hand. In this case, look at the screenshot:
Then hold down the ALT and click on the mask icon in the layers palette.
Then select a brush with the following settings:
We choose white as the main color and paint over the mask, opening it in those places where it is necessary. Don't overdo it, the effect should look as natural as possible.
Layers palette after the procedure:
As you can see, there are obvious defects here and there. You can eliminate them with any of the tools described above, but first you need to create a fingerprint of all layers at the top of the palette by pressing the key combination CTRL+SHIFT+ALT+E .
No matter how hard we try, after all the manipulations the face in the photo will look blurry. Let's give it (the face) some of its natural texture back.
Remember we left the original layer untouched? It's time to use it.
We activate it and create a copy using the keyboard shortcut CTRL+J . Then we drag the resulting copy to the very top of the palette.
Then go to the menu “Filter – Other – Color Contrast” .
We set up the filter based on the result on the screen.
Next, you need to change the blending mode for this layer to “Overlay” .
Then, similar to the process of blurring the skin, we create a black mask and, using a white brush, open the effect only where it is needed.
It may seem that we have returned the wrinkles to their place, but let's compare the original photo with the result obtained in the lesson.
With enough perseverance and accuracy, using these techniques you can achieve fairly good results in removing wrinkles.
We are glad that we were able to help you solve the problem. Add the Lumpics.ru website to your bookmarks and we will be useful to you. Thank the author and share the article on social networks.
Describe what didn't work for you. Our specialists will try to answer as quickly as possible.
Did this article help you?
NO
Terms of Use
The editor is free, and registration is not required and is impossible in principle. All functions are immediately available without any restrictions.
However, there is also a price for such freeness - these are advertisements and they really interfere with editing. At the same time, the ad blocker also does not help - if it is turned on, the service simply will not open.
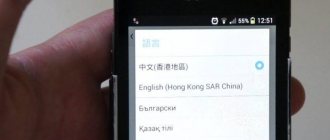
I'm pleased with the localization of the Russian language. In general, 9 languages are supported here, so it will be easy for a user from any country to get used to the interface.
Finally, if you like the online app, there is always the option to download the mobile version. It is also available for free, but contains in-app purchases.
Photo processing methods
Many Android smartphones have built-in photo editors, where you can change the tone, crop, expand the photo and play with colors. But in most cases there is no function to remove the red-eye effect. For this reason, we have prepared for you a list of programs from the Play Market for working with photos. We have collected the most popular utilities that have received good reviews on the site.
Eye Color Changer
The first program from the list: Photo Changer (clickable link). It completely suits our needs. You can not only remove the unwanted effect, but also change the eye color to whatever you like. The result of the utility can be seen in the screenshot below.
Cover eye color photo changer
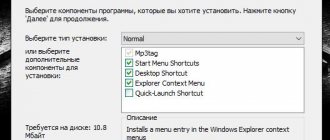
PRO photo editor
According to the developers, the PRO photo editor has functionality for editing the red-eye effect and, judging by the reviews on the Play Store, it copes with its functions perfectly. In addition to this, the list of its advantages is much longer:
- Auto-edit – improves the photo with one click of a button.
- Filters, special effects, frames and stickers to add.
- Tracing paper, figurine, drawing on a photograph.
- Flip, rotate, flip and crop images.
- Adjust light, clarity or blur. Lightening or darkening frames.
- Working with text or fonts. It is possible to create your own meme.
This is just a short list; it’s easier to download and fully familiarize yourself with the extensive functionality of Pro-Photo Editor. This is what the utility icon and sample images look like in the Play Store.
Pro Photo Editor in Play Store
InFrame – Photo Editor
Photo editor InFrame
All lovers of mobile photography or Instagram have probably heard about the InFrame photo editor. Its advantages will be difficult to describe within the framework of the article, so we will highlight the main ones:
- Lots of filters for photo processing - the pictures look juicy and professional.
- Replace and add background images to photos.
- Many options for working with text, adding signatures and inscriptions, beautiful fonts to choose from.
- Color correction manually or using filters.
- Multi-uploading photos on Instagram is a very cool thing.
The list is endless, we recommend installing and using it for all lovers of mobile photography.