Microstocker and illustrator Olga Zakharova shared several methods that she uses when creating her next illustration for sale or for a commercial order. The methods are simple and most practicing illustrators probably know about them, however, they all come with nuances that are worth paying attention to.
When I first started this blog, I knew absolutely nothing about stock images and knew very little about creating vector illustrations. Therefore, I wanted to share every important discovery with the world - I understood that just as I recently suffered, not knowing how to make a seamless texture, someone else is now suffering 
Now it has become more difficult. Because the “newcomer” stage has already passed, and many things seem so obvious to me that until one of the newbies starts asking questions about them, it doesn’t occur to me to write about them. Therefore, guys, do not hesitate to write comments, ask all questions, even those that seem stupid (there are no stupid questions).
Three pictures - three different ways of creating. Can you guess which one is which?
This is all to say that I was recently asked - what is the most convenient way to draw a picture in Illustrator?
After all, there are a great many ways to turn an idea or sketch into a vector image using our favorite program. And I decided to describe the most famous methods - with their pros and cons. I myself use different methods, depending on the result I want to get.
Trace / Image Trace
The most automated way to make a vector image from a sketch and, as it seemed to me before, the fastest (disclaimer - now I don’t think so anymore).
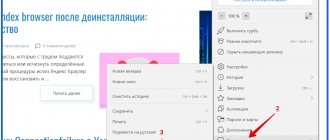
The image is traced using the image trace panel (the top panel of the Window is Image Tace) - simply place your sketch on the work area, open the panel, select one of the presets from the drop-down menu (everyone has different settings, you can choose the best one at random) - for example, sketch - and after a minute or two your file is turned into a vector. Then you just need to remember to remove the “garbage” - various empty paths that are formed in the process. To do this, without removing the selection from the traced object, you need to go to the top menu Object - Path - Clean Up.
Trace is ready! As they said at one of my previous jobs, “press the button and go to the cash register.” But, alas, everything is not so simple.
The result of the trace looks cool only when the original sketch picture was of high quality (clear lines with a minimum of hand shake, no fuzzy lines, etc.), then it was scanned with a decent DPI and at least slightly processed in Photoshop (whitening the background, adding contrast) . In all other cases, the trace requires modification.
I do this: turn on the visibility of the paths (cmd+H), select a contrasting color for them in relation to the stroke (double click on the layer name) - and, enlarging the image to 200-300%, check the accuracy of the lines. A regular pencil helps me a lot with this - I like it better than a smoothing one - and the plugin from Astute Graphics Smart Remove Brush Tool, which can be used to remove unnecessary points, minimally changing the line.
It’s important here not to overdo it in “licking” the picture - if you need perfect, straight lines, it’s quicker to use one of the tools that will be discussed below. It makes sense to use a trace when you want to preserve the “hand-drawn” effect.
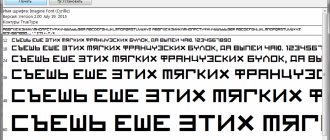
I currently only use the trace for quotes like this:
Pros and cons of trace:
+ You can relatively quickly turn a good sketch into a vector image while maintaining the hand drawn effect
– You need to spend time to process – The entire object is already vector, that is, it is more difficult to change the thickness of the lines – The lines will not be perfectly straight (this is also a plus)
My verdict is this: you need to use the trace wisely, applying it not to everything in order to save processing time, but to selected images in order to preserve the “manual” effect and some carelessness of the lines.
Vector graphics applications
The type of graphics that determines the format for presenting objects is the main criterion for classifying graphic editors. There are vector, raster and hybrid tools for working with graphics. Their capabilities differ and often complement each other. Using vector editors, they create logos, icons, maps, technical illustrations, diagrams, and flowcharts. Let us briefly describe the best representatives of this direction in open source.
Inkscape
Inkscape is a high-quality, professional open-source vector graphics editor that is available for use on Mac OS X, Linux and Windows platforms . Its functionality is in many ways comparable to advanced paid analogues, such as Adobe Illustrator and Corel Draw. The program has an extensive set of tools, a simple interface, and localization in different languages, including Russian.
If necessary, standard capabilities are expanded through custom additions. A distinctive feature is the use of SVG from W3C as the default format. Thanks to this, the software is suitable for creating vector graphics objects of any complexity: technical and artistic illustrations, animation.
Inkscape Features and Benefits:
- own rendering engine;
- an extensive set of filters, effects, drawing tools;
- vectorization of raster graphics;
- support for complex operations with contours;
- text editing and processing;
- many keyboard shortcuts provided for quickly calling functions.
Projects made in Inkscape can be exported to PDF, EPS, OpenDocument Drawing, PNG, PostScript and other formats.
You may need to use tutorials to understand some of the app's features . Fortunately, there are enough of them on the Internet.
Vectr
Vectr is free graphics software that comes with a basic set of features and intuitive tools. This simple vector editor is ideal for beginning designers. It is convenient because it can be used online or downloaded to your PC desktop under Mac, Linux, Chromebook, Windows.
The program's functionality is enough to create simple graphic objects: logos, clipart, icons, social network banners, interface layouts.
Features and Benefits of Vectr:
- availability of cross-platform and browser versions;
- the ability to demonstrate work on a project in real time;
- sharing functions, joint editing, automatic synchronization with an online account;
- a simple algorithm for performing standard vector operations.
Finished images are saved in JPEG, SVG, PNG, AI, EPS formats.
The disadvantages of the program include the English-language interface. But it is carefully thought out and well organized, so it does not create difficulties even for those who are not good at English.
Gravit Designer
Gravit Designer is a cross between the two editors mentioned above. The application is free, easy to learn, and has more advanced functionality compared to Vectr .
This is a good tool for drawing logos, corporate identity elements, and developing detailed and multi-color illustrations.
Features and benefits of Gravit Designer:
- cross-platform – the application is presented in desktop versions for different operating systems (Windows, Chrome OS, MacOS, Linux), versions for mobile devices and online implementation;
- library of vector assets - icons, stickers, shapes, illustrations, lines, frames;
- a complete set of vector tools for creating and editing objects;
- a large number of effects and styles;
- access to Google fonts.
Completed projects are exported to PDF, SVG and several raster formats.
Among the disadvantages, periodic performance problems when performing operations with large files.
Blob Brush
Of all the illustrator tools, the most similar to a real, living brush is the blob brush. For this reason, he is very loved by artists who switch from live drawing or drawing in Photoshop to vector. The beauty of this tool can only be appreciated by those who have a graphics tablet - with its help you can control the thickness of the lines by pressing.
This tool has so many fans that I’m even somehow embarrassed to admit that I don’t like it and practically don’t use it at all. This evokes in people about the same emotions as when I say that I don’t like “The Master and Margarita.” But this is what it is. Examples of using blob brush in my portfolio can only be found in very, very old pictures, which will most likely be deleted during the next cleaning.
One of my first pictures, drawn with blob brush
With a blob brush you can draw lines the same way you do with a felt-tip pen on paper (comparing with a brush, it seems to me, is not entirely correct, since the transparency of the blob brush cannot be adjusted by pressure), provided, I repeat, that you have a tablet.
Pros and cons of blob brush:
+ Makes it easier for artists to switch from raster to vector + Simulates “live” drawing
– You need a tablet to appreciate all the beauty (and the ability to draw won’t hurt either) – The thickness of the lines can only be set before drawing, as soon as the line is drawn - it is essentially a vector object with a fill - as in the case of a trace, it is difficult to adjust the thickness after the fact
Pentool
Probably the most incomprehensible tool for beginners, which turns out to be an extremely convenient and functional thing when you get to know it better. Very soon I will add a lesson to the store about how to make Bezier curves your best friends, because I myself spent a lot of nerves on them at one time. The pen is the tool that is most distant from artists and close to graphic designers, because to draw a line, you don’t need to draw it with a brush/pencil, etc., but put a dot, then another one, and so on, adjusting the bend and length with the curve handles.
For some reason, it seems to me that girls draw the blob with a brush, and boys draw it with a pentula, because it is so strict and serious. And yes, this is my favorite instrument. True, not a standard pentul, but an upgrade from Astute Graphics called Vector Scribe.
Pros and cons of pentula:
+ Clean and neat lines + You can adjust the thickness of the drawn lines/picture at any time in a couple of seconds, until expansion is made (which must be done before sending to stock, but it is better to save an unexpanded copy in the working file) + Pentul is a great way to create pictures on stock for those who cannot draw in the classical sense of the word
– All drawing comes down to arranging dots and turning handles - this bothers many creative people – It’s also useful to master the Shape Builder Tool and the Pathfinder panel, because a regular eraser won’t help to remove the excess – To learn how to confidently handle pentula, you need to master a certain amount theory and a lot, a lot of practice, but at first the lines will turn out crooked and it will take a lot of time to draw
Brush (regular) / Brush
A compromise between pentula and blob brush for those who want to draw lines rather than dots, but still have more control over how the line looks.
Either on a line drawn with a brush or on a “pentula” one, you can “attach” a huge number of different brushes - from the standard library (though they cannot officially be used on stock), or !! their own, each time getting a new result. Then you need to remember to expand the whole thing (that is, turn it into a vector using the Object - Expand command).
Pros and cons of the brush:
+ The ability to edit lines remains and you can draw with your hands (not with dots)
– You need a tablet – The lines almost always don’t turn out the way you want – maybe my hands are crooked, but in my opinion the same blob brush allows you to more accurately control the line
The blob brush and brush have their own individual settings, which can be accessed by double-clicking on a specific tool in the left panel.
For the brush, you can adjust the sensitivity and smoothness of the line; for the blob brush, you can also enable or disable the automatic sticking of objects of the same color to each other. I have nothing to tell you in detail about the settings, as I have standard ones.
Types of graphics
There are two branches of software for editing and processing images - raster and vector.
In the first case, the picture is a grid that consists of small squares, the so-called pixels, in the second, the image is specified by a huge number of mathematical formulas.
You can find many graphic editors on the Internet . Some are massive, like Photoshop, or fast and light, and online!
The article provides a brief overview of the top ten graphic programs - from editors for amateur photo design to applications for creating professional modern web graphics.
Simple geometric shapes
We are talking about a square, a circle, lines, polygons - most often, of course, they are used not by themselves, but in combination with a pentule. Drawing with geometric shapes is suitable for those who love geometry in pictures; they enjoy clear shapes and a minimum of points on the paths. Previously, I used shapes only for some obvious actions - for example, I made the eyes of a character using a circle, or the frame of a house using a square .
After watching the Illustration for Designers: Create Your Own Geometric Animal course on Skillshare, I rethought the role of shapes in pictures and became interested in learning how to see shapes in objects. This is how a series of animals was born, which I plan to continue soon:
Pros and cons of drawing with shapes:
+ The lines come out perfect, no need to think about where to put the dot and how to pull the handle
– It is very difficult for most people to switch to “thinking in forms” – You will still have to use additional tools - Pentul, Pathfinder panel or Shape Builder Tool
Approximately 80% of my current pictures are drawn with the InkScribe plugin - the same analogue of the pentule from Astute Graphics, which I already talked about (by the way, I plan to write a separate post about Astute plugins as soon as the potential size of this post stops scaring me).
The remaining 20% is trace, simple shapes and sometimes the Dynamic Sketch Tool. This is something like a pencil, only more accurate and with more settings (again, Astutovsky).
No one but you can decide which tool will be more convenient/faster for you to draw. So my main advice is to try them all, use them for different pictures, different styles, in different situations and don’t let other people’s opinions influence you. Because for some, blobbrush is the most beautiful and cutest of all, but for others, to draw cool pictures, they don’t even need a tablet - they do it with a mouse and a pentool.
Cover photo: ShutterStock
Why does a web designer need SVG?
Web designers who are familiar with vector graphics know how important it is to monitor the quality of their work and save time. Let's look at the reasons that make SVG one of the convenient tools when working with vector images and more.
Reason 1: Scalability
Unlike raster graphics, vector images do not lose quality after enlargement .
Raster images are made up of pixels, so when enlarged, such images turn out grainy and blurry, since there are a fixed number of pixels. Vector ones consist of geometric shapes - curves, lines, circles, etc. The flexibility of such images allows you to change sizes and other characteristics (color fill, shape) without losing quality.
Reason 2. Ease of change
Modification of the SVG format can be achieved both by using graphic editors and via CSS on the site itself. We can easily change the color, parameters, image shape , etc. When using raster images, you only need to make changes to the original layout and then export.
Reason 3. Possibility of using animation
You can add dynamic effects to SVG using JavaScript or CSS3. An effective and dynamic design will not only help you stand out among competitors, but also, with the right approach, will become a tool for increasing conversion.
also helps to add interactivity to the site: you can insert a link to one of the elements, change the image on hover, etc.
Reason 4. Loading speed
In addition to visual design, a web designer needs to consider page loading speed, as this directly affects conversion. Users have become less patient, so customers will not wait for the site to load, but will close it and move on to competitors. The failure rate especially increases if the site does not load from mobile devices.
SVG files are one solution to this problem. They take up less space than raster images, and you can also use the code to “clone” - write down the characteristics once and use links in different places on the site. also suitable for developing responsive page design .
Reason 5. Impact on SEO
Another reason to use SVG is the technology's impact on search engines. Since SVG images can be represented as code, search engines index them and you may rank higher among your competitors.
Vector graphics are often used to create icons, various geometric shapes, logos and illustrations. With SVG you can use such images without losing quality. Let's look at a few examples of using this technology.