Formatting is a popular procedure performed on hard drives and other storage media. When setting formatting parameters, the user can specify a specific file system. In particular, today we will consider the issue of formatting a hard drive in FAT32.
What is FAT32?
You probably know that there are several file systems, each of which has its own characteristics and limitations. In particular, at this moment we will talk about the FAT32 file system.
FAT32 is a derivative of the FAT file system, being its more advanced version, allowing you to manage disk space much more efficiently.
FAT32 is a fairly popular file system, but at the same time it is also outdated, significantly inferior to the NTFS file system. The fact is that the size of a file written to a disk with the FAT32 file system should be no more than 4 GB, while for NTFS this limitation does not exist. That is why the NTFS file system is recommended for hard drives with a large amount of disk space, and FAT32, respectively, for small drives, for example, flash drives (in fact, as a rule, various small removable drives go on sale with this file system).
In defense of FAT32, it should be noted that it is still considered the most stable and simple file system, and in addition, this file system is supported by a much larger number of existing operating systems.
Management
Now let's move directly to the instructions that will help you understand how to format your hard drive in FAT32. The process is actually simple. You should open a command prompt. We recommend formatting the disk using standard elements of the Windows operating system. To open Command Prompt, you can go to the Start menu and then click the Run tab or use the Windows key + R keyboard shortcut. If everything was done correctly, a new dialog box should open in front of you, in which we enter the command: “CMD”. This will bring up the command prompt.
How to format a hard drive to FAT32?
So, we come directly to the very issue of formatting a hard drive in FAT32. As you might expect, a hard drive can be formatted in two ways: standard Windows tools and third-party programs. The first method will not require you to use additional software, but the second can help out in situations where the system cannot complete disk formatting using the standard method.
Method 1: formatting a hard drive using standard Windows tools
1.
Open Windows Explorer to This PC, which will display all the drives connected to your computer.
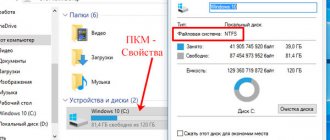
Right-click on the disk that will be used for further work and select “Format”
.
2.
A window for setting disk formatting options will appear on the screen.
In the “File system”
you will need about
.
If necessary, specify a name for the volume label, and then start formatting by clicking on the “Start”
.
3.
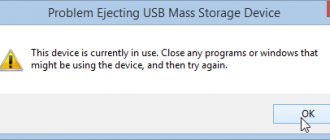
The system will warn you that during the formatting process all information will be erased from the disk. If the information contained on the disk is important to you, be sure to back it up before starting formatting.
The duration of formatting will depend on the size of the hard drive. Once the procedure is completed, you will see a window with the following content on your screen:
Method 2: Format the hard drive using the FAT32 Format program
Now let's move on to analyzing the formatting process if you need to use third-party software to complete this procedure.
In this case, we recommend that you use the FAT32 Format
, which has a simple interface, is not overloaded with various functions, and is also distributed absolutely free. You can download this program using the link at the end of this article, which will redirect you to the official website of the developer (to download the program, just click on the utility image).
What’s noteworthy is that the program does not require installation on your computer, so immediately after launching it, you will first need to select the current drive, which will be formatted in FAT32. If necessary, change the volume label to a custom name near the “Volume label”
.
If you are using the utility after unsuccessfully formatting the disk using standard Windows tools, we recommend unchecking the “Quick Format”
, but it is worth considering that in this case the duration of formatting may be quite lengthy.
To start formatting, you just have to click on the “Start”
.
Confirm the start of formatting (after this it will be impossible to cancel the procedure, which means that all information contained on the disk will be erased).
As soon as the program status reads “Done,” it means your hard drive has been formatted and you can safely close the utility.
Computer repair in Samara
The Windows 7 operating system limits the size of the hard drive when formatting it in the FAT 32 file system to 32 gigabytes. For larger hard drive partitions, you can use the NTFS file system. The NTFS file system is exclusive to Windows operating systems, so a hard drive with this file system cannot be read using Linux or Mac OS X without using special utilities. If you want to use a large hard drive on a computer running a non-Windows operating system, you will need to bypass the disk size limitation by formatting it using the command line or using third-party applications.
Instructions
Command line
1. Once you have installed and connected the hard drive to your computer, open the Start menu. Click "Computer". This screen contains icons for all partitions of your hard drive. Remember the letter value of the hard drive partition (for example, “D”) that you want to format. Also remember the name of the section, for example “New Section”. Close the window.
2. Click the Start menu button. In the search bar at the bottom of the screen, enter “cmd” (without quotes).
3. Right-click on the “cmd” icon that appears in the search results, and then select “Run as Administrator.” To continue, enter your administrator account information if required. This will display the Command Prompt window.
4. Type “format /fs:fat32 (hard drive partition letter)”, then press Enter. If you want to format a partition with the letter "D", then the command will look like this: "format /fs:fat32 D".
5. Enter the name of the hard drive partition in the line that appears and press “Enter”.
6. To confirm that the hard drive is ready to format, enter the letter “Y” and press the “Enter” key.
7. If desired, enter a new name for the hard drive partition, then press the “Enter” key to complete the formatting operation. Close Command Prompt and return to your desktop.
Third Party Applications
1. Download a third-party application to format your hard drive. There are two free programs that allow you to format large hard drives with the FAT 32 file system. These programs are "Fat32Formatter" and "Fat32 Format". Download, install and run the program.
2. Click on the drop-down menu at the top of the window and select the hard drive or drive letter you want to format. Fat32Formatter allows you to format a hard drive with multiple partitions, while Fat32 Format formats just one partition. If you are using "Fat32Formatter" and want to create one large partition on your hard drive with many small partitions, then click on the existing partition, then click the "Delete Partition" button.
3. Enter a name for the hard drive or its partition in the “Partition name” field. You can also leave this field blank.
4. Click the “Start” button to format the hard drive.
Notes
Formatting your hard drive will destroy all data stored on it. Before formatting, make sure you have backed up all important data.
Similar
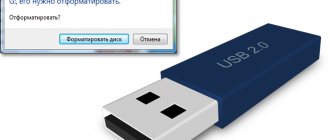
Is it possible to format a flash drive to fat32 using special programs?
There is one caveat. Flash drives larger than 32 GB (64 GB, 128 GB, etc.) usually cannot be converted to fat32 format using the methods described above. That is, using standard OS tools. What should I do? You need to use special software. For example, you can use utilities such as:
- HP USB Disk Storage Format Tool, etc.
The interface of any program for formatting flash drives is simple. The user, after performing a few simple manipulations, can easily change the format to fat32. However, for your convenience, we offer you brief instructions on how to use each utility.
The program is a command line application. Therefore, it does not need to be installed. At the same time, the utility supports different types of removable drives. Do you want to know how to use it to “format” a flash drive to fat32?
- Download and launch the program.
- In the window that opens, at the very top, select the desired flash drive.
- To quickly format, check the box next to “quick format”. For completeness, remove it.
- Then click on the “Start” button. We wait a couple of seconds.
- Formatting the flash drive to fat32 has been successfully completed!
This utility is recommended by the popular flash drive manufacturer Sandisk. And it’s no coincidence. The program is really very convenient and functionally well optimized. To use it to format a flash drive in fat32 you need to:
- Download and install the program on your computer.
- Select the media in Drive.
- Enter the name of the flash drive in the “Volume Label” line (but this is optional).
- Click Option and set the required formatting options.
- Click “Ok” and “Format”.
HP USB Disk Storage Format Tool
A very popular program that allows you to format memory cards and flash drives of various types and sizes. How to use it? Everything is extremely simple.
- We download the utility onto the PC or laptop to which the flash drive is connected. It usually comes in the form of a zipped file. So you just need to unzip the folder.
- Run the program as administrator using the right mouse button.
- A familiar window will appear, reminiscent of the interface of many other similar applications. In it, select the flash drive, indicate the file system type (fat32), and enter the volume label. Again, if you wish, you can activate the quick formatting option.
- Click “Start”.
Drives up to 32 GB
If you plan to clear media up to 32 GB, you can do this using standard Windows tools. You just need to first save all the necessary information on your PC and start cleaning:
- In the “ My Computer ” folder, open the context menu on the desired device and select “ Format ”;
- A formatting window will open and in the “ File system ” menu you need to select the FAT32 format;
- Uncheck “ Quick Format ” to completely delete all data and eliminate possible reading problems;
- The formatting process will start, due to the fact that full cleaning was selected, this may take some time;
- When finished, click “Ok” and the window will automatically close.
After the process is completed, you can re-write information to the media.
Formatting a local disk
The system partition is the volume on which Windows or Mac OS files are located. Formatting a hard drive causes problems when you need to delete information from a system volume.
If you follow the above recommendations, you may encounter various types of errors.
This is because the operating system cannot delete the volume on which it resides. There are also certain restrictions that relate to booting the computer: the BIOS is set to automatically boot the system volume.
Let us immediately note that changing the system volume is carried out only if it is necessary to reinstall the operating system. It is impossible to change volume “C” without installing a new operating system.
You can edit drive “C” as follows:
- First you need to find another operating system carrier. This could be a bootable USB drive or DVD. When installing them, it will be possible to format and then install the operating system. You can use other programs that do not require changing the OS, but many of them are more expensive or have little functionality.
- After the system downloads the installation files, the complete installation of the OS will be confirmed, and then the function of selecting a partition for storing files will be available. There are settings that have a formatting function.
- When you select the appropriate function, data is deleted and the operating system is subsequently installed.
Sometimes, to launch the media with installation files, you need to press a certain key combination or one key (depending on your BIOS), after which the BIOS opens. It should be set in the “Boot” tab and in the “Boot Device Priority” section to automatically boot from external media. After this, the computer reboots and downloads the installation package. New computers are configured in such a way that they initially scan external media, after which information is only read from the hard drive. If a black screen appears after the computer manufacturer's logo, you should press "Enter", otherwise the download will not proceed.
It is worth considering that installation is possible only if all information is deleted from the hard drive. Formatting and installing Windows 7 is much easier than using the earlier version of XP. This is due to the addition of a menu, which is created by providing a choice of one of the functions.
Cleaning
Formatting in FAT32 can also be done when the computer starts, but for this you will need to use special software that is present on most boot disks. When the command line is open in front of you, you should select the disk that we will clean, for example, “format /FS:FAT32 X:”, where instead of the last designation you should set the letter of your drive. If you don’t know what exactly to enter, then you can go to “My Computer” and look there. When everything is done, we’ll take a closer look at how to format a hard drive in FAT32. You will be asked to confirm your request, after which you will receive a special warning, which will indicate that after the procedure, all data stored on the media will be erased. In order to continue the operation, you will be required to enter the letter “Y”. After this, formatting will begin. This process may take a certain amount of time, depending on the size of the disk.
December 2019 update fix:
We encourage you to try this new tool. It fixes a variety of computer errors and also protects against things like file loss, malware, hardware failures, and optimizes your computer for maximum performance. This fixed our computer faster than doing it manually:
- Step 1: Download PC Repair & Optimizer Tool (Windows 10, 8, 7, XP, Vista - Microsoft Gold Certified).
- Step 2: Click “ Start Scan ” to find Windows registry issues that may be causing problems with your PC.
- Step 3: Click " Fix All " to fix all problems.
(additional offer for Advanced System Repair Pro -> Website | License Agreement | Privacy Policy | Remove)
However, FAT/FAT32 can format hard drives up to 16 TB, and most operating systems support up to 2 TB. Microsoft has set a 32GB partition size limit for the FAT/FAT32 file system to support NTFS, which is generally more efficient when dealing with large partitions.
In fact, this limitation only exists in recent versions of Windows. Additionally, Windows recognizes large hard drives formatted in FAT/FAT32. Finally, you can bypass the 32 GB limit.
Advantages of the FAT/FAT32 file system
The age of the FAT32 file system has its advantages and disadvantages. The big advantage is that FAT32 is the de facto standard because it is very old.
- HDD Low Level Format Tool - a utility for low-level formatting of various drives
If you select the FAT or FAT32 file system:
- Better performance with fewer writes.
- Less memory usage.
- Accelerated hard drive scanning.
- Works with all versions of Windows, Mac, Linux, game consoles and almost anything with a USB port.
- Less disk space is required for file system data to create more free space for other data.
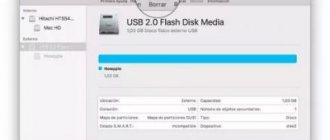
Formatting an external hard drive to FAT32 with DOS
- Open a command window by going to Start, then Run, then type CMD.
- Now enter the following command in the command prompt:
Format/FS: FAT32 X:
- Replace the letter X with the letter on your external hard drive in Windows. Windows is starting to format the drive to FAT32!
It also seems like there is a problem using the command line next to the size limit issue. Namely, some users can take forever to format the hard drive. I don't know why, but I've seen this quite often, and it can be very annoying to wait 5 hours before losing the entire format. If the format takes more than an hour, simply cancel it and try one of the following methods.
https://support.wdc.com/knowledgebase/answer.aspx?ID=291&lang=tr
RECOMMENDED: Click here to resolve Windows errors and optimize system performance
CCNA, Web Developer, PC Troubleshooter
I am a computer enthusiast and practicing IT professional. I have many years of experience in computer programming, troubleshooting and hardware repair. I specialize in web development and database design. I also have a CCNA certification in network design and troubleshooting.
Formatting your hard drive is the best way to remove all information. You must also do this for a new drive before Windows will allow you to store data on it.
- In what format to format a flash drive: optimal choice of file system
How to format a hard drive to fat32
The time taken depends almost entirely on the size of the hard drive. For a small drive, formatting will take only a few seconds, but for a very large drive, it will take about an hour.