Having looked at the articles that are displayed in the search engine for this request, I was simply shocked. A seemingly ordinary procedure, without any complications, is written in such a complicated way and with a bunch of inaccuracies and nonsense. In one of the articles I came across this recommendation: “You should definitely turn off Wi-Fi on your laptop.” Question: “Why is this necessary?”
In general, all the articles that I have seen or were written by amateurs who do not understand anything about routers. Or carbon copies copied with errors and with screenshots of old models that have long been no longer on sale. That is why I decided to write more detailed and normal instructions on how to properly reflash your router and change the software on it.
I’ll say right away that most systems have the ability to update firmware offline. That is, the router itself searches the Internet for an update on the official server, downloads it and installs it. To do this, you just need to go to the administrator panel of the transmitter and click on the appropriate button.
But sometimes the search fails or an error occurs. In more rare cases, the system itself cannot find the update. How to flash in this case? Then you can do it manually. Download the file from the site and install the new system. I will write about this in more detail in the article.
Why do you need to update the system?
Router firmware often improves system performance and makes it faster. This will also help against constant freezes and failures in the Wi-Fi network. For example, it constantly crashes or falls off, and you have to reload it.
For example, during an update, my system added support for a mobile application. Now I can access the router from anywhere in the world thanks to cloud technology, which did not exist before.
On some models, the Internet starts to work a little faster, without packet loss and a decrease in response. And now I will tell you how to update the firmware of the Internet center manually.
Firmware for Zyxsel routers
When carrying out the firmware procedure for zyxsel brand devices, you must consider the following steps.
- Initially, in a standard sequence, we provide access to the Internet, automatically obtaining an IP address, as well as the corresponding standard server number, as is the case with the asus brand, as is already known, this is necessary to access the server with a software update.
- By entering the required number into the command line, in the table that appears, enter the password, usually the standard password is the word “admin”. After which, having checked the revision number of your zyxsel device, we proceed to the update procedure, followed by a reboot.
- After a successful update, your Wi-Fi router will automatically log into the Internet, with subsequent stability and performance.
- The update procedure must be carried out as consistently as possible, without allowing any failures, which could lead to a complete disruption in the operation of the Wi-Fi router.
If you still have questions about how to flash a Wi-Fi router from Asus, watch the video with detailed instructions:
Connecting and logging into the Web interface
Our task is to connect to the router’s network. This can be done via cable by connecting to the LAN port of the device. The same goes over the air by connecting to WiFi. After this, you need to enter the router address. If you haven’t changed it, then the standard IP or DNS is located on a piece of paper under the router body.
I have a DNS address specified, but very often they also write IP using addresses such as 192.168.1.1 or 192.168.0.1. The login and password for the “Administrator” may also be indicated there. The addresses must be entered into any browser. But this only needs to be done in the address bar at the very top.
How to update router firmware
The newest routers can be updated either automatically or at the request of the user through a mobile application. But not all models have such capabilities, so in most cases you will have to perform the process manually. It may differ slightly for different routers, but in general it is similar.
Downloading the firmware
Find out the name of your router - it is written on its case. Then download the firmware file from a reliable source - the manufacturer's website. In our example, the router manufactured by TP‑Link is called TL‑WR840N. We open the official website and find the corresponding model there.
Find the “Support”, “Downloads”, Downloads or Support section - the firmware files are contained there.
Please note that it is extremely important to install the correct firmware on the router, otherwise it may stop working.
Sometimes it happens that one router model has several so-called hardware versions. Study the signatures on the device case and make sure that you are downloading the appropriate firmware.
Go to router settings
When the firmware is downloaded to disk, we proceed to install it. To do this, open your browser and enter the router’s IP in the address bar. Typically this is 192.168.1.1 or 192.168.0.1.
If these addresses are not suitable, look in the documentation for your router for the correct one. When you enter the required numbers, press Enter.
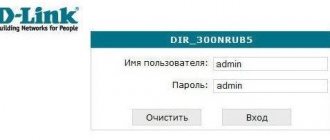
You will see the login panel for the router settings. Here you need to enter a password and login - most often this is the word admin. Sometimes the password is 1234. If these credentials do not work, you will have to refer to the router documentation again.
Saving settings
Sometimes, after updating the firmware, the router settings are reset to the factory version, and the router is unable to connect to the network. Therefore, you need to make a backup copy of them in advance.
Find the item called “Backup and Recovery”, Backup and Recovery or something like that. It is usually located under Advanced, Management, Advanced Settings, or System Tools. Click “Backup” and the router settings will be saved to your disk.
Once the firmware update is complete, they can be restored. Open Backup & Restore, select the saved file and click Restore.
Installing the update
Now find the firmware update option in the settings. Most often it is located in the Advanced, Management, “Advanced Settings” or “System Tools” section - depending on the router model. Select "Software Update".
Now is the time to make sure that the firmware version you downloaded is newer than the one installed. Already existing software is displayed in the router settings.
Now you need to point the router to the downloaded firmware file. If your router is equipped with a USB port, you may need to write the file with the new software to a flash drive and connect the media to the port. But in most cases, it is enough to click on the Open or “Open” button and select the file downloaded from the manufacturer’s website on the disk of your computer.
Once you've selected the item you want, click Update or Refresh and wait until the process is complete.
The process should not be interrupted, otherwise the router may fail.
So don’t bother updating during a thunderstorm or when there are too many power outages.
When the process is completed, the router will reboot. This usually happens automatically, but if the router asks, you will have to reboot it manually.
TP-Link
First, we need to find out our hardware version, that is, what version the router was released under. To do this, turn it upside down and look at the label. You need to look at the number after the letter “V”.
Now go to the page – https://www.tp-link.com/ru/support/download/.
Select: “For home” – “ Routers” – “ Wi- Fi routers” . Now you can enter the router model, but it’s easier to select it from the list below.
Select the hardware version and click on the “Firmware” button.
Click on the download button. Download the file to your desktop and unzip it. On new firmware, go to: “Advanced settings” - “System tools” - “Firmware update” . After that, click “Browse” and select the firmware file that was inside the archive.
For older models, go to “System tools” – “Firmware update” – “Select file” . At the very end, click “Update”.
Step-by-step OpenWRT firmware on the TP-LINK TL-WR741ND router from Windows
Routers lose their native firmware for various reasons. The desire to add functionality, solder a USB port, or simply add stability to the operation of the router. In my case, the router on the latest stable native firmware with 1-5 WiFi and 1-2 Ethernet consumers froze 1-2 times a week. It's not very scary, but it's also annoying to reboot. I wanted stability. After a long search and reading reviews, the choice fell on OpenWRT. The article already provides step-by-step instructions without the trial and error that I had to go through.
Step 0
I hope that when you start updating the router firmware, you understand that at one of the steps you may lose access to the Internet. So, I strongly advise you to read the entire article, download all the necessary files in advance and then proceed with the firmware.
Step 1
The first thing to do is update and install the latest native firmware. Here you can find the latest firmware for TL-WR741ND
, for the corresponding hardware version.
- Turn the router over and check the version of the hardware in it using the sticker on the case.
- Download the archive with the latest firmware.
- Flash the router with the firmware from the archive in the usual way (System Tools -> Firmware Upgrade).
Step 2
Next, you need to select the OpenWRT firmware version.
You should use the exact file that matches the hardware version of your model. Don't neglect this rule! There are two file system options for booting: JFFS2 and SquashFS. Judging by the reviews, you should opt for SquashFS files. The word factory
in the file name means that you must upload such a file to your device over the factory (native) firmware.
a file with the word sysupgrade
is only applicable for upgrading OpenWRT, i.e.
uploaded after factory
firmware.
SquashFS versions:
- TL-WR741ND V1 Factory
- TL-WR741ND V1 SysUpgrade
- TL-WR741ND V2 Factory
- TL-WR741ND V2 SysUpgrade
- TL-WR741ND V4 Factory
- TL-WR741ND V4 SysUpgrade
JFFS2 Versions:
- TL-WR741ND V1 Factory
- TL-WR741ND V1 SysUpgrade
- TL-WR741ND V2 Factory
- TL-WR741ND V2 SysUpgrade
- TL-WR741ND V4 Factory
- TL-WR741ND V4 SysUpgrade
Download factory
firmware and sew it in the usual way (System Tools -> Firmware Upgrade).
Step 3 or all is lost
After successful firmware installation, we get a working router with the web interface turned off.
Therefore, it is no longer possible to access the settings through the browser. Further steps are as follows: Download PuTTY Download WinSCP
Open PuTTY
, select
Telnet
protocol, address
192.168.1.1
port
23
, click “Connection”.
We log into the router. Initially you are under the root
without password.
We type the command: root
user twice . Next we write: exit
Open WinSCP
, select
the SCP
protocol, address
192.168.1.1
port
22
, User name:
root
, Password is the one you set earlier, click “Login”.
We answer yes to all vague questions and see a window with files on your computer and router. Next, take the second part of the firmware (the one that is sysupgrade), rename it to code.bin and drop it on the router in the /tmp folder. We close the program.
Open PuTTY
, select
SSH
protocol, address
[email protected]
port
22
, click “Connection”.
We type the password that we set earlier for root. We log into the router and type the command to flash it: sysupgrade -n /tmp/code.bin We wait until the router flashes and reboots.
Let's focus on the light bulbs. Next, repeat the step: Open PuTTY
, select
Telnet
protocol, address
192.168.1.1
port
23
, click “Connection”.
We log into the router. Initially you are under the root
without password.
We type the command: root
user twice .
Next we write:
/etc/init.d/uhttpd enable /etc/init.d/uhttpd start These two commands enable and start the router web interface.
Turn off the router, turn on the router.
The LuCI web interface is available to you at 192.168.1.1. Log in using the root user and the password that was previously set for root.
UPD.
After long use, the only glitch was noticed. When you change the MAC address on the WAN port, after 1-2 days it is reset to the factory one. Otherwise, the router shows miracles of stability.
D-Link
- Let's look at the version of the device. To do this, look under the router and look at the piece of paper. We are interested in what comes after “ H/ W Ver.:” or simply “ H/ W”.
- We go to the website – https://www.dlink.ru/ru/products/5/. We choose our router. Go to the “Downloads” tab.
- Download our software version.
On classic firmware, go to: “System” - “Software Update” , click “Browse”, select the file and click “Update ”. You can also click on the "Check for Updates" button below.
On new devices, select “Advanced settings” at the bottom, click once on the arrow and select “Software update”. Next, “Review” and “Update”.
How to reflash a Wi-Fi router
Hello, in this video let's look at the issue of reflashing a Wi-Fi router, but before we start, it would be reasonable to find out why we need to reflash a router at all? I don’t often set up Wi-Fi routers, so I turned to a friend who is a specialist in this matter. She works for a company that provides local and Internet networks and configures network equipment.
And here are the most common problems that arise, after which you have to reflash the router:
- disabling Wi-Fi
- router freezes
— the DHCP service does not work for automatically setting up a network connection
— VPN connection is not established
- slow data transfer speed
Therefore, if you have encountered similar problems, then it makes sense to reflash the device. Personally, when I get a new router, I immediately reflash it, it’s like updates for Windows, they should always be fresh!
Well, let's get started!
And before I start, I’ll say one thing, everything that I will show further, you do at your own peril and risk, and if you listen and watch carefully, there shouldn’t be any problems.
I will be flashing a TP-LINK Wi-Fi router, model TL-WR841ND, this is what it looks like. First of all, we look at the back side of the router, here we are interested in the web interface address for configuration, login and password. Typically the web interface address is 192.168.0.1 or 192.168.1.1 , again, this address can be found in the settings of the network connection through which the router is connected to the computer. Just look in the properties of the gateway address, for me it is 192.168.0.1, enter this address into the browser, enter the username and password and get into the web interface for managing the router.
If you can’t log into the web interface, you may have already changed the router’s IP address, login or password, so you can simply reset the settings by holding the Reset button on the router for 10 seconds. But if you didn’t set it up, then it’s better not to do anything, but contact specialists who configured the equipment, since after a reset all settings will become factory settings and nothing will work!
In my status tab it is displayed:
Firmware version: 3.14.19 Build 130122 Rel.43330n
Hardware version: WR841N v8 00000000
Now, according to the version of the equipment, you need to download the latest firmware for it, for this we can type TP-LINK in Yandex, in search of the official website of the developer, here tp-linkru.com go to the site \ Support \ Downloads \ Product type: wireless equipment \ Model : TL-WR841ND \ Version: v8 \ Search .
It is extremely important to download the firmware specifically for your router, because if you install the firmware for another device, you can get dressed and go to the service center! Let's check this again. Although in my web interface the equipment is indicated as WR841N, and on the device itself as WR841ND, perhaps the firmware was installed here for the WR841N, but I’m used to trusting what is written on the device itself. Although the web interface indicates model No. TL-WR841N/TL-WR841ND, this means that these devices are similar and the firmware should be suitable, but I will still choose the model that is indicated on the back panel of the router.
We find the latest version, download it to the computer and unzip it, as a result we have a file with the extension .bin , this is the firmware.
Before starting, I advise you to take screenshots of the previous settings, just in case, so that in case of a reset, you can configure it again. If you have Windows 7, this can be done using the built-in program psr - problem screen recorder, which I talked about in one of the lessons. Start \ Run \ psr \ Settings \ Number of stored snapshots 100 (this is the maximum) \ Start recording \ and preferably go through all the tabs of the web interface. Let's check if the screenshots have been recorded, everything is fine.
Let’s also go to System Tools\Backup and Restore\Backup\config.bin – our settings are stored in this file.
Now we can proceed System tools \ Firmware update (it is advisable to connect the device to an uninterruptible power supply before updating the firmware so that the electricity does not unexpectedly go out, under no circumstances should you reboot it while the firmware update is in progress, and it is also advisable to disconnect all patch cords, in addition which is connected to the local machine) \ Select file \ Update \ Yes \ Then the router reboots
My settings are saved, if you don’t, then go to System Tools\Backup and Restore\Select file\Restore
If it doesn’t work, then use the created screen shot file and restore from it!
And finally, if you updated the firmware to the latest version, but the problem did not disappear, or others appeared, try installing it on an older version, since it happens that the new firmware does not yet work stably and may contain errors.
Sevostyanov Anton
- View profile
- (Registered Users)
Become a reader
0
ASUS
- We go to the website – https://www.asus.com/ru/Networking/Wireless-Routers-Products/.
- Choose your router.
- Go to the first tab and select the “ BIOS and software” section. Next, download the latest version.
- In the “Admin Panel” select “Administration” , then go to the “Firmware Update” tab. After that, select and download the file. You can also update the software without downloading by clicking on the button above.
ZyXEL Keenetic
Some have a hardware version and some don't. You need to know it so as not to download the wrong firmware, which can break your Internet center. So let's look under the body.
We are interested in the inscription " Rev." – remember the meaning after this word. Now go to the SITE. Select your Wi-Fi device. Now select the software for your version. If there is no such letter at all, then download any version - but best of all, the latest one.
In the router, select the “System” section at the very bottom. Then “Files” and click on “ firmware”. Next, select the firmware file with a similar name that was downloaded earlier and load it onto the device. This method helps when you see an update error on the main page, but the transmitter refuses to update the firmware automatically.
Alternative firmware on modern routers
- Introduction
- Packaging and equipment
- Appearance
- Design Features
- Testing methodology and test stand
- Using alternative firmware
- Installing DD-WRT on ASUS RT-N16 and RT-N13U
- Installing DD-WRT on TP-Link TL-WR1043ND
- Working with firmware
- Brief overview of DD-WRT capabilities
- Overclocking ASUS RT-N16
- Rollback to native firmware
Hello again.
I hope you liked the updated Part I of the article, dedicated to the ASUS RT-N13U and TP-Link TL-WR1043ND routers, as well as their accompanying Wi-Fi adapters from the same companies. We promised to tell you about using alternative firmware for them, and we will keep that promise. But as you may remember, the results of speed tests for both wired and Wi-Fi connections showed that the TP-Link router is slightly faster than its more expensive counterpart from ASUS. Of course, this state of affairs could not suit the Taiwanese company, so the test laboratory almost immediately received at its disposal a router that was supposed to surpass its competitor. Therefore, before moving on to the study of working with alternative firmware, as well as overclocking routers, we would like to review one more device.
ASUS sent us the ASUS RT-N16 router for testing. It is equipped with an impressive set of functions, as well as truly powerful hardware. But first things first.
Just like its younger brother RT-N13U, the router comes in a large box decorated in blue colors. At first glance, you can see that the theoretical throughput of an 802.11n wireless network using MIMO technology can be 7 times higher than using 802.11g technology. Informative…
The box additionally notes the router’s ability to work with media formatted with the NTFS file system, and finally
availability of Gigabit Ethernet ports.
The equipment is standard, but it should be enough to get started:
announcements and advertising
2080 Super Gigabyte Gaming OC for 60 rubles.
Compeo.ru - the right comp store without any tricks
RTX 2060 becomes cheaper before the arrival of 3xxx
Ryzen 4000
series included in computers already in Citylink
The price of MSI RTX 2070 has collapsed after the announcement of RTX 3xxx
Core i9 10 series is half the price of the same 9 series
The price of memory has been halved in Regard - it’s more expensive everywhere
In addition to the router, you will find in the kit:
- Ethernet cable;
- Power unit;
- Warranty booklet;
- Instructions;
- Disk with software.
The instructions pleased me with their thickness. However, you shouldn’t look into it after using the RT-N13U - the standard router setup interface from ASUS is very convenient and simple.
The newcomer looks standard, and this is more of a plus than a minus. I would like to note the good build quality, as well as the horizontal layout.
I liked the design from TP-Link better; the combination of black and white looks stylish and not as ordinary as a completely beige case. But this is a matter of taste and will not affect the rating.
Set of connectors on the rear wall:
Here is the first pleasant surprise: finally, the bright minds from ASUS came up with a wonderful idea - if we are going to make a router with the ability to use it as a file and print server, then why not equip it with two USB ports? Excellent and convenient, although I note that the other two routers can use USB hubs. With the exception of two USB ports, we see three antennas and four Gigabit Ethernet ports - all standard, but enough to provide acceptable functionality.
Judging by one of the inscriptions on the box, the device from ASUS is filled with productive hardware. Let's open it to make sure:
The device is based on a chipset from Broadcom. His characteristics are truly serious and command respect. It uses a Broadcom 4718A processor with an operating frequency of 533 MHz, but ASUS engineers lowered it to 480 MHz. Also soldered are two memory chips from Samsung, 64 MB each (K4T51163QG-HCE6), giving a total of 128 MB. Excellent performance for a router. The amount of flash memory used is 32 MB and should be enough for any mockery of the firmware. The RT-N16 also uses a Gigabit Ethernet controller from Broadcom labeled BCM53115SKFBG.
We have again brought together the characteristics of competitors for a visual comparison, but this time, instead of the RT-N13U, the honor of representing ASUS belongs to its “big brother”:
| ASUS RT-N16 | TP-Link TL-WR1043ND | |
| Iron | CPU: Broadcom 4718A 480 MHz RAM: 128 MB (2 x 64 MB) ROM: 32 MB | CPU: Atheros AR9132 400 MHz RAM: 32 MB (2 x 16 MB) ROM: 8 MB |
| Communication ports | 1 WAN and 4 LAN | 1 WAN and 4 LAN |
| Port type | 10/100/1000 Mbit/s LAN/WAN | 10/100/1000 Mbit/s LAN/WAN |
| Wireless communications | Supports 802.11b, 802.11g and 802.11n, supports MIMO technology | Supports 802.11b, 802.11g and 802.11n, supports MIMO technology |
| Antenna type | Three external antennas | Three external antennas |
| Encryption support | WEP, WPA, WPA2, WPS (called EZ-WPS here) | WEP, WPA, WPA2, WPS (called QSS here) |
| Receiver sensitivity | -75dBm @ 54 Mbps | -68dBm @ 54 Mbps -85dBm @ 11 Mbps -90dBm @ 1 Mbps |
| Transmitter power | 15.8~19.5 dBm | 20 dBm |
| Periphery | 2 USB ports, with the ability to organize a print and file server | USB, with the ability to organize print ( only after flashing ) and file server |
| UPnP and IPTV Multicasting support | Yes | Yes |
| Safety | Filtering by MAC address, built-in Firewall | Filtering by MAC address, built-in Firewall |
| Ability to install third-party firmware | Yes, DD-WRT | Yes, DD-WRT |
This time, when comparing characteristics, I would give preference to the router from ASUS. Its advantages include a more powerful processor, more RAM and space for firmware, as well as the presence of two USB ports and the ability to organize a print server with native firmware. Not bad at all. It will be all the more interesting to look at the test results.
By the way, the standard interface of the ASUS RT-N16 router is a complete copy of the RT-N13U interface. Therefore, for those who want to appreciate all the beauty, simplicity and functionality of the interface from ASUS, we recommend turning to the first part of the article, where all its praises have already been sung. I would just like to point out that for some reason the standard firmware pages load very slowly. Even through trial and error, as well as using different browsers, we were unable to achieve fast loading of the router setup pages.
In the second part of the review, the TP-Link adapter from the previous part and a regular PC with a built-in network card with the following characteristics were used as a client:
- Motherboard: ASUS M4A79 Deluxe, BIOS version 2708;
- Central processor: AMD Phenom II X4 940BE, Socket AM2+, 3.0 GHz in stock, 1.4 V;
- RAM: 8 GB (2 GB x 4) OCZ OCZ2P10662G, DDR2 PC8500 (1066 MHz) DIMM CL5 5-5-5-15-26-2T (2.1 V);
- Cooling system: Thermaltake Big Typhoon VX, 1200 rpm;
- Thermal interface: KPT-8;
- Video card: Sapphire Radeon HD 4870 Vapor-X 1 GB;
- Hard drive: Seagate ST3750330AS (750 GB);
- Power supply: COOLER MASTER Silent Pro 600 W;
- Case: Thermaltake Xaser V.
It was previously noted that with the tariffs of our providers, Internet speed is not limited by the performance of WAN routers. Therefore, testing in the second part was carried out only on the local network. The speed of wired and wireless connections of routers was measured using standard firmware and with the latest DD-WRT firmware (at the time of writing - version r15747).
All standard firmwares have been updated to the latest versions from the manufacturer's website.
I am sure that many people are interested in the issue of using alternative firmware on home routers. With the proper skill and care in reading manuals, you can purchase a router with almost unlimited functionality. As a site specializing in overclocking, we couldn’t ignore these firmwares also because they allow you to overclock the router’s hardware. By the way, we also have to find out whether this is necessary or not.
The most commonly used firmware is DD-WRT, which, however, does not prevent you from using programs for the second most common, OpenWRT. DD-WRT is a free firmware based on the Linux kernel, successfully developed by a huge community. The main hangout is the forum and wiki. This firmware has a convenient and extremely functional web interface, although I will immediately warn you that some modifications will require using the command line via telnet. Numerous add-ons are easy to install, so everyone can customize it to their own taste.
Below are two mini-reviews on installing the firmware, installing an add-on in the form of a print server on it, as well as instructions on how to return to standard firmware.
Please note that all modifications, incl. software, you do it at your own risk and neither the site editors nor the manufacturing company is responsible for your incorrect actions.
Let's start with today's newcomer and his “little brother”.
In order to update to DD-WRT, you need to put the router into firmware recovery mode. Before this, you need to prepare - connect a single computer to it via LAN, remove all USB devices from the router. We register the network address on the computer 192.168.1.2
and the gateway address is
192.168.1.1
, although if the computer was previously automatically assigned an IP address by this router, this may not be done. Install the supplied software from the router disk. Next, you need to turn off the router, then use a pen or other thin object to press the black “Reset” button and plug in the power cable while continuing to hold the same button. At the same time, the power indicator on the front panel of the router starts blinking. After this, launch the Firmware Restoration program from the ASUS Utility folder, having first completely turned off all firewalls, incl. built into Windows. Next, you need to “slip” into the program a file with initial firmware created specifically for updating from the standard one. You can download it
oh from here. Enter the name of the router and download the firmware. For RT-N16 it will be dd-wrt.v24-14896_NEWD-2_K2.6_mini_RT-N16
, and for RT-N13U -
asus-to-ddwrt
. The flashing process will begin.
With a competitor from TP-Link, everything is somewhat simpler - we download the firmware from here. The file name will be factory-to-ddwrt
. After downloading, go to the web interface to the Firmware update page and update using the downloaded file.
After the process is completed, for any router you should wait a few minutes, after which you need to start telnet and connect to the router with the latest firmware ( o 192.168.1.1
).
At the command line, enter the login root
and password
admin
.
Next, enter the command to clear the router’s memory - mtd -r erase nvram
and then
reboot
to reboot.
That's it, the firmware is completed, you can go to the web interface. When you first launch, you will be asked to enter a new username and password. Remember, when you further connect to the router via telnet, no matter what user name you enter, the correct one will be root
. However, you must use a new password.
Don't rush to play with the new firmware and configure it. First, you need to update to the latest version, because the version downloaded from the site is stable, but far from the most functional. Restart your browser and go to the router configuration page again, enter a new username and password, and then go to Settings - Administration - Firmware Upgrade.
The latest firmware version can be downloaded from here. We go to the site, then go to the folder with the latest firmware versions (at the time of writing the review it was 11-17-10-r15747
).
Next, you need to select the hardware that matches your router. If everything is simple with ASUS RT-N13U and TP-Link routers, then the RT-N16 router is hidden under the fancy abbreviation broadcom_K26
. After downloading, update the router from DD-WRT using the file with the new firmware. Don't forget to set the option to clear settings after
flashing.
After this simple procedure, we set the login and password again, close and open the browser again, enter the new login and password again, and now the router is ready for use.
Just as it is impossible to comprehend the immensity, it is not possible to write about all the functions of the alternative DD-WRT firmware. But we will still try to give you a general idea of the functionality of this firmware. When you log into the router’s web interface, without even entering your login and password, you are taken to a page with information.
After entering your login and password, you can configure all the necessary parameters for accessing the Internet on the “Setup” tab. DD-WRT supports all types of connections, however, routing to use the provider’s regional networks will need to be configured manually in the “Advanced Routing” tab.
and in the tab for setting up wireless networks, only the most necessary options are also available; we are most interested in the “Advanced Settings” section, which contains settings that cannot be found in standard firmware.
The list of them is really extensive:
Among the settings that most strongly influence the speed, it is worth noting the transmitter power (TX Power), Frame Burst technology and WMM Support.
Let's move on to the best part - in the additional services tab, you can enable various plugins, which there is no need to list. Here you can also configure the operation of the DHCP server.
Unlike standard firmware, routers running DD-WRT can act not only as VPN clients, but also as servers.
In the USB tab, you need to set all switches to the “Enable” position, then you can use the services of a file and print server.
After setting up the options for mounting USB drives, you can also configure “sharing” of drives via the SMB and FTP protocols. Both work flawlessly.
The “Hotspot” tab can be used by those who want to deploy Wi-Fi in a public place. Many options available:
In the “Security” tab, in addition to the standard options for filtering DoS attacks and the firewall, it is also possible to enable filtering of various active objects, which will have a positive effect on both traffic and computer security.
Also in the DD-WRT firmware you can very flexibly configure filtering of access to various resources or protocols.
A standard feature of all routers, port forwarding is also available, and entire ranges of ports can be forwarded. Everything is built with maximum flexibility in mind, which is good news.
For normal operation of the print server, you must enable “JFFS2 support” in the settings, and also, if desired, enable file system cleaning.
After all the manipulations performed, to enable the print server, just copy the following commands into the “Commands” line and click “Save Startup”. sleep 4
mkdir -m 755 -p /dev/usb
mknod -m 660 /dev/usb/lp0 c 180 0
/usr/sbin/p910nd -f /dev/usb/lp0 0
Reboot the router after connecting the printer to it. Now you can use the printer by adding it using the router’s IP address, port 9100, RAW protocol and installing the appropriate drivers. For Mac OS X, you must use the Gutenprint drivers and the HP Jetdirect Socket protocol.
On the information page you can estimate the amount of free RAM, and in the Bandwidth tabs you can admire beautiful Flash graphs of network usage.
If you look closely at the previous screenshot, you will see that the processor used in the RT-N16 does not operate at the standard frequency of 480 MHz, but at a frequency of 532 MHz.
This was achieved thanks to simple overclocking, which, unfortunately, is only available for rare chipsets. We kindly ask you not to overdo it with overclocking, because... there is a possibility of turning the router into a beautiful plastic brick. Don't forget about additional cooling, because... Even in stock mode, the RT-N16 has a fairly hot temper. It might make sense to think about installing a fan. This is especially true if you increase the transmitter power (from the standard 17 mW this can be done up to 251 mW). However, during our testing, no problems arose due to overclocking the router to frequencies of 532 MHz for the processor and 266 MHz for the memory. To overclock, you need to type three commands by connecting to the router via telnet: nvram set clkfreq=532,266
nvram commit
reboot
.
For ASUS RT-N16, there is a simple process of rolling back to the native firmware: you just need to go to the DD-WRT interface and update to the native firmware via standard Firmware Update. With its “younger brother” everything is just as simple - just repeat the instructions for entering it into recovery mode and then restore the standard firmware. With a router from TP-Link, everything is somewhat more complicated - you need to download the modified firmware and copy it to a USB drive. After this, make sure that the media is mounted (all settings related to USB in DD-WRT must be enabled) and go to telnet. Next you should run one command: mtd -e linux -r write /mnt/ linux
. Instead of the firmware name, substitute the name of the downloaded file. After a while, the letters and will appear, changing each other, after which the router will restart. Do not forget to update the standard firmware after this.
Let's move on to the tests. Given the many options for the development of events, we were very interested to find out whether routers on alternative firmware could be faster than their standard counterparts, as well as how overclocking the RT-N16 would affect its performance. However, we had no special illusions.
Let's look at the speed of routers when using Wi-Fi.
The router from TP-Link still holds the lead in our testing. A miracle did not happen and its competitor from ASUS stubbornly refuses to learn from the mistakes of its younger brother. Obviously, it uses only two antennas out of three. This is also evidenced by the DD-WRT interface, which sees only two antennas (Left&Right). Otherwise, the results are also not the most pleasant. When using the DD-WRT firmware, the Wi-Fi connection speed drops quite significantly, and the drop is observed for all devices. Apparently, this is due to the insufficiently smooth operation of this firmware with the 802.11n standard at high speeds. Let's hope this gets fixed soon.
Now let’s evaluate the speed of routers over a wired connection.
The results of this test were exactly the opposite. The ASUS device is noticeably faster than its competitor from TP-Link when connected via cable. While overclocking the ASUS router had virtually no effect on its speed, the DD-WRT firmware turned out to be faster than the standard one. We did not list the speed of less than 100 Mbit/s of the RT-N13U router, because... she would be humiliatingly small among these monsters.
Before concluding, I would like to dwell on the quality of the utilities from the Taiwanese company included with the router. There are five of them: Device Discovery, Download Master, Firmware Restoration, WPS Wizard, as well as a proprietary utility for working with the printer. When installing Download Master, without asking, it takes over the .torrent extension, which, in the laboratory’s humble opinion, is unheard of impudence. Firmware Restoration refuses to work without completely turning off the Windows Firewall, which is apparently due to some religious reasons. And the printer driver installer refuses to work over a wireless network:
Is this probably how it should be?
All this does not have the best effect on the company’s image, because the interface of their routers, unless, of course, it slows down when loading, as is the case with the RT-N16, is an excellent role model and evokes extremely warm feelings in the laboratory.
Before drawing final conclusions, I suggest you think about one more side of the issue. The ASUS RT-N16 router in Moscow retail costs more than 4,400 rubles.
A router from TP-Link costs 2,000 rubles, or almost half the price, from
2,300 rubles.
! At the same time, the performance of the wireless subsystem of the ASUS router is frankly weaker than that of its competitor. Only in testing the Ethernet connection does ASUS take the lead.
Are you ready to pay almost twice as much for a gain in wired connection speed, or for a faster processor that heats up your router more, or for more RAM? Decide for yourself, and in the second part of our testing we again give victory to the router from TP-Link.
Thank you for attention.
Always yours, open to suggestions, Iliapan
The author thanks Vice
for assistance in testing and photographing materials
We express our gratitude to:
- ASUS for providing the ASUS RT-N13U and ASUS RT-N16 routers for testing;
- TP-Link for providing the TP-Link TL-WR1043ND router and the TP-Link TL-WN821N Wi-Fi adapter for testing.
Can't log into router after flashing
This happened to me twice. And it’s not even clear why, since I downloaded the firmware from the official website. Then you should reset the factory settings and try other versions of the software update. To do this, find the “RESET” or “RESET” button on the back and press it for 12 seconds until the device begins to blink. After that, wait a couple of minutes until the system reinstalls.
Router firmware from D-Link
To flash a Wi-Fi router from D-link, which means adding a more stable and adapted version of the software to the microchip.
- First you need to connect the Internet by connecting the cord to the appropriate connector, and then connect it to the network connector of the motherboard. The modem indicators should light up, signaling that the Internet is working.
- Download the software from the official website (https://ftp.dlink.ru/pub/Router/), checking the firmware with the version of the router to ensure compatibility of this device.
Important! For example, you CANNOT install firmware for DIR-300 NRU hardware revisions B1, B2 and B3 into a DIR-300 NRU router that has hardware revision B5, B6 and vice versa.
- When starting the update process, disconnect the router from the Internet, leaving only the connection to the computer.
- Having selected the required firmware, you must follow the commands specified in the program, agreeing with the terms of the procedure.
- After the sequential steps described, the router will begin to reboot, after which the actual “firmware” of the device will begin.
- After completion, the router will reboot again, and by logging into the router interface, you will be able to see changes in the device version number, but the basic functional settings will not change.
If you still have questions about how to flash a Wi-Fi router from D-Link, watch the video with detailed instructions: