In this article we will look in detail at all the possible reasons why the printer may not be detected via USB, via Wi-Fi or over a local network. Options will be given for resolving a poor connection, reinstalling software, correctly setting up equipment and printing services, problems with the operating system, and several others. The instructions are applicable to any model of device from Canon, HP, Epson, Samsung, Xerox, Brother, OKI, Kyocera.
Despite the rapid development of wireless technologies, many users continue to use USB cables to connect their printing equipment. The problem when a laptop or computer does not see the printer often arises for this very reason during the installation process. "Comp" simply does not find the printing device or does not recognize it on the selected port.
It is not uncommon for a PC to no longer see the machine for printing in operating systems Windows 7, 8, 10 on a local network or via WiHi. Although previously the equipment worked properly without failures or problems. In addition, the printer may not appear in the device manager, which indicates that the drivers have failed.
Incorrect connection
If you just bought a new printing device or are connecting old equipment to a new PC, but Windows doesn’t even want to detect the device, then the first thing you should do is check that the connection is correct.
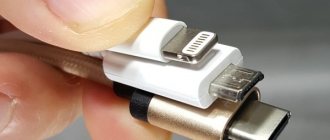
- The USB cable should be connected to the input on the printer body specifically for it. Many people often confuse it with an Ethernet connector, which can even harm the equipment. Plug the other end of the cable, where the flat metal plug is, into the input on the back of the computer. Never use the outputs on the front of the case, as they do not have a direct connection to the motherboard. Do not use USB cable extensions. Double-check the interface versions. Version 2.0 is connected to the black inputs, and 3.0 to the blue ones. This is also an important point.
- WiHi connection does not always have a stable signal, and due to its very intensive use, it often disappears. This applies more to offices, since there are not many consumers at home. In addition, the router may be turned off or the network settings (name and access code) may be changed. It would be a good idea to double-check this.
Testing the USB port
Printing devices are connected to the computer via USB, version 2.0. If a failure occurs in the OS (operating system), activation of the port in the BIOS fails. As a result, the external device does not differ when connected, be it headphones or a flash drive. What to do in order to correct the situation? You need to enable the controller by going into the BIOS.
This is only possible when the OS starts. Each version of the software (Windows 7, 8, 10, etc.) provides its own combination of keys for this, which must be pressed after connecting the computer to the power supply with the start button. If it is not known for sure, you can try pressing F1, F2, F8, Del in turn.
Driver problem
Often the laptop does not see peripheral equipment in the Windows 7 or 8 operating systems due to driver failures. This is special software that controls the operation of the printer during the printing process. To check for such a problem, you should follow a few simple steps:
- Click “Start”, find the “Computer” shortcut on the right, right-click on it, and select “Manage” from the menu.
- On the left in the list, click on “Device Manager”.
- In the list, look for your printer by model name, call up the context menu with the mouse, and go to properties.
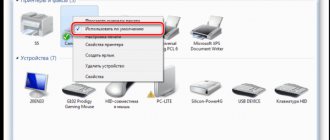
- If instead of the message “The device is working normally” you see something else, then install the latest versions of drivers.
Instructions for installing drivers if there is no proprietary disk. Describes the different ways to update the printer software.
Adding a printer manually
As a rule, the operating system itself downloads the necessary components for devices from official resources when it detects new devices. However, any system can fail; in this case, you need to know how to do everything manually. Let's add the printing device ourselves through the menu with parameters:
- Expand the “Options” menu interface using any method described in the section above in this article. Launch the tile for setting up devices.
- Let's move on to the second block for scanners and printers. Click on the plus sign to add a new device.
In the “Printers and Scanners” section, click “Add”
- We are waiting for the search for available printers to complete. In this case, your printer must be correctly connected to the PC and turned on. The operating system itself can find the device and add it.
Wait while it searches for available printers
- If nothing is found, click on the link “Required printer...”.
If the system does not find the printer, click on the “Required Printer” link
- In the new window, select one of the items depending on the type of connection (Bluetooth, network connection by IP address, etc.). For example, let's choose a local or network printer with manual settings. Click on “Next”.
Select the last item and click on “Next”
- Select the port in the first drop-down menu or create a new one. Click on “Next”.
Select the desired port from the menu
- In the first list we highlight our manufacturer. In our case it is Toshiba. In the second field, click once on your printer model.
Find your printer model in the window
- If you have a disk with drivers, click on the “Have from disk” button and insert the disk into the drive. If there is no disk, just click on “Next”.
Insert the driver disc if you have one
- On the next page in the Add Wizard, write the printer name and click “Next” again.
Enter the printer name
- We are waiting for the printer to install.
Please wait while the printer installation finishes
- If necessary, allow shared access to the printer.
If you wish, allow sharing of your printer
- As a result, we receive a message about the successful installation of the printer and the “firewood” for it. Click on “Print test page”.
Click on "Done"
Windows Print Service is not running
In addition to drivers, the operation of printing equipment in the Windows OS is controlled by a special service. We are talking about the “Print Manager”, the launch of which needs to be checked at this moment. To do this, launch the “Management” snap-in, as shown in the first paragraph of the section on drivers. Further:
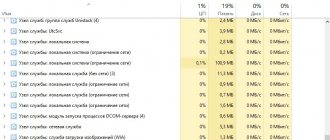
- At the end right, select the “Services” shortcut, wait until all services are displayed, find “Print Manager”.
- From the context menu, go to properties, check that everything matches as in our screenshot.
- If the “Run” button is active, then use it to restart.
Print service and system failures
The connected machine may be disabled in the print service, so the PC does not detect it. The following list of steps will tell you what to do in this case.
- We go to the control panel. Then go to administration, click “Services”.
- In the list we find “Print Service”.
- We check the startup type, which should be automatic, and the running state is noted.
System failures are usually called hard-to-explain OS errors. Sometimes the reason is quite simple: the computer suddenly disconnects from the power supply. Or some program is interfering, during the loading of which the system files were damaged. To solve the problem, you can restart the computer, although this only helps at the beginning. Interruptions in the operation of the printer may be affected by reasons that are not directly related to it, as it seems at first impression. If no printer is installed on the PC for a long time, the system could well have shifted its settings regarding the printing function.
Features of Windows 10
After updating Win 10, for many, the system stopped finding printing devices or they simply stopped working on their own, although before the “update” everything was fine. In this section you will find detailed instructions for troubleshooting when your laptop or computer does not see the printer via USB in Windows 10, with explanations and screenshots for inexperienced users of this operating system.
The instructions are applicable if Windows 10 displays the errors “Driver unavailable”, “Work paused”, “Printer requires attention”. Below is the correct procedure in such unusual cases for models of printing devices from HP, Canon, Samsung and other brands. Detailed attention is paid to the situation of problems with drivers when they are not installed using the standard automatic method.
Built-in troubleshooting tools
There are three ways to use the automatic troubleshooting tool for printer problems in 10:
- Go to the control panel and there find the “Troubleshooting” shortcut. Find the “Hardware and Sound” section, and in it the “Use the Printer” item.
- In the control panel, you can immediately select the “Hardware and Sound” snap-in, and your printing device (if it is there) in the list. Then right-click to select “Troubleshooting” from the drop-down menu.
- Download the Printerdiagnostic10 utility from the Microsoft website.
Regardless of the startup method you choose, the automatic fix tool will be activated. The utility scans the system for print devices connected to it and checks for problems with them. The following will be checked: stability and availability of connections, relevance and integrity of drivers. The system will try to automatically correct the printer's operation.
Manually adding a printer
If the first option using a special utility did not help solve the problem, then try adding a print device manually yourself. To do this, find the “Printers and Scanners” section in the Control Panel. On the right, find the add button and click it. After starting the search, there will be a shortcut at the bottom “The printer you want is not in the list.” Click it and in the window that appears, select any item that best suits your situation.
Installing drivers manually
As another option, you can safely consider downloading and installing the printer through a driver program. Most printing software has built-in detection capabilities. Which is what we will use in our problem case. If you have an installation disk for your printer, you can consider yourself very lucky. If you cannot find such driver media, download the latest drivers from the printer manufacturer's website.
Detailed instructions for manually installing the printer driver. A selection of links to software databases on websites of different brands.
Before installing a set of new files, it is recommended to delete old ones, if any, to avoid software conflicts. To clear the system of old drivers, you can use the Windows + R command, type “printui /s” in the window, go to the “Drivers” tab, select the desired package and delete. In some cases, before deleting it is necessary to stop the print service and then start it back. This is done via the command line with the requests “net stop spooler” and “net start spooler”, respectively.
Advice and solutions from manufacturers
Popular equipment manufacturers did not stay away from the problems and expressed their opinions on the problem. You can listen to their recommendations, which will tell you which direction to go to solve the problem when the printer does not work on Windows 10.
- Canon assures that its equipment will work with old drivers in the new OS. In addition, it offers, if necessary, to download updated software from its website.
- HP recommends trying to install drivers for Windows 7 or 8 on devices running Windows 10. There shouldn't be any problems.
- For Epson, the “firewood” must be updated by first downloading the files from the company’s website.
Funds from equipment manufacturers
Many manufacturers of printing devices also have utilities for troubleshooting printer problems similar to Microsoft's. Their work is tailored to the models of their devices, which significantly increases the chances of using them.
- If you use one of the HP models, then pay attention to the “Print and Scan Doctor” program.
- For owners of Canon printing devices - “Canon My Printer”.
- Epson users are not deprived of this opportunity either. They are recommended to use "Epson Status Monitor".
- For OKI printers, in case of malfunctions, “Brmainte” software has been created to find and eliminate them.
- We diagnose Samsung using “Samsung Printer Diagnostics”. In addition to printers, it is suitable for diagnosing faxes, scanners, searching and installing additional software.
- When working with Brother, “BRAdmin Professional” helps without fail. At the same time, it scans the network, print server, and SNMP protocol for problems and malfunctions.
Video instruction
Solving problems with USB printer support in 10.
Update the printer driver
A missing or outdated printer driver may cause the system to report that the printer is not connected, so make sure your printer driver is updated.
Updating your printer driver to the latest version can not only solve any possible problems with your printer such as printer not printing, printer error, etc., but will also give you more options when printing.
There are two ways to update the printer driver: manually and automatically.
Manually: You can manually download the printer driver from the manufacturer and install it on your computer. Make sure to download the latest correct version compatible with your Windows system. Since this depends on the printer manufacturers and models, we will not cover it here.
Automatically: If you don't have the time or patience, you can do it automatically using special programs such as Driver Easy.
Such programs will automatically recognize your system and find the correct drivers for it. You don't have to know exactly what system your computer is running, you don't have to risk downloading and installing the wrong driver, and you don't have to worry about installation errors.
Can't see the network printer
If the PC does not recognize the network printer, the main problems may be:
- The device is not “shared” or cannot be used during this period of time for remote access from other network clients. Such a client is any PC or laptop with access to a local network.
- The printer or “computer” to which it is connected is in a different workgroup.
- Network discovery is not enabled on the parent computer of the printing device.
- The router that is used to communicate with the printer via Wi-Hi is turned off, or the Ethernet patch cord has been removed.
Correct settings for printing via a network printer. Recommendations for solving problems of equipment availability over the network.
Types of faults
There may be several breakdowns due to which Windows 10 does not see the printer:
- the printer is not turned on;
- wire fault;
- missing or old drivers;
- another printing device is selected;
- virus;
- failure in the automatic operation of the print service;
- USB controller disabled;
- physical breakdown.
The reasons why the laptop stopped seeing the connected printer are very different and most of them can be easily resolved on your own, without resorting to the services of specialists. The only exception is a physical breakdown; obviously, in this case, repairs will be required at a service center.
OS problems
Malfunctions or incorrect settings of individual components of the operating system or the computer itself can affect the operation of printing equipment. Let's take a closer look at the options for problems with anti-virus software, BIOS settings, and the presence of viruses, which should be eliminated first if the PC does not see the printer.
- Malicious programs can negatively affect various processes within the operating system. Printing is no exception to this simple rule. Check your drives with an antivirus or even a free one-time utility like Cure It from Doctor Web.
- A full-fledged antivirus itself or the built-in Windows Firewall can also “cut off” or block signals from the printer, mistakenly considering them dangerous. Try disabling your antivirus software for a while or setting it up to exclude printing equipment.
- BIOS settings make it easy to disable USB ports, which could happen after updating it or user actions. Check that the USB port controller is turned on.
Visual diagnostics of technical condition
It can be confusing if your computer doesn't recognize your printer. Documents cannot be printed and the connected device does not appear in the list. But the user is sure that he has correctly connected the printing unit or MFP via USB. Apparently the system should work, but it failed. Why can't my laptop see the printer? It is necessary to find out the reasons. Experts know that there may be several of them.
What should you do if the computer does not see the connected device? It is necessary to understand the problems in the functions of the equipment and correct them.
To find out why the computer does not see the printer, it is first recommended to check the cable that connects the device to the PC:
- Integrity is not compromised;
- No fractures are observed;
- The exposed wires are not visible.
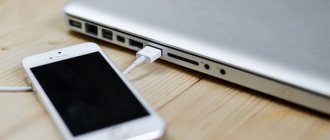
The cable is normal, but the computer does not see the printer. Let's move on to inspecting the location of the plugs in the ports of interconnected devices. Visually inspecting the printing device, you need to plug it into the power supply. The USB cable is connected to the socket in it and the computer. The entire system turns on. Next, we continue the inspection in the following stages to determine why the PC or laptop does not see the printer via USB or the reason is completely different.
- Checking the functionality of the button. In a situation where the printer does not respond when you press it, you should move the wire relative to the socket. If the device is found on the PC and then lost again, we can assume that the socket is loose. That is, the computer does not see the printer via USB.
- You need to make sure that all buttons are lit.
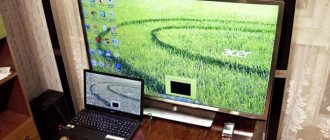
- If possible, you should try connecting the printing device to another computer. Or connect the printer via a wireless network. Repeating the same error specifies the problem. The cause of the failure is in the computer, if this PC does not see the printer, but others detect it. The printing device is fine in this situation.
Print queue
As an option, I can also suggest clearing the print queue. To do this, go to the already familiar “Devices and Printers” located in “Start”. Then right-click on our printer and select “View Print Queue”. We delete absolutely everything that is in the window that appears; if it is empty, just close it, this is clearly not the problem.
If the queue is not deleted, then you need to restart the computer. After that, go to this window again and try to delete the queue. It is possible that these manipulations will lead to nothing. Then disconnect all wires from the computer that relate to the printer and try cleaning.
Additionally: Troubleshooting Windows problems
It also happens that the normal operation of MS Word, and at the same time the printing function we need, is interfered with by some drivers or programs. They can be in the program memory or in the system memory itself. To check if this is the case, you should start Windows in safe mode.
- Remove optical disks and flash drives from the computer, disconnect unnecessary devices, leaving only the keyboard and mouse.
- Restart your computer.
- During the restart, hold down the "F8" (immediately after turning on, starting from the appearance of the motherboard manufacturer's logo on the screen).
- A black screen with white text will appear in front of you, where in the “Advanced boot options” you need to select “Safe Mode” (move using the arrows on the keyboard, press the “ENTER” ).
- Log in as an administrator.
Now, after starting your computer in safe mode, open Word and try to print a document in it. If there are no problems with printing, then the cause of the problem lies in the operating system. Therefore, it needs to be eliminated. To do this, you can try performing a system restore (assuming you have a backup of the OS). If until recently you normally printed documents in Word using this printer, after a system restore the problem will definitely disappear.
Devices are not displayed in the "Devices and Printers" folder in Windows 7
So, the essence of the problem is this: in the Windows 7 “Devices and Printers” folder, devices installed on the PC, as well as printers, are not displayed. Usually, when opening a folder, the green bar at the top does not reach the end a little and stops. All devices work fine and appear in Device Manager. This problem is associated with missing or damaged Windows system files. To fix it, you need to identify these files and replace them. We start by identifying system files with errors. To do this, run cmd.exe with administrator rights: “Start -> cmd.exe -> right mouse button –> run as administrator”
or “Win+R -> cmd.exe -> Enter”. A window will appear:
Type the command "sfc /SCANNOW" and press the "ENTER" key. The "sfc /SCANNOW" command scans all protected system files and replaces incorrect versions with correct ones. To see all available options, enter "sfc /?". When the scan is complete, the following text will appear:
To create a text file containing a list of files that were not recovered by “sfc.exe”, enter the command “findstr /c:”[SR]” %windir%\Logs\CBS\CBS.log >%userprofile%\Desktop\sfcdetails .txt". After executing it, a file “sfcdetails.txt” will be created on the desktop; in it you need to find lines like this (there is an entry “Cannot repair member file”):
These are the files that could not be recovered. In the described case, the problem turned out to be with the “fdProxy.dll” file. If you have a similar problem, follow the steps above and replace this file with the one you download below. You can also look for these files in the “C:\windows\winsxs\” folder.
To replace files, run cmd.exe and enter the following commands:
1. Make the current user the owner of the file:
takeown /f Path_And_File_Name
example: takeown /f C:\windows\System32\fdProxy.dll
2. To give administrators full access to a file:
icacls Path_And_File_Name /GRANT ADMINISTRATORS:F
example: icacls C:\windows\System32\fdProxy.dll /GRANT ADMINISTRATORS:F
3. Replace the file:
Copy Path_And_File_Name_Of_Source_File Path_And_File_Name_Of_Destination
example: copy C:\Users\Radon\Downloads\ fdProxy.dll C:\windows\System32\fdProxy.dll
This procedure can be done with other broken files detected during scanning.
After all the steps taken, you need to restart the computer.
newsload.ru
Drivers
Outdated or corrupt driver files can also cause the “printer is not connected” or “not working properly” message. Viruses or careless user actions can damage the software of printing equipment. In the first case, you need to first clean your PC from malware, and in the second, you just need to be more attentive and responsible.
If an antivirus is not installed or its database is outdated, then use free one-time utilities. For example, a good solution for “treating” an infected “computer” would be Cure IT.
To fix the problem with the drivers, you just need to reinstall them. Follow two simple steps to do this.
- Remove old drivers. Using the quick launch tool (Windows + R), launch the print manager “printui /s”, select the desired package, and delete it.
When we receive a usage message, stop the print service via the command line. Press Windows + R, enter “cmd”, in the line the command “net stop spooler”, do not close the window. We try to remove the driver again. We start the service back with the command “net start spooler”.
Additionally, you can remove the printer from Device Manager.
- We install the drivers again. This can be done in several ways: using the installation disk for the printer, download it from the manufacturer’s official website, or from the built-in Windows driver database.
Collection of drivers. Quick search and direct download.
All ways to install printer drivers. Detailed explanation of each installation option.
Troubleshooting Service
If another PC sees the printer, then you need to check the operation of the operating system.
- First, use a troubleshooting service. The program checks the connection, the default printer assignment, the operation of services necessary for printing, and drivers. Open Control Panel and section
.
- In the next window, click
, and then
.
- Select
from the list, if available, and click Next.
- Otherwise, select Printer is not in the list.
- Follow
.
or could not fix it automatically, then serious problems with the operating system are most likely:
- For information about checking for viruses, restoring system files and the OS, see the article The printing subsystem is unavailable.