Make sure there is power
Before proceeding with further diagnostics, you need to make sure that the monitor is receiving power.
This is indicated by the LED on the front panel, which should light up or blink in one of the colors. If the indicator does not light, check the power buttons on the monitor and extension cord: it is possible that someone or you yourself accidentally pressed them while cleaning and did not notice.
If everything is fine there, then the reason may be in the cable. From the plug side, it is fixed in the socket quite clearly and reliably, but it is simply inserted into the monitor’s power connector. It is possible that the wire has moved slightly in the socket and the contact has been broken.
Try inserting it a little harder into the connector and checking the indicators. There may also be problems with the cable itself. To exclude them, replace the wire with another one, for example from a computer power supply - they are suitable (unless it is a model with an external adapter).
Additional information that may help when the second monitor is not detected
In conclusion, some additional nuances that may help figure out why the second monitor is not visible in Windows:
- If one monitor is connected to a discrete video card and the other to an integrated video card, check whether both video cards are visible in Device Manager. It happens that the BIOS disables the integrated video adapter when there is a discrete one (but it can be enabled in the BIOS).
- Check whether the second monitor is visible in the video card’s proprietary control panel (for example, in the “NVIDIA Control Panel” in the “Display” section).
- Some docks that have more than one monitor connected to them at once, and some "special" connection types (like AMD Eyefinity), Windows may see multiple monitors as one and still have them all working (and this will be the default behavior ).
- When connecting a monitor via USB-C, make sure that it supports connecting monitors (this is not always the case).
- Some USB-C/Thunderbolt docking stations may not support all devices. This sometimes changes in newer firmware (for example, when using the Dell Thunderbolt Dock, not every computer or laptop can work correctly).
- If to connect a second monitor you purchased a cable (not an adapter, but a cable) HDMI - VGA, Display Port - VGA, then very often they do not work, since they require support for analog output on the digital output from the video card.
- When using adapters, the following situation is possible: when only the monitor is connected via the adapter, it works properly. When connecting one monitor via an adapter and another directly with a cable, only the one connected with the cable is visible. I have guesses why this happens, but I can’t offer a clear solution to this situation.
If your situation differs from all the proposed options, and your computer or laptop still does not see the monitor, describe in the comments exactly how, what video card the displays are connected to and other details of the problem - perhaps I can help.
Check the video cable connection
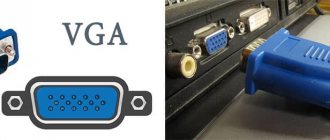
VGA, DVI and HDMI cables.
Photo: public domain / Pinterest Make sure that the signal wire is also securely fixed. HDMI and DisplayPort must be inserted all the way, and VGA and DVI must be additionally secured with screws on the plugs. Then do the same with the connector on the other end of the cable that connects to the computer.
If possible, try replacing the wire or connecting through a different connector. For example, if your video card and monitor have multiple ports, use DVI instead of VGA or HDMI. Or vice versa.
Another cable may simply be connected to the wrong video card. This happens when the motherboard has a pin for integrated graphics, but a discrete adapter is used. If you recently disconnected the monitor wire, check that it was connected correctly. The plug must be inserted into the connector, which is located at the bottom, separate from the main group of ports.
Force Windows 10 to detect second PC monitor
If there is no problem with the physical connection to your PC and the second monitor, you can use the Settings app to force detection of the second display.
- Open Settings > System.
- Click Show.
- Go to the Change Display Order section and click Define.
Switch signal source
Photo: Cheon Fong Liew / Flickr
Some monitors with multiple ports have the ability to switch between input sources. Just like on TV. The correct connection may not be detected automatically, and then of course there will be no image on the screen.
Switch the signal source using the Input or Source button with a square with an arrow inside it. For detailed information about this function, please refer to the operating instructions.
Make sure your monitor is working properly
If none of the previous tips helped, your monitor may be broken. The easiest way to rule this out is by testing the display on another computer. Ideally, swap monitors with someone for a day.
However, there is another way. Disconnect all wires from the display except the power cable and turn it on. If a message about no signal or any other information appears on the screen, it means that everything is fine with the monitor and the problem is in the computer.
If the display remains black and no indicators on the case light up, the monitor will have to be taken to a workshop for repair.
Correcting external monitor settings
If you determine that there are no problems with the physical connection, you can use the Settings app to have Windows 10 detect the second monitor.
Force detection of second display
To manually detect a second monitor with display settings, follow these steps:
- Open Settings .
- Go to the System section.
- Click on Display.
- Under Change display order, click the Discover button in the lower right corner (if applicable).
Once you complete these steps, Windows 10 will be able to detect the second monitor, which you can then configure as needed using Display Settings.
Connecting a wireless display
When trying to connect a wireless display, you can use these steps to connect as a second monitor on your device:
- Open Settings .
- Go to the Devices section.
- Click on Bluetooth and other devices .
- Click the Add Bluetooth and other devices .
- Select a wireless display or dock .
- Make sure the wireless display is turned on and discoverable (see your device manual).
- Select a display from the list.
- Continue with the on-screen instructions.
Once you complete these steps, your wireless monitor should be detected as a new external display.
Evaluate the reliability of contacts
Correctly installed memory.
Photo: public domain / Pinterest RAM, video card and other components are installed in slots on the motherboard. If they have recently been changed, cleaned, or taken out of their sockets for any other reason, there is a possibility that the components are not inserted completely. Due to poor contact, there may well be no image on the monitor.
To check, unplug the power cable from the computer and carefully remove the side cover by unscrewing the screws at the end of the rear panel. Inspect the video card and RAM sticks. Make sure they are inserted straight and all the way. The latches on the sides of the RAM must be closed, and the video adapter must be secured with a screw to the chassis chassis.
Check your memory
The golden stripes are contacts.
Photo: Ruocaled/Flickr The computer may not turn on due to one or more problematic memory modules. Typically, the system speaker makes several sounds, although not always.
With the PC de-energized, remove the cover. First, take a photo to return your memory to its place after the experiments. Then move the latches along the edges of the RAM slots apart and remove the modules. Clean the contacts with a regular office eraser and wipe with alcohol if you have it on hand.
Reinstall the memory, connect all the cables and check if the computer works. If not, then you can still try to remove all the RAM modules, leave only one, or swap them in the slots, trying to start the PC after each manipulation.
If an image does appear on the monitor, then the problem is definitely with the memory and you will need to replace the defective modules with new ones.
Installing the latest graphics driver
A damaged, faulty, or outdated graphics driver may prevent the second monitor from being recognized. The easiest way to resolve this issue is to reinstall or update the graphics driver to fix the connection between the external monitor and the computer.
Update the graphics driver using Device Manager
To update your graphics card driver using Device Manager to resolve the second monitor detection issue, follow these steps:
- Open Device Manager .
- Expand the "Video adapters" branch.
- Right-click the adapter and select the Update driver .
- Click Automatically search for updated driver version.
- Restart your computer.
If Windows Update can find a newer driver, it will automatically download and install the update, hoping to fix any issues with your external monitor.
Reinstalling the graphics driver
To reinstall a video card driver that may be damaged or not working properly, follow these steps:
- Open Device Manager .
- Double-click to expand the Video Adapters branch.
- Right-click the adapter and select the Uninstall device option.
- Uncheck Remove the driver from this device.
- Click the Remove button.
- Restart your computer.
- Device Manager again .
- Right-click the computer name and select the Scan for hardware changes option.
After you complete these steps, Windows 10 will try to reinstall the graphics driver automatically during startup, but it is recommended that you use these steps to ensure the driver is installed correctly.
Rolling back the graphics driver
In case Windows 10 is unable to detect the second monitor due to a driver update issue, you can use the previous graphics driver to resolve the issue.
To remove and reinstall the old graphics driver, follow these steps:
- Open Device Manager .
- Expand the "Video adapters" branch.
- Right-click the adapter and select Properties.
- Click the Driver tab.
- Click the Roll Back Driver button.
Tip: If the button is grayed out, you won't be able to roll back the driver. However, you can still use an older version of the driver if it is available on your device manufacturer's support website. - Select an option to answer the question that appears.
- Click Yes.
- Restart your computer.
Once you complete these steps, Windows 10 will be able to detect and start displaying content on your external monitor.
Test your video card
Photo: ctvarner/Flickr
Of course, a burned-out video adapter cannot display any image and the screen will remain black. To check, taking safety precautions, disconnect the internal power cable from the video card. Unscrew its fastening screw, and then slightly bend the slot latch and carefully pull out the adapter.
Clean the card contacts with an eraser and alcohol, then put it back in place and, after putting everything back together, try starting the computer again.
Another option is to replace the video card with another one that is known to work. If this helps and a picture appears on the monitor, you will have to fork out for a new video adapter.
Check the power supply
If all else fails, then most likely the cause of the problem lies in the power supply. This can only be checked if you have the appropriate skills. At a minimum, you need to have a multimeter on hand and know how to use it. If you are confident in your abilities, then act like this.
Photo: public domain / Pinterest
With the case cover removed, find and disconnect from the motherboard the long connector with the largest number of wires that come from the power supply. Unbend a paper clip and use the resulting jumper to connect the contact with the green cable and any of the contacts with the black wire to simulate the PC power-on signal.
| Orange | +3.3 V |
| Red | +5 V |
| Violet | +5 V |
| Yellow | +12 V |
| Blue | −12 V |
Next, switch the multimeter to DC voltage measurement mode. Press the black probe to any contact on the black cable, and then touch the red probe to the contacts of the yellow, red, orange, purple and blue wires one by one. Compare the values with those given in the table above.
If the voltage is missing or differs from the reference voltage by more than 5%, the power supply will probably need to be repaired or replaced. If you have a working unit, you can immediately try installing it instead of the standard one and see the result.