- 14shared
- 0Facebook
- 14Twitter
- 0VKontakte
- 0Odnoklassniki
A Wi-Fi router is a useful device that relieves the user of the need to be literally tied to the Internet by wire. According to numerous experiments, the signal range of an average power router reaches 100 meters indoors, and 300 meters outdoors. Once configured, a wireless router does not require any additional maintenance, it is extremely easy to use, but, like any technical device, it is not immune to failures and breakdowns.
Examples when a seemingly correctly configured router does not distribute Wi-Fi are not that uncommon. In this case, the network status, depending on the nature of the problem, can be “No Internet access” or “Restricted”, although a scenario in which the network is detected by the system, but there is no actual connection or large traffic losses are observed, is also possible. In this article we will try to figure out why the router does not distribute the Internet via Wi-Fi, and at the same time we will see what can be done in this or that case.
Temporary failure of the router
If the router works day and night, its operation may sooner or later fail, so the very first thing to do if the router stops distributing the Internet is to turn it off, wait a few minutes, and then turn it on again.
Rebooting the router can also help the device (computer or tablet) detect the network if it is suddenly not detected when the device is turned on. Users of devices connected to one or another wireless network often encounter this problem.
Problems on the provider side
If rebooting doesn't help, the next thing to check is whether there are any restrictions from your internet service provider. It is likely that there was an accident somewhere on the server, the backbone cable was damaged, unplanned maintenance work is being carried out, and you will delve into the settings and be at a loss as to why the router does not distribute Wi-Fi. Dial your provider's technical service number and make sure that the problem is not on their side, and only then look for the source of the problem on your own.
No signal from Wi-Fi router
Before you begin to find out the reasons why there is no signal from the Wi-Fi router, you need to reset all settings to factory settings. There is a small button on the back of the device that must be pressed for ten to fifteen seconds. Then you can move on to the modem settings, where the main goal is the WAN point, which is responsible for connecting to the network. If the operator works with Dynamic IP, then all settings must correspond to this picture:
If your Internet provider uses a different type of connection, then you should select the appropriate option, for example Static, like the Rostelecom provider, L2TP2/Russian L2TP or others.
If the user does not know what type of connection he has, then this question can easily be answered by calling the contact center of his provider.
For example, this is what the L2TP2/Russian L2TP connection settings look like:
Hardware faults
At the next stage, we check the serviceability of the equipment - cables and router. If the power light does not light, the power cord or power supply may be damaged. We check the condition of the cables in the house (apartment) and outside it, and see if the plugs fit tightly in the sockets. Many modern routers have hardware power on/off and Wi-Fi distribution buttons.
It often happens that someone at home picked up the router and accidentally pressed one of these buttons. This point also needs to be checked. The wireless network indicator deserves special attention. If the Wi-Fi icon on your router is not lit, this could indicate several problems.
- Breakdown in the distribution system. You can’t do anything here yourself, you need to call a specialist.
- There is a problem with the router software. It can be eliminated by rebooting, adjusting or resetting the settings, or, in extreme cases, flashing the firmware.
- The Wi-Fi sharing button is disabled. In this case, the router does not distribute Wi-Fi, but the Internet is available and you can connect to it through the router via cable. If a cable connection is only possible directly, without a router, this may indicate either a breakdown of the device or a failure in its settings.
Problems with the Wi-Fi network on the router
This malfunction should be divided into two categories to avoid confusion. Because the solutions there will be different.
- When the router does not broadcast the Wi-Fi network at all. Your laptops, tablets, smartphones do not see the network.
- When there is a Wi-Fi network, devices will connect to it, but the Internet does not work. No internet access.
People often write to me saying that the router has stopped distributing Wi-Fi. And try to understand, the wireless network has completely disappeared, or it is there, but the devices do not access the Internet. Let's look at these two situations.
When the wireless network disappears completely
Reboot the router. If it doesn’t help, then check the button that is responsible for turning the wireless network off and on. It is available on a large number of models. It looks something like this:
It may have been pressed accidentally.
Also, please note that for some reason the router may have reset the settings, and now the Wi-Fi network has a standard name. It is indicated on a sticker on the bottom of the device.
When there is Wi-Fi, but no Internet
We also first reboot the router. Let's see if the Internet has disappeared on all devices, including cable. It would be nice to connect the Internet directly to the computer and check if it works. Maybe the provider has some kind of problem.
I wrote in more detail about these problems in the article: the router does not distribute the Internet via Wi-Fi. What to do. Both problems are addressed there. Everything is detailed and with screenshots.
Incorrect Wi-Fi settings
Incorrect router settings are most often indicated by a lit but not blinking Wi-Fi indicator, as well as a change in its color from green to orange or red. The problem is resolved by correctly configuring the network settings. This procedure is somewhat different in different router models, although the principles are the same. If you have never configured routers before, it is best to entrust this task to a specialist called to your home; at a minimum, you can check whether the wireless network is enabled in the device settings.
To enter the router settings, connect it to your PC via cable, go to 192.168.1.0 or 192.168.1.1 in any browser and log in with your login/password (admin/admin by default). In TP-Link routers, for example, you need to go to the “Wireless” section and check whether the “Enable Wireless Router Radio” item is checked. The checkbox “Enable SSID broadcasting” must also be checked, otherwise devices will not be able to see the network. In other models, the setting may be located in a different place (look for the Wireless network or WLAN section).
What to do if the Internet does not work?
1) Check cable connections
The provider's cable (the cable stretched from the entrance to the apartment) must be connected to the WAN port of the router (blue port).
The computer must be connected by cable to the LAN port (yellow port) or via Wi-Fi to the router’s wireless network.
2) Check initiation
Check if the Internet indicator on the router is on:
If it does not light up, the problem is most likely in the provider’s cable. You need to do the following check - disconnect the cable from the WAN port (blue) and connect it to the LAN port (yellow).
- If the LAN indicator (in the form of a computer icon) lights up, then the router’s WAN port is faulty. The router must be taken to a service center.
- If the LAN indicator does not light up, it means there is no physical connection with the provider’s equipment. It is necessary to call technicians from the provider to check the cable.
Lights orange - there may be a problem both in the router settings and in the Internet provision by the provider, see point 4
Lights up green. If you switched cables in step 1, then check your Internet access now - the Internet should work. If the cables have not been touched, you need to check the computer settings, see point 3.
If no indicators light up at all, there is a problem with the router’s power supply. Check whether the power supply is connected to the outlet and whether the power plug is fully inserted into the router. Is there really electricity in the outlet? Check the operation of the router in another outlet. If possible, change the power supply to one with similar characteristics (amps/volts). If all else fails, the router must be taken to a service center.
3) Check the connection settings on your computer
Check if you have a cable or wireless connection.
Go to “Control Panel” – “Network and Internet” – “Network and Sharing Center” – “Change adapter settings”.
1. If you are using a cable connection between your computer and the router, then find “Ethernet” or “Local Area Connection” in the list
1.1 If you see a red cross on it, it means the cable is not connected, check the connection, reconnect the cable both on the computer side and on the router side.
2. Check your wireless connection
2.1. If you are using Wi-Fi, find "Wireless Network" in the list
2.2. If you see a red cross on it, it means you are not connected to Wi-Fi, open the list of wireless networks, select yours and connect
2.3. Is your network not on the list? Check the Wi-Fi indicator on your router. If not lit, press the Wi-Fi button on the back of the router
3. Checking connections from the provider.
3.1. If your ISP uses PPPoE, PPTP or L2TP, an additional connection may appear in the connection list. This connection must be disabled.
Next you need to check the received IP address and gateway. Double-click on your connection (wired or wireless), click “Details”, check the lines, which should be as follows:
DHCP enabled – Yes
The IPv4 address is 192.168.XY, where X is 0 or 1 and Y is usually 100
The default gateway is 192.168.X.1, where X is 0 or 1
4) Check the settings in the router’s web interface
From a computer or laptop (as a last resort - from a tablet) open the browser
We recommend Google Chrome, Mozilla Firefox, Safari, Internet Explorer.
In the address bar (not in the search, but in the address bar)
dial: 192.168.0.1
Or just follow the link: https://192.168.0.1/
If it doesn't open, try: https://192.168.1.1/
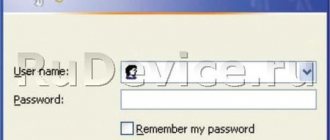
In the menu that opens, enter your username and password. Standard values:
Username – admin
Password – admin
Note:
If the standard admin\admin does not work, it means you have previously changed this data to your own. If this data cannot be found, in this case you will have to completely reset the settings to factory settings. Before resetting the settings, be sure to make sure that you know all your data under the contract with the telecom operator (connection type, login, password, etc.).
After this, the router setup menu will open.
Classic Turquoise interface (or old green):
We go to the left Network - WAN
If the New blue interface:
Go to the top “Advanced settings” - on the left “Network” - “Internet”.
The most important step:
You must know what settings your provider requires: connection type, login/password, server address. You must be 100% sure of all these parameters. If in doubt, contact your provider and demand that they tell you all the correct settings.
Login and Password must be strictly in accordance with the agreement with the provider. Even an incorrectly selected register will result in the router not connecting.
In the “IP address/Server name” field, the address of the provider’s VPN server must be specified.
It’s also worth checking to see if your provider has a MAC address binding; if so, ask them to check your router’s binding to see if they see the correct MAC address.
If you are sure that the data is correct:
- Just in case, manually enter the data again and click “Save”
- We check that the high-speed connection of the provider is disabled on all computers (If your connection type is PPPoE, L2TP, PPTP). You can also find this connection in the control panel in the list of all connections, see step 3.
Note:
If your provider is Beeline, then this operator could transfer you to a new type of connection and for some reason not inform you about it. Then it will look like this:
New interface:
In this case, change L2TP/L2TP Russia to Dynamic. IP address:
For all providers:
If at the time of the problem in the “Status” menu - the “WAN” (Internet) table you see ip: 0.0.0.0 there
This means the router has lost connection with the provider. In most cases, in such situations, the problem is on the provider's side. In this case, you definitely need to check the Internet operation without a router. To do this, turn off the router and connect the provider’s cable directly to your PC or laptop.
If the Internet definitely works without a router, but not with a router, that is, the router does not connect to the Internet, but all the data is entered correctly and the indicators are lit as they should, then you need to save the system log and send it to us by email to technical support, describing your problem in detail. problem and specifying the device model:
We will review the system log and respond by email within business days.
Incorrect network adapter settings
If Wi-Fi does not work on the router, this does not always mean that the problem is hidden in the router. It is quite possible that the settings on the receiving device - a computer, laptop or tablet - have gone wrong; in any case, it won’t hurt to check the configuration of the wireless adapter. Open network connections with the command ncpa.cpl , go to the properties of your wireless network, in the list of parameters on the “Network” tab, find the item IP version 4 (TCP/IPv4) and double-click on it.
In the properties window that opens, set to obtain the IP address and DNS server address in automatic mode. If automation is already set, try manually setting the DNS address 8.8.8.8 (Google) or 77.88.8.88 (Yandex). You can also set the address of any other alternative DNS server, which is not difficult to find on the Internet.
Conclusion
So, now you know what to do if the router does not provide Wi-Fi. You can share your experience in troubleshooting problems related to Wi-Fi distribution using the comment form below.
- 14shared
- 0Facebook
- 14Twitter
- 0VKontakte
- 0Odnoklassniki
Internet access errors
There are other reasons why the modem does not distribute Wi-Fi. If your computer has access to a Wi-Fi connection, but the Internet is not working, one possible cause of the problem is an incorrect OS configuration. If the computer device previously had a connection to the network of another provider, this may indicate that the settings retained the existing IP address and DNS server.
To reconfigure, do the following:
- The taskbar on the right has a sign for a wireless Internet connection. You should right-click and then select Network Management.
- After clicking on network management, a window appears where you need to select the option to change the network adapter. Next, select the wireless connection and “Properties”.
- After selecting Properties, a window opens where you should select “TCP/IPv4 protocol” from the list listed. After right-clicking on it, select “Properties”.
- The user opens the network card with its settings. This allows you to manually register the IP and DNS server address. In order for the wireless connection to work correctly, you should install a marker opposite the line for automatically receiving IP data and automatically receiving DNS server data.
- After the items are selected, select “OK” twice. To complete the settings, you need to restart your computer device.
- After this, you should reconnect to the wireless network.


