Instructions for setting up the TP-Link TL-MR3420 router
- Authorization
- Changing the factory password
- Setting up an Internet connection Setting up 3G/4G Connections
- Setting up a PPPoE connection (Rostelecom, Dom.ru)
- Setting up an L2TP connection (Beeline)
- Configuring PPtP (VPN) while automatically obtaining a local IP address (DHCP)
- Setting up PPtP (VPN) with a static local IP address
- NAT when automatically obtaining an IP address (DHCP)
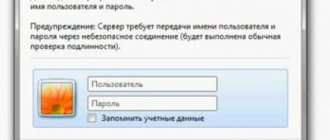
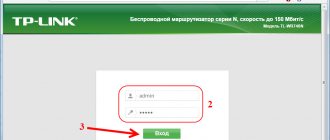
Authorization
In order to get to the router’s web interface, you need to open your Internet browser and type 192. 168.1.1 in the address bar, Username - admin , Password - admin (provided that the router has factory settings and its IP is not changed).
Wireless network test
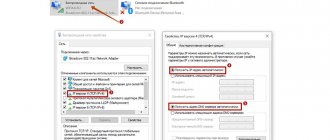
The next step is to check the functioning of the wireless segment of the computer network when connecting a PC to it. The TP-Link TL-MR3420 router itself, as noted earlier, is already configured and must be turned on. Next, on a PC with a wireless adapter, go to the Network Control Center. Its shortcut is located in the lower left corner of the screen. In the list that opens, we find our network and connect to it, but do not forget to enter the password correctly. Next, close all windows and launch the browser and use the previously described method to check that Wi-Fi is working correctly when connected from a PC.
Changing the factory password
To ensure that no one but you can enter the router settings, you need to change the password to enter the settings.
To do this, select on the left menu System Tools – Password and enter the settings:
- Previous username: old username, enter admin
- Previous password: old password, enter admin
- New username: enter a new username, you can leave admin
- New password: enter a new password
- Confirm new password: Confirm the new password
Contents of delivery
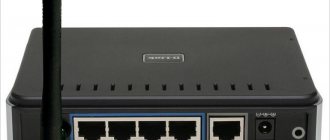
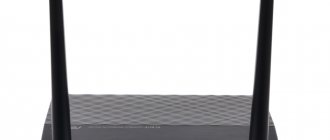
The list of complete documentation for the TP-Link TL-MR3420 compares favorably with its competitors. Reviews highlight the presence of several additional booklets on network products from this manufacturer, which allow novice users to select the most optimal equipment for their home network. In addition to booklets, this list also includes a certificate of conformity, a warranty card and an instruction manual. In addition to the router itself, it comes with 2 bendable antennas, a crimped twisted pair cord, a power supply and a CD with application software for setting up this network device.
Setting up an Internet connection
Go to Network - Internet Access. Here you choose how (by what technology) you will connect to the Internet:
- 3G/4G Preferred - Use 3G/4G as the primary connection and WAN as the backup connection.
- WAN Preferred - Use WAN as the primary connection and 3G/4G as a backup connection.
- WAN only - Use only WAN to connect to the Internet.
- 3G/4G only - Use only 3G/4G to connect to the Internet.
Reviews from router owners and experts' opinions about it
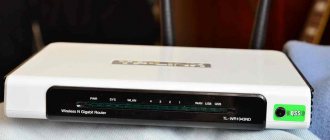
The TP-Link TL-MR3420 turned out to be almost perfect. Reviews from owners indicate that its main drawback is the glossy finish on the top of the device cover. On the one hand, this is a rather controversial decision by the designers. But on the other hand, if such a drawback is indicated, then the router really turned out to be practically without flaws. Network experts have a similar opinion - the device is perfectly balanced and is perfect for organizing a small office or home network.
Setting up 3G/4G Connections
1. To set up the Internet via a USB modem (3G/4G), go to Network - 3G .
- Region: Russia
- Mobile Internet service provider: Choose your telecommunications provider
- Connection mode: Connect automatically
- Authentication Type: Auto
2. If your telecom operator is not among those offered, go to Advanced Settings. Check “ Manually specify dialing number, APN, username and password .” Here we enter the data from your telecom operator. After entering the settings, click Save .
3. To set up an Internet connection via a WAN port, go to Network - WAN . Here, in the WAN Connection Type , select the type of connection that is used by your provider.
Set connection parameters via Wi-Fi
This stage is performed on devices running Android OS. The TP-Link TL-MR3420 itself is already properly configured. Setting up the connection of a mobile device is done like this:
- In the status menu, activate the “Wi-Fi” transmitter.
- Go to the program menu and find the “Wi-Fi” shortcut. Open this utility.
- Next, click the “Search” button. When finished, select the name of our network and connect to it. In this case, you need to enter the password that was previously set.
Next, close the window and launch the browser. We enter the address of any search engine and wait for its start page to open.
Setting up a PPPoE connection
- In the WAN Connection Type field : select PPPoE/Russia PPPoE
- User Name: your login according to the contract
- Password : your password according to the agreement. In some firmware, just below it asks Confirm Password
- Secondary Connection : Disabled
- WAN Connection Mode : Connect Automatically
- After entering the above settings, click Save . The Internet is configured.
Setting up an L2TP connection
- WAN Connection Type : select L2TP/Russia L2TP
- User Name: your login according to the contract
- Password : your password according to the agreement. In some firmware, just below it asks Confirm Password
- We put an end to Dynamic IP (Dinamic IP)
- IP Address/Name – server address or name (specified in the contract)
- MTU size (in bytes) - change the value to 1450 or less
- Connection mode (WAN connection mode) - Connect Automatically
- After entering the above settings, click Save . The Internet is configured.
Provider details
Next, you need to find out the values that will be set in the TP-Link TL-MR3420. Configuration without these parameters is simply impossible. All necessary information can be found in the agreement with the provider. First of all, this is the connection type. L2TP or PPPoE are most often used for these purposes. Also, this document must provide a login and, of course, a password for gaining access to the global web. If you use a static address, it is also included in this agreement. In general, all the necessary data is often given in this document and must first be clarified so that there are no problems during the setup process.
Configuring PPtP (VPN) while automatically obtaining a local IP address (DHCP)
- WAN Connection Type : select PPTP/Russia PPTP
- User Name: your login according to the contract
- Password : your password according to the agreement. In some firmware, just below it asks Confirm Password
- We put an end to Dynamic IP (Dinamic IP)
- IP Address/Name – server address or name (specified in the contract)
- MTU size (in bytes) - change the value to 1450 or less
- Connection mode (WAN connection mode) - Connect Automatically
- After entering the above settings, click Save .
Setting up PPtP (VPN) with a static local IP address
- WAN Connection Type : select PPTP/Russia PPTP
- User Name: your login according to the contract
- Password : your password according to the agreement. In some firmware, just below it asks Confirm Password
- Select Static IP address
- In the fields IP Address/Server Name , IP Address , Mask , and Gateway , enter the data from the contract. In the DNS you can enter the DNS address of your provider
- Connection mode (WAN connection mode) - Connect Automatically
- After entering the above settings, click Save .
Setting up Wi-Fi on the router
Setting up a Wi-Fi connection. In the side menu, go to Wireless Mode . In the window that opens, enter the following settings:
- Wireless network name (SSID) field
- Region : Russia
- Channel (Chanel): Auto
- Mode: 11bgn mixed
- Channel Width : Automatic
- Enable wireless broadcasting and Enable SSID broadcasting - check the boxes
- Click the Save button
Setting up Wi-Fi encryption. In the side menu, go to Wireless Security :
- Select the encryption type WPA-PSK/WPA2-PSK
- Version - Automatic
- Encryption - AES
- PSK Password: enter the password for the Wi-Fi network. The password must not be less than 8 characters
- Click the Save button at the bottom. After saving the settings, you will be prompted to reboot the router; ignore this requirement (red inscription below).
Port forwarding/forwarding
This function automatically redirects requests for certain services from the Internet to the appropriate host on your local network, located behind the router’s firewall. This function should be used if you want to create a server (for example, a Web server or mail server) on the local network behind the router’s firewall. Go to Forwarding and click Add New .
IP address - the network address of the device to which the request will be redirected. Service port and Internal port - the number of the port that needs to be opened Protocol - Select the required protocol Status - Enabled. Click Save .
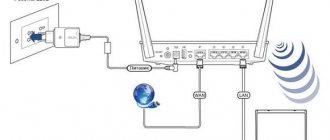
We move the router to a permanent place and connect
Now we select the place where the router will be permanently located. It should be located as close as possible to the center of the apartment or house. This will provide the largest coverage area. Also, the input wires from the Internet service provider should approach this point without any problems. Well, there must be a 220V outlet in relative proximity. As soon as the location is chosen, we begin to connect the router according to the previously described method. At the final stage, we install the twisted pair cable from the provider into the blue port of the network device. This completes the switching for the TP-Link TL-MR3420. In most cases, the firmware does not require updating. Therefore, we check that the connection is correct and supply voltage to the router.