How to connect Wi-Fi on iPhone
IMPORTANT! Before setting up your phone, first check whether you are within range of a particular wireless Wi-Fi connection. You can use home Wi-Fi, or you can connect your iPhone to free networks, for example, in cafes or shopping centers.
So let's begin:
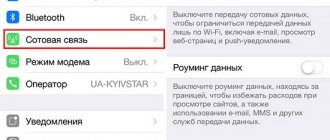
- Go to the home screen and go to the “Settings” menu.
- We look for the line “Wi-Fi” and enable the option.
- Then a search for available Wi-Fi will automatically start.
- Choose a name and connect.
This method is suitable for connecting to unprotected routers, for example, in public places.
If you are connecting to a secure Wi-Fi, the sequence will be slightly different:
- Open the “Settings” menu.
- We look for the line “Wi-Fi” and enable the option.
- After automatically searching for Wi-Fi, select the desired access point.
- Enter the password and click “Connect”.
If you cannot connect your phone to Wi-Fi this way, it means you are entering the wrong password. To find out the correct one, contact your Wi-Fi administrator.
DO NOT FORGET! To connect your phone to secure Wi-Fi, you need to know the password; a “lock” icon is displayed next to such connections.
There are also situations when you need to connect your phone to a hidden access point that is not displayed in the general list. To connect your smartphone, you need to know the exact name of Wi-Fi:
- Open the “Settings” menu.
- We look for the line “Wi-Fi” and enable the option.
- Click “Other” and enter the exact name.
- Click "Security".
- After this, you need to select the type of protection, as shown in the illustration below.
- We return to the “Other network” item and enter the password.
- Click “Connect”.
WiFi Analyzer
A useful program that is usually not used for very long. It is needed when the connection with the wireless router is broken, interrupted, or the Internet disappears when connected via Wi-Fi. It is then that, using “Analyzer,” you can find a free channel, as well as view the weaknesses of the network and its length in a particular area of the house or apartment. Use is short-term, after which it can be removed.
The most common problems when trying to connect an iOS phone to Wi-Fi
It often happens that you seem to have done it correctly and followed the instructions, but nevertheless you cannot connect your phone with the iOS operating system to Wi-Fi. Don’t despair and think that the saying “Technology in the hands of a monkey is a piece of iron” is about you. Most likely, this is not due to some technical glitch.
If you cannot connect your phone to Wi-Fi, do the following:
- Check your router connection. Also make sure you are in range.
- Check that the Wi-Fi option is turned on on your smartphone. Go to “Settings”, then to “Wi-Fi”. If there is a blue check mark next to the desired name, this means that the connection on the phone is successful and problems are observed in the router.
- If you want to connect your phone to Wi-Fi at home, check that the cables are connected correctly and that the router is configured correctly.
- Reboot your IOS phone and set it up again.
- Reboot your router and also configure it again.
If all else fails, try the following:
- If you are trying to connect a smartphone in a public place, contact an employee of the establishment and ask him to set up Wi-Fi.
- Check the connection on other devices, such as a laptop, or ask others if the Internet works for them. If there is also no connection on other devices, then there is a problem with the Internet provider. Contact your Internet provider.
- Try connecting in a different location or to a different Wi-Fi. If attempts are unsuccessful, contact a service center to have your iPhone checked.
- Update the router firmware version and check that your smartphone is in the list of supported devices.
Portable Wi-Fi Hotspot
First on our list is an app called Portable Wi-Fi Hotspot. The program is intended for distributing Wi-Fi Android, or rather, it is a smart shortcut that makes it much easier to enable the access point on Android devices. In general, in order to make an access point from your smartphone, you do not need any special programs, the Google system can do everything itself, you just need:
- Go to settings.
- Go to “Shared modem and networks”.
- Select the line “Wi-Fi access point”.
- Click on “Create access point”.
Portable Wi-Fi Hotspot does all the same operations, just in one click, which we found very convenient.
You can download the utility from Google Play.
How to connect Android to Wi-Fi
Many people think that setting up an iPhone is really not an easy task. Few people will argue with this statement. But when it comes to Android, many people think that these are easy-to-use smartphones that even a child can figure out. However, in fact, when trying to set up Wi-Fi, some difficulties may arise here.
In general, the popularity of Android is growing every day. Probably, there is no longer a person who does not have a smartphone or tablet with the Android operating system in his arsenal of home equipment. Even the smallest children today actively use these gadgets instead of the usual toys, dolls, cars, etc. But few people know how to properly configure Wi-Fi.
You just need to connect your smartphone once and in the future the smartphone will independently connect to Wi-Fi. But it’s not uncommon to see situations where you need to configure Android manually.
For a visual illustration, we will use an LG G4 smartphone with Android 5.1 operating system. However, the model does not matter, Android smartphones are almost the same.
Before you start setting up Android, you need to install Wi-Fi by turning on the adapter. The adapter can be turned on in two ways:
- Via the toolbar.
- Through device settings.
The first method is very convenient: we slide our finger across the screen (from top to bottom) and see the toolbar, as in the figure:
We are looking for the Wi-Fi button with the corresponding icon. Click on it and thus activate the Wi-Fi model.
After this, the system starts searching for available wireless networks and the following list appears on the screen:
Select the one you need and connect. If it is password protected, enter the combination of characters and click “Connect”. The whole process is automated and will not take much time.
Another question is if the connection is hidden in the router settings or the DHCP function is disabled. Then you need to configure Android manually.
WiFi Key Recovery
The next interesting Wi-Fi program for Android is called Wi-Fi Key Recovery.
With its help, you can view all passwords from all networks to which your device has ever been connected. The application will be very useful if you suddenly want to remember your network password, for example, at your workplace.
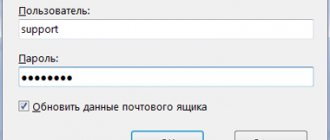
To see the password for the desired network, you just need to launch the application, find the name of the access point in the “SSID” line, and in the “рsk” line there will be a password in quotes.
Note: ROOT rights are required for the program to work. Also, if you are sure that your device was connected to a certain network, but you did not find it in the list, then this network is public and you can connect to it without a password, because the application displays only password-protected networks.
You can download the program.
How to set up Wi-Fi on Android manually if the connection to the router is hidden
Just like the first method, we first need to enable the adapter. But the methods listed above are not suitable for us. We change the strategy: first go to “Settings”. But then we act depending on the version of the phone. Find the “Wi-Fi” item and open its menu. Turn on the adapter. If you have an earlier model, then find the “Wireless Networks” item and select “Wi-Fi Settings”. Move the adapter to the on position.
Next, we move on to manually searching for available connections: you will be offered a list of access points that were found automatically. If you are connecting to a hidden network, click “Add Wi-Fi”:
Enter the exact name of the hidden access point (SSID) and proceed to security, as in the illustration below:
After this, save the changes.
IMPORTANT! The name entered must match the name specified in the router.
Instructions for Android smartphones
It is necessary to perform the following sequential actions:
- Unlock the smartphone screen and swipe your finger across it from top to bottom;
- Depending on the gadget model, the appearance of the lowered curtain may differ, but the principle of operation is the same, for example, the owner of a Samsung Galaxy will see a menu that looks like this:
And on an LG display, the top part of the curtain may look like this:
The location of the Wi-Fi icon may vary, but it is usually present in the top menu when you swipe down the console;
- If the Wi-Fi icon is not active, touch it to activate it;
- After this, available networks will be displayed (if the list of points does not appear, then you need to touch the icon again and hold your finger on it for several seconds until a list of Wi-Fi networks within the radius of the gadget appears);
- Then tap the network you plan to connect to. If it is protected, you will need to type the code and click “Connect”;
- Ready! The wireless connection activity icon will appear at the top line of the screen.
If the user does not find the Wi-Fi icon in the curtain, then you need to go to “Settings” and take the following steps:
- Activate the Wi-Fi adapter by changing the position of the slider in the column of the same name;
- Tap on the Wi-Fi inscription in this column with a slider, and a list of networks will be displayed;
- Touch the network to which you want to connect the device;
- If there is no security, the connection will occur automatically, and if not, a window will pop up to enter a password;
- Write the code, click the “Connect” button;
- Ready.
How to manually set up Wi-Fi on Android if DHCP is disabled
In order to add a new connection to a router that has the DHCP function disabled, check the box in the “Connect additional parameters” line. Next, you will be able to enter your own IP address, proxy server and other information. To enter the IP address and other information, select Static in IP Settings. Fill in the lines that appear with information about the router and start “Save” or “Ok”.
As you can see, no special professional knowledge or skills are required, the process is simple and straightforward. If you follow the instructions provided and do everything correctly, you will be able to set up an Android or iPhone in a matter of minutes. We hope this article helped you.
How to set up WiFi on Android?
We must immediately stipulate that the question of how to set up an access point on an Android phone will be discussed in detail below. Now we are talking about connecting to an existing wireless network in order to gain access to the Internet.
To connect to a wireless network, you need to know its name and password. In most cases, the user only needs a few taps on the smartphone screen:
- In the “Network and Internet” menu, open “WiFi”.
- Move the slider to the “Enabled” position if it has not already been done.
- Select the desired name from the list and tap on it.
- In the window that opens, you must enter a password. This is done once, then the smartphone remembers the password.
In this situation, two problems are possible: the desired network is not visible in the list and there is no connection due to DHCP settings. Both problems can be solved if you manually configure Wi-Fi on your Android phone. To do this you will need:
- Scroll through the list of available connections to the end and find the “+Add” button.
- Enter a name and click “Advanced”.
- If DHCP is configured on the router (all devices automatically receive an IP address), then in the “IP Settings” section leave the value DHCP.
- If the router is not configured or does not support such a function, then you must select “Custom” and manually enter the IP address, gateway, and the addresses of both DNS servers.
This completes setting up WiFi on an Android phone; these instructions are also suitable for Android tablets.
If you have done everything according to the instructions, but the Internet on your phone still does not work, do not panic! The solution is closer than it seems. Just use our article at the link above!