Good afternoon friends. Cleaning the Temp windows folder, is it really necessary, or can we do without it? I have already mentioned this system folder many times in my articles, but I have never written an article about this folder and what exactly it was created for, I also have not mentioned. In this article we will fill this gap.
We have already mentioned various means of freeing up space on the system disk, since this disk, especially if there is little space on it, can very quickly become clogged with system junk, and your computer, no matter how new it is, will start to work slowly.
I have already said, and I will repeat again, any partition of the Windows system must have at least 20% free space, otherwise problems with this partition may begin. This is especially true for the system disk. All system files need free space to function smoothly. Otherwise, speaking in Russian, the files will have nowhere to expand, and various failures and errors may begin.
Is it possible to delete the Temp folder and what is it for?
Most likely, you will not be able to remove it, since it will contain programs that are currently functioning. But, let's first figure out why it is needed?
So, in the Windows system, all folders with files are divided according to certain parameters. They can be divided into system folders and user folders.
Folders and system files are those that are used only by the Windows OS itself for its normal functioning. When a person interferes with the operation of such files, for example, deletes them, this action can end disastrously for the overall operation of the computer. The computer will start to malfunction or stop starting altogether.
But, if a person uninstalls a user folder, this will in no way affect the system itself. The program whose folder you deleted will simply stop working for you. Or it will start to have errors and glitches. In this case, it is better to completely remove this program and install it again if you still have its distribution.
Regarding the Temp folder, I want to say that it belongs specifically to the system folder. Its name is an abbreviation of the word "temporary". It can be translated as “Temporary”, which, in essence, is what it is. It stores temporary information in itself.
What does temporary information mean? This has its own nuances. The first is based on the fact that when you install any software, the OS uses this folder to save intermediate information. In other words, it transfers elements of the installed software into it, which then begin to form special modules necessary for installing this program on a PC. Then, after you have completely installed the software, these modules are no longer needed, and the system leaves them in the Temp folder.
Why it turns out that Windows does not always delete these files automatically is a topic for another article. But, most importantly, the system junk remains in this folder. Then, over time, it becomes more and more. And, if you do not remove it at least once a month, this may end badly for the system.
Another nuance is based on the fact that even Windows, during its operation, constantly adds certain information to our folder. But the OS tries to deny access to these system files to users.
Temp folder: what is it and why is it needed?
So, you can understand the purpose of this directory using the usual interpretation of the abbreviation Temp from the word temporary. The basic interpretation, in simple terms, means “a directory for storing temporary files.”
If anyone doesn’t know, in the process of its operation the operating system itself or the programs installed into it for their own needs create exactly the temporary files necessary for correct installation or operation. The files in the Temp folder usually have a .tmp extension, some of them are deleted automatically, for example, upon completion of some process, some remain in the system, and if the process associated with them is in the active stage, say, running in the background, then It’s simply not possible to get rid of such files. So it turns out that the contents of this directory, in fact, are the most common computer garbage, which can and should be gotten rid of, but do this without harm to the system.
Where is the Temp folder?
This folder, starting from Vista OS and up to Windows 10, is contained at the following address:
C:\Windows\Temp
Interestingly, in the Windows OS there is only a system Temp folder, but there is also a user folder. It is also called Temp. This folder belongs to the account of a specific PC user, and is contained inside another folder, which has the same name as your account. This is the account you are currently signed in to.
The OS dumps information directly related to your work on the PC at this time into this folder.
When you turn on the PC and the main software starts, this software sends some of its elements and various calculations to this folder. Later, when required, the system takes the necessary information from this folder to perform various functions.
Why is this necessary? To save space on the PC RAM board, which is always loaded anyway. Typically, the system deletes the created temporary information for the day upon completion of work. If your computer sometimes freezes, then the information from the Temp folder becomes unnecessary junk.
If you have several accounts on your computer, then there are also several Temp folders. Each account has its own Temp folder. Since the owner of the computer, by default, gets full access to his own folders with files, the creators of Windows decided to hide this folder in order to avoid many problems that may arise for beginners. In other words, you won’t see it in the folder directory.
If you really want to look at this folder and remove unnecessary junk from it, it is possible to temporarily create a visible folder from this folder. Also, if you are confident in your computer knowledge, you can leave it as such.
Opening hidden files
So, to see such files, let's go to the “Control Panel”. Select “Large icons”, at the bottom “Explorer options”.
In the new window, select the “View” menu. In this window, scroll the slider down, and above the very bottom line put the “Show hidden files...” checkbox. Then click “Apply”, then OK.
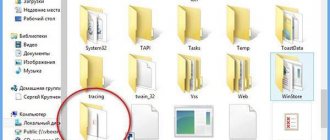
After this, you will be able to view hidden folders with files. Now we need to find daddy Temp. It is contained at:
C:\Users\User_name\AppData\Local\Temp
User_name is the folder with your account. The first folder can be called “Users”. We go to this address through the conductor.
How to properly and safely delete temporary files in Windows 10
There are several ways to get rid of temporary files in Windows 10. Let's look at each of them.
Through the "Options" window
Windows 10 has a new feature for scanning the contents of hard drives and then cleaning individual files and partitions. You can use it in the “Options” window:
- Click on the gear icon in the Start menu. It is located above the power button. The second launch method is simpler: you need to press the Win + I key combination. Click on the gear to open the “Options” window
- Select the System tile.
Open the first "System" section in the Windows Settings window
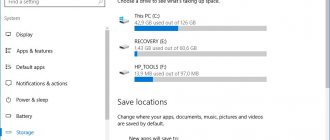
- Switch to the "Storage" block.
Launch the system disk in the “Storage” tab
- Since temporary files are located on the system disk, select it by clicking once with the left mouse button.
- The system will begin analyzing the data located on the system disk. Wait a while.
Wait until the analysis of the contents of the system disk is completed
- As a result, the system will show how much space a particular partition of the hard drive occupies. We are interested in “Temporary files”. Let's open this block.
Open the Temporary Files section to delete items
- Place a check mark next to all three items. Now just click on “Delete files”. We are waiting for the cleaning process to finish.
Select all three items and click on “Delete files”
Video: How to delete temporary files through the Options window
Using special disk cleaning utilities
Third-party utilities designed to clean systems of junk files can also permanently erase temporary files. One of the most famous is CCleaner, developed by Pirifrom. It can be used for free. The interface has been translated into Russian and is intuitive.
To delete temporary files using CCleaner:
- We are launching the official website of the developer of the CCleaner utility. Click on the green Download Free Version button.
Click on the Download Free Version button
- Open the downloaded file and follow the simple step-by-step instructions to install the cleaning application. Don't forget to uncheck the boxes for installing additional software if you don't need it.
- Using the CCleaner icon on the “Desktop”, launch the utility. You are immediately taken to the desired “Cleaning” section. In a large list of items, check the boxes to the left of those that need to be cleared. Make sure that in the "System" section o. In the Applications tab, you can optionally delete your browsing logs, browser cookies, and other information.
Check the items that need to be cleared, including the “Temporary files” object
- Click on “Analysis”.
- When it is completed, the window will display a list of items for further deletion, as well as the total amount of memory they occupy.
After analysis, a list of files for subsequent deletion will appear in the window
- Click on “Cleaning”. We confirm our action by clicking on “Continue”.
Click “Continue” to confirm cleaning
- We are waiting for it to end. Once completed, the window will display information about the amount of memory that was freed during cleaning.
After cleaning, a message indicating the successful completion of the procedure will appear in the window.
In addition to CCleaner, you can use programs such as Advanced Systemcare, Reg Organizer and others to clean up temporary system files.
Video: how to clear your system of temporary files using CCleaner
Due to the built-in Disk Cleanup service
In the tenth version, a built-in utility for removing junk files called “Disk Cleanup” remains available. It will help you find and erase temporary files that were not deleted in the Settings window.
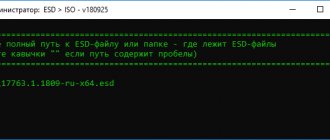
- Press the Win and R keys. In the “Open” field, type the command cleanmgr. Click on “OK” or press Enter.
Enter the command cleanmgr in the "Open" field
- In the next gray window, select drive C from the drop-down menu. Click on “OK”.
Select your system drive from the drop-down menu
- As a result, a special “Disk Cleanup” window will appear on the screen, where the amount of data that can be deleted from the PC memory will be immediately indicated.
The Disk Cleanup window immediately shows the amount of memory that can be freed
- The same window can be launched in another way. Open Windows Explorer via the This PC icon on your Desktop. Right-click on the system drive and select “Properties”.
Select the last item "Properties" in the context menu
- Below the disk visualization there will be a “Disk Cleanup” button. Let's click on it.
Click on the "Disk Cleanup" button under the disk image
- You can safely check the boxes next to all the items on the list. There must be about and “Temporary Internet files”. Now click on “OK”.
Be sure to check “Temporary files” and click “OK”
- Click on “Delete files” to confirm the cleaning.
Click on “Delete files”
- We are waiting for the process to complete.
Wait until the process of cleaning the system from junk files is completed
Video: How to delete temporary files using Disk Cleanup
Manually cleaning system folders with temporary files
Partitions with temporary files that are created by utilities and the OS are stored on the system disk. Every Windows 10 user can open these folders and remove files from there. However, you should do this after finishing work in applications and before turning off the computer.
- Open the Windows Explorer window using the This PC icon located on the Desktop.
- Open the system disk by double clicking the mouse.
Open your system drive in Windows Explorer
- Follow the path: “Users” - “Folder with the name of your account” - AppData - Local - Temp.
Open the Temp folder on your system drive
- In the last folder, you need to select all the files with the mouse pointer and right-click on them. Select “Delete” from the list of options. After this, we confirm that we want to permanently delete the objects.
Click “Yes” to delete files from the Temp folder
- We return to the system disk. Now you need to go to another Temp folder. First open the Windows section, and then Temp. Temporary operating system files are already located here. We remove objects from the folder in the same way as in the previous steps of this instruction.
Delete the contents of the Temp folder in the Windows partition on the system drive
- Restart the device.
Cleaning manually
So, now we will clear your Temp account folder. You will clean the system folder using the same method.
- So, we enter this folder using the method described above;
- Next, we need to select all the content. You can, of course, select one folder at a time, but I advise you to select them all, since there are a lot of folders and files. To do this, press the buttons Ctrl+A . With us, all elements on the page are highlighted;
- Then, click on the Del , and the deletion of files and folders begins.
The deletion will begin, but not all folders will be deleted. Windows will start to pop up saying that some folder or file does not want to be deleted. This shows that Windows is currently using this folder. In this case, simply click “Skip” in the window that appears and continue deleting. Many such messages may appear. Click “Skip” on all of them and delete the remaining elements.
But, this is a little tedious, especially if you have not deleted items from this folder for a long time. Therefore, in the window that opens, you need to check the “Run for everyone...” checkbox and the OS will stop bothering you with such questions.
Removal of temporary folders continues. The longer you have not removed such items, the longer it will take to remove them. As a result, after deleting, I was left with a few files out of many. This is fine. Don’t forget to empty the trash bin yourself afterwards, or using the lower method.
Disk Cleanup utility
I have already written how to use this utility, so I will not tell you in detail how to do it. I'll write briefly:
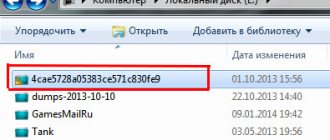
Click on the “Computer” shortcut and enter Explorer. In the window that opens, select the system disk and right-click on it. In the context menu, select “Properties”.
In the window that appears, we need the “General” tab. In this window we see information about the system partition. How much space is free, how much is occupied. But, we are interested in the “Disk Cleanup” button. There is no need to be afraid to press it. The utility will clean only junk and will not touch the necessary files. Click "Disk Cleanup".
The program starts scanning the disk.
After this, a window appears with the result of the scan. On my disk, 424 MB can be cleared. It would have been more if I had not cleared the Temp folder first. Do you think which files need to be cleaned (check the boxes)?
You can safely clear all files that the system itself has ticked. Also, I checked the “Downloads” line (before cleaning, I advise you to see if this folder has the necessary information), and also “Trash” to remove from it all the items that we placed in it during the last cleaning. But, most importantly from the topic of our article, check the box above the “Temporary files” line. Click “Clean up system files”.
The program began to estimate the amount of freed up space. After that, in a new window, again check the boxes above the required elements. Click OK.
The program asks us:
Click “Delete files”. This is done to give us time to think about whether we are really going to delete these files? Our files have been deleted.
How to empty the Temp folder
You can use one of three methods.
- Manually delete all content . go to the folder and select all the files by pressing the key combination Ctrl + A. Then use the Shift + Del to permanently erase all selected files.
- Use the tools built into the operating system. Go to “ This PC ” and right-click on the system partition. Select " Properties " and then the " Disk Cleanup " utility. Depending on the volume of accumulated garbage and the speed of the hard drive, the startup time can vary from a couple of seconds to several minutes. Those files that have a checkmark next to them can be safely deleted. In addition, at your discretion, you can empty downloads, recycle bins, and others. However, temporary data stored in the “ Temp ” folder, and which is not currently used by the system and programs, is located under the corresponding “ Temporary files ” item (who would have thought). Check the required boxes and confirm the operation.
- Third party software . Probably everyone has already heard about the popular CCleaner program, which can not only rid your computer of system junk, but also: optimize the registry, configure startup, find duplicate files and much more. This is exactly the tool that every user should have installed. The utility does not consume a lot of system resources, fully supports the Russian language and is freely available. In general, a must have. Download here.
We clean the disk with an optimizer program
There are many such programs, both paid and free, you can choose any, for example, CCleaner. For thorough disk cleaning, I suggest a program created by Russian specialists called “Computer Accelerator”. The program can, in addition to high-quality disk cleaning, clean the registry, remove errors from it, and remove unnecessary programs from startup. You can organize planning for searching and removing such errors, etc.
I don’t want to talk in detail about this unique program now, since I have already written a detailed article about it: - Computer accelerator. In the article you will find most of the answers to your questions. In addition, this software has its own support service that will qualitatively answer all your questions. Also, you can find out the answers to your questions from the video, which I also attach.
Using third party utilities
Now a few more words about how the Temp folder is cleared. What it is is probably already a little clear. Let's see how to get rid of its contents using special programs, usually called optimizers.
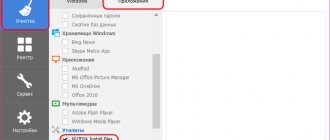
Any such package has a special module for searching and deleting temporary files, and it makes absolutely no difference where they are located. And, as a rule, it is involved in cleaning and optimizing the system by default, although if you have the necessary knowledge, you can make your own settings. Let us explain using the simplest CCleaner utility as an example.
Here in the cleaning section you need to pay attention to the tabs located on the right side (Windows and Applications). In principle, for deep cleaning, you can select all items, including not only temporary files, but also memory dumps, clipboard, system message history, etc. In fact, all this information can also be classified as temporary objects, or, more simply put, as ordinary computer garbage. Everything else is simple. We activate the analysis process, and after issuing the results, we confirm the deletion of files using the appropriate button. As you can see, nothing complicated. By the way, it is the use of such programs that allows for the most complete and safe cleaning.