Sometimes strange folders with an image of a padlock appear on your computer on drive C, D, E or others. Inside them there are strange, unknown, at first glance, subfolders and files that cannot be deleted. Such folders are protected from deletion by the average user; they can be used for network data exchange, for storing windows update files, and much more. By and large, these are service folders that are used by the Windows system for its own purposes. If you want to delete these folders, we will now tell you how to do it.
Attention, deleting protected folders on drive C can lead to the loss of functionality of the entire Windows system. On drives D, E, etc., deleting such folders will not lead to a system crash.
Instructions for deleting protected folders.
When you try to delete protected folders, the following message appears
To delete a protected folder, right-click on the folder name and go to the properties section. In the window that opens, go to the Security section. Here we are interested in the Groups or Users tab, where you need to select your account (administrator), then click the Advanced button.
A new window will appear in which you need to go to the Owner section, and then click on the Change button.
A new window will appear in which you need to select your account, check the Replace subcontainer owner... checkbox, and then click the apply button.
A window will appear notifying you that you have become the owner of this folder. Click OK
Now we need to go to the Permissions section, here again we select our account, and click the button Change permissions.
Here we highlight your account and click the Change button.
In the window that appears, you need to select everything as shown in this screenshot and click on the OK button.
Now we return to the previous window, where we check the boxes Add permissions inherited from parent objects and Replace all permissions of a child object... then click Apply.
A window will appear with the following content, click Yes. Now your protected folder looks like a regular folder. You have full access to it and have the right to delete it in the usual way.
Creating, moving, deleting and other manipulations with files are routine actions that everyone has to perform. However, it happens that you cannot delete a folder that has become unnecessary. The system reports that the operation cannot be completed. If you still need to get rid of the extra folder, you will have to understand what causes such a reaction from the operating system and how to correct this situation.
Let's try to figure it out ourselves. Those for whom this may seem difficult can contact a specialist who provides customer service for computers in your office or home.
Causes and possible solutions to the problem
The inability to delete a particular folder may be due to the following reasons.
Folder corruption
Folder corruption. This may occur due to a software glitch, physical problems on the disk, or due to the destructive actions of a virus. Often it is quite enough to simply restart the computer or scan it with an antivirus.
File is busy
The file is occupied by some program or system process. To verify this, you should open the Task Manager and stop the desired process that is using this file or folder.
Situations often arise that a folder in Explorer appears empty, but it cannot be deleted. The reason may be hidden in the settings of the standard Windows Explorer. The “Do not show hidden folders, files and drives” mode may be activated, so the folders only at first glance seem empty, but in fact service files are stored there. You should make sure of this, otherwise there is a risk of deleting important data.
Lack of rights
The folder contains files, but it cannot be deleted due to insufficient rights to perform this action. The options for correcting this situation are as follows:
- Use an account that has sufficient rights. You need to re-login to the system under a different user who has administrative rights. After completing all the manipulations, you can log in again under your name.
- Get rights for your account to delete folders. There is a risk here that advanced rights will not only allow the user to gain greater control over the system, but also a virus that penetrates an account with administrative privileges can cause much more trouble.
- Use third-party programs to forcefully delete information that has become unnecessary.
Disc is write protected
If, when you try to delete a file or folder from a flash drive, memory card or hard drive, you receive the message: “The disk is write-protected”
(The disk is write-protected), then write protection is installed on it.
We have a separate article on how to unlock a write-protected flash drive, memory card or hard drive. The topic is quite extensive. Therefore, you can familiarize yourself with it by going to the article at this link: How to unlock a write-protected flash drive, memory card or hard drive in Windows 10, 8, 7.
Or by watching a separate video.
Granting administrator rights
A user with normal rights already has sufficient capabilities to freely perform the necessary actions with many folders, without having access to system information. This prevents damage, accidental or intentional, to folders and files that are important for the operation of the OS. Only accounts with administrator rights have these rights.
A good option is to have, in addition to the main account, a second one that has administrative privileges for situations where the rights of the main account are not enough.
If you need to grant extended rights to a user account, then only the system administrator can do this. Next, we will show several ways in which you can, using an administrator account, grant a user greater rights to manage computer resources.
Using system settings
The sequence of actions is as follows:
- By clicking the “Start” or “Win” button on your keyboard, enter “User Accounts” in the search bar.
- In the window that opens that says “Making changes to a user account,” select the “Manage another account” section.
- A window will open with a list of computer users. Select the one you need, click on it, select “Change account type” and set o.
- All you have to do is click on the “Change account type” button. The user now has administrator rights.
Using the command line
This method requires some experience, and if you do not have confidence in your abilities and knowledge, then it is best to contact specialists, for example, a company that provides computer assistance in Balashikha or another area closest to you. For the rest, let's continue:
- Press the "Start" or "Win" button on your keyboard and enter the "Cmd" command. An entry will appear in the “Programs” list; you need to right-click on it and select the “Run as administrator” menu item.
- An MS-DOS terminal window will open. Now you need to enter the command “net user administrator /active:yes” (without quotes) and press Enter.
- To restart a computer.
Deleting a user
You can delete a user from any account that has administrator rights. This can be done through the Control Panel:
- Open the Start menu by clicking the Win button or the corresponding checkbox icon on the left side of the Quick Access toolbar.
- Launch Control Panel.
- Go to the user account management section.
- From the list of available actions you need to select the “Manage other...” item.
- Select the account you need.
- Click on the "Delete" hyperlink.
Restart your PC to correctly save changes to the registry. However, if you try to delete the admin account in this way, you will not succeed. The required button simply will not be in the list of available operations.
If uninstallation is prevented by a running program
In the event that deletion is impossible due to the fact that the file is occupied by some program, you must either stop this program, or, if it is a system process or a program that simply cannot be stopped, perform some actions.
Editing the Startup list
In order to prevent the launch of a program that blocks the ability to delete the desired folder, you must:
- Click the “Start” button or the “Win” + “R” key combination and enter the “msconfig” command.
- The System Configuration window opens. Select the "Startup" tab.
- Unmark the application that does not allow you to delete a file or folder.
- Click “Apply” and then “Ok”.
- To restart a computer.
Now, if the interfering application has been disabled, the removal will be successful. If you didn’t get it right with the program, you should repeat the steps and disable what you need.
Using Safe Mode
Another way to delete a folder that is used by some program, or that a virus cannot remove, is to boot the system in safe mode. For this:
- Open the “System Configuration” window in the manner indicated above.
- Select the “Download” tab, in the “Download Options” section put o and o.
- Click “Apply” and then “Ok”.
- To restart a computer.
The system will now boot into safe mode. After deleting the folders, you should go back to “System Configuration” and uncheck Safe Boot.
There is another way to get into safe mode. When booting the computer, until the Windows startup screen appears, you must press the F8 button. A window with additional download options should appear.
You need to select the line “Safe Mode” and press “Enter”. After downloading, open Explorer and delete everything that is required.
Uninstall using the command line
You can use the command line by opening the MS-DOS terminal window that we mentioned earlier. To delete a file, you can use one of the commands:
- “del c:BadFolderBadFile.txt” – deletes the BadFile.txt file from the c:BadFolder folder.
- “del/fc:BadFolderBadFile.txt” – the “/f” key allows you to delete a protected file.
- “del/ac:BadFolderBadFile.txt” – using the “/a” key, all files in the folder that contains the BadFile.txt file are deleted.
All names of folders and files must be entered without errors. It will be impossible to restore files deleted in this way, since they will not be placed in the Recycle Bin.
Enable the built-in Administrator account in Windows 7
There are two ways to enable the built-in Administrator account.
- Using the AutoLogon unattended installation option
The built-in Administrator account can be used during an unattended installation by setting the Microsoft-Windows-Shell-Setup component's AutoLogon setting to Administrator . This action enables the built-in Administrator account, even if no password is specified in the AdministratorPassword parameter.
You can create an answer file by using Windows Setup Manager.
The following sample answer file shows how to enable the Administrator account, set the Administrator account password, and automatically sign in.
- Local Users and Groups MMC snap-in
Change the properties of the Administrator account using the Local Users and Groups MMC snap-in.
- Open the MMC console and select the Local Users and Groups .
Administrator account and select Properties .
window will open : Administrator .
On the General , clear the Account is disabled check .
Close the MMC console.
The administrator account is now enabled.
Unlocker
This convenient and simple program, after installation, creates the “Unlocker” line in the context menu. Having selected a file, just call up this menu by clicking the right mouse button.
The window that appears will show the program that is preventing the deletion of this file. This is convenient because you just need to close the specified program, and you no longer have to perform any “violent” actions to delete the file.
Lockhunter
Another program, very similar to the previous one in capabilities. After installation, a line in the context menu is also created.
All operations that can be performed with the file are presented in the form of large buttons.
The program should be used carefully so as not to accidentally delete files that Windows needs for normal operation.
Fileassassin
This program works a little differently. To delete a file, you need to launch the program and select the desired file in the window that opens.
After the object to be deleted is selected and the parameters for working with it are specified, you must click the “Execute” button.
Removing unnecessary accounts in windows 7
Windows 7 is a multi-user system that allows you to create multiple accounts on one computer. This is a very convenient opportunity - everyone uses their own “account”, has a separate folder with documents, and their own desktop. On the other hand, each profile takes up a certain space, so sometimes it becomes necessary to delete an account in Windows 7.
Deleting accounts
Important! To manipulate other Windows 7 profiles, you must have local administrator rights. Otherwise, you will not be able to change or delete other user accounts.
But what if there is no administrator profile in the list of accounts?
- Launch windows command prompt. This can be done through the “Run” menu (command “cmd.exe”) or using the search found in the “Start” menu.
- Type the command “net user Administrator /active:yes” (for the Russian version of Windows) or “net user Administrator /active:yes” (for the English version).
- Go to the Start menu and click Change User.
- In the account selection window, click on the “Administrator” profile that appears.
With administrator rights, you can configure Windows 7 by disabling unnecessary services and optimizing the operation of this system.
Control Panel
First of all, try to get rid of the account through the “Control Panel” - this is the simplest and most convenient method that almost always works.
- Open Control Panel and go to User Accounts.
- In the profile management window that opens, select “Manage another account.”
- Select the user profile you want to remove from the system.
- When you go to the desired profile, click the “Delete” button.
You will be prompted to save the user data stored in the account you are removing from your computer. If there was some important information that you do not want to lose, click the “Save Files” button. As a result, a folder bearing the name of the deleted profile will appear on the desktop. If there is no need to save the data, select “Delete files”. After selecting the actions that need to be performed with the files, you will only have to confirm your desire by clicking the “Delete” button again.
Computer Management Console
- Right-click on the “My Computer” icon and select “Manage.”
- In the tree list on the left, find the “Utilities” section and go to it. Expand the “Local Users” subsection and select “Users”.
- A list of all available accounts will appear in the main console window. Select the profile you want to get rid of, right-click on it and select “Delete”. Here you can set a password on your computer to protect your personal data.
A warning about the consequences will appear on the screen. If you are confident in your decision, click the “Yes” button to get rid of the account.
Account Manager
- Click the "Start" button and launch the "Run" menu (or use the Win+R combination).
- Type the command “control userpasswords2” and press Enter.
- On the Users tab, highlight the name of the account you want to get rid of and click Delete.
- Confirm your intention by selecting “Yes” in the window that appears.
System registry
Launch the system registry by typing “regedit” through the Run menu.
Just in case, create a backup copy of the registry so that, if necessary, you can correct errors that lead to unstable system operation. To make a backup copy, open the “File” menu in the Registry Editor and select “Export”.
In the menu on the left, follow the following path: HKEY_LOCAL_MACHINE\SOFTWARE\Microsoft\windows NT\CurrentVersion\ProfileList.
Now you need to check all sections whose names begin with “S-1-5”. Expand the sections one by one and look at the “ProfileImagePass” parameter, which indicates membership in a specific profile.
The parameter value must correspond to the path to the user directory in the “Users” folder on the system drive.
After finding the desired partition, you need to delete it and at the same time erase the user directory, which is located in the C:\Users folder. After this, you need to restart your computer.
Even if you accidentally delete the wrong entries, you can always restore the Windows 7 registry. However, there is one condition - you must have a backup copy of the registry, which you previously saved as a file with the *.reg extension.
As a last resort, you can use automatically created backup files, which are stored in the “Regback” folder (windows\System32\Config).
mysettings.ru
System Restore
Another way to try to unlock folders or files is to roll back the system to one of the backup points. This method is applicable if such backup points are created regularly. This is a radical remedy, because all changes made to the system since the last point was created will be forgotten.
- After clicking the “Start” button, type “System Restore” in the search bar and press “Enter.”
- In the System Restore window, click Next.
- A list of all recovery points will appear, from which you need to select the one you need.
- The last window will warn you about the selected restore point and prompt you to perform this operation. You need to click the “Done” button.
Command line
The fastest and easiest way to enable the administrator account is from an elevated command prompt.
To do this, run the command:
net user administrator /active:yes
Advice . If the command returns that the name was not found, your administrator account has probably been renamed. You can display a list of all accounts with the command:
In our case (Russian version of Windows 10), the account is called “Administrator”. We activate it with the command:
net user Administrator/active:yes
By default, there is no password specified for this account (empty password), so we strongly recommend changing it to something quite complex. The password is set by the command (the password will need to be specified twice).
net user Administrator *
Using a different OS
An alternative way is to connect the drive that contains the non-deletable files to another computer running Windows or Linux running from its own drive. You can also use a special assembly of the system, the so-called “Live CD”, launched from a flash drive or optical disk, designed to restore and check the main operating system of the computer. You can use boot utilities from antivirus software developers.
From the system's point of view, folders and files of the operating system of someone else's disk are simply objects of the disk's file system that can be easily deleted, moved to another location, etc. It is important not to delete unnecessary things, otherwise, by returning the disk to its place, you can end up with an inoperable system.
Causes of problems when trying to uninstall
Difficulties in destroying a particular file always have a logical basis. Here are the main reasons for the impossibility of uninstalling information from a computer:
- Damage to the directory in which the component is located. Failures can occur due to physical damage to the hard drive, the presence of virus software in the OS, or due to malfunctions of Windows components. To get rid of this problem, just reboot your computer and run an antivirus program to check for viruses.
- Employment of a third party process. To correct this situation and “unblock” the file, just call up the “Task Manager” by right-clicking on the “Start” icon and selecting the menu item of the same name. If the directory located in Explorer appears empty, and you cannot erase it, then you need to configure the display of hidden files - check the box and find a service system element that prevents the folder from being destroyed.
- Lack of administrator rights. In this case, the reason for the inability to delete a system-protected file may be the use of a restricted account. In this case, the solution would be to log in from an account with Administrator rights. You can also use third-party uninstaller utilities or try asking the administrator for rights to manipulate folders through the current account.
How to disable super admin?
Actually, these are all the main ways to delete user registrations. This could have ended there, if not for one “but”. Most users know that, starting with the seventh modification of Windows, a so-called super administrator appeared in the system, with maximum rights and privileges. Because of this, you have to run some programs as an administrator, and even agree to the warnings issued by the User Account Control Center. It is, of course, not recommended to disable the control level, but you can get rid of the constant requirements of the system. To do this, you just need to deactivate the superadmin entry. After this, all programs will initially be launched as administrator, and control center warnings will no longer bother you.
To deactivate, call the command line (necessarily as an administrator and only this time), enter the command shown in the image above and press the enter key. After execution, even a restart is not required.
How to get admin rights?
In order to easily delete protected files from your computer, it does not hurt to obtain administrator rights. Only the admin has the necessary competencies to perform various manipulations with digital information located on hard drives. To manage PC resources, you need to go to the system settings and get the appropriate access group:
- Click on the “Start” icon located at the bottom left of the screen and enter the key phrase “User Accounts” in the search bar. For Windows 10 owners, you need to tap on the magnifying glass icon located at the bottom left of the screen next to the Start menu and enter the “Account Management” key.
- In the dialog box that opens, select in the “Making changes to an account” section a special subsection called “Manage another account.”
- In the “Changing account type” window, in a special section called “Selecting a new account type”, click on the button located at the bottom of the current program window - “Changing account type”.
- After carrying out the above manipulations, the user will receive administrator rights.
You can also get extended access rights using the cmd menu.
To quickly access the command line:
- Press the Win+R key combination. In the “Run” window, in the “Go” line, enter the “cmd” command. Or enter the code “cmd” in the built-in Windows search bar, right-click on it and select the “Run as administrator” option from the drop-down list.
- In the MS-DOS window that opens, enter the command, accurate to a space, “net user administrator /active:yes”, but without quotes, and then click on the “Enter” key.
- Reboot the PC - after these steps, the account will receive admin status.
Interesting fact! You can also get "superuser" rights, which are virtually unlimited, even more extensive than the standard "admin" mode. They allow you to delete protected files from a flash drive or built-in hard drives; you just need to configure the rights in TrustedInstaller.
The TrustedInstaller account allows you to save critical elements of Windows and the main components that ensure the operation of the axis from unauthorized access. Even the administrator does not have the rights to edit such information. So, if you try to erase a critical component, the screen will display “Request permission from TrustedInstaller...”.
To obtain this permission, you must follow the instructions:
- Go to “Explorer” and right-click on file, go to “Properties”.
- In the “Security” tab, select the “Advanced” option.
- In the “Advanced Security Settings” menu, go to the “Owner” tab and find the “Change” option at the bottom of the display.
- In the “Change owner to...” column, you must specify the admin’s name, then tap “OK.”
- Confirm the action by clicking “OK” again.
- After these manipulations, when you go to “Group and Users”, you will be able to see the additional “Administrators” tab. Select this entry and click on “Edit”.
- "termserv.dll" will appear. In the “Permissions for the admin group” section, check all the items in the “Allow” column.
- Click on the interactive button “Apply”, after which you can exit the “Properties” dialog box by clicking on “OK”.
- Restart your computer.
Ten
The reasons why people need to delete an account vary greatly, and there is nothing criminal in them, there is no need to focus on this, it is better to get straight to the point and start the discussion with the Windows 10 operating system. I will only note that all subsequent actions are required run as administrator. We discussed how to obtain his rights in one of the previous articles.
Microsoft
In most cases, to fully work on a PC, local access is sufficient and for some reason it is necessary to delete the Microsoft account. I bring to your attention two simple solutions to the problem.
Make it local
Complete destruction of a Microsoft account is often not at all necessary; it is enough to simply change its status, turning it into a local one. For this:
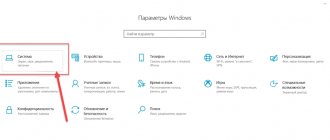
- Initially, you need to get into the “Settings” of your PC; this can be done through the “Start” menu or by pressing the Win and I keys simultaneously.
- In the “Accounts” section, you need to select the “Email and UZ” subsection.
- At the bottom of the window, find the blue-highlighted inscription “Log in from local UZ instead” and click on it.
- A window will open containing a form for switching from one type of knowledge to another; you must fill in the fields (only the name is required).
- Follow the instructions of the system, which will prompt you to restart and log in with the changed account.
Delete
If, nevertheless, to optimize the performance of Windows 10, permanent deletion of the Microsoft account is required, then the algorithm changes slightly, although the first step remains the same:
- We go to the same section of “Settings”, but select the item “Family and other users”.
- Select the required user and click on the corresponding “Delete” button (all his data will be deleted).
- There is also a button for changing the type of ultrasound, which can serve as an alternative to the method described above.
Local
Friends, let’s move on without further ado to ways to delete a local account in Windows 10.
Control Panel
First of all, let's look at the most natural, simple and familiar method, probably familiar to many - deleting a Windows 10 account using the Control Panel:
- In the “Control Panel” window we find the “User Account” section, and there is the “Manage another account” item.
- We mark with a click the required profile (suitable for Microsoft UZ as well) and click on the required command, in our case, “Delete UZ” (the data of the user being destroyed can be erased or saved).
Command line
In Windows 10, account deletion is also available via the command line:
- Launch the command line with administrator rights through the Start menu.
- We enter the command “net users” and check among the displayed profiles the name of the one we want to destroy (if there is no doubt about the correctness of the name, then this item can be omitted).
- Enter the command “net user ХХХХХ /delete”, where ХХХХХ is the name of the desired user.
- Confirm the action by pressing the Enter key.
KM manager
There is another option - to eliminate the annoying user through the “UZ Manager”, which can be accessed through the “Run” line launched from “Start” or by pressing the Win and R keys simultaneously. Next:
- In the command line, write “control userpasswords2” and confirm by pressing Enter.
- In the list of users registered on the PC that appears, select the one you need and click the “Delete” button located just below.
Built-in
Friends, let's talk about what to do if you need to remove the built-in administrator or guest account in Windows 10. You most likely won’t be able to remove them completely, and there’s no need to, just disable them:
- In the command line launched with administrator rights (via “Start” or Win + R), type the command phrase “net user ХХХХХ /active:no”, where ХХХХХ is the name of the administrator or guest who needs to be disabled.
- Press Enter.
Password
Very often, Windows 10 users do not need to delete an account, but disable the password request when logging in. There are many ways, you can write a separate article about them, but I’ll tell you the simplest and most common:
- In a special field for entering commands (the “Run” line), launched from “Start” or using the Win + R keys, enter one of the following phrases (the result is identical) – netplwiz or control userpasswords2.
- Highlight the desired user with a mouse click and uncheck the “Require username and password” checkbox.
What to do if a running application interferes?
If deletion is impossible due to the operation of a particular system process or application, then you need to perform certain manipulations to terminate the specified program.
First of all, you can try to configure the Startup elements, since it is this utility that blocks the deletion of the necessary directory in Windows. In order to configure the list of startup programs, you need to:
- Call “Run” by simultaneously holding down the Win + R keys. In the dialog box that opens, enter the code combination “msconfig”.
- In the “System Configurator” that appears, go to the fourth tab from the left called “Startup”.
- Uncheck unnecessary applications that block access to uninstalling an unnecessary component.
- Be sure to click on “Apply”, then click on “OK”.
- Reboot Windows.
After performing these manipulations, you can easily uninstall unnecessary information: the running process will no longer interfere with the user’s actions.
Working in Safe Mode
The next important method that will allow you to quickly delete most protected files in Windows 7 is to configure the OS to boot in safe mode. To make these settings, you will need:
- Go to “System Configuration” using the method described above, then go to the second tab from the left called “Boot” and at the bottom of the display select the section called “Boot Options” and check the “Safe Mode” box. Just select “Minimum” load.
- Tap on the “Apply” button to save the changes made and click on “OK”.
- Reboot PC.
After these steps, Windows will boot into safe mode: you can safely perform any manipulations with folders, then go back to the “Configuration” menu and uncheck the “Safe Mode” item.
Note! To get into safe mode not through the “Configurator” menu, but much faster, you need to restart the PC, and before the Windows splash screen appears on the display, hold down the “F8” key on the keyboard. If the user did everything correctly, “Additional download options” will appear on the screen. You should click on the down arrow and go to the appropriate operating mode, then click on “Enter”.
How to remove or disable KNOX on Samsung
To remove KNOX on Samsung, you can use the built-in method, which works perfectly on official firmware and does not require root rights, or additional utilities that work with root rights. Choose the best option for yourself.
Removal without root rights
The standard procedure for disabling a protected function is as follows:
- Find KNOX in the list of applications. Launch the program.
- Go to the menu.
- Click Settings.
- Click on the words “Delete”.
- You will be prompted to make a backup copy of your data. I recommend agreeing with this.
- Unlock the screen with a password or another suggested method.
- Click Next and then OK.
After this, the device will reboot and the protected folder on Samsung will disappear.
Please note that not all devices allow you to delete or even open a protected folder.
Working through the cmd menu
You can delete a locked file through the well-known “MS-DOS” menu by entering one of the available commands:
- del c:OneFolderOneFile.txt – allows you to destroy the “Onetxt” element located in the “OneFolder” directory;
- del/fc:OneFolderOne.txt – allows you to get rid of protected .txt (the block is indicated as “/f”);
- del/ac:OneFolderOneFile.txt – the “/a” code helps destroy the contents of the “OneFolder” directory, including “OneFile.txt”.
Note! When destroying information via the Command Line, the data is not placed in the trash. To restore them, you will need to download a special utility like Recuva or Disk Drill.
Using third party utilities
To delete files from a protected drive, you can use third-party applications. One of the available file managers, for example, Total Commander, is perfect. This software allows you to destroy a folder by simply pressing “F8” and then confirming the action. In this way, you can even delete protected files from the DVR. However, there are limitations to uninstallation in Commander; you may end up needing another software solution with more powerful features.
An interesting solution would be the Unlocker application, which allows you to get an additional tool called Unlocker in the Windows context menu. This “Unblocker” allows you to quickly determine the path to the executing component that interferes with the uninstallation of the element. It is enough to select the “Delete” option in the lower left menu to quickly destroy the selected information.
An analogue of “Unlocker” is “Lockhunter”. To destroy a particular Windows element, you will need to select the “Delete” button with a red cross in the context menu that opens after calling the “What is locking this file” option.
Note! Such “Unlockers” should be used extremely carefully to avoid possible deletion of system folders, which could lead to Windows malfunction.
The Fileassassin utility allows you to manipulate data by selecting the “Execute” option in the application window.
System Restore
The last way to remove installation files, if these actions are protected by the administrator, is the so-called system rollback. It is important to understand that if you choose this solution, all changes made on the PC after the specified recovery date will be irretrievably lost. If the user is not confused by this point, then you can proceed to action:
- Enter the key phrase “System Restore” into the built-in search bar, then click “Enter”.
- In the “Recovery...” menu, click on the option in the lower right corner of the “Next” program.
- Select a restore point by date and tap “Next”.
- To start the rollback operation, just click on “Finish” and wait for the running process to complete.
Of course, there is another method for deleting protected files, such as connecting to a PC with Linux or Windows, which is launched from its own disk or flash drive - “Live CD”, or other boot utility. The fact is that when launching another axis, the PC will perceive the data of the current OS as ordinary data, on which the performance of the PC does not depend. But this method can lead to permanent damage to the axis, so it is intended exclusively for experienced Windows users.