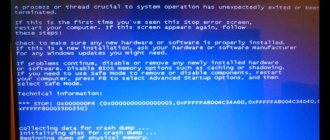
When Windows stops loading and a black or blue window with technical messages appears, this can confuse most users. But sometimes the problem can be solved quite simply.
♥ ON TOPIC: The best analogues of Lightroom: 10 programs for Windows and Mac, available without a subscription.
What does the “CPU Fan Error! Press F1"
Users may encounter an error whose full text, verbatim, looks like this:
CPU Fan Error! Press F1 to Resume or CPU Fan Error! Press F1 to Run SETUP.
If you translate this phrase, you can understand its meaning. After turning on and when starting to boot, the computer undergoes self-diagnosis, as a result of which an error was detected with the operation of the fan on the processor. Here the computer prompts the user to fix the problem by entering the UEFI (BIOS) settings or to ignore it and continue working.
Most often you just want to press the F1 key, as the computer suggests, and continue with the normal boot. However, in this case, the user takes on the risks - you need to be really sure that there are no problems with cooling the processor and it will not overheat.
♥ ON TOPIC: How to find a forgotten Wi-Fi password (Wi-Fi network) on a Windows computer: 4 methods.
The fan is not connected/connected to the wrong connector
Another common problem is when CPU Fan Error appears when you boot your computer. It's easy to make a mistake: there are many almost identical connectors on the motherboard. Hence the conclusion: do not install the cooler without instructions for the device.
CPU Fan Error F1 also appears on the screen when you have not connected a cooler to the motherboard at all. Dealing with the problem is simple: turn off the computer, open the system unit, connect the cooler to the desired connector. This kind of problem also appears when purchasing a new computer: store service workers may forget about this fan.
Why does the error “CPU Fan Error! Press F1"
At the very beginning of the computer and thereafter, the UEFI (or BIOS) system provides the correct voltage for the equipment and monitors its operation, including fan speeds. Their status is determined by detecting the rotation speed of the blades, which can be adjusted in the UEFI (BIOS).
And the “CPU Fan Error” error occurs when the system detects a low speed of the cooler or its complete stop. Needless to say, the active cooling system of the processor ensures its operating temperatures. Without a cooler, any time-consuming task will quickly lead to overheating of the device, so it is no coincidence that the computer warns the user about the problem.
♥ BY TOPIC: How to upload photos and videos to Instagram from a Mac or Windows computer.
Finding out the cause of the error
Before you panic and disassemble the case, let's check the settings. If you changed the cooler rotation speed in any programs or in the BIOS immediately before the “CPU fan error” error appeared during boot, return everything to its initial state. You can also try to select settings that will make the error message disappear. We also recommend checking if the time on your PC is reset upon startup. If it is reset, then the reason may be a faulty battery on the computer's motherboard, which means resetting other CMOS settings. In this case, replacing the battery will completely solve the problem. If you disassembled the system unit before the error appeared (repaired, changed something, or simply cleaned it), then the essence of the problem may lie in the incorrect connection of the fan (or its disconnection). Let's talk about this in more detail.
As already mentioned, before loading the system, the BIOS evaluates the operation of each element of the computer, including the cooler. The number of revolutions is measured, and if they are zero, an error appears. Most often, the fan is simply connected to the wrong connector, and the system cannot detect it. In this case, reconnecting the wire will be enough to fix the problem. The next reason may be a mismatch between the motherboard and the fan plug (for example, the plug is three-pin, and the connector on the board is four-pin). In this case, the cooler works properly, but the system simply cannot determine the number of revolutions. The best solution in this case is to select suitable equipment. If this is not possible, then below we will tell you how to ignore the error.
If all of the above reasons are excluded, then it is still worth getting into the system unit and checking whether the cooler is working, whether the wires are interfering with the movement of the blades, whether there is a lot of dust in it, etc. Simple cleaning of the cooler can also help. True, not for long. Here it is important to decide whether it’s time to simply change the processor cooling system.
How to set/restore all BIOS Setup options to default
See if the fan (cooler) is spinning
If the system signals a fan rotation error, it is logical to assume that there is something physically wrong with it. To do this, you will have to inspect the system unit from the inside. You will need to carefully remove its cover and see if the fan actually rotates. It may well be that it is jammed due to dust, or it is being hampered by cables from the power supply caught between the blades.
Most likely, the situation can be easily resolved. The wires can be removed and tied with plastic ties, and dust can be easily removed using a brush or blowing out the cooler with compressed air. If the fan is clogged quite heavily, it will have to be removed for a while. To do this, you will need to either unscrew the screws or unclip the latches. Of course, such a check should be carried out with the computer de-energized.
♥ ON TOPIC: How to speed up your computer with Windows 10, 8, 7: 20 tips.
Is the fan connected correctly?
Upon physical inspection, the fan may appear clean and even turn easily when moving by hand. It’s just that the cooler doesn’t want to spin when the computer is running. It may simply be incorrectly connected to the appropriate connector on the motherboard.
The connector itself has a special key that seems to prevent it from being inserted in an unnatural way into the connector. But people can be inattentive or just do it for the first time. Some manage to make a mistake, also applying physical force. And the three fan wires generally drive inexperienced users into a stupor.
In addition, it happens that users connect the three-pin plug of the cooler to the four-pin connector on the motherboard. Everything seems to be working and spinning, but the system cannot recognize the speed sensor and the “CPU Fan Error” error appears. In this case, you need to select a compatible cooler or disable fan rotation control in UEFI (BIOS) (see point 5 below).
In the picture on the left is a connector on the motherboard, on the right are fan plugs with different numbers of pins. The assignment of the pins is always identical: 1 — “minus”, 2 — “plus”, 3 — speed sensor, 4 — speed control
Sometimes the mistake lies in connecting the cooler to the wrong connector. On a motherboard (especially an advanced one), there may be several of these for fans at once. The connector for the processor cooler is labeled CPU_FAN, but there is also a similar CHA_FAN nearby.
But this connector is suitable for case fans. Any cooler must be connected exclusively to the connector intended for it, and you will have to check the alignment of the grooves on the connectors. You can turn on the computer and everything will work properly.
♥ ON TOPIC: svchost.exe is loading memory in Windows 7, 8, 10: what is this process and how to solve the problem.
How to get rid of the error
Having found out that the reason does not lie in the settings, we try to remove the left cover of the system unit and visually evaluate the operation of the cooler. In the case of a laptop, remove the back cover. Before disassembling, it is important to read the instructions for the device, since each model has its own design features.
Make sure the fan is spinning
If any elements inside the case, for example, hanging wires from the power supply, or dust accumulated on the surfaces, prevent the rotation of the blades, you need to remove them from the cooler to restore normal operation of the device.
IMPORTANT. All actions are performed with the computer turned off.
If the rotation of the cooler is blocked by cables, they can be tied with plastic ties. Dust from the fan and radiator is removed with a brush and compressed air. If there is significant contamination, you will need to remove the cooling system for cleaning, for which you need to unclip the latches, unscrew the screws and carefully remove the cooler. After the procedure, we fix the fan and connect it to the board, after which we turn on the computer and see if the error disappears.
IMPORTANT. Double-check the presence of thermal paste on the heatsink to avoid overheating the processor when trying to turn on the computer.
Checking the correct connection
If the fan is clean and there is nothing obstructing its rotation, but the blades do not spin when the computer is running, it is likely that the connection to the board is not made correctly, so the next step is to check the connection.
The fan plug has three pins and should connect to three pins on the motherboard (usually labeled CPU FAN under them). Power Fan and Chassis Fan connectors are optional. If the cooler is connected to them, this is the cause of the error. Let's see if everything is in its place. If not, we'll fix it.
ADVICE. Some system units are equipped with a special function for adjusting the rotation speed of the cooler blades from the front panel. To enable this function, you need to connect the cooler a little differently. Check the documentation for the cooling system and motherboard. The fan may have been connected incorrectly because of this.
When the plug is inserted into the correct connector and the grooves on the connectors match, turn on the computer and check the operation.
Pin assignment: 1 — “minus”, 2 — “plus”, 3 — speed sensor, 4 — speed control
Increasing fan speed
You can change the rotation speed of the blades in the BIOS settings. In the case when the speed is set to excessively low, the appearance of an error can be caused precisely by this reason, since the system perceives this fact as a lack of rotation. If these settings have changed, you should disable the Smart Q-FAN speed control option in the BIOS and save the changes by pressing F10, or select, by gradually increasing the parameter value, the blade rotation speed at which an error will not occur. Selecting the optimal setting value, each time with a slight increase in speed, save the changes and reboot to check if the error has disappeared.
Fan replacement
Sometimes the blades do not spin due to the failure of the cooler itself, which is quite likely if the previous methods did not help. To check the functionality, you can apply a voltage of 5-12 volts to the connector, for which you can use, for example, a Krona battery or four AA elements connected in series. We connect the “minus” of the battery to the first contact of the connector (black wire), and the plus to the second (red or yellow).
If there is still no rotation, your suspicions have been confirmed and the fan will need to be replaced.
Increase fan speed
You can increase the fan speed programmatically in the BIOS (UEFI). The error we are describing can precisely occur due to a low speed - it seems to the system that the cooler simply does not rotate.
It is likely that you have already manually changed these settings at some point. In this case, you will need to disable a function called Smart Q‑FAN (may be called differently) to intelligently control the cooler speed. You can save the settings and exit by pressing the F10 key.
In the same section you can usually find the cooler rotation speed at which the error will no longer be displayed. The user will have to gradually increase the speed, exit the BIOS (UEFI) while saving the settings, reboot and look at the result.
♥ ON TOPIC: Does your Windows computer freeze? Hotkeys that will help solve the problem.
Replace the fan
Sometimes, which happens rarely, the fan may not rotate due to its own failure. You will need to check whether the device is working. This can be done by applying a voltage of 5 to 12 Volts to the connector. In such a situation, a Krona battery or four AA batteries connected in series are suitable.
The negative pole of the battery must be connected to the first contact of the connector (black wire), and the positive pole to the second contact (yellow or red wire). If the fan does not turn on when connected to such a circuit, then it can be considered physically broken. You need to buy a new one.
♥ ON TOPIC: How to disable the login password in Windows 10: working methods.
Ciphers are easy
CPU Fan, CPU Opt, Pump Fan
Not every “mother” has the entire set of the above interfaces. But everyone has one of them. This is the CPU Fan - the connector of the most important fan in the computer - the processor.
There is only one CPU Fan connector on the motherboard, but on many motherboards in the gaming segment there are combinations of CPU Fan + Pump Fan or CPU Fan + CPU Opt. Pump Fan and CPU Opt are designed for a water cooling pump fan, but can also be used for an additional fan for an air CPU cooler.
CPU Fan, Pump Fan and CPU Opt are usually located near the socket (socket for installing the processor) and have 4 pins:
- The 1st pin corresponds to the black wire of the fan - this is the ground or minus of the power supply.
- The 2nd pin corresponds to the yellow or red wire - this is the plus of the 12 V power supply. On some models of motherboards, 5V is supplied to this pin.
- The 3rd pin corresponds to the green or yellow wire - this is the tachometer output, which measures the fan speed.
- The 4th pin, corresponding to the blue wire, receives the control signal of the PWM controller, which regulates the rotation speed of the cooler depending on the heating of the processor.
On some older motherboards, the CPU Fan has 3 pins:
- 1st – ground or minus of the power supply.
- 2nd – plus power supply 12 V/5 V.
- 3rd – tachometer sensor.
The rotation speed of the cooler connected to the three-pin connector is regulated by changing the supply voltage.
Modern processor coolers are usually equipped with 4-pin plugs, but some budget and older models have 3 pins.
If the fan plug has more or less pins than the CPU Fan connector, you will still be able to install it in your computer. To do this, simply leave the fourth pin free, as shown in the diagram below.
Connecting the processor cooler to the CPU Fan connector is strictly necessary; this is monitored by the POST hardware self-diagnosis program, which runs when the PC is turned on. If you connect the cooler to a different connector or not connect it at all, the computer will not start.
This is interesting: Power saving mode on the monitor: what is the reason and how to fix it
Sys Fan
Sys Fan connectors , of which there can be from 0 to 4-5 pieces on the motherboard, are designed to connect an additional cooling system for internal devices, for example, a chipset or hard drive.
Sys Fan contact groups have 4 and sometimes 3 pins. By the way, you can connect an additional processor cooler fan to one of them if there is no more suitable connector.
The rotation speed of turntables connected to 3-pin Sys Fan connectors, as in the case of 3-pin CPU Fans, is controlled by changing the supply voltage level. And in some implementations of motherboards it is not controlled in any way.
Sys Fan contact groups are often, but not always, located in the middle of the board near the chipset. Their use is optional.
Cha Fan
Cha (Chassis) Fan are designed for connecting case fans. The pinout of their contact groups is identical to the Sys Fan, that is, these connectors are interchangeable - the turntable on the case can easily be connected to the connector for the chipset cooler and vice versa.
The conventional difference between Cha Fan and Sys Fan is only in location - the former are often placed on the edges of the motherboard, facing the front side and the “ceiling” of the system unit. Another thing is that there is at least 1 Cha Fan connector on any motherboard.
PWR Fan
Pwr Fan is a relatively rare connector designed for a power supply fan. Such an implementation of a power supply unit is not common, and therefore, as a rule, there is no need for such a connection. However, if your PC's power supply has a Pwr Fan connector, but the motherboard does not, you can connect it to any free Cha Fan contact group.
Optional connectors
AIO Pump – designed to connect a water cooling pump. Compatible with any air system fans.
H-AMP F an – high current connector. Designed for fans with high current consumption.
W- PUMP+ – contact group for high-power devices included in the water cooling system. Withstands current up to 3 A.
M.2 Fan – designed for cooling M.2 standard drives.
ASST ( Assist) Fan – for connecting additional fans that are equipped with some motherboards in the gaming segment.
EXT Fan – 5-pin connector for connecting an additional controller board designed to control the operation of several case or system fans.
Activate bypass RPM monitoring
An unpleasant error can be avoided even if the cooler is physically connected to the wrong connector on the motherboard or the user has deliberately limited the speed to reduce noise. It is necessary to disable the rotation control function in the BIOS (UEFI), which will help resolve the situation.
But you should take such a step only if you are aware of the risks of processor overheating. It would be useful to set up additional temperature control of working devices using specialized programs, for example, SpeedFan.
In the BIOS (UEFI), look for the CPU FAN Fail Warning parameter (or an analogue, for example, CPU FAN Speed, etc.) and disable it by setting it to Disabled or Ignored. Save the settings and reboot your computer.
See also:
- The disk is 100% loaded on Windows: how to fix the problem.
- 32-bit or 64-bit Windows: what's the difference and which system should you install?
- How to automatically switch language (layout) on the keyboard in macOS or Windows.
February 8, 2020 Tags: iFaq, Apple News, Repair.
Comments for the site
Cackl e
How to ignore an error
In cases where you are sure that the cooler is working, you can ignore the error by correcting some values in the BIOS. This can be done by disabling the cooler speed monitoring function. For this:
- We go into the BIOS.
- We are looking for the Hardware Monitor item.
- Select the CPU Fan Speed section.
- Select the “N/A” state (sometimes “Disabled”).
Having done this, do not forget to periodically monitor the operation of the cooler yourself, since the system will not be able to warn you about overheating, which will result in damage to the processor. You can check the temperature in a special program in the “Computer - Sensors” section. We also advise you to correct some values in the BIOS. For example, the threshold for automatically shutting down a PC when it overheats. We do it this way:
- Go to the BIOS again.
- Select Hardware Monitor.
- We check the RPM values and the required amount for the cooler to start working. If the switching threshold is too high, overheating may occur even before the cooling system starts operating. The average fan speed is 1500-2000 RPM (revolutions per minute).
Another option would be to simply disable waiting for the F1 key to be pressed. To do this, you just need to turn off the “Wait For F1 if Error” option (switch it to the Disabled state). In new operating systems, you can find this option in the “Boot” section.
IMPORTANT. This item applies only to non-critical errors.
Occasionally, the problem may be with the motherboard. In this case, diagnostics followed by repair or replacement are necessary.
To summarize, we note that the most common reason for this error to appear is a non-working or poorly functioning cooler. Replacing this part is easy and inexpensive. In any case, it will cost less than buying a new processor in case of overheating. How did you fix this error? Share your experience in the comments.