Windows 10 users often face this problem where the computer freezes on boot for a certain period of time. Running dots in a circle, symbolizing the startup of the system, are displayed on the screen for 4-5 minutes.
This OS “behavior” is caused by a number of reasons. Let's find out in more detail what to do if your computer freezes when rebooting.
Disabling Fast Startup
Fast Startup Windows 10 works on the principle of hybrid sleep mode. When turned off, the system saves the kernel and loaded drivers to a hibernation file on the system disk, and when the computer starts, it loads the saved OS state from it into memory.
This feature allows Windows 10 to boot faster, but can also cause problems when it gets stuck in a reboot loop. Additionally, updates also cannot be installed properly as they require the computer to be completely rebooted. To disable the feature, follow these steps:
In the “Run” window, which is called up by the keyboard shortcut Win + R, enter the command control panel and click on “OK” to enter the Control Panel.
Switch the view to large icons and go to the Power Options section.
In the left panel, click on the “Power button action” link. On the next screen, click on the “Change settings that are not currently available” option, which requires administrator rights.
Now go to the bottom of the screen and uncheck the “Enable Fast Startup” option. Save changes and exit.
Restart your computer. Check if Windows 10 freezes during boot.
Case No. 1 - the appearance of a blue screen of death
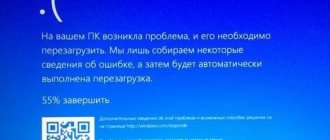
The most common error that occurs during work is a message stating that the computer is not started correctly, and the PC will now restart (see also Blue Screen of Death: causes of the error and how to fix it).
Also, this problem may appear during the installation of Windows updates (you will also find it useful: Errors when updating Windows 10) and can be solved by a simple reboot. Then everything may work fine, after which the error will appear again after some time. What could be the reasons for this problem?
- The most likely reason is a faulty power supply (especially if the PC is turned on the second or third time). After two unsuccessful attempts to start the operating system, system recovery is automatically initialized, and the computer finally returns to working condition.
- Another option is to disable fast boot mode in the OS settings. How to do it?
How to create an FTP connection to quickly share files between Android and PC
We go to the control panel by right-clicking on the start button and selecting the appropriate item in the menu.
Go to the “Sound and Equipment” section and select the “Power Options” category.
In the list of subcategories on the left side of the screen, select the “Power button action” option and click on it.
Next, find the “Change settings that are currently unavailable” button and click on it.
We see a list of hidden parameters that can be changed. Uncheck the “Activate fast boot” checkbox and confirm your decision by selecting the “Save changes” button.
Finally, another very possible reason for the appearance of a BSOD window is the incorrect operation of system software (most often, antiviruses, firewalls, and registry cleaning programs). If you recently installed one of the above applications, try to remove it - perhaps the OS will work again.
As a rule, the appearance of the BSOD screen is accompanied by another window in which the user is prompted to restart the PC or use auxiliary settings.
If you see such a window, try to repair damaged Windows 10 files and registry using the System Restore mechanism.
How to do it? Click the “Advanced Settings” button, then “Troubleshooting”, “Advanced Settings”, “Boot Options”. After all this, click on the button to reboot.
When the computer restarts, the Boot Settings window will appear. When it is on the screen, press the F6 button on your keyboard to launch Safe Mode with support for cmd mode. If it works, log in as an administrator.
In the prompt that appears, enter the following commands in order:
- sfc /scannow
- dism /online/cleanup-image/restorehealth
- shutdown –r
It is important to note that after entering one of the first two commands, the computer may not respond to user actions for a long time, freeze, or generate errors. Be patient.
What are “codecs” and why are they used?
Now wait for the PC to restart. Most likely, these steps will allow you to fully restore the functionality of the operating system.
Disable location, cryptography, and selective startup services
You can get rid of Windows freezing at boot by disabling the Cryptography and Location services.
Location service allows you to track your computer's location. It also allows a website or external program to determine your location.
Cryptographic services allow the installation of new applications and also verify the signing of Windows files in various programs.
Open the Run window using the Win + R key combination, enter the msconfig command and confirm its launch with OK.
Go to the "General" tab and check the "Diagnostic run" option.
Click "Apply" and exit the window.
Open the services with the services.msc command from the interpreter window (Win + R).
Scroll until you find Crypto Services. Double-click to open Properties and click on the Stop button. Expand the startup type drop-down list and set the value to "Disabled". Click "OK" to save the settings and close the window.
Now expand the Start menu, click on the gear icon to enter Settings. Open the Privacy section, in the left pane, go to the “Location” tab and turn off the location service.
Restart your PC. Check if the system hangs on boot. If these actions do not bring any improvements, you can return the changes made.
Reason and solutions
In fact, there is one reason for the situation in question, and it is the incorrect operation of third-party applications or system components. And it is on this basis that the search for a solution should begin.
Option 1 , it is also the simplest and most banal. Its use is justified in cases where the conductor began to malfunction after installing any software. This can happen due to the fact that most software implements individual extensions into Explorer for their work, and sometimes this is not only an inactive menu item, but a full-fledged module that is automatically loaded the moment you right-click. Therefore, if you know the installation date of the problematic software, then simply roll back the system to the moment it was installed, and this is done as follows:
- Open “Control Panel” (“Start” - “All applications” - “System”) - “All Control Panel Items” - “Recovery”;
- Select the “System Restore” line and confirm the action using administrator rights;
- In the window that opens, check the box next to “Select a different recovery point”;
- The recovery wizard will present all available points that were created manually by the user or automatically by the system when carrying out any manipulations related to changes in the normal operation of the OS;
- Select the date you need and click “Next”.
The computer will automatically reboot. Wait for recovery and do not turn off the computer's power. After restoration, check the correct operation of the conductor and, if necessary, repeat the above steps, only with a different point.
Option 2. Involves two methods of execution, the first is implemented using standard operating system tools, the second is implemented using third-party specialized software. It’s worth noting right away that the procedure is not complicated, regardless of the method chosen.
Method 1:
- Press the key combination “WIN+R” and enter the command “msconfig”;
- Go to the “Services” section and check the “Do not display Microsoft services” checkbox;
- Next, click “Disable all” to deactivate third-party services;
- Go to the Startup tab and open Task Manager;
- Disable all active items, regardless of the degree of influence on the operation of the OS;
- Agree to the reboot and wait for it to complete.
ADVICE. After turning it on, check the operation of Explorer, and if it works properly (and with a 99% probability this will be the case), return to “System Configuration” (WIN + R) and gradually enable previously disabled services, and check the operation every time you turn it on Conductor. In this way, the “problem system component” will be found by brute force.
Method 2:
- The basis has the same structure as the method described above, except that to implement it you will need third-party software called “ShellExView”, you can download it from the official developer website https://www.nirsoft.net/utils/shexview .html, where you can also download the crack;
- Launch the program and go to the “Settings” tab and check the box “Hide/show all Microsoft extensions” and in the line “Show 32-bit extensions”;
- Everything that will be displayed in the program is the result of third-party software, so you can safely select them and press the “F7” button (Deactivate selected entries);
- Next, open “Settings” again and click on the “Restart Explorer” line;
- Check the functionality of Explorer;
- If the result has not changed, you can double-check the Microsoft extensions that were hidden in the steps described above.
- If the result is successful, then use the same brute force method to check/find which extension is causing the freeze.
Driver Update
Outdated or incompatible drivers also often cause the stuck boot issue. After updating Windows 10, drivers may not install correctly. Try updating them automatically. You can also install them manually after downloading the latest versions from the vendor's website.
Expand the Start menu by right-clicking and select Device Manager.
All devices installed on the computer will be displayed here. Update everything, including your video card, network adapter, sound card, modem, and more.
For example, to update your video card driver, expand the Video Adapters tab. Right-click on it, select Update.
On the next screen, select the first option (automatic search).
If it was not possible to update this way, first download the latest version of the software from the video card supplier’s website and install it. If the driver package does not have an executable file (.exe), unpack it to any folder, and then specify it when updating manually (second option).
Update drivers for all devices and check if the problem is fixed.
Why the right mouse button does not work: common problems
First, let's look at the theoretical part - why the right mouse button does not work. In this case, it is easier to understand what to do next. A malfunction may occur for the following reasons:
- Mechanical failure.
- Conflict with a third party application.
- Damage to system files and component storage.
- Low batteries (relevant for a wireless mouse).
- Action of viruses.
If the right mouse button does not work well, do not rush to make drastic decisions. First, try connecting the pointing device to another laptop or computer. If it works fine, then it is not the problem.
Deleting the contents of the SoftwareDistribution folder
If some system files are damaged, the system may also freeze during boot. Corrupted files occur for a number of reasons. Sometimes one application conflicts with another, and incorrect entries can corrupt files. Follow these steps:
Boot your computer into Safe Mode. To do this, open the Start menu, click on the Power button. Hold Shift and click on the “Reboot” button. When the action selection window opens, follow the path: Troubleshooting - Advanced options - Boot options, then press F4.
Then type “command prompt” in the system search bar, and under the result found, click on the “Run as administrator” link.
In the console, run the command:
net stop wuauserv
This command will stop the update process running in the background.
Now run the command cd %systemroot% which will move to the Windows installation directory.
Type ren SoftwareDistribution SD.old, which will rename the SoftwareDistribution folder to SD.old. When the computer does not find the SoftwareDistribution, it will be forced to create a new one.
Now enter the net start wuauserv command, which will start the update service. After rebooting your PC and see if it freezes at boot.
Case No. 2 – the Windows logo appears and the PC turns off
If you stopped at the iteration with the Win 10 logo appearing and subsequent loading stopping, the reason for this behavior is the same. The only difference is that in this case we will not be able to get into the console command line to launch the recovery mechanism. Now, to initiate the recovery procedure, we will need a boot disk with the Win 10 operating environment. If you do not have one, you will have to burn it to a CD or flash drive (link just above) on another computer.
We boot from the disk (to do this, we may need to change the order of boot objects in the BIOS so that the boot is carried out first from the CD, and only after that from the hard drive). The standard installation initialization screen appears. We select the “OS Restore” item, as a result of which we find ourselves on the same form of environmental recovery.
Next, we turn to case No. 1, described just above, and repeat the same steps described earlier.
Case #3 – Boot failure or OS wasn't found errors.
It may happen that during boot up a black screen appears on the display with the error text indicated in the title.
The first thing that comes to mind when such a message appears is that the order of devices to boot in the BIOS is incorrect. Another likely reason related to hardware faults is a broken hard drive or SSD drive. If you are absolutely sure that all your disk devices are ok, there is a 99% out of 100% chance that the error is due to a damaged bootloader. How to fix it?
How to find out your Windows 10 product key
We boot from the disk with the “tens” distribution recorded on it. On the installation start screen, select “OS Restore”.
Next, “Troubleshooting and troubleshooting”, “Advanced settings”, “Boot-time recovery”.
By selecting this menu item, the process of restoring the environment bootloader is initialized, which will solve our problem. When the recovery procedure is completed, the computer will restart automatically.
In the above article, I described the most common errors associated with the inability to load an operating system and methods for solving them. In general, each error should be considered individually, but the solutions I described will most likely fix your problem and you can continue to work successfully.
Problematic applications
Check if there are any applications that are freezing and cannot be closed properly. Or maybe the system freezes occurred after installing the latest programs.
Open the Control Panel using the control panel command from the Run window (Win + R). Go to Programs and Features.
Sort the list by date and remove the latest programs.
Then restart your computer. Check if the problem is fixed.
Disabling firewall and antivirus
Try disabling the Firewall and see how it affects the boot process. Windows Firewall monitors incoming and outgoing Internet packets. It also blocks connections or applications from being installed if they do not meet its criteria.
Open the Control Panel using the control panel command from the interpreter window (Win + R), go to Firewall. In the left panel, click on the “Turn Firewall on or off” option.
Check the "Disable..." option on both the Home and Public networks tabs. Save changes and exit. Check if the OS freezes on boot.
Installing pending updates
Try updating your system to the latest version. Windows releases important updates aimed at fixing bugs.
Open the system search bar, type “Windows Update”. Under the found result, click on the “Open” item.
Click on the “Check for updates” button. Once pending ones are detected, they will be installed automatically.
Then check if the problem is fixed when booting the system.
Note: If your computer freezes during startup, hold down the power button for a few seconds to turn it off. If you cannot turn it off, unplug the power cable. When using a laptop, remove the battery and wait a few minutes before plugging it back in.
