Windows 10 IoT Enterprise Lite, mini, micro 1909 (18363.387) for SSD xlx (x64)
There are two builds of Windows 10 Enterprise in the distribution.
Computer for the system:
Processor:
at least 1 GHz
RAM:
from 4Gb
Video card:
Microsoft DirectX 9 support with WDDM driver support
Screen resolution:
1024 x 768
Windows 10 IoT Enterprise Lite, mini, micro 1909 (18363.387) for SSD xlx (x64) torrent, changes:
ENWin10-IoT-Ent-x64-Lite(18363.387_en)-for-SSD_xlx.iso Include:
1. Windows 10 IoT Enterprise Lite (Store & Xbox is left, can be easily removed if desired [dism++, etc.]) Video:
>>>
2. Windows 10 IoT Enterprise mini (cut as much as possible, deleted: Store, Xbox, MSMQ, IIS WebServer, Virtualization, etc...) 3. Windows 10 IoT Enterprise micro (optionally removed Cortana, the search does not work!)
Info en Checksums: CRC32:
6ED69B44
MD5:
8DD9CEE39922973813AD878CC0A1B82C
SHA-1:
6096482173C5B7C3176A61F6AC98C4E6953C1C55
Made from the original image 18363.356.190918-2052.19h2_release_svc_refresh_clientbusiness_vol_x64fre_en-us.esd, updates integrated: kb4520390-x64 kb4517211-x64 kb4515871-x64
RU
Win10-IoT-Ent-x64-Lite(18363.387_ru)-for-SSD_xlx.iso Contains:
1. Windows 10 IoT Enterprise Lite (Store, Xbox, if desired, dism++ can be easily removed, etc.). Video:
>>>
2. Windows 10 IoT Enterprise mini (cut as much as possible, removed: Store, Xbox, MSMQ, IIS WebServer, virtualization, etc....) 3. Windows 10 IoT Enterprise micro (Additionally removed Cortana, search does not work!)
Checksums: CRC32:
97ECE2D2
MD5:
D2A8B973ECAD534801AE6547AF70E0F0
SHA-1:
200BFCA4624D09C2E4A6CEDC1D22FC7B25E0D466
Made from the original image 18363.356.190918-2052.19h2_release_svc_refresh_clientbusiness_vol_x64fre_ru-ru.esd, updates integrated: kb4520390-x64 kb4517211-x64 kb4515871-x64
!!! ATTENTION !!!
The builds have a reduced number of installation points, do not offer a Wi-Fi connection, and only local login is offered during installation.
After installation, you can configure everything you need. When installing the OS on an HDD (regular hard drive), be sure
Tweaks_SSD-to-HDD.reg
file after installation . This (after several reboots) will significantly speed up the startup of the system and programs.
Changing keys
If you need the Pro or Pro for Workstations version, then change the product key to the installation key or your own:
Installation keys: Professional:
VK7JG-NPHTM-C97JM-9MPGT-3V66T
Pro for Workstations:
NRG8B-VKK3Q-CXVCJ-9G2XF-6Q84J
In components, disable “Device blocking” -> “Unified write filter”.
Delete the folders:
C:\ProgramData\Microsoft\Windows\Start Menu\Programs\UWF filter C:\ProgramData\UWF
Versions Pro for Workstations and Enterprise in the RU assembly will have the correct English name when the keys are changed.
Deleted!
Edge, OneDrive, QuickAssist, OCR-TIFF Filter, Defender, WinSATMediaFiles, Linux Subsystem, Feature for UNIX, Disk Encryption (SecureStartup[BitLocker]), Windows Hello, Printing-XPSServices, WebcamExperience, SecureAssessment.
What's in the Additional_Files folder
On the installation disk (flash drive) in the “Additional_Files” folder there are additional files (the folder can be deleted from the flash drive): The “Services_Disable.reg” file will disable some services and diagnostics.
The "Services_Enable.reg" file will enable some services and diagnostics if it is necessary to install drivers, etc. from the Internet. (After application, you need to restart the computer)
.
The file “Docs_Show.reg” will enable the display of folders in Explorer: Videos, Documents, Downloads, Images, Music, Desktop. The file "Docs_Hide.reg" will disable the display of these folders (disabled by default). The file “SystemLogs_OFF.reg” will completely disable system logs; after applying and rebooting the computer, you can delete all log files from the folder: Windows\System32\winevt\Logs !!! ATTENTION !!! Using this tweak on other builds or the full OS will make it impossible to boot.
The file "SystemLogs_ON.reg" will enable logs by default. The file "Swapfile_ON.reg" will enable an additional swap file for tiled applications. (Needed when using “heavy” applications from the store and lacking RAM.)
For old (and not only) games: dxwebsetup.exe - installation of dx9 libraries from the Internet. 2019_Visual-C++: vc_redist.x64.exe and vc_redist.x86.exe (it is better to install both). InSpectre.exe - a utility for disabling the inhibitory protection "Meltdown and Specter" (screenshot InSpectre.png), or an analogue: Manage_Speculative_Execution_Protection_Settings_v1.9.bat mdstool-win64.exe - checks for vulnerability to Microarchitectural Data Sampling attacks (Intel ZombieLoad).
-Activation-
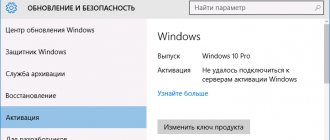
If you have a MAK key/digital license for your hardware, see screenshots Act1.png, Act2.png If you don’t have a license, use the activator in the W10-Digital-Activation folder. W10-Digital-Activation: Activating Windows 10 using a Digital License. (thanks to Ratiborus!!!) See screenshots ActD1.png, ActD2.png An Internet connection is required for activation! If available, install your key using the command in Comstroke from the admin (where XXXXX-XX... is your key): slmgr /ipk XXXXX-XXXXX-XXXXX-XXXXX-XXXXX
Additional information
Information for everyone:
If you install “your” drivers, do not connect the network until they are installed!!! To install drivers from the Internet, enable the startup type of the Windows Update service “Manually” (enabled manually by default), disable it after installation (Startup type - Disabled). No compression algorithms were used. When installed on a disk/partition up to 30 GB in size, the system “self-compresses”. When installing on a larger disk, after installation it is recommended to check the status with the command:
compact /CompactOS:query
And, if necessary, compress the OS with the command:
compact /CompactOS:always
!!! ATTENTION !!!
In the settings - Privacy, do not disable access to “Camera” and “Microphone” for applications, otherwise Skype, etc.
they will be unavailable. Let me remind the happy owners of multi-core “underbooks”, “greenies” and those who like to experiment - in all xlx assemblies, in the power settings, the ability to enable parking of processor cores at low loads is unlocked, which makes it possible to save battery power when powered offline.
There is no decrease in performance (or minimal, in some applications it may even increase). When the load increases, all cores are switched on. To enable parking, just change two points as in the screenshot, you don’t need to touch the rest. The result is visible immediately in the “Resource Monitor” after clicking the “Apply” button.
For 4-core processors (we count only physical cores, virtual ones do not count!) we set 25%, for 2-core processors 50%.
Add.
information (only for Enterprise): About the use of the “Unified Write Filter (UWF)”
Any antivirus takes up disk space, interferes with work and terribly slows down the system, including the standard monstrous Indian “Defender” (also the main spy!).
The idea of getting rid of the antivirus and making the system “unkillable” can be implemented by the “Unified Write Filter” (UWF filter) function, available in the Enterprise and Education versions. The essence of the idea is to organize an overlay in memory and completely prohibit writing to the system disk (with the exception of a customizable list of exceptions). Thus, in the current session, all changes are stored in the overlay and are valid only until the computer is restarted. After rebooting, the system will be in the state it was before the filter was turned on. By disabling the UWF filter and restarting the system, you can use it in normal mode; this is necessary when updating, installing programs, drivers, etc. In the assembly, the Unified Write Filter (UWF) component is already enabled, the default overlay size is set to 1024 MB, which is enough for normal work. When you enable the UWF filter, the page file is automatically disabled! It is advisable to organize a paging file on any non-system drive. 1. Install and fully configure the system, drivers, programs. Work as usual until the system “shovels” everything it needs and adapts to your hardware (do several reboots, let the system “settle”...). 2. (Optional) Consider and edit the list of exceptions for folders, files, registry entries that are allowed to be written to (Start > UWF filter > UWF cmd-files > right-click on SetExclusions.cmd - Edit [enclose path with spaces in quotes]) . Disk defragmentation - disable the system disk in scheduled optimization, defragment the system disk manually, after disabling the UWF filter! 3. After all the settings, enable the “UWF filter” and restart the computer. The system disk is now write-protected, which is very useful for the disk (especially for SSDs). 4. For any changes to settings, installation of drivers, programs, etc., first disable the “UWF filter” and restart the computer! Start - UWF recording filter
- shortcuts correspond to files (in the shortcut properties - run as administrator): "Enable UWF" - C:\ProgramData\UWF\UWF_ON.cmd "Overlay 1024 MB (def)" - C:\ProgramData\UWF \SetOverlay1024.cmd "Overlay 4096 MB" - C:\ProgramData\UWF\SetOverlay4096.cmd "Disable UWF" - C:\ProgramData\UWF\UWF_Off.cmd "Overlay size" - C:\ProgramData\UWF\GetOverlay.cmd (see how much memory the overlay takes up) “List of exceptions” - C:\ProgramData\UWF\GetExclusions.cmd (view the list of existing exceptions) “Current UWF settings” - C:\ProgramData\UWF\UWF_GetConfig.cmd (view the current state of UWF) “Remove exceptions” - C:\ProgramData\UWF\RemoveExcl.cmd (the file must be edited to suit your needs) “Set exclusions” - C:\ProgramData\UWF\SetExclusions.cmd (the file contains a sample list, you need to edit it to suit your needs. ) As an example, as a sample, the assembly contains the SetExclusions.cmd file, which contains a list of exceptions. Before using it you need to edit it to suit your needs!!! The file is launched for execution using the “Set exceptions” shortcut.
To avoid a large number of stupid questions, installing the Enterprise version is strictly not recommended for beginners! Adherents of the integrity and purity of the complete OS, as well as assemblies of any other authors, are asked to pass by SILENTLY! To the questions “how to return defender, Linux”, etc. There is only one answer: install the full OS and don’t fool your head! Questions about “blupup” are ignored, all complaints should be directed to the Indians in M$.
Screenshots of Windows 10 IoT Enterprise Lite, mini, micro 1909 (18363.387) for SSD xlx (x64) torrent:
Screenshots from MSI GE70 2PL Apache laptop
Download Windows 10 IoT Enterprise Lite, mini, micro 1909 (18363.387) for SSD xlx (x64) via torrent:
Disabling credssp in Windows via NLA
I would consider this method of solving the situation as a quick, temporary solution until you install security updates. To allow remote connection to the server and avoid the situation that an error occurred during credssp authentication, do this. Open the properties of my computer, once in the system, you can also press WIN+Pause Breake at the same time or, alternatively, enter control /name Microsoft.System in the command line. In the “System” window we find the menu item “Remote access settings”
Uncheck "Allow connections only from computers running Remote Desktop with Network Level Authentication"
After this, you can easily connect to this computer or server, but what if you can’t get there and uncheck this box, then the Windows registry will come to our aid. You can remotely create the necessary registry keys that will disable the NLA checkbox or the CredSSP policy. To do this you can go two ways:
- Use Windows Network Registry
- Use remote computer control, for example PsExec.exe, I already showed you how to open ports in a firewall remotely.
Let's try it through the remote registry; to do this, open Regedit through the Run window.
From the “File” menu, select “Connect network registry”, then find the server you need.
You will connect an additional registry with two hives. Follow the path (If you do not have CredSSPParameters, you will need to create them):
Here you need to create a REG_DWORD key with the name AllowEncryptionOracle and the value 2 . In this option, the CredSSP policy will set the Vulnerable level - this is the lowest level of protection. This will allow you to connect to servers remotely using RDP. However, this will expose the servers to attacks.
Or you can also disable NLA, to do this, find the registry branch:
SecurityLayer key there and set it to the value to deactivate Network Level Authentication.
Now you can do the same thing through PsExec.exe, setting the minimum protection level for CredSSP or disabling NLA , to do this, while in cmd in administrator mode, enter the command:
w10-cl01 is the computer name.
Next, with a cmd session running for the remote computer, run the command:
You can do the same to disable Network Level Authentication, the command will be like this:
Once again, I draw your attention to the fact that this method is temporary and the most unsafe, used in cases where nothing can be done or it will take longer, but it is necessary yesterday; be sure to install all the necessary updates.
The most correct method is to install updates
When you have managed to connect everywhere and the time has come for servicing your servers, we quickly install updates that close the flaw (CVE-2018-0886 | CredSSP Remote Code Execution Vulnerability).
Previously, there were such KBs, but they can change their number over time, so follow the link above, it will be more reliable.
- Windows Server 2012 R2 / Windows 8: KB4103715
- Windows Server 2008 R2 / Windows 7: KB4103712
- Windows Server 2020 / Windows 10 1607 - KB4103723
- Windows Server 2020 / Windows 10 1703 - KB4103731
- Windows Server 2020 / Windows 10 1709 - KB4103727
- Windows Server 2020 / Windows 10 1803 - KB4103721
After installing Windows security updates that were released after May 2020, you may encounter the CredSSP encryption oracle remediation when RDP connecting to a remote server and Windows computer in the following cases:
- You connect to a remote desktop on a computer with a recently installed old (for example, RTM) version of Windows (for example, Windows 10 below build 1803, Windows Server 2012 R2, Windows Server 2016) that does not have the latest Windows security updates installed;
- You are trying to connect to an RDP computer that has not installed Microsoft updates for a long time;
- The RDP connection blocks the remote computer, because There are no required security updates on your client computer.
Let's try to figure out what the RDP error CredSSP encryption oracle remediation means and how it can be fixed.
So, when you try to connect to the RemoteApp application on RDS servers running Windows Server 2020 / 2012 R2 / 2008 R2, or to the remote desktops of other users via the RDP protocol (on Windows 10, 8.1 or 7), an error appears:
This error is due to the fact that Windows Server or the regular desktop version of Windows to which you are trying to connect via RDP do not have Windows security updates installed (at least since March 2020).
The fact is that back in March 2020, Microsoft released an update that closed the possibility of remote code execution using a vulnerability in the CredSSP (Credential Security Support Provider) protocol. The problem is described in detail in bulletin CVE-2018-0886. In May 2020, an additional update was published in which, by default, Windows clients are prohibited from connecting to remote RDP servers with a vulnerable (unpatched) version of the CredSSP protocol.
Thus, if you have not installed cumulative security updates on Windows RDS/RDP servers (computers) since March 2020, and May updates (or newer) are installed on RDP clients, then when you try to connect to RDS servers with an unpatched version of CredSSP an error will appear stating that it is impossible to connect: This could be due to CredSSP encryption oracle remediation.
The RDP client error appears after installing the following security updates:
- Windows 7 / Windows Server 2008 R2 - KB4103718
- Windows 8.1 / Windows Server 2012 R2 - KB4103725
- Windows Server 2020 - KB4103723
- Windows 10 1803 - KB4103721
- Windows 10 1709 - KB4103727
- Windows 10 1703 - KB4103731
- Windows 10 1609 - KB4103723
To restore a remote desktop connection, you can remove security updates on the client from which the RDP connection is made (but this is highly not recommended , i.e. there is a more secure and correct solution).
To solve the problem, you can temporarily disable CredSSP version checking on the remote computer on the computer from which you are connecting via RDP. This can be done through the Local Group Policy Editor. For this:
- Launch the local GPO editor - gpedit.msc;
- Go to the Computer Configuration -> Administrative Templates -> System -> Credentials Delegation policy section;
- Find a policy named Encryption Oracle Remediation (Fix encryption oracle vulnerability). Enable policy ( Enabled/ Enabled), and as an option in the drop-down list, select Vulnerable / Leave vulnerability;
- All that remains is to update the policies on your computer (gpupdate /force command) and try connecting via RDP to the remote computer. With Encryption Oracle Remediation and set to Vulnerable , your CredSSP-enabled terminal applications will be able to connect even to RDS/RDP servers and Windows computers that do not have the latest security updates.
- Force Updated Clients - the highest level of protection, when the RDP server prohibits connections to non-updated clients. Typically, this policy should be enabled after a complete update of the entire infrastructure and integration of the latest security updates into Windows installation images for servers and workstations;
- Mitigated – in this mode, outgoing remote RDP connections to RDP servers with a vulnerable version of CredSSP are blocked. However, other services using CredSSP work fine;
- Vulnerable – the lowest level of security when connecting to an RDP server with a vulnerable version of CredSSP is allowed.

