What is Telnet
Telnet is a means of communication that is established between terminal devices. An example of such a connection is quite simple: a personal computer and a server that supports a similar type of connection. Telnet is not any software, it is a communication protocol . But it should be noted that there are some utilities that work via the “terminalnetwork” protocol.
In the recent past, Telnet was one of the main ways to connect to the network. Now the utility is practically not used . Today, operating systems have more advanced protocols installed, eliminating any additional actions from the user.
This communication protocol is used in some operations:
- remote desktop connection
- checking ports for connectivity;
- using software that is only available on remote machines;
- the use of system directories that can only be opened using this type of protocol;
- sending email without using additional software;
- users using this protocol allows other users to gain access to their personal computer.
Telnet on network devices
We have already said that using the Telnet protocol you can manage not only computers, but also a wide variety of network devices. The most common class of such devices is routers. So what is Telnet in a router, what is it for, how to enable it?
Depending on the manufacturer and specific model, you can enable Telnet access in different ways. You can log into the router via the web interface or through the console. In the first case, you will need to find a remote administration point where one or another type of connection is allowed (Telnet, ssh). In the second case, access can be granted via the command line. Each administrator chooses a scenario that is convenient for themselves. However, there are routers that implement only one of two possible initial connection options, for example, only a web interface is available. An administrator who is accustomed to working with the console will find it rather uncomfortable to look for the item where he needs to put the coveted checkbox, but in reality there is nothing complicated about it. The interface of most modern routers is quite clear. The names of the menu items speak for themselves; the minimalist design will not allow you to get confused.
Installation and launch
There is no need to download the utility; Telnet is built into Windows 7/8/10 by default.
Installation and startup instructions:
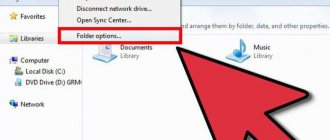
- to install the client you need to open "Control Panel»;
- then select “Programs” and “ Turn components on or off ”;
- in the list of system components you should find “Telnet Client”;
- Check the checkbox and click “OK”, the installation process will begin.
In order to start the client you need to open the command line:
- in the “Start” menu, enter “ CMD ” in the search bar;
- Next, launch the command line as administrator and enter “Telnet”;
- After this, the utility window will open.
5 Major Microsoft Failures
We invite you to watch the video on installing Telnet in Windows:
How to Telnet Windows 10 - launch, connect and start using
Hello, dear blog readers. Today I decided to write an article that will be entirely devoted to a fairly common question from users - how to install Telnet Windows 10. After reading this article, in a few minutes you will be able to install the Telnet client on your computer correctly and without any problems.
What is a Telnet client?
Telnet is a fairly common network protocol that is used to implement the entire text interface over the network using the TCP transport. One of its most important tasks is to create an ideal interaction between terminal processes and terminal devices.
In simple terms, this client is a simple program that has a text interface and makes it possible to quickly connect one computer to another using the Internet. Typically, this process is carried out using a regular command line. The location of the program is drive C, folder Windows\System32. And the client works approximately like this:
The administrator of one of the computers gives permission for the other to connect to it. When you enable the Telnet service, it makes it possible to enter all the necessary commands used to access programs and various services on a remote computer. Such software can be used for a very wide range of processes: to open access to email, databases, files or other tasks. By default, this network protocol is disabled, but its activation can be done quickly and quite easily.
Enabling Windows Features
- Start your computer;
- Open the control panel;
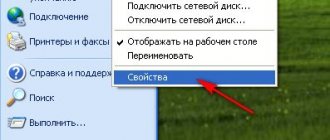
- Find the Programs and Features tab. In the upper left corner of the tab that opens, select “Turn Windows features on or off.”
Software activation
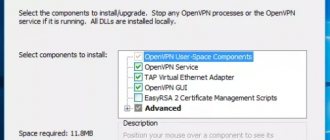
In the list of available components that appears, select the “Telnet Client” folder (check the box next to the desired folder), click “OK”.
IMPORTANT: In some cases, you will need to wait one or more minutes for the client to fully install. During this process, you do not need to think that your PC is frozen and take some measures to solve the problem. This can lead to a number of errors that may require you to reinstall the client.
In cases where you want to activate via the command line, you should use the quick command. For this:
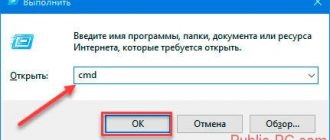
- In the “Run” field, open the command line (type “cmd”);
- In the line that appears, type the following phrase: start /w pkgmgr /iu:"TelnetClient" Press the "Enter" key. After a few seconds you will be returned to the initial command line. To start using the Telnet client, simply reboot it.
3. There is another way, but for this we will need administrator rights. Launch the console with administrator rights and enter the following command:
dism /online /Enable-Feature /FeatureName:TelnetClient
How to enable and start using the program?
To begin, open a command prompt. Don't forget that the Telnet network protocol is now launched via the command line. To perform the action, simply press the “Win” key and enter the “Cmd” command in the “Run” field. Next, type the phrase “Telnet” and press “Enter”. If everything was done correctly, the command line should disappear, and instead the Telnet line will start, which should look something like this - “Microsoft Telnet”.
The next step is connecting to the server. How to enable Telnet Windows 10?
At the command prompt without errors, enter the command:
open serveraddress [port]
Upon successful completion of the operation, a window will open asking for your username and password. After successfully connecting and using the service, all that remains to be done is to properly end the session: open the command line, write the word “quit” in it and press “Enter”.
The client is launched and available for use absolutely free. Almost all available commands for using this network protocol can be downloaded on the Internet (close, display, set, st and others).
how to install Telnet
With this I would like to say goodbye to you and conclude today’s article. To solve the problem with Telnet Windows 7/8/10 once and for all, I divided the entire text into detailed paragraphs. Therefore, I really hope that the text will help you and will not raise any questions. I would be very grateful for subscribing to my blog and reposting on social networks.
Sincerely, Victor
Source: https://it-tehnik.ru/software/windows-10/step-by-step-instructions-for-installing-telnet-client-on-windows-10.html
Port check
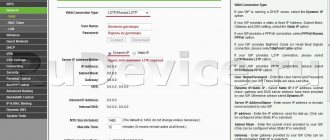
Checking a network port to see if a personal computer can access it in Telnet:
- in the window you need to enter the telnetip command;
- Next you should enter the IP address of the computer, for example, 192.168.1.1. You can view the address in the settings of your network router;
- At the end, enter the FTP port “21”. Thus the command will look like this: telnet 192.168.0.1 21;
- After this, an error message if the port is not available or asking you to enter additional information if the port is open.
Let's start using it
Launch
Launching TELNET on Windows 7 and any other Windows is quite simple. To do this, you first need a client, if it is not already installed:
- Go to the Control Panel.
- Select “Programs”.
- Select the “Turn Windows features on or off” tab.
- Find the Telnet client and put a marker next to it if it is not already installed.
Then click “OK” and wait a minute while the client is installed.
The terminal is launched in Windows via the command line, if you do not have any special utilities installed for working with Telnet. But since you are reading this article, it means that you are just starting to get acquainted with this topic, and first it would be nice to master the basics of management using the command line.
- Launch the command line as administrator.
- Enter "telnet".
The command line will reboot, and the TELNET command line will now open, in which we will work.
Checking the port
One of the simplest actions performed in TELNET is port checking. You can check the port to see if it can be accessed from your computer. To do this you need to do the following:
In the command line opened using the method above, enter: telnetip address port number
For example, if your IP address is 192.168.0.1 and the port number is 21 (FTP port), then enter:
telnet 192.168.0.1 21
If the command produces an error message, it means the port is unavailable. If a blank window appears or a request to enter additional data, then the port is open. For Windows, this method of checking the port can be quite convenient.
Telnet Commands
Utility commands are a way to interact with it. To display a list of all commands , you must enter “help”. Next, we will look at the main commands in detail:
- “open” - the request allows you to connect to a remote server;
- “close” — interrupting the process of connecting to a remote server;
- “set” — setting parameters for connecting to the server;
- “term” - the request is intended to indicate the type of terminal ;
- "escape" - sets the control character ;
- “mode” — selection of operating mode ;
- “unset”—resetting previously entered parameters;
- “start” — start the server;
- “pause” — temporary stop of the server;
- “continue” — continuation of server operation after a pause;
- "stop" - complete stop of the server.
Programs for working with Telnet
After starting all the necessary Telnet services, you can safely start working using the built-in Windows tool - the command line. It is called from the Start menu, either by clicking on the corresponding item, or by speed dialing (cmd). It is advisable to always run the command line with “Administrator” user rights (either local, the device on which you are working, or domain). This way, you won't have to restart the application if elevation is required. In addition to the existing tool of the operating system itself, there are also third-party programs that allow access via the Telnet protocol. The most popular of them is Putty. Along with it, other applications running under different operating systems are also popular, such as TeraTerm, AnyConnect, DTelnet, EasyTerm, KoalaTerm and many others. Which program to use, everyone decides for themselves, depending on personal preferences, interface requirements, etc. There are no significant differences in terms of functionality between them, and there cannot be. Each utility implements the entire available list of Telnet commands.
Telnet on Linux
Like Windows, Telnet is built into the Linux operating system.
Previously it was used as the standard Telnet protocol, now it has been replaced by the more improved SSH. As with the previous OS, the utility in Linux is used to check ports, routers, etc. Let's look at the main operating modes:
- " line by line ". This operating mode is recommended. In this case, editing the request is carried out on the local PC and is sent to the server only when it is ready;
- " character by character ". Every character typed in the console window is sent to the remote server. You cannot edit the text here. When you delete a character using “Backspace”, it will also be sent to the server.
16 GB in iPhone: when all is not lost
Basic commands in Linux:
- “close” — interrupt the connection;
- “encrypt” — enable encryption;
- “logout”—turn off the utility and close the connection;
- “mode” — selection of operating mode;
- “status” — connection status;
- “send” — sending a telnet request;
- “set” — setting server parameters;
- “open” — connection to a remote server;
- “display” — display of special characters.
Next, let's look at several ways to use the utility in Linux:
- in the console window, enter a request to check the availability of the server , for example, “telnet 192.168.1.243”;
- Next, let’s check access to the port by entering the request “telnet localhost 122” and “telnet localhost 21”. A message will appear on the console screen indicating whether any of the ports are accepting the connection;
- example of remote control using telnet. To do this, enter the request “telnet localhost 23” in the main window. "23" is the default port. To perform remote control, you need to install “telnet-server” on your local computer. After this, a message will appear asking you to enter your login and password.
Telnet service: and Telnet client?
Both concepts from the title have already been mentioned a little higher. Like many other applications, Telnet has a client side and a server side. However, a Telnet server is not necessarily a server in the general sense of the word. The computer from which the connection is made is considered to be a client, the device to which this connection is made will be the server. This could be a router, a computer, or any other host that supports command line control. If we are talking about remote administration of a personal user computer or server, the Telnet port must be open. It is often closed for security reasons, so when you try to establish a session, an error message will appear. To check open and closed ports, you can use a special utility or web service. The standard Telnet port is 23. If you want to not only connect to other computers yourself, but also allow administration of your PC via Telnet, then in the same operating system snap-in you need to check the box next to the Telnet server component. The PCs and server hardware that you administer should be configured in the same way.
Telnet is not an internal or external command
This error appears if this client is not installed on the personal computer. You need to do the following:
- open the “ Control Panel ”;
- go to “Programs” and in the left column “ Windows features on or off ”;
- in the window that opens, find “Telnet Client” and mark this checkbox, click “Ok”.
Second way:
- you need to open the command line as an administrator;
- in the window you need to enter “dism /online /Enable-Feature /FeatureName:TelnetClient”;
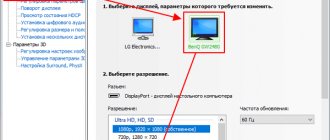
- if the list of components is not displayed, edit the registry;
- keyboard shortcut "Win+R» launch the “Run” utility;
- open the tree and find “HKEY_LOCAL_MACHINE\SYSTEM\CurrentControlSet\Control\Windows”;
- Then we find the value “ CSDVersion ” and change the parameter “200” to “0”.
How to find out which video card is on a Windows computer
Launch the terminal. Enable required services
In modern operating systems of the Windows family, before starting Telnet, you need to check whether this component is installed on the system. This is not difficult to do. For Windows 7, the most common operating system today, you need to perform the following sequence of actions:
- Select “Control Panel” or Control Panel from the “Start” menu.
- In the window that opens, select “Programs”. In the English version of the system this will be Programs.
- Go to the “Turn Windows features on or off” tab. The system generates a list of all available components. Already installed ones will be marked with checkboxes. This process may take several minutes.
- After the list is loaded, you need to find the Telnet client item. There is also a Telnet server in the menu, but we will return to this a little later. If there is no checkmark next to the item we need, it needs to be checked.
- After clicking the “OK” button, the system will begin to install the necessary components for the correct operation of the protocol. This may take some time, but on modern computers the process is unlikely to take more than a minute. Thus, the question of how to enable Telnet was resolved in 5 simple steps.