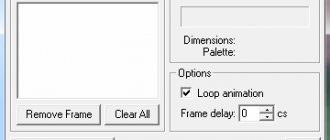
Standard system tools
To take a photo on your laptop you don’t need to install anything or go anywhere. Everything you need is already in the OS itself, and now we will show you how to use it in different versions of Windows.
Windows XP
Let's start, perhaps, with the oldest operating system. It would seem that it is hopelessly outdated and is no longer used by anyone. But in reality, everything is not quite like that. Many people install this OS because of its lightweight nature. So, let's figure out how this is done:
- First, click the “Start” button and go to the control panel.
- Switch the display mode to classic by clicking on the link on the left side of the window.
- In the control panel, select the icon that we marked with a red frame.
- If the webcam is connected and its driver is installed, you will see the corresponding icon. Double left click on it.
- The setup wizard will launch, at the first stage of which we need to click “Next”.
- A small window will appear with a picture of our camera. Clicking the marked button will take a selfie.
- As a result, the photo will be taken and will appear in the right window. There you can turn it and perform other simple operations. When the process is completed, click “Next”.
- Then we do the following:
- set the name of our image;
- specify the folder to save it;
- click “OK”;
- proceed to the next step by clicking “Next”.
- When everything is ready, click the item marked in the screenshot below.
How to take a photo with a PC or laptop webcam in Windows 10
A PC or laptop webcam is not the best tool to use for capturing pleasant moments in life or for practical purposes. Of course, in the case of PC cameras, we won’t paint everyone with the same brush; there are devices on the market with different shooting quality. But in the case of laptops, everything is more or less certain: unlike smartphones and tablets, laptops are a type of desktop computer device and are not intended for external photo and video shooting.
Laptops are usually equipped with weak internal web cameras for everyday communication using VoIP telephony. And no more. But situations can be different, for example, at the right moment the battery of a camera or smartphone runs out. Well, or the high-quality digital filming device has broken down. At worst, you can resort to taking photographs with the webcam of a PC or laptop. How to do it?
In Windows 10, you can work with any type of connected camera without the help of third-party software. Naturally, we are talking about amateur photography, we are not talking about professional-level software. Windows 10 comes with the Camera , a minimalist environment for managing cameras connected to computers.
The application automatically detects the camera or external peripheral camera present in the computer assembly and broadcasts its image immediately after launch. The main thing is that the camera driver is installed in Windows 10. The application has two operating modes - video and photography, they are activated by the corresponding buttons on the panel on the right. In the photo creation mode, press the button with the image of the camera - and the photo is ready. A thumbnail of the last photo will be placed in the right panel at the bottom; when you click on the thumbnail, it will open in the Windows 10 Photos . In the panel on the left in the photo creation mode, we are offered two shooting options - a delay timer for taking a photo and adjusting the brightness of the image.
In the application settings for creating photos, we are offered the “Professional” . It provides several software features. We can use the framing grid to create our ideal frame with accents on the desired objects.
We can select the photo quality from a list of presets with different camera matrix resolutions, aspect ratios and image sizes.
And we can use the slow motion mode. In this mode, when the timer is activated, pictures will be taken continuously at selected intervals. This action is stopped by the same snapshot button.
created by the “Camera” are saved automatically in the user profile folder “Images” , in a special subfolder “Camera Roll” .
You cannot change this path in the application settings, at least this is the rule in the current version of Windows 10 1903 as of the date of writing. To prevent photos from being lost as a result of a critical failure of the operating system, which led to its reinstallation, the path to save the pictures can be changed along with changing the path to the entire folder "Images" . To do this, you need to change the location in its properties, specifying a new path on a non-system drive. Or you can transfer the location of only the “Camera Roll” . To do this, in the Settings , go to the device memory settings. Click the option to change the location where new content will be saved.
And for the “New Photos” , we change the disk to one of the non-system ones.
We use third-party software
Yes, you can take photos using Webcam without installing any software. However, the functionality of this option is very limited. For example, we cannot add effects, captions, etc.
In order for all this to take place, you should resort to using certain programs. There is a lot of such software, for example, the same MyCam, but we will only tell you about the best program. It's called WebcamMax.
- Download the application from its official website, install it and launch it.
- To take a photo, simply press the button indicated in the picture. As a result, the photo thumbnail will be saved in the field located slightly below.
- Accordingly, we can enable video recording. To do this, press the second button.
- As you have already noticed, on the right side of the window there are many different effects that are applied to a person’s face in real time. Moreover, we can independently adjust the size and position of this or that object.
A little to the left is a list of categories. By choosing one of them, finding the desired effect becomes a much simpler task.
- For example, we can put on different hair and our interlocutor, in our case a woman, will like it.
Let's also consider the additional functionality of WebcamMax:
- Video playback mode.
- We can take a screenshot of the laptop screen.
- The Picture in Picture effect is supported.
- Right at the moment of recording a video or photo, we can draw doodles, choosing the color, line thickness and many other parameters.
- Add one effect or several at the same time.
- We can use any of our pictures, add a beautiful signature, or even insert Flash animation.
- It is possible to download new effects.
This is not all the capabilities of our application. You will learn about its other functions while using it.
Taking photos from videos
It is impossible to describe the impressions in words. My child’s facial expressions immediately caught my eye - he managed to display 20 emotions on his face in 10 seconds.
It’s impossible to catch this with a camera; you just won’t even have time to turn it on. And your baby will immediately start posing.
I remember that I put the video camera on the table, directed it, turned it on and went into another room. So she filmed for half an hour...
But only today, 17 years later, the idea came to find a simple program that could take a photo from a video.
Not just a couple of screenshots, but break the entire video down by seconds or frames. I didn’t have to search for long - this is the Free Video to JPG Converter program.
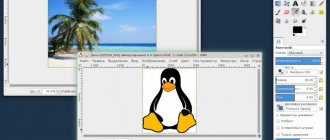
Selfie in Linux
Often the Linux operating system is installed on a computer or laptop. If this situation occurs to you, we will show you how to take a picture from the Webcam in this case:
- OSes based on the Linux kernel can be equipped with different desktop environments. In our case, these are Mint and Cinnamon. Therefore, press the menu button, then go to the “Administration” section and launch the program manager.
- Enter the name of the application you are looking for and click on the desired result.
- Click the install button.
- Enter the superuser password and click “Authenticate”.
- We are waiting for the installation to complete.
- Now our program can be launched.
We can take photographs, record videos and add various effects.
Download Free Video to JPG Converter
| Purpose: | Free program to convert video to photo |
| The name of the program: | Free Video to JPG Converter |
| Manufacturer (author): | DIGITAL WAVE LTD® |
| Status: | For free |
| Category: | Conversion |
| Installer (archive) size: | 26.9 MB |
| OS support: | Windows XP,7,8,10 |
| Interface language: | English Russian… |
| Safety: | No viruses |
| Similar programs: | Format FactoryMP4Cam2AVI |
| Link to installer/website: |
…
…
The installation is simple, but requires attention - you need to uncheck a couple of boxes (if you do not have Anti-tick installed)...
Method 1: Software
AMcap
- if you want to use the software, first check out AMcap, a program created by Microsoft. It is quite simple and has access to your webcam. The program is free and can be downloaded from the developer’s official website;
- After installation, open AMcap. You will see a small dialog box that will automatically detect your webcam. This is what the main interface will look like;
AMcap program interface
- It only takes a few seconds to activate your AMcap webcam. Once this happens, you will be able to take photos using your PC camera by going to "Capture" and selecting "Take picture";
Go to “Capture” and select “Take picture”
- when you take a photo, the image will be automatically saved. Go to Windows Explorer and find the photo. Next, all you have to do is open it using any graphics program by right-clicking on the file and clicking “Open”.
Open the image in any graphics program by right-clicking on the file and clicking “Open”
Picasa
- Another software solution is Picasa. Picasa is a full-fledged free graphics program that allows you to work with images, including taking photos using a webcam;
- To take photos with Picasa, click the webcam icon in the toolbar at the top of the screen. This icon will display the function - “Capture photos and videos from a webcam or other video device”;
Click the webcam icon on the toolbar at the top of the screen
- after clicking on the icon, a dialog box will load that will automatically detect your webcam;
Dialog box that automatically detects your webcam
- To take photos, tap the small camera icon located below the webcam display. When you take a photo, miniature versions of your photos appear at the bottom of the dialog box.
Click the small camera icon located under the webcam display
Yawcam
- Yawcam is another worthwhile program. It's also free. Here you can take pictures and also create streaming videos;
- After installing the program, two dialog boxes will appear on the screen - one to display the webcam, and the other to access the program menu items. To have Yawcam detect your webcam, click “Settings” and select “Detect webcam”;
Click “Settings” and select “Detect webca”
- to take a photo with Yawcam, go to "Window" and select "Capture";
Go to “Window” and select “Capture”
- just click on the “Capture!” button to take a photo. Then the “Save...” option will appear, allowing you to save the photo.
Click on the “Capture!” button to take a photo