How to view installed fonts on Windows 10
To view the symbol templates available in the system, you need to do the following:
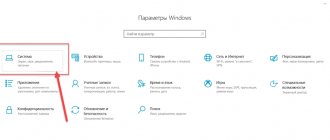
- Using the system search form, find the Settings application and open it.
- Select the “Personalization” tool there.
- Expand the “Fonts” subsection.
- After which a list of templates available in the system will appear. You need to familiarize yourself with it before looking for and installing others. Perhaps one of them will suit you and no further action will be required.
Additional character templates are often required to work with various utilities. For example, with the world-famous applications “Photoshop” and Word.
Installation through the Microsoft Store
In the latest versions of "tens" it became possible to download fonts from the Microsoft store. To do this, go to the “Fonts” page of the “Settings” application and click on the “Get additional fonts from the Microsoft Store” link at the top.
There will be a transition to a store where free and paid fonts for Windows 10 are presented. However, the choice here is still very small.
How to install a font on Windows 10
If the user wants to install a new font, then it is better for him to use one of the methods described below. Any of them will allow him to expand the collection of symbols in Windows 10.
From the official store
In Windows 10, it became possible to install character templates from the Microsoft Store. True, it contains a small number of packages, but expansion of this catalog is expected in the future.
They are installed from the store like this:
- Open sequentially “Settings” → “Personalization” → “Fonts”.
- Click the “Get additional fonts from the Microsoft Store” tab to open a list of them. You can also directly open the Store app and use the search form.
- Next, in the font catalog, double-click on the template icon and go to the download page.
- Next, click the “Get” tab to download and install the selected package.
- It will then be available for use on the Fonts page in the Settings app. If there is an update for the template, it is advisable to install it immediately.
Using a file
As mentioned above, the Microsoft store offers a small number of templates. A more extensive range of symbol packs can be found on third-party resources, and they can be free or paid. Windows 10 can work with two types of font files: ttf and otf.
The installation procedure looks like this:
- Having downloaded files of the required formats from any site, right-click on the desired template and select “Install”.
- After which the package installation process will begin.
Once the procedure is completed, it will be available for use.
Windows 10 works with ttf and otf files, so to use fonts with other extensions you need to install additional software.
From a special folder
Fonts used in OS Windows 10 are files in the TrueType format with the .ttf extension or OpenType with the .otf extension. They are located in the C:/Windows/Fonts directory. You can open this folder with a standard or third-party Explorer, as well as through the “Control Panel”. To add a new template, you need to drag or copy the package file to this folder, after which it will appear in the list of installed templates.
In addition, this folder allows you to manage fonts; for this, the “View”, “Delete” and “Hide” tabs are available at the top of the Explorer window. By double-clicking on the required template, you can see the styles included in it.
Using a third party program
Special programs that can be quickly found and downloaded on the Internet allow you to install and conveniently work with character templates. Some of them are described below.
Font Massive Light
This utility can work with various types of font files, including .pfm and .pfb. It allows you to remove and install the necessary packages.
The utility can compare packages, search for similar ones, convert them into a format for Adobe Illustrator and does not require installation. It is better to download and install it directly from the developer’s website.
FontForge
This program will be useful for those PC users who want not only to install additional packages, but also to create their own. Using the built-in tools of FontForge, you can draw, save and add your own character options to OS Windows 10. It provides a large number of possibilities that allow you to efficiently work out any symbol. It is better to download and install the application directly from the developer’s website.
detailed instructions
- We start by opening the Start menu, where we need to find the Control Panel line, as shown in the screenshot.
- A standard Explorer window will appear in front of us, in which we look for the Category button in the upper right part, then click on it once with the left mouse button.
- After this, the settings menu will open, where you need to select the Small icons line, as shown in the screenshot. To do this, just click once with the left mouse button on the desired line.
- After this, the window will refresh again, and in it we need to find the Fonts folder. We find and open it.
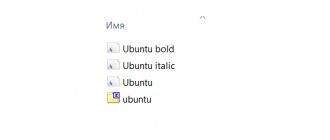
- This is where, as shown in the screenshot, all the fonts that were installed on your operating system are located. Each of them has a unique name, which is located under the font icon. The icons you see show the graphical execution of a particular version of the font, so you can easily choose the one you like right here.
Where to download fonts and in what formats
As mentioned above, Windows 10 can work with .ttf and .otf font files, so you need to download templates with these extensions. You can download them completely free of charge from various Internet resources, so the most famous of them are described below.
Google Fonts
This resource presents a large collection of Google fonts in the public domain. For a quick search, there is a well-thought-out filtering system.
To download a package, you need to click on it, and then at the top of the next page click “Download family”. After which the archive with the files will be downloaded to the PC’s hard drive.
FontSpace
This site has a much larger collection of fonts. It contains 71,000 packages. They can be sorted according to the necessary criteria. For example, you can choose to sort by style.
1001 Free Fonts
Although the name of the site contains the number 1001, its collection consists of more than 10,000 fonts. For quick searching, you can sort by style, title, and newness.
Many templates are completely free, but some require a license to download and use. And for only $20 you can download all packages at once.
Font Squirrel
This resource mainly presents free fonts. If they are not enough, then you can use the discounts section. There is a search form and convenient filtering of packages by style, language and popularity.
There are two very useful tools here: Webfont Generator - allows users to create their own packages of symbols and Font Identifier - recognizes characters in images uploaded by the user and finds similar packages in the site directory.
FontStruct
This resource has 47,000 fonts in its archive. There is a useful tool for creating your own templates in TrueType format. Moreover, the interface of this editor is quite clear.
Important! Many character templates require a license to download and use, so look for free packages or create your own.
How to find the fonts folder
There are several ways to go to the desired directory. All of them can be easily implemented in just a few mouse clicks.
Run window
One of them is to use the Run system utility, invented by Windows developers to make it easier for users. The Run window opens in different ways:
1. The easiest and fastest way is to press two keys at the same time - Win (located in the bottom row of buttons and looks like a floating window) and R (top row of the alphabetic keyboard, no need to switch to English).
2. You can click on the magnifying glass located at the bottom of the screen on the taskbar, enter “Run” in the search bar and activate the corresponding application from the search results with two left clicks of the mouse.
3. Launch the desired window from the list of Start commands located on the left functional part of its window.
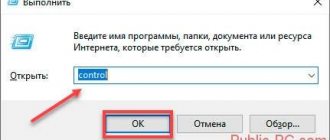
After the required window appears, to switch to fonts, you need to enter the value %windir%\fonts in its line and confirm execution by pressing OK or Enter.
Control Panel
The next way is to access the “Control Panel” through the “Start” context menu. Easier and faster:
- Click on the “Start” menu, right-click;
- In the context menu that opens, point to “Control Panel” to display a list of all its elements;
- In the list itself, move down by scrolling to the desired “Fonts” folder and go into it with one left click.
If for some reason the desired element is missing from the Start context menu, then:
1. Enter the value “Control Panel” in the “Start” search bar.
2. Launch the corresponding application from the search results (one quick left click of the mouse).
3. At the top of the wizard that opens, where the “View” settings tool is located, open the list of possible options (by default, “Category” is set there, and you need to click on it).
4. Select the “Small icons” value to display all elements of the “Control Panel”.
5. Among the icons that appear, find “Fonts” and go to them with one left click.
System catalog
The directory itself, like all the contents of the system, is located on the local drive C (or a drive with a different letter, but always where Windows is installed). It's easy to find:
1. Launch Explorer (click on the folder icon on the taskbar at the bottom of the desktop or write the word “Computer” in the search bar).
2. With two quick left clicks, go to the system drive (C by default).
3. Go to the Windows directory.
4. Find and expand the Fonts directory.
How to open settings
There is a simple way to get into the font settings.
1. Copy or manually enter the Fonts value into the search bar on the taskbar.
2. Select “Font Options” from the list of search results.
How to remove a font
The font is removed in Windows 10 as follows:
- The first thing you need to do is open “Settings” → “Personalization” → “Fonts”.
- Next, click on the package you do not need to open a page with detailed information.
- Then scroll down to find the Delete button. Then click on it. Next, in a small dialog box you need to confirm the deletion. To do this, press the “Delete” button again.
As a result of all these actions, the template will be completely deleted from the PC.
Control
The Windows 10 operating system has a folder in which all used fonts are stored. To find it, you need:
- Go to the Windows folder located on drive C.
- Next, find the Fonts folder. All data is stored in it.
The second installation method is to copy the file to this folder. By logging into it, you can manage fonts, that is, install new ones and delete those that are not used. But it is not recommended to do the latter, since they may be required for the smooth and correct operation of the OS.
To remove unused files, you just need to hide them. To do this, select “Hide” from the context menu. The file itself will not be completely deleted - it will simply no longer appear in the lists of available programs. As a result of these actions, the operation of the operating system will not be disrupted. And if necessary, you can restore hidden files and use them during your work.
Back Next
Extracting from the archive
Often files downloaded from the Internet end up packed into a special compressed folder - an archive (for example, with a .rar or .7z extension). This is done to save server space and reduce traffic.
To work with the contents of such objects, they must be unpacked. For this purpose, special programs are used - archivers. If you don’t have such software on your personal computer, you need to install it.
Download the WinRar utility from the official website of the developer - https://www.win-rar.ru/download/. Be sure to select the correct bitness for your operating system. The program will run on any version of the OS, including version 10.
Download the required version and install the archiver following the instructions of the Install Wizard. When the process is complete, right-click on the saved archive to bring up the settings and select the “ Extract ” option. In the window that opens, you need to specify the folder into which you want to unpack the contents. Now you can start installation.
Second way.
This method is best used when you need to work with several fonts at once and need to install several. We go to the menu with the right mouse button, there we select the install item and just click it.
- How to change the default font on a computer or laptop in Windows 10
You can install several files by selecting the files, and then again through the menu with the right button and select install.
Windows font extension
Fonts in Windows are the most common files that contain information about the design of text. Typically, they are in ttf or otf format, which stands for TrueType and OpenType. Sometimes the woff type is found - it can be converted to a more popular format using online converters.
Original and custom fonts can also be PostScript Type 1 - this is a set of files (up to 4 pieces) with pfm, p, afm and inf extensions. To install such a combined font, you need to select the pfm file. However, Type 1 is very rare - and you probably won't work with it.