Recently released, the new Windows 10 operating system comes with enhanced security that keeps the OS safe and eliminates many threats. To protect the system as much as possible, the developers have disabled extended rights, thanks to which third-party software has more access to system resources. For example, a self-compiled program for reading some database, not signed by any certificate, will run with limited access rights. To enable full access in the system administrator account, we will describe the various ways in which the administrator gains advanced rights to manage the system.
The first way to get extended admin access
The first way to obtain administrator rights is quite simple. First of all, you need to log into Windows 10 with an account that has administrator rights .
Let's try to run the WordPad program built into the operating system with extended rights. To do this, using the keyboard shortcut Win + Q, go to the Windows 10 search and type the phrase “WordPad” in it.
Now click on the result with the right mouse button. In the context menu that opens, find the “ Run as administrator ” item. After completing this step, we will launch the WordPad program in advanced admin mode .
In a similar way, an application can be launched from the Start in the All Applications and launched through the context menu, as shown in the image below.
If you want to run a program with extended rights that is located on the Desktop, then feel free to go to the shortcut context menu and select the item responsible for running as administrator .
Also, if you go to the Shortcut Properties and click the “ Advanced ” button, you can set utilities to automatically launch with administrator rights. For example, the image below shows an example of setting up a text editor for Notepad++ programmers.
Another way to run the WordPad utility with elevated privileges is to run it in a command prompt with administrator rights . To do this, launch the console in this way - right-click on the “ Start ” icon and select the item that is responsible for launching with administrator rights. Now let's execute the write command in the console. After this, our text editor will start with elevated rights.
Second way
The command line can help out in almost any difficult situation where access to administrator rights is required, and it will help the user out here too. The method is easy and fast, and will help to cope with the problem in such an inconvenient situation.
Let's move on to fixing our problem using the command line:
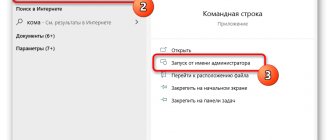
- open “Command Prompt”, do not forget to open it using “Run as administrator”;
Search for “command line”
Right-click on the program and select “Run as administrator” from the menu
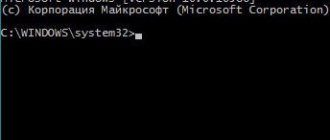
- In the open “Command Prompt” we enter this command net user administrator / active: yes.
In the “Command Prompt” enter the command net user administrator / active: yes, press Enter
Attention!
If your computer has an English version of the operating system, then instead of “administrator” you need to write “administrator”.
After writing this command, administrator functions become available to the user.
The second way to get advanced admin mode
For the second method, we will also need a command line that is launched with administrator rights. We also log into an account that has admin rights. Then we go to the Windows 10 search and type in the phrase “CMD”, which is responsible for searching for the console.
Click the button on the result found and select the item that will launch our console with extended rights. With the console running, run the command shown below.
By running this command, you will give your account extended rights and be able to run utilities without any restrictions. You can perform the reverse operation in the console and revert all changes by changing the word “ Yes ” to “ No ”.
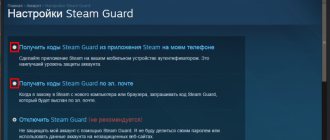
How to enable the Administrator account using PowerShell
To enable the administrator account using PowerShell , follow these steps:
Step 1: Right-click on the Start menu or press the Win + x key combination in the menu that opens, select PowerShell (administrator) .
Step 2: Type the following command to enable the built-in administrator account and press Enter:
Get-LocalUser -Name "
administrator " | Enable-LocalUser
After completing these steps, the administrator account will be enabled by default and available on the login screen.
If you no longer need the administrator account, run this command:
Get-LocalUser -Name "
administrator " | Disable-LocalUser
The third way to get extended admin access
In this method, we will also launch the console with administrator rights and execute the command shown below in it.
After executing this command, the Local Security Policy . You can also enable this add-on in the Control Panel if you don’t like using the console.
In the open add-on, follow the following links: “ Local Policies / Security Settings / Accounts : 'Administrator' Account Status ” and in the option that opens, set the switch to the “ Enable ” position.
By completing these steps, you will be able to become a user with full access rights in the system.
How to get administrator rights in Windows 10
You can enable elevated privileges in Windows 10 in several ways.
Important! Home version users will not be able to use all of the available options described below.
Using the Command Line
This method is universal for all versions of Windows and is considered the simplest. Launch an elevated Command Prompt. In the window that opens, enter: net user administrator /active:yes . When an English-language OS is installed, the command is written as follows: net user administrator /active:yes .
Healthy! There is no default password for this entry, so it is worth setting one. This can be done using the command: net user Administrator * in the Command Line, repeating the password twice.
Local Security Policy utility
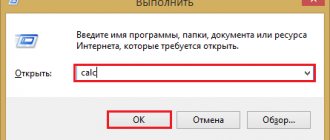
In the Run window, enter the command secpol.msc .
Healthy! An alternative option for launching the Local Security Policy utility: Start -> Control Panel -> Administrative Tools.
After this, follow these steps:
Open the “Local Policies” branch –> Security Settings –> select “Accounts: State “Administrator”” in the right window
This option is disabled by default. Double-click on it and set the marker to the “on” position.
Using the Local Users and Groups utility
lusrmgr.msc in the Run window . In the window that opens on the left, select the “Users” section. A list of all computer users will open on the right side. On the Administrator entry, double-click on it and uncheck the “Disable account” option. After this, save your changes.
Computer Management utility
compmgmt.msc in the Run window . In the window that opens, in the tree list, follow the path:
Computer Management –> Utilities –> Local Users –> Users –> select the Administrator line and double-click on it
In the window that opens, uncheck the “Deactivate account” menu.
Video “Windows 10 Administrator Rights”
The video shows in detail how to enable superuser rights using the command line and the Local Users and Groups utility.
The fourth way to get extended admin access
Let's launch the console in the same way as in the first example and execute the command lusrmgr.msc in it
This command will launch an add-on that allows you to manage users of the Windows 10 operating system. The add-on can also be found and enabled in the Control Panel.
With the add-in open, find the Users Administrator user in it . Opening this user, about as shown in the image below.
Now restart your PC and log in as the user we performed these steps for.
Having completed these operations, you can become a user with full access rights in the system as in the previous example.
Using the control panel
To change the account rights from a simple user to an administrator in the control panel, follow these steps:
- Open Control Panel (you can do this by searching in the taskbar).
- Open "User Accounts".
- Click Manage Another Account.
- Select the user whose rights you want to change and click “Change account type.”
- Select "Administrator" and click the "Change Account Type" button.
Done, the user is now a Windows 10 administrator.
The fifth way to become an administrator with extended rights
Let's launch the command line for the fifth time with administrator rights and execute the following command in it: control userpasswords2
This command can also be executed in a program that is launched with the Win + R key combination.
This command will allow us to launch a window in which we can manage user settings. The window will open to the first tab “ Users ”. To complete the task, we need to go to the “ Advanced ” tab.
On this tab, click the Advanced button, which will take us to the familiar add-in from the previous example. Therefore, we perform all the actions as in the previous example.
Using the Local Users and Groups utility
Another way to make a user an administrator is to use the built-in Local Users and Groups tool:
- Press the Win+R keys on your keyboard, type lusrmgr.msc and press Enter.
- In the window that opens, open the “Users” folder, then double-click on the user you want to make an administrator.
- On the Group Memberships tab, click Add.
- Type "Administrators" (without quotes) and click OK.
- In the list of groups, select "Users" and click "Delete".
- Click OK.
The next time you sign in, the user who was added to the Administrators group will have the appropriate rights in Windows 10.
The sixth way to get extended admin access
In the sixth method, we will describe running programs with extended privileges as a regular user. Therefore, we will switch to a user account that has normal rights. Our next step will be to launch the Notepad++ program through the shortcut context menu on the Desktop . This launch method is described in the first example. If we launch Notepad++ using this method, the OS will ask us for the password of one of the system administrators.
Therefore, we will enter the required password and launch Notepad++ with extended privileges.
As you can see from the example, we launched the Notepad++ text editor using a regular account. The only thing worth considering in this example is that without the admin password you will not be able to use this method.
How to disable the built-in Administrator account in Windows 10
In general, to disable the built-in administrator account, it is enough to use the same method described in the first part of the guide, start the command line, then enter the same command, but with the /active:no key (i.e. net user Administrator / active:no).
However, a situation that is often encountered lately is when such an account is the only one on the computer (perhaps this is a feature of some unlicensed versions of Windows 10), and the reason why the user wants to disable it is partially not working functions and messages like “Microsoft Edge cannot be opened using the built-in administrator account. Log in with a different account and try again."
Note: before performing the steps described below, if you have been working under the built-in administrator for a long time, and you have important data on the desktop and in the system document folders (images, videos), transfer this data to separate folders on the disk (this will be easier They will then be placed in the “regular” folders, not the built-in administrator).
In this situation, the correct way to solve the problem and disable the built-in Windows 10 administrator account is as follows:
- Create a new account using one of the methods described in the article How to create a Windows 10 user (opens in a new tab) and grant the new user administrator rights (described in the same instructions).
- Log out of the current built-in Administrator account and log into the newly created one - the user one, not the built-in one.
- Once logged in, launch a command prompt as an administrator (use the right-click start menu) and enter the command net user Administrator /active:no and press Enter.
In this case, the built-in administrator account will be disabled, and you will be able to use a regular account, also with the necessary rights and without restriction of functions.
Let's sum it up
From the examples it is clear that launching an application with elevated privileges and making yourself an administrator with advanced capabilities is not at all difficult. But before you give your account extended privileges, you should consider the security factor .
Judge for yourself, it’s not without reason that Windows 10 developers have limited the capabilities of the administrator account. The main factor of this limitation is the execution of malicious code in the top ten, which can damage the system files of the operating system. Therefore, be extremely careful when trying to become an elevated administrator.
And we, in turn, hope that our material will help give our readers an answer to the question that torments them - how to get administrator rights in Windows 10 and will allow you to solve many problems.
Enabling and disabling via command line
This is a universal and quick method that allows you to enable an account in any edition of Windows 10. Other methods may not work in the home edition of Windows 10.
- Right-click “Start” and select “Command Prompt (Administrator)”.
- Type the command below, press Enter. net user administrator /active:yes If your computer is running English Windows: net user administrator /active:yes
- Open Start. After that, in the upper left corner, click on the user name with the left mouse button. You will see a new user in the pop-up menu - Administrator. Click on this line and you will be taken to the standard login screen. Log in as an Administrator and then perform the necessary administrative actions.
- To continue normal work with your computer, log out of the Administrator account and return to your account.
- After completing all the administrative actions you need, disable the Administrator profile to secure your computer. Log in as yourself, open the command prompt (step 1) and enter the following command, press Enter. net user administrator /active:no If your computer is running English Windows: net user administrator /active:no
Creating a second administrator
You can skip this step if you already have two users on your computer and both of them are administrators. If there is only one account, then first you need to create a replacement for it, and then delete it.
- Open the Windows search engine.
You need to click on the magnifying glass icon
- Search for Control Panel and launch it.
Everything is simple here
- Go to the “User Accounts” menu.
We need an icon with faceless creatures that resemble people
- We are looking for the line “Add a new user in the 'Computer Settings' window.”
One account must be an administrator
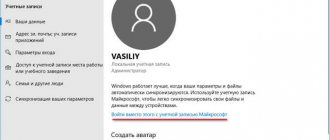
- In the window that opens, click on the “Add a user for this computer” button.
Click on the button with the + icon
- Then we look for the line “I don’t have this person’s login information” and click on it.
If you have a Microsoft account, you can enter your details, but this is not necessary
- In the next window, click on the link “Add a user without a Microsoft account.”
It’s enough for us to have an offline account, so we’ll create just that
- Enter the data: the name of this account and the password for it.
But this information needs to be entered. It concerns directly the account in the system
- Then we return to the account settings and select the newly created one.
Now click on new account
- In the window that opens, click on the line “Change account type”.
For now, the new account does not have administrator rights.
- Place a dot next to the “Administrator” item and save the settings.
But now she will have the same rights as an administrator