Hidden folders in Windows 10
Hi all! Today we will analyze hidden folders in Windows 10, what they are and what they are for, how to view and create them, this knowledge will greatly help you in eliminating problems such as treating your computer for a virus or Trojan, or changing some fine settings of the installed utility on your computer. So, sit down and read, it will be interesting.
What are hidden files
Hidden files are files or folders in Windows that have the H attribute - hidden. By default, system files and some part of the user profile are hidden. If you want, you can make any folder or file hidden in Windows 10.
How to hide windows files
In order to hide windows files, you need to select any file or folder and right-click on it and select properties from the context menu.
hide windows files
Next, to hide a folder, for example, select Hidden. As a result, you will mark the folder with the Hidden attribute. As a result, if the display of hidden files is not enabled, it will disappear from visibility.
how to hide a folder
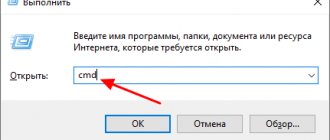
The same can be done from the command line. Let's say I want to make the C:\RegFiles folder hidden. To do this, while in the command line, preferably opened as administrator, go to the desired directory where the desired object is contained, I remind you that my folder is in the root of the C:\ drive
cd / - go to the root attrib +h “Here we write the name of your folder”
As a result, we set the “Hidden” attribute on the folder
If you need to set a hidden attribute for all folders and files in your folder, then you need to run the following command:
cd C:\RegFiles - Go to your folder attrib +h /s /d - set the attributes
To make the folder visible you need to run on the command line:
cd / - go to the root, since I have a folder here, you may have a different path attrib -h “Name of your folder”
Type the following command to remove the hidden attribute from all files and folders within a folder and press Enter :
cd C:\RegFiles - you may have a different path attrib -h /s /d
Methods to show hidden folders in Windows 10
If you have set yourself the task of displaying hidden files, then there are a number of methods for this, which will be discussed below:
- Using Windows Explorer
- Using the Control Panel
- Via the Windows Registry
- Using PowerShell cmdlets
Consult the registry
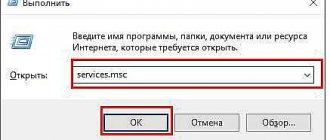
- To make the registry appear, hold down the Win + R keys.
- When the Run dialog box opens, type regedit and Enter.
- Go to "HKEY_CURRENT_USER -> Software -> Microsoft -> Windows -> CurrentVersion -> Explorer -> Advanced".
- Find a function that allows o and set it to "1".
- This will result in previously unavailable information appearing.
- To hide documents again, simply enter the value “2”.
- You can also set "ShowSuperHidden" to "1" to view protected information.
Enable display of hidden folders and files
In order to allow viewing of hidden elements in Windows 10, open “This PC” and select “View”.
Open this computer
Or the start button-Explorer
Windows 10 Explorer
We see that the hidden elements checkbox is not checked, so we fix it.
hidden elements
You can immediately notice that new elements have appeared on drive C that were not there before.
hidden folders
Let's look at the properties of this folder
hidden element properties
As you can see, there is a hidden attribute.
hidden windows files
Windows 10 by default hides such system folders so that whoever wants to replace them and do anything is a person who understands this matter, and if he has enabled hidden folders, he knows exactly what he is doing.
How to enable display of system files in Windows 10
Here, too, everything is very simple, press the Win+Q keys. As a result, the start menu search form will open.
Windows 10 search form
In the search form, enter the explorer parameters
Windows 10 Explorer Options
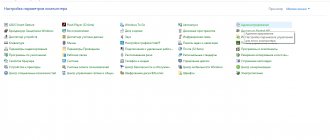
You can also open Explorer settings through the Windows 10 control panel by right-clicking on the start button
Windows 10 control panel
In the Control Panel, select File Explorer Options
Explorer Options
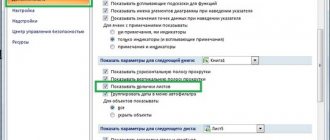
In the form that opens, select the View tab. Please note that to display hidden elements you need to check the box Show hidden files, folders and drives, and for system files, uncheck the box Hide protected system files (recommended), after which they will appear, among them, for example, you will see the file swaps.
View tab
When you uncheck Hide protected system files (recommended), a warning will appear, click Yes.
Hide protected system files (recommended)
You should end up looking like this
If you go to the desktop, you can immediately notice new system files.
windows 10 desktop
How to enable the display of invisible data using Windows 10
To enable showing hidden files and folders in Windows 10, you need to do the following:
- Click on the “ Start Control Panel menu item ;
- Now find the item “ Design and personalization ” in the list presented and go to it;
- Go to the “ Show hidden files and folders ” section;
- A small window will open and the “ View ” tab will immediately be active;
- In the “Advanced options” section, find the “ Show hidden files, folders and drives ” item and move the switch, clicking OK when finished;
- In most cases, virus programs, in addition to the “ Hidden ” attribute, also set the “ System ” attribute on directories and files. In this case, you will additionally need to disable it. To do this, in the “ Folder Options Hide protected system files box .
Unfortunately, when it comes to the effects of viruses, even the described actions may sometimes not help. Many virus programs are capable of blocking any user actions to configure Windows 10 , which makes it not only impossible to open hidden data, but also to perform many other actions with files and directories. If you have a similar situation, move on to the next part.
Enable access to hidden folders in Windows 10 through the registry
If you are my regular subscriber and reader, then you have long known that all the settings that you see in your Windows 10 operating system are actually located in the Windows registry, this is its heart. It is logical to assume that you can change the key you need in it to get the desired result. And so, open the Windows Registry Editor, I remind you to do this, press WIN + R and enter regedit.
In the Registry Editor, you can enable hidden folders, both for a specific user and for all users within a given computer.
Enable for a specific user
To do this, go to:
HKEY_CURRENT_USER\Software\Microsoft\Windows\CurrentVersion\Explorer\Advanced
Find here a key named "Hidden", which means hidden. Since by default in Windows 10, displaying hidden files and folders is prohibited, this “Hidden” key will have a value of 2.
Click on it and go to its properties, change the two to 1.
If you don't see hidden folders in Explorer, try pressing F5 to refresh the cache. Set » ShowSuperHidden » to » 1 » to show protected operating system files. Set the value to " 2 " to not show protected operating system files.
How to show hidden files in Windows 10, several ways
If you don't already know, there are many more folders and files on your computer than you usually see in File Explorer. Many of these files are hidden by your system for certain reasons. However, if you want to access them, you can force your computer to show hidden files in Windows 10.
Once you make hidden folders and files visible using any of the methods, you will find them available for use in your folders using File Explorer.
Use File Explorer to Show Hidden Files in Windows 10
The easiest way to show hidden folders and files in Windows 10 is to enable the option in the File Explorer utility. After this, all the hidden files will be visible to you on the screen and you only need to enable one option in the tool.
1. Open any folder on your computer and it will launch the File Explorer utility. Then click on the View
" at the top to control how the tool displays your files.
2. Once you are there, look at the section that shows Show/Hide
" There is an option here that says hidden items. It is disabled by default and you need to select it to enable it.
3. Once enabled, you will be able to see the hidden folders and files available on your computer. You might want to go to the folder where the hidden files are if you don't see anything in the current folder.
Using Control Panel to Show Hidden Files in Windows 10
If you love using the traditional Control Panel utility to change your settings, you'll be glad to know that you can also use it to show hidden files on your Windows 10 computer. Once again, this only requires turning on a single option.
1. Launch Control Panel by searching and clicking it in the Cortana search box.
2. When it opens, select Large Icons from View Options at the top. Then find and click on the option that says File Explorer Options.
3. Go to the View
" at the top to change the viewing settings in
Explorer
.
4. You will find an option that shows “ Show hidden files”
", folders and drives on your screen.
Enable this option to show hidden files
, and then click
Apply
, then
OK
.
Change Registry Key to Enable Hidden Files in Windows 10
You probably won't want to use the registry method for a task like showing hidden files, but if that's what you prefer for your tasks, you can use it and make all your hidden files visible in your file manager.
1. Press Windows + R
, type
regedit
in the field on the screen and press
Enter
.
2. 2. When it opens the registry, navigate to the following path. HKEY_CURRENT_USER\Software \Microsoft\Windows\CurrentVersion\Explorer\Advanced
.
On the right side you will find several options that you can change. You need to find the one called “ Hidden
”, to open it click on it twice.
3. By default the entry should have a value of 2
, which hides hidden files.
You need to change this value to 1
to show hidden files on your Windows 10 computer. Make the changes and click OK.
Recognizing hidden files in Windows 10
If this is your first time enabling and accessing hidden files on your computer, you probably won't know what those files look like. Although these files are just like any other file on your computer, they look a little different than regular files when you view them in Explorer.
After turning on the option to show hidden files, you will see these files with a lighter color for their icons. If you look at a hidden folder, you'll see that its icon doesn't look as solid as a regular folder.
Recognizing hidden files and folders among regular files shouldn't be too difficult, as their appearance makes them easy to find.
Hiding files in Windows 10
If you're done with what you wanted to do with your hidden files, you can turn them off on your computer again. This way, they won't interfere with you when you're working with regular files on your computer.
Hiding hidden files is quite easy actually in Windows 10. All you need to do is disable the option in the method you used to enable these files and you will be done.
1. If you used the " Explorer"
To show hidden files, open the
Explorer
, click the
View
at the top, and uncheck
Hidden Items
.
2. If you chose the Control Panel method, go to the File Explorer Options
and select the
Don't show hidden files, folders, or drives
.
Then click " Apply
" then "
OK
".
3. Windows Registry Method users just need to change the hidden entry value to 2
, and you will be all set. It will disable the option that shows hidden files on your computer.
Why are some files always hidden?
If you're like me, you're probably curious about why your computer is hiding certain files on your system. While those of you who hide your own files have your own reasons for doing so, Microsoft really only has one reason: to prevent accidental damage to your computer.
Most of the files that are hidden by default are actually your core system files. They are hidden to ensure they are not deleted or modified. Since these are core files, even a slight modification to them can cause the entire system to malfunction.
If hidden folders are not displayed
There may be a situation where you have checked the necessary checkbox to display hidden elements of Windows 10, but they do not appear, there is most likely a problem with the action of a virus. First, check your system for malware. When you are sure that they are not there, open the registry and follow the path:
HKEY_LOCAL_MACHINE\SOFTWARE\Microsoft\Windows\CurrentVersion\Explorer\Advanced\Folder\Hidden\SHOWALL\
Make sure you have the "CheckedValue" registry key and it has a value of 1, do the same in the user branch along the path:
HKEY_CURRENT_USER\Software\Microsoft\Windows\CurrentVersion\Explorer\Advanced
After that, reboot and everything should be restored.
Method No. 3
Using the registry, you can also quickly enable/disable the display of elements. To do this, click on the Start button and open the Command Prompt (Admin) application. Copy the following command and enter into the command prompt window: reg add “HKCU\Software\Microsoft\Windows\CurrentVersion\Explorer\Advanced” /v Hidden /t REG_DWORD /d 1 /f
To disable the display of hidden items, enter the following command: reg add “HKCU\Software\Microsoft\Windows\CurrentVersion\Explorer\Advanced” /v Hidden /t REG_DWORD /d 2 /f
How to view hidden folders and files using PowerShell
To show hidden folders in Windows 10, via PowerShell, you need to open a shell, go to the desired directory and run the command:
Get-ChildItem -Force
In my example, you can see that on the C:\ drive in Windows Explorer we do not see hidden files and folders, but in PowerShell they are, for example:
- Recovery
- pagefiles.sys
- swapfile.sys
- ProgramData
Recently I needed to get a list of hidden files in a directory. PowerShell made it quite easy and quick to unlist a list by checking if the "File" attribute contains the string "Hidden":
Get-ChildItem C:\myfolder\ -Recurse -Force | Where { ($_.Attributes.ToString() -Split ", ") -Contains "Hidden" } | Select FullName
This is how you can easily enable hidden folders in Windows 10. I hope you now understand the purpose of these things and you have one less question. Below is a video version of this article. If you have questions about this article, I expect them from you in the comments. Site material
"Hide" attribute
All files and folders in the operating system have attributes that describe their state. In Windows there are only seven types: four main and three additional. The “hide” attribute is responsible for hiding, which can be set in the graphical interface.
Click on a free area of the desktop to expand the context menu. Select the item marked with one and open the additional list of actions. We create a new directory with which we will work in the future.
Click on the created folder, bringing up the control menu for it. We go to the last item, highlighted with a frame in the screenshot.
The Properties dialog opens by default on the General tab. We put a tick in the place indicated by the arrow in the screenshot. Press the button located to the right and marked with a two.
In the additional window, uncheck the box about. As a result of these actions, the contents of the hidden directory will no longer be indexed and will become unavailable for discovery by the Windows search system.
How to access invisible AppData directory
AppData contains information about installed software. By default it is invisible. Its volume is constantly increasing, and if you find that there is no space on the disk, then you will need to find a directory to empty it.
Just press Win + R, type %appdata% and enter. This will launch a new window and take you directly to your account's Roaming directory, where most of your app information is stored. To access one of the "local" directories, simply move up one level in the address bar.
Note. Once you've completed troubleshooting or other tasks, you can restore the default settings by returning to Explorer > View > Options > View and changing the previously set option.
Additional tip: to hide any file, simply right-click on it and select properties. Then, next to the attribute, select the appropriate checkbox. And uncheck this box if you need to show the document on your computer.
