When there is insufficient memory, ordinary applications that you install from different sources are sent to the pagefile.sys file - a browser, a graphic editor, instant messengers, and so on. And the swapfile.sys file contains built-in Windows 10 applications and applications installed from the Windows Store.
Swapfile and Pagefile always work in pairs. The volume of swapfile.sys does not exceed a couple of tens of megabytes, but pagefile.sys can “swell” to several gigabytes during operation. Because of this, some are looking for a way to disable the page file in Windows 10 to free up disk space. But if you do this, swapfile.sys will also be disabled - and without it, many built-in Windows 10 applications will simply stop running.
Is it necessary to create
The page file is a system element located on the hard drive that acts as an auxiliary source of random access memory (RAM). The main task is to ensure maximum computer performance when running labor-intensive processes. It is recommended to create a swap file on a weak or moderately powerful PC in the following cases:
- using a computer to watch movies in high quality or surf the Internet;
- if the device has less than 8 GB of RAM;
- launching demanding games, graphic editors or powerful utilities for video editing.
Important! After creating the file, the work of the listed processes will speed up, but there will be less free space on the internal drive.
Optimal virtual memory size
In each device, the amount of virtual memory is set by default and is located on the system disk. Windows independently decides how many resources it needs to use in order to complete the task as quickly as possible.
If there is insufficient memory, the user can use the virtualization function and set the necessary parameter. In the paging file on Windows 10, the optimal size is calculated according to the following table:
| RAM size, MB | Useful virtualization volume, MB |
| 512 | 5012 |
| 1024 | 4012 |
| 2048 | 3548 |
| 4096 | 3024 |
| 8192 | 2016 |
Attention! You should not set the size of virtual memory, which will greatly exceed the amount of RAM. This can lead to accelerated fragmentation of the hard drive.
Increasing the paging file size
To change the file on Windows 10 computers, you need to do the following:
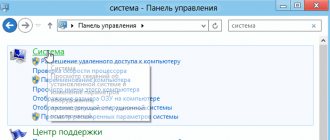
- Search for “System” and select the component of the same name from the results.
- Click on the “Advanced system settings” hyperlink.
- In the “Performance” section, click on Settings.
- In the “Advanced” tab, click on Edit.
- The “Automatically select paging file size” window will appear, at the top of which you need to uncheck the box.
- In the next line, select the internal drive. Click on Specify size.
Next you will need to increase the initial and maximum sizes. The first option is permanently reserved by the Pagefile.sys component. If you need to expand the space, you will have to reduce the size or completely disable the page file:
- Select a line with the original size and enter the required amount of memory.
- Carry out a similar manipulation in the field with maximum volume.
- Click the Set button and restart the computer.
Note! You can only add memory in megabytes. For example, if you need to set 2 GB of swap, you need to enter 2048 MB. In case of reduction, it is not recommended to enter a value less than 400 MB.
Disabling virtualization
No third party software is required to disable virtual memory. Standard Windows 10 tools will allow you to deactivate several paging files at the same time. You can do this as follows:
- Find the computer icon.
- Right-click and click on “Properties” in the context menu.
- In the window that appears, select the section for additional system parameters.
- A page will open on which you should find the performance block and click on the tab with parameters.
- In the new window, select “Advanced” among the three sections.
- Click on the change button.
- A page with the previously specified parameters will be displayed. Select a hard drive that has virtualization enabled and check the box next to “No paging file.”
- Click on the Set button, OK.
Upon completion, the system will prompt you to restart the computer, after which you can change the virtualization settings.
Summarize
The page file in Windows 10 (swap file) is a virtual addition to the computer's RAM, and the system uses it during operation. It is located at the root of the system disk partition by default. If the system does not have enough of its resources (RAM), then it turns to it. But you can set your own parameters if your computer’s capabilities allow.
So the user decides to add virtual memory to Windows 10 and install the Windows 10 page file, for example, for games that require first-class graphics and speed so that the computer does not slow down.
Note that everyone chooses the optimal size of the paging file in Windows 10 themselves, although the choice can be given to the operating system. Those who optimize computers on their own usually say that nothing bad will happen if you set its size to twice the size installed on the PC. In any case, it is better to check this experimentally.
How the page file works in Windows 10
Virtual memory is a hidden element that is located in the root folder of the system disk. The main task of the paging file is to record information that, due to its size, does not fit in RAM. If the system needs stored data, it is enough to create virtualization and remove the missing elements. This approach saves time - after activating the labor-intensive process, you do not have to collect information from the entire drive.
The paging file works effectively if the computer is equipped with a RAM module with less than 8192 MB. Virtualization is relevant when the PC design includes an integrated video card. If the user turns on demanding games or programs on a weak device, the page file loads the resources that are missing from the RAM.
What functions does RAM perform?
Random access memory (or RAM) stores and processes data from running applications. If the hard drive stores all the information that will be used in the future and which should not be lost after the computer is turned off, then RAM works with data needed only for executing the program at the current moment.
For example, you launched a browser. It has a huge number of background processes, graphic elements and executable commands, which will be stored in RAM. The more tasks a program performs, the more memory it will need.
RAM stores and processes data from running applications
The standard Windows 10 Notepad application takes up about 3 megabytes of RAM, and the Edge browser takes up 200 megabytes, but provided that it is just running and one page is open. More demanding applications (image editors, 3D scenes, etc.) and games can take up to several gigabytes.
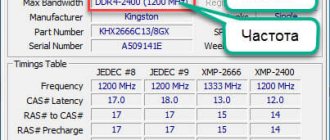
You can find out how much memory the application takes through the “Task Manager”. To do this, open Windows search, enter “task manager” in the text field, select the best match and run it. In the “Processes” tab you can find the necessary information.
You can see how much memory the application takes in the “Task Manager”
What will filling in lead to?
If the memory is almost full (80% or more), the computer will start to slow down. This is due to the fact that all applications constantly create new tasks that are placed in memory. And if there are too many of them, then the RAM cannot cope, and a queue forms, leading to freezing. Ultimately, applications that run out of memory at the right time will throw an error and be forced to close. Because of this, unsaved files may be lost.
What is pagefile.sys and swapfile.sys
Unlike older versions of the operating system, Windows 10 is equipped with several swap files - pagefile.sys and swapfile.sys. The items can be viewed in the root folder of the system drive. But for this you will need to activate the hidden object detection function.
Paging files differ in how they serve loaded programs. For example, swapfile.sys is designed to load resources into integrated applications or utilities that were installed from the Microsoft store.
The pagefile.sys element is designed to serve programs downloaded from various sites - clients, instant messengers, games, graphic editors, video processors, players and browsers.
Despite the differences, swap files always function in pairs. The amount of memory occupied will always be different. For example, if pagefile.sys can grow up to 4 GB, then swapfile.sys will take about 100 MB. For this reason, many users refuse to expand virtual memory if the amount of RAM exceeds 8 GB.
Moving the swap file
Virtual memory on Windows 10 can be configured regardless of the number of media. If necessary, moving paging files is possible to external drives. Instructions:
- Find the computer icon on your desktop.
- Select “Properties” in the context menu.
- Select the performance section, go to the block with parameters and click on the Advanced button.
- Open the partition with virtual memory and click on the Edit button.
- Opposite the line with automatic size selection, uncheck the box.
- Set the required parameters in the fields with initial and maximum size.
- In the “Disk” window, find a suitable drive and click on the Set button.
- To restart a computer.
Important! If you need to increase the speed of virtualization, it is better to use the system disk.
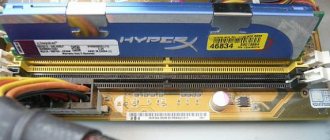
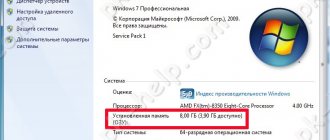
Windows 10 does not see all RAM
Ways to configure display of all RAM on Windows 10
If you are faced with a situation where not all RAM is available on Windows 10 and you have not swapped the modules, you should follow these steps:
- Press “Win+R” and enter “msconfig”.
- The System Configuration window will open. Go to the “Download” tab. Click on the “Advanced options” button.
- A small window will open. Here you need to remove o.
- After saving the changes, you need to restart your computer and see how much memory is being used.
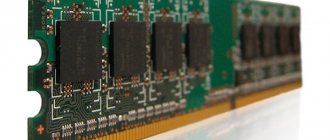
If Windows 10 does not see the full amount of RAM, you should remove the sticks from the slots and swap them. We also recommend cleaning the contacts of the RAM modules. To do this, take a rubber band and carefully wipe off dirt from the contacts.
If you insert the modules incorrectly, a post will occur when the PC boots. You will need to return the modules to their places and restart the computer. After downloading Windows 10 32 bit, you need to download the MemTest86 program and check the performance of the RAM.
If everything is fine with the modules, but Windows does not see all the RAM, you may be using an old version of the motherboard firmware and you need to update the BIOS and also check some of its parameters.
- The first BIOS parameter that is responsible for stable operation of RAM is memory redistribution. In different firmware versions, this section may be named differently (Memory Hole Remapping, H/W DRAM Over 4GB Remapping, Hardware Memory Hole). Therefore, it is worth studying the instructions for the board in detail or finding a description for the version of the BIOS used.
The memory redistribution function transfers the address blocks used by expansion cards into the address space beyond 4 GB. Thus, it is possible to increase the amount of RAM (otherwise Windows10 will see 3-3.5 GB). To fully support such a volume, it is necessary to use 64-bit processors and 64-bit versions of the OS (or server versions of 32-bit operating systems that allow PAE physical address expansion). If you have less RAM, be sure to turn off this option (Disabled), as problems with the RAM may occur. Enable memory redistribution – value Enabled.
- Memory settings for AGP video aperture are the amount of memory that the system shares with the video adapter. It is necessary for displaying textures and drawing pictures. This amount of memory may not be used by the system if it is blocked by the video adapter. There is only one way to enable it: boot into BIOS, select AGP Aperture size. Standard values are 32 MB, 64 MB, 128 MB and Auto. We look at how much memory the video card has and set the required value by value. Often this is 128 MB. However, you can try each of the options to see which one gives the best result.
After making all changes to the BIOS settings, you need to boot into Windows and check if the entire amount of RAM is visible. If the system still does not see the RAM, you should try inserting other modules into the slot. It is possible that the old RAM sticks have failed or are defective.
To learn why the system does not see all the RAM and how to fix it, watch the video:
softikbox.com