XP mode in "home" versions of Windows 7
If you don't have one of the above-mentioned Windows 7 variants installed, you will still be able to install XP-mode. The main condition is that you have a legal installation CD or downloaded Windows XP ISO file.
Open Windows Virtual PC from the Start menu and click Create a virtual PC at the top of the menu bar. Then follow the installation wizard instructions.
Once you've set up your virtual machine, insert the Windows XP CD into your drive and launch Virtual PC by double-clicking the "XP Mode.vmcx" file.
The virtual machine should now start installing Windows XP, which you will need to follow step by step. 512 MB of memory should be sufficient for Windows XP.
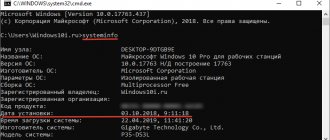
Windows XP mode and Windows Virtual PC component available in Windows 7 operating systems.
Windows XP Mode installation package.
Depending on whether Windows XP Mode was previously installed on your computer, installing Windows XP Mode may involve one or two steps. The first step is to install Windows XP Mode (including the parent virtual hard disk) on the computer. The second stage is always mandatory. This step installs a virtual instance of Windows XP Professional SP3 as a virtual machine. the Windows Virtual PC start page .
1. If Windows XP Mode is not installed on your computer, you can download the Windows XP Mode installation package, which is distributed separately from Windows Virtual PC. This package is free and includes a pre-activated copy of Windows XP with Service Pack 3 (SP3) in VHD format. You can download this package from the Windows Virtual PC home page
Installing Windows XP Mode for Windows 7.
Windows XP Mode is an environment that allows you to run legacy desktop applications designed for the Windows XP system, thanks to a combination of the functionality of Windows XP and Windows Virtual PC. Windows XP Mode - Windows 7.
After downloading the Windows OS installation disk image file - Windows XP, Windows 7, Windows Vista from the network, insert a blank R or RW disk into the DVD drive and enter Nero Express.
Installing Windows XP Mode - WindowsXPMode_ru-ru.exe.
Double-click the file WindowsXPMode_ru-ru.exe . The Windows XP Mode installer will open. If you do not want the virtual hard disk file to be stored on the system drive, specify a different location. .
Installing Windows virtual PC.
Windows6.1-KB958559-x64.msu.
Installing an update for WindowsXP mode.
Windows6.1-KB958559-x64.msu.
After installing the updates, click “Start.” - “Windows XP Mode”.
The Windows XP Mode installer opens. The license agreement will be displayed. To use Windows XP Mode, you must accept the license agreement. Follow the instructions on the remaining pages of the wizard.
To install Windows XP Mode, check the box - I accept the license terms and click Next .
Credentials for Windows XP Mode . You will need to provide a password for the required XPMUser account, which the wizard will automatically create. This is the default account used to run Windows XP Mode and virtual applications that are installed on a virtual instance of Windows XP SP3. If you don't have to enter a password every time you start Windows XP Mode, you can save your credentials.
You must enable automatic updates because Windows XP Mode uses the Windows Update service to obtain Windows XP Service Pack 3 (SP3) system updates. To receive updates for Windows XP Service Pack 3 (SP3), both the host computer and the virtual machine must be connected to the Internet. In a virtual machine running Windows XP Mode, you should also configure the Windows Update service.
With Automatic Updates, Windows 7 will regularly check for updates and install them. For the licensed version of Windows 7, check the box - enable automatic Windows updates.
Disk sharing . Sharing drives on your computer in Windows XP Mode makes it easier to copy and paste data between Windows XP Mode and Windows 7, and virtual apps can also save files to locations specific to Windows 7. For more information about sharing drives, see See the Sharing disks with a virtual machine section.
The installation process for Windows XP Mode begins.
It is not recommended to interrupt the installation of Windows XP Mode - it should be completed in one go.
What is Windows XP Mode? Windows XP Mode is an environment that allows you to run legacy desktop applications designed for the Windows XP system, thanks to a combination of the functionality of Windows XP and Windows Virtual PC.
Wait for the message “Windows XP Mode installation completed successfully” to appear in the Windows XP Mode - Windows Virtual PC installation window. Windows XP Mode will be available in a few seconds.
Wait for your personal settings to load.
One of the advantages of using a virtual machine is that it can change hardware more easily and quickly than on a physical computer. For example, to add or remove a network adapter or change the amount of memory, just shut down the virtual machine and change the corresponding setting. Without opening the computer.
Wait while device drivers are found and installed.
How does Windows XP mode work?
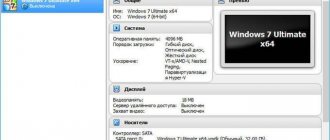
Windows XP Mode works in two ways: as a virtual operating system and as a program opener in Windows 7. Windows XP Mode runs in a separate program-like window on the Windows 7 desktop that is a full-featured version of Windows XP. Windows XP mode allows you to use physical CD and DVD drives, install programs, save files, and perform other tasks as if you were using a computer running Windows XP.
After installing Windows XP Mode, the virtual machine is ready to be configured. You can start installing the necessary applications in it. Once applications are installed, they can be opened directly through the Start of the main Windows 7 operating system.
By clicking on the Start you will see the familiar Windows XP menu.
Opening a Windows Virtual PC virtual machine
To start the virtual machine, select Windows Virtual PC Start . If this menu item is not visible, click All Programs , select the Windows Virtual PC , and then select Windows Virtual PC .
To start the virtual machine, click on the item - Windows XP Mode.
You can work with programs that you are used to on Windows XP / 2000 / 2003. In the virtual machine window, select the application you need
You can also run old 16-bit applications and 16-bit DOS programs in the virtual machine window.
In the Windows XP Mode Windows Virtual PC (see above), click Tools - Options .
Attention !!! Save a backup copy of the Windows XP Mode package WindowsXPMode_ru-ru.exe (WindowsXPMode_xx-xx.exe, where xx-xx is the locale) in case you need to restore your Windows XP Mode environment. For example, you can burn an EXE package to a CD or DVD and store it with other installation media. It is recommended to have a backup copy because Windows XP Mode uses two virtual hard disks—a parent virtual hard disk and a differencing disk. Without a parent disk, the difference disk will be unusable. If the parent disk is damaged or deleted, if you want to recreate your existing Windows XP Mode environment, you must use the same virtual hard disk that was used when you installed Windows XP Mode.
Windows XP Mode uses NAT (Network Address Translation) as its default network connection. The connection mode can be changed later in the network settings.
Creating a virtual machine
Virtualbox XP mode will start faster
- Once prepared, you can create a virtual machine and run Windows XP mode from your desktop.
- Move the newly created "VirtualXPVHD.vhd" file to a folder that you will not change again. In the future, Virtualbox will always look for and use this exact file at this address.
- Launch Virtualbox and create a new virtual machine in the New field. In the next field, enter a name of your choice, select "Microsoft Windows" as the type, and select "Windows XP (32-bit)" as the version.
- In the Disk section, select Use an existing disk, click the folder icon, and select the VirtualbXPVHD.vhd file in the directory you are using. Now click the “Create” button.
Installing Windows 7 XP Mode
XP Mode is a really useful feature that solves most problems with running outdated programs on Windows 7. Another plus is that it can help solve problems with supporting outdated equipment, whose manufacturers are too lazy to write drivers for new OSes. This is especially true for users of 64-bit Windows 7. XP Mode system requirements:
- You must have Windows 7 Professional, Ultimate or Enterprise installed. “Home” versions, unfortunately, are taking a break.
- The processor must support virtualization technologies (Intel-VT or AMD-V). You can check your processor using a tiny program called SecurAble (direct download link).
If you do not have Windows 7 SP1 installed, it is advisable to upgrade to install XP Mode.
Installation
- Download the Windows Virtual PC and XP Mode distributions: https://www.microsoft.com/windows/virtual-pc/download.aspx. Select the system, language and click on the DOWNLOAD button in steps 2 and 3. Attention! Before downloading you will be asked to confirm the authenticity of the OS!
- Install Virtual PC. There are no difficulties here, so let's move on right away.
- Launch the XP Mode installer:
XP Mode (1)
- Select the installation path:
XP Mode (2)
It is advisable to install in a partition with sufficient free space. The XP Mode virtual hard disk will grow dynamically as programs are installed (up to a maximum of 120 GB). - Check “Run Windows XP Mode” and click Finish:
XP Mode (3)
- We accept the license terms:
XP Mode (4)
- Select the virtual machine installation folder (it’s better to leave it unchanged) and set the Windows XP guest user password:
XP Mode (5)
- Select the Windows XP guest update options:
XP Mode (6)
Install updates without hesitation. In fact, Microsoft is giving away a license for virtual Windows XP (yes, this happens!). - Let's start and finish the installation:
XP Mode (7)
XP Mode (8)
Usage
- Virtual PC is launched via the Start menu -> Programs -> Windows Virtual PC or User Folder -> Virtual machines. Unlike Virtual PC 2007, virtual machine management is built into Explorer.
- USB support has finally been added to Virtual PC. In the virtual machine menu, select the USB item, select the one you need from the list of devices, install the driver. There is no problem with this in XP!
- To run a program in XP Mode, you must first install it in virtual XP (Start -> Programs -> Windows Virtual PC -> Windows XP Mode).
- Programs installed in virtual XP are launched from Windows 7 (Start -> Programs -> Windows Virtual PC -> Windows XP Mode Applications) in “transparency” mode. It looks as if the program is running in Seven, only the program window is displayed in XP style. Of course, the classic option of launching from a virtual system is also available.
- To run programs installed in virtual XP by default (for example, IE6) in XP Mode, you need to move/copy the IE6 shortcut to the folder C:\Documents and Settings\All Users\Virtual XP Main Menu. After this, the IE6 shortcut will appear in the Windows 7 menu in the Windows XP Mode Applications folder.
- Some programs are prohibited from running in XP Mode. For example Pinball. To remove the ban, in virtual XP, open the registry editor (regedit), go to the section HKEY_LOCAL_MACHINE\SOFTWARE\Microsoft\Windows NT\CurrentVersion\Virtual Machine\VPCVAppExcludeList, look for a parameter named pinball.exe in the list, and delete it after finding it. Reboot the virtual machine. Move the Pinball shortcut to C:\Documents and Settings\All Users\Main Menu. Unfortunately, launching the game in XP Mode did not please me - the simplest game in terms of graphics was particularly slow. Apparently the new version of Virtual PC inherited problems with hardware acceleration from its predecessor.
When preparing the material, a lot of useful information was taken from the article by Dmitry Rudykh.