How to change the start icon on Windows 7?
For the sake of variety, sometimes you want to change the Windows start icon, because seeing the standard image every day is boring.
How to do this for seven? To change the start button, use the Windows 7 Start Button Changer program. It can be downloaded for free.
The simplest option
If you have downloaded the program to your computer, all you need to do is run it.
But be sure to do this as an administrator. Then all you have to do is select the icon you like, replace it and enjoy the new button. If everything worked for you, you can stop there. However, sometimes things get complicated, so it requires a little more steps and a file called explorer.exe.
Option to change the explorer.exe file
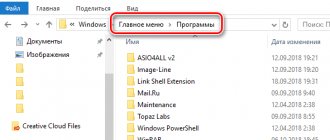
Go to system drive C. Find the Windows folder, open it and find the file we need there.
It will be called that way - explorer.exe. Click the mouse (with its right button) so that a list with items appears. There we select “Properties”.
Open the “Properties” item, tabs will appear there. We need "Safety". A list of users will appear in the window. Select the group called “Administrators” and click on the “Edit” button.
In the next window, in the permissions for the group, you need to check the vertical column “Allow” opposite all the items in the box. Be sure to apply the changes and agree to the new permissions.
Now we return to the “Security” tab, we need to additionally set permissions for changes. The button is called “Advanced” and changing this parameter will enable special permissions for the Administrator group.
In the tab that opens, select the line “Administrators” with one click of the mouse. Click on the function to change permissions.
If you did everything correctly, in the “Permission” column opposite the “Administrators” group you will have o. In normal mode, by default, permissions are displayed at the Read and Execute level.
In the window that appears, you will need to change the permission details and to do this you need to click on the “Change” button. The next window will be called "Resolution Element". In the “Allow” column, check all the boxes. We agree with the changes.
Please note that the Owner tab should display your account name or Administrator name.
Now we have all the rights to make changes at the system level. Launch Windows 7 Start Button Changer, first download and install it. Right-click on the icon and run as administrator. There you need to select an item called “Change Start Button”. We will need the "Sample Orbs" folder. This is a special archive with a set of buttons. Choose which one you like best and click “Open”.
To cancel the changes, just click on the button called “Restore Original Explorer Backup” and the start icon will return to its original appearance.
Step-by-step instructions for changing the Start menu
Step 1:
First, you need to launch “Taskbar and Start Menu Properties.” To do this, right-click on the Start button. As a result of your actions, a context menu should appear, where you will have to select the “Properties” button.
Step 2:
Once in the settings window we need, select the “Start Menu” tab. The first thing that will catch your eye is the setup of the power button. You can select the action that will happen to the computer after you click this button. By default, the computer turns off, but you can change the action to hibernate, sleep, end the session, or any other action that is most convenient for you.
The button marked 3 leads to the help desk, which describes many options for customizing the Start menu.
Step 3:
The button under the number 4 leads to the Start settings settings. Most of them enable or disable the display of certain components of the Windows 7 Start menu. The settings offer 2 types of display: as a link and as a menu. In case 1, when you hover the mouse over an object, a multi-level menu will be displayed, and if you change the item to 2, then after clicking on the object, a new window will open. If you do not want an item to appear on the menu, select the appropriate option.
Step 4:
Let's move on to privacy settings. This feature allows you to display all frequently launched documents and programs in the Windows 7 Start menu. If you want to disable this feature, uncheck the box next to the top item.
Attention!
A check mark next to the bottom item means that the panel will display all recently opened files of a particular program. For example, the picture shows Paint files that the user has recently worked with. If you want to disable the function, uncheck the corresponding box.
Step 5:
Start Menu Settings window :
- The checkmark next to the “Highlight recently installed programs” button means that such programs will be highlighted in a different color. To disable the feature, uncheck the box.
- “Large icons” for frequently used programs can be changed to small ones by unchecking the box.
- In the “Control Panel” column, it is recommended to check the box next to “Display as menu”, then when you hover the mouse over an object, a convenient menu will appear.
- The column “Open menu when cursor pauses” means that you do not have to press the mouse button, the Windows 7 will open on its own when you hover the cursor.
- In the “Devices and Printers” item, it is better to check the box if you have a printer. This way, you will have access to the device directly from the Start menu.
Step 6:
To set the number of programs that will be displayed in the Start menu, in other words, the size of the menu, we again turn to the “Start Menu Settings” window. The figure shows which menu items are responsible for this function. To change the number of programs displayed, set the desired number in the column to the right of the item.
How to change a file icon in Windows 7?
For those who want to change their personal computer settings and make file icons different, this step-by-step instructions is the most accurate.
Having completed all the steps, you can now always change the icons at your discretion. Moreover, you will not need third-party applications or additional programs, as is the case with replacing the start icon; here you can get by with standard 7 tools.
The icons themselves can be downloaded from the Internet or even ordered from a designer if you want something truly unique.
After making changes, do not forget to save the data by clicking “Apply” and “OK”.
Start button for windows 7: how to change appearance in the simplest way?
Users of Windows-based computers are often very picky, and over time they no longer like the “native” graphical interface of the system. The Windows 7 Start button is no exception. And you can change its appearance.
What you need to change the Start button
First of all, it is worth noting that it is not possible to do this using the G7’s means. Therefore, the “Start” button for Windows 7, or rather its appearance, is changed exclusively by third-party programs. Next, we will consider one of the most interesting and popular utilities called Windows 7 Start Button Changer.
But things are not so simple with her. When you try to open it after installation, the system reports that the application should be started as an administrator (this is understandable), but when you select the appropriate launch type from the context menu, nothing works. Why? Yes, only because the user, although he seems to be his own administrator on the local computer terminal, does not have the necessary access rights in the global context (after all, there is also a super administrator). Thus, such rights will have to be obtained initially.
How to change the Windows 7 Start button: preliminary steps
The lack of administrative rights is directly related to the explorer.exe file, which is located in the windows root directory, so you need to start with it.
Right-click on the file and select the properties access line. On the security tab, select the administrator group and click the change settings button located just below on the right. A list of permissions will appear in the window below, where you should mark all available components, and then confirm the changes made.
At the next stage, use the “Advanced” button on the same tab, again select the administrator group and proceed to change permissions. In the corresponding column, we again set the “birds” opposite all available lines, and then confirm the changes again.
It is imperative to make sure that the user is the administrator or owner of the computer (the registration name must be written in the appropriate line).
Practical application of the program
Now the Windows 7 Start button can be changed. In practice this is not difficult. First, we launch the installed utility exclusively as administrator. After the steps taken, everything should work fine.
There are two items in the main window: the first allows you to change the appearance of the button (Select & Change...), the second is responsible for restoring the original appearance (Restore Original...). We are interested in the first line. Click on it, and then find the Sample Orbs directory (the Windows 7 Start button icons are stored here). Choose what you like and press the open button.
It is important to pay attention to the type of folders. If you need to preview images, select the appropriate type in the view menu (special button at the top) (large icons, huge icons - whatever is convenient for you).
If you need the “Start” button for Windows 7 to take on the classic look provided by the graphical interface of the “7” itself, we use the second line in the program to restore the default view. In general, everything is simple.
Conclusion
It remains to add that the utility described above was taken solely as a clear, simple example. You can find quite a lot of applications for changing buttons and, in general, the entire interface. For example, a utility called windows Blind was once very popular. It was precisely she who could customize the system interface very finely, however, when emulating an OS of a higher rank, it consumed too many resources. But with modern processor chips and amounts of RAM, this problem has disappeared.
As for the initial actions with setting permissions, they will have to be performed in any case, otherwise the system simply will not allow the user to make the appropriate changes in appearance. Yes, before performing all the procedures, it wouldn’t hurt to create a system restore point (just in case), otherwise you never know…
fb.ru
How to change folder icons in Windows 7
Changing a folder's icon will allow you to make it unique by making it stand out from the crowd. The steps are quite simple, so even if you are a beginner, you can easily figure out the procedure.
.
If for some reason you don’t like the result, then you can return everything by opening the same path: Properties - Settings - Change icon. On the last tab there is a “Restore Defaults” function. By clicking on it, you will restore the icons that are present in the system by default.
Installing icons using IconPackager
There is another way to change folder icons to any others.
To do this, you can use the convenient IconPackager utility. If there are no icons for certain types of files or programs in your collection, the icons for these objects will remain the same - without changes.
It happens that you need to return the icons back. In this case, in the same program, click on “Windows Default Icons By: Microsoft” at the bottom of the screen from the available icons and apply the rule by clicking on “Apply icon package”.
Other programs for changing icons
To install icons, the tools suggested above are not always enough. For example, you liked an icon, but it is presented only in the PNG extension, while installing new icons requires the ICO extension. In this case, two programs will be useful:
- AveIcon 2 is a small program that can convert icon files from PNG and ICO.
- IrfanView is a utility that comes in handy if you need to convert an entire collection of icons at once.
Another program is IconTo. Its capabilities lie in the fact that you can assign specific picrograms to individual system objects. For example, you replaced the folder icons, but for one very important one you want to use a unique icon. This is where IconTo can help.
Video on replacing standard icons in the seven
Watch the visual video instructions on how to change standard icons to your own: Thus, if you want to change the icons of folders, files and other objects in Windows 7, you can use the capabilities of the operating system itself.
It is enough to download the pictograms from the Internet as individual icons or as a whole collection. Installing icons will only take a few minutes, even if you use third-party programs. In Windows, you can change the design, themes, desktop background, screensavers and shortcuts. But you cannot change the design of the Start button through standard settings. It displays the Win logo by default. And what if you want to see a different image on the main menu? The only option is to use third-party programs, since the OS itself does not provide the necessary tools. Find out how to change the Start button in Windows 7, what utilities are suitable for this, and how to use them.
The main menu picture is tied to the “Explorer.exe” system service (do not confuse it with the name of the browser). The new icon should not affect the operation of Win. But still this is a change in OS files. And it’s better to create a restore point. If something goes wrong, you can return the settings that were before installing the icon.
- Click the Start button.
- Go to "Control Panel".
- "System" menu in the "System and Personalization" category.
- Item "Additional parameters". He's on the right.
- System Protection tab.
- "Create" button.
Click on Create
- Come up with a name for the restore point.
- Wait while the current Windows configuration is saved. You can return to it in the future if critical errors occur.
- To make a backup, click the “Restore” button. It's in the "System Protection" menu. All available points will be there.
Restore point
The main menu picture is tied to the “Explorer.exe” system service (do not confuse it with the name of the browser). The new icon should not affect the operation of Win. But still this is a change in OS files. And it’s better to create a restore point. If something goes wrong, you can return the settings that were before installing the icon.
- Click the Start button.
- Go to "Control Panel".
- "System" menu in the "System and Personalization" category.
- Item "Additional parameters". He's on the right.
- System Protection tab.
- "Create" button.
Click on Create
- Come up with a name for the restore point.
- Wait while the current Windows configuration is saved. You can return to it in the future if critical errors occur.
- To make a backup, click the “Restore” button. It's in the "System Protection" menu. All available points will be there.
Administrator rights
To change the main menu icon, you need full access to Explorer.exe. This is the service responsible for the conductor. The file is located in the system root directory C:/Windows/. To edit it you need administrator rights.
- Go to this folder.
- Find "Explorer" and right-click on it.
- “Properties” item.
- Section "Security".
- Click the "Edit" button.
- In the “Permissions for the System group” field, set the value to “Full Control”.
- Click on "Apply".
You can also open administrative access to the file using the Takeownershipex program. Find it online, download, install and run. There will be two buttons: “Gain access” and “Restore access”. Click on the first one and specify the path to “Explorer”.
Just in case, create a backup copy of this file. Just copy it anywhere. If anything, you can change the edited version to the original one.
Where can I find the badges?
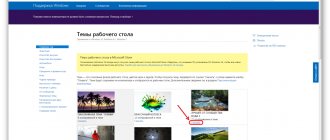
It’s better not to put the first art you like from your gallery on the “Start” button. Use images specifically designed for this purpose. They are already edited and have the appropriate format and size. They also specify the correct arrangement of objects. Suitable images can be downloaded from the 7themes website or oformlenie-windows.ru. Although there are a lot of resources with free icons.
Possible appearance of the Start button
The file with the icon must have a BMP extension (no background). Make sure that it has three options for icons: for a “regular” button, highlighted and pressed. Try hovering over the main menu. And you will see that it changes depending on what is done with it. Although no one forbids putting one picture for all “states”.
Start Button Changer is a utility through which you can load a new image for the main menu. It has a very simple interface. There are only two functions: setting an icon and resetting to original settings. Suitable for Win 7 only. The name of the program translates something like this: “Start Button Converter.” Here's how to use it:
- Find it on the Internet and download it. Just enter the query “Windows 7 Start Button Changer” in a search engine and select any site. It is better to download from resources that are on the first page in the search results.
- If the utility is in an archive, unpack it.
- There should be an executable file with the extension .EXE.
- Right-click on it.
- “On behalf of the administrator” item.
Start Button Changer window
- To change icons, click the “Select & Change” button.
- Specify the path to the icons.
- Click on “Open”.
- To restore the original settings, there is the “Restore Original” option.
Changing the Start button icon in Windows 7
Changing the Start menu button icon in Windows 7 is almost as easy as setting a new wallpaper on your desktop. In this post I will tell you how to do this to diversify the appearance of your windows.
Selecting an icon for the Start menu button
There is a huge collection of menu icons on Deviantart. Their number is constantly increasing thanks to the efforts of users.
Especially for the readers of my blog, I have selected the most interesting, in my opinion, Start menu icons. Just click on the link under the picture, then on the “Download File” inscription at the top right of the page:
Aero+ start button METRO ORBS Microsoft Metro Start Orbs windows Orb Pack 2 Win7 Start Orbs windows 8 8102 Metro Orb Aero+ Glow Start Orb windows 8 New Logo
The full collection is here. And this link will contain the most popular Start menu icons.
Windows 7 Start Orb Changer program
To change the icon you will need a simple Windows 7 Start Orb Changer program.
Windows 7 Start Orb Changer v5 can be downloaded from here. Click on the link and wait a moment - the download should start automatically. If this does not happen, click on the word “here” on the page that opens.
Instructions for changing the Start menu icon
1. Download and unpack the contents of the archive with icons into any folder:
Unpacked pictures - icons for the Start menu
2. Download and unpack the Windows 7 Start Orb Changer program and launch it.
3. In the running program, click the Change button, select our picture, then click the Open button:
Select and open the Start button icon
4. We are waiting. The desktop should disappear for a few seconds, then reappear with a new Start menu icon. Enjoying the result:
The resulting result. The button changes its appearance depending on the action, just like the Start button should behave.
5. If you suddenly need to return the standard icon, just click the Restore button in the Windows 7 Start Orb Changer v5 window or download and install this icon. Also, nothing prevents you from changing the icon to another one - just press the Change button again and select another icon.
Some tips
1. The program for changing Windows 7 icons Start Orb Changer is quite buggy. If while applying the Desktop icon disappears and does not appear for several minutes, press the key combination Ctrl+Shift+Esc, in the Task Manager that opens, click File - New task (Run...) - enter “explorer” without quotes and click OK. The desktop will appear.
2. If you are unable to change the icon (for example, the program crashes with an error), try taking ownership of the file “C:\windows\explorer.exe”. Instructions on how to become the owner (i.e. gain full access to the file) are here. This usually solves all problems with changing the icon.
3. If you still can’t change the icon (or it changes to the standard one after restarting windows), click the inconspicuous arrow in the corner of the window...
Click on the little icon in the corner
...and select Change By Editing Resources there:
After this, the icon will change without problems, but only if you have become the owner of the explorer file (see the previous paragraph).
glashkoff.com
Start Orb Changer for Windows 7
Here's how to change the Start icon on Windows 7 using Start Orb Changer
- Find it online and download it.
- Unpack it if it is in the archive.
- Run it as administrator.
- There will be three samples of icons: “Default” (not active), “Hover” (when selected - you need to move the cursor) and “Pressed” (pressed).
- To change them, click on “Change”.
- Specify the path to the graphic file.
- The “Restore” button resets the settings and returns the standard icon.
The application has advanced options. To open them, click on the small gray arrow at the bottom right. Only two points are important.
- By Patching Memory. RAM is used to change the main menu.
- Be Editing Resources. Edited by "Eexe".
Changing the appearance of the Windows Start button
In Windows, you can change the design, themes, desktop background, screensavers and shortcuts. But you cannot change the design of the Start button through standard settings. It displays the Win logo by default. And what if you want to see a different image on the main menu? The only option is to use third-party programs, since the OS itself does not provide the necessary tools. Find out how to change the Start button in Windows 7, what utilities are suitable for this, and how to use them.
Restore point
The main menu picture is tied to the “Explorer.exe” system service (do not confuse it with the name of the browser). The new icon should not affect the operation of Win. But still this is a change in OS files. And it’s better to create a restore point. If something goes wrong, you can return the settings that were before installing the icon.
- Click the Start button.
- Go to "Control Panel".
- "System" menu in the "System and Personalization" category.
- Item "Additional parameters". He's on the right.
- System Protection tab.
- "Create" button.
Click on Create
- Come up with a name for the restore point.
- Wait while the current windows configuration is saved. You can return to it in the future if critical errors occur.
- To make a backup, click the “Restore” button. It's in the "System Protection" menu. All available points will be there.
Administrator rights
To change the main menu icon, you need full access to Explorer.exe. This is the service responsible for the conductor. The file is located in the system root directory C:/windows/. To edit it you need administrator rights.
- Go to this folder.
- Find "Explorer" and right-click on it.
- “Properties” item.
- Section "Security".
- Click the "Edit" button.
Now we need to set administrator rights to explorer.exe
- In the “Permissions for the System group” field, set the value to “Full Control”.
- Click on "Apply".
You can also open administrative access to the file using the Takeownershipex program. Find it online, download, install and run. There will be two buttons: “Gain access” and “Restore access”. Click on the first one and specify the path to “Explorer”.
Just in case, create a backup copy of this file. Just copy it anywhere. If anything, you can change the edited version to the original one.
Where can I find the badges?
It’s better not to put the first art you like from your gallery on the “Start” button. Use images specifically designed for this purpose. They are already edited and have the appropriate format and size. They also specify the correct arrangement of objects. Suitable images can be downloaded from the 7themes website or oformlenie-windows.ru. Although there are a lot of resources with free icons.
Possible appearance of the Start button
The file with the icon must have a BMP extension (no background). Make sure that it has three options for icons: for a “regular” button, highlighted and pressed. Try hovering over the main menu. And you will see that it changes depending on what is done with it. Although no one forbids putting one picture for all “states”.
Start Button Changer for windows 7
Start Button Changer is a utility through which you can load a new image for the main menu. It has a very simple interface. There are only two functions: setting an icon and resetting to original settings. Suitable only for Win 7. The name of the program translates something like this: “Start Button Converter.” Here's how to use it:
- Find it on the Internet and download it. Just enter the query “windows 7 Start Button Changer” in a search engine and select any site. It is better to download from resources that are on the first page in the search results.
- If the utility is in an archive, unpack it.
- There should be an executable file with a .EXE extension.
- Right-click on it.
- “On behalf of the administrator” item.
Start Button Changer window
- To change icons, click the “Select & Change” button.
- Specify the path to the icons.
- Click on “Open”.
- To restore the original settings, there is the “Restore Original” option.
Start Orb Changer for windows 7
Here's how to change the Start icon on Windows 7 using Start Orb Changer
- Find it online and download it.
- Unpack it if it is in the archive.
- Run it as administrator.
Star Orb Changer
- There will be three samples of icons: “Default” (not active), “Hover” (when selected - you need to move the cursor) and “Pressed” (pressed).
- To change them, click on “Change”.
- Specify the path to the graphic file.
- The “Restore” button resets the settings and returns the standard icon.
The application has advanced options. To open them, click on the small gray arrow at the bottom right. Only two points are important.
- By Patching Memory. RAM is used to change the main menu.
- Be Editing Resources. Edited by "Eexe".
Classic Shell
The Classic Shell utility is suitable for Windows 8 and 10. It is a large-scale program for customizing the Start menu. But now we only need icons in it.
- Download it from classicshell.net. There is a tab “ALL DOWNLOADS”.
- Start the installation. To work with the design of the main menu, use the “Classic Shell Start Menu” component. You don't have to download the rest.
Installing Classic Shell
- Open the application.
- On the Menu Style tab, select the All Options option and click OK.
- You want classic Win style
- Check the “Change button image” checkbox.
- ABOUT.
- "Select image."
- Show the way to it.
If “Start” is missing
If after installing the icon the menu bar and all shortcuts on the desktop disappear, you need to restart Explorer.
- Launch Task Manager. To do this, use the Ctrl+Shift+Esc keys.
- Go to File - New Task.
- In the input field that opens, write “explorer.exe” without quotes.
- Click OK.
The Start button cannot be changed through personalization settings. Yes, and in other Win parameters there is no such option. To add a new icon, you need third-party programs. They edit the system file “Explorer.exe”, to which the icons are attached.
NastroyVse.ru
Classic Shell
The Classic Shell utility is suitable for Windows 8 and 10. It is a comprehensive program for customizing the Start menu. But now we only need icons in it.
- Download it from classicshell.net. There is a tab “ALL DOWNLOADS”.
- Start the installation. To work with the design of the main menu, use the “Classic Shell Start Menu” component. You don't have to download the rest.
- Open the application.
- On the Menu Style tab, select the All Options option and click OK.
- You want classic Win style
- Check the “Change button image” checkbox.
- ABOUT.
- "Select image."
- Show the way to it.
Configure using the Classic Shell program
If you don’t have enough capabilities and such fine-tuning of Start in Windows 7, then you will need a small Classic Shell utility. With its help, you can customize the display of not only the start menu, but also Explorer, and return the classic look of IE 9. It is completely free. And its Russified version can be downloaded from the developer’s website. Need to do.
Users of Windows-based computers are often very picky, and over time they no longer like the “native” graphical interface of the system. The Windows 7 Start button is no exception. And you can change it.
If “Start” is missing
If after installing the icon the menu bar and all shortcuts on the desktop disappear, you need to restart Explorer.
- Launch Task Manager. To do this, use the Ctrl+Shift+Esc keys.
- Go to File - New Task.
- In the input field that opens, write “explorer.exe” without quotes.
- Click OK.
The Start button cannot be changed through personalization settings. Yes, and in other Win parameters there is no such option. To add a new icon, you need third-party programs. They edit the system file “Explorer.exe”, to which the icons are attached.
Certain interface elements remain the same. Users often decide not to waste their time and simply remove the theme from the list of installed ones. Especially for you, we have made instructions that will help you replace the standard Start
. To do this, you do not need to have special knowledge or write code; all you need to do is follow the instructions specified in the instructions step by step.
Well, let's get started!
First of all, we need to get administrator rights to the explorer.exe
, which is located in the
C:/Windows/
.
We will do this using the Takeownershipex program. So, the procedure is as follows: That’s all, now the file is completely under our control and now we can freely change the “Start” button or make changes to system files. If you suddenly need to restore the original settings, you need to run the program again and click on the button labeled Restore access rights
.
You will see a list of all files to which you previously received access rights, select the ones you need and click Restore rights
.
Installing the classic theme
Windows 7 comes with several pre-installed themes. Among them there are basic ones that can radically change the graphical display of the interface of the entire OS. Including returning the Start panel to its classic look. Also, the use of simplified design themes can significantly save the power of the processor, video card and RAM. To change the OS theme to classic, you need to do the following:
- Start menu.
- Select “Control Panel”.
- Here we find the “Personalization” item.
There is also another way to get here. Directly from your desktop. This method of transition is much faster and occurs through the right-click submenu.
- Right-click on the desktop.
- Select the bottom item “Personalization”.
- In the “Change sound and image on your computer” window, go to “Basic (simplified) themes”.
- Click on the “Classic” theme icon to activate it.
After this, the graphical display of all interface elements of Windows 7 will become classic. Including the Start panel. You can change the theme to the previous one by clicking on its mouse icon (left mouse button).