What you need to do before you start using the Odin program:
- Charge the device at least 50%;
- It is advisable to use an original, undamaged USB cable;
- To install the firmware, you need to use the USB port located on the back panel of your PC. The ports on the front panel are not suitable for this operation;
- The downloaded firmware must be placed in a folder without Russian characters, it is advisable that it be “hidden” nearby, you can place it on the desktop;
- Do not under any circumstances disconnect the device from the PC while flashing the firmware; you may end up with a brick.
odin.exe removal of malware and related folders
The odin.exe virus appears as soon as the user installs software bundled with malicious objects. It's not the end of the world; in fact, this computer threat is waiting to be eliminated. The browser experiences general slowdown and is unable to function properly. Check the task manager for Core versions - compare folders, related.
odin.exe
Odin.exe malware occurs in the Core version, compare the folder where the Task Manager can be monitored. Unfortunately, removing the threat is not that easy. This tends to create interconnected components and mask them in the background. We classify the current item as unwanted and insist on immediate uninstallation.
The odin.exe adware can and will cause the problem of constant browser redirects to random pages, which could potentially infect your computer with various malware. We recommend that you stay away from clicking on these advertisements, no matter how complicated or intrusive they are.
odin.exe
The odin.exe process can be called in a slightly different way. It most likely won't be determined by a random name, but there have been other variations of this process before. In order to remove odin.exe adware and other associated files and registry entries, please follow the removal recommendations prepared by us below.
Detailed instructions on how to remove odin.exe infection
- First of all, you need to download and install GridinSoft Anti-Malware .
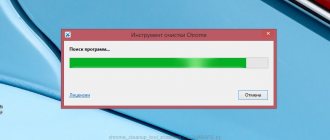
- Open the program and select “ Quick Scan ” or “ Full Scan ”. A full system scan is recommended, but due to the presence of viruses, your computer may suffer from performance problems, in which case use Quick Scan.
- Scan your system and look at the result.
- After the scan is completed, you need to click on the “ Clean Now ” button to remove odin.exe virus:
- (optional) Close all available browsers if possible.
- In GridinSoft Anti-Malware, select “ Tools ” and then “ Reset browser settings ”:
- Follow these instructions: select the browsers that need to be reset, click on the “ Reset ” button.
Finally, restart your computer to apply all the changes made:
Preventative tips for your PC from being infected with odin.exe again in the future:
GridinSoft Anti-Malware offers an excellent solution that can help prevent malware from infecting your system in the future. This feature is called “On-run Protection”. By default, it is disabled after installing the software. To enable it, please click on “ Protect ” and click on the “ Start ”
This useful feature can allow people to prevent the installation of malicious software. This means that when you try to install some suspicious applications, On-run Protection will block this installation attempt. NOTE! If users want potentially dangerous programs to be installed, they can select the "Ignore Always" button. In case you want to block the malware, you must select “Block always”.
Source: https://free-antimalware.com/ru/odin-exe-malware-removal-and-related-folder/
How to flash Samsung using Odin:
Method one: using single-file firmware (data will be saved)
- First of all, you should enable ODIN MODE on your device (you can find the key combination on the Internet). For example, for the Samsung Galaxy Note 2 you need to turn off the smartphone and simultaneously press the three buttons “Volume Down”, “Power” and “Menu”. After which the smartphone will go into bootloader mode.
- Follow all the steps in the instructions above and connect your device to your computer using a USB cable.
- The pre-downloaded firmware must contain one file with the extension tar or tar.md5. No additional files are needed, this one contains everything for normal firmware of the device.
- Launch the Odin program on your PC and click on the “AP” button and then select the downloaded firmware (.tar or .tar.md5 file).
- Go to the “Options” tab and check the boxes only opposite the “Auto Reboot” and “F. Reset Time", the rest must be cleared.
- Now all that remains is to click on the “Start” button and wait for the firmware process to complete. Remember not to turn off the computer or disconnect the device at this point.
- As soon as the firmware is finished, your device will automatically reboot and you can disconnect it from the PC.
Method two: using multi-file firmware (all data from the device will be deleted)
- We carry out the first two points from the previous instructions.
- The downloaded multi-file firmware may contain files with the extension .tar or .tar.md5 (and there may be 3 or 4 files themselves, there can be many variations). Here you need to know some subtleties. The names of the file parts will correspond to the fields in the Odin program. But, program versions starting from 3.09 have received changes in the names of the fields, so the corresponding values will be given below: BL = Bootloader (bootloader) AP = PDA (code) CP = PHONE (modem) CSC = CSC (part with region)
- We launch Odin and in the corresponding fields of the program, one by one, indicate the path to the parts of the firmware (Bl, AP, CP and, if available, CSC).
- Go to the “Options” tab and check the boxes only opposite the “Auto Reboot” and “F. Reset Time", the rest must be cleared.
- Now all that remains is to click on the “Start” button and wait for the firmware process to complete. Remember not to turn off the computer or disconnect the device at this point.
- As soon as the firmware is finished, your device will automatically reboot and you can disconnect it from the PC.
Method three: using a PIT file (service firmware used for recovery, all data will be erased)
- We carry out the first two points from the first instructions.
- Service firmware can contain one or several files with the extension .tar or .tar.md5, as well as a PIT file. There are cases that the PIT file is embedded in the CSC, so you do not have to separately specify the path to the file in the program. It all depends on the device model and firmware/assembler version.
- Launch Odin and click on the “AP” button and then select the firmware file with the extension .tar or .tar.md5.
- Go to the “Pit” tab and click on the “PIT” button, select the downloaded file.
- Go to the “Options” tab and check the boxes only opposite the items “Auto Reboot”, “F. Reset Time" and "Re-Partion", the rest must be cleared.
- Now all that remains is to click on the “Start” button and wait for the firmware process to complete. Remember not to turn off the computer or disconnect the device at this point.
- As soon as the firmware is finished, your device will automatically reboot and you can disconnect it from the PC.
Method four: using multi-file firmware with a PIT file (data will be deleted)
- We carry out the first two points from the first instructions.
- We launch Odin and in the corresponding fields of the program, one by one, indicate the path to the parts of the firmware (Bl, AP, CP and, if available, CSC).
- Go to the “Pit” tab and click on the “PIT” button, select the downloaded file.
- Go to the “Options” tab and check the boxes only opposite the items “Auto Reboot”, “F. Reset Time" and "Re-Partion", the rest must be cleared.
- Now all that remains is to click on the “Start” button and wait for the firmware process to complete. Remember not to turn off the computer or disconnect the device at this point.
- As soon as the firmware is finished, your device will automatically reboot and you can disconnect it from the PC.
Download Odin for Samsung
All versions of Odin available for download:
Odin for older models before 2011 (recommended)
- Odin v1.30
- Odin v1.52
- Odin v1.61
- Odin v1.70
- Odin v1.82
- Odin v1.83
- Odin v1.84
- Odin v1.85
For models up to 2014 (recommended)
- Odin v1.86
- Odin v1.87
- Odin v2.10
- Odin v3.04
- Odin v3.06
- Odin v3.07
For models 2014 and newer (recommended)
- Odin v3.09
- Odin v3.10.0
- Odin v3.10.5
- Odin v3.10.6
- Odin v3.10.7
- Odin v3.10.7.1
- Odin v3.11.1
- Odin v3.11.2
Odin for Samsung models from 2020 and newer (recommended)
- Odin v3.12.3
- Odin3 v3.12.4
- Odin3 v3.12.5
- Odin3 v3.12.7
- Odin3 v3.12.10
- Odin3 v3.13.1 (support for .lz4 firmware)
- Odin3 v3.13.3 (support for .lz4 and Android 9.0 PIE firmware)
- Odin3 v3.14.1 (Android 10)
- Odin3 v3.14.4
How to install custom recovery using the Odin program
To avoid unnecessary problems when performing subsequent steps, you should pay attention to the beginning of the article, which talks about the preliminary steps that should be taken before using the Odin program.
Before you begin the process of installing (flashing) custom recovery, you should download it to your PC. You can learn more about recovery from the article “What is recovery mode and how to enter it?”
You can download the recovery for your smartphone/tablet model using the following links:
- ROM Manager
Developer: ClockworkMod
4.35
- TWRP recovery
- Philz Touch recovery
The process of flashing the recovery firmware itself consists of several simple steps:
- Launch Odin and click on the “AP” button, then select the downloaded recovery file with the extension .tar or .tar.md5.
- Go to the “Options” tab and check the boxes only opposite the “Auto Reboot” and “F. Reset Time", the rest must be cleared. (The “Auto Reboot” checkbox can lead to resetting the recovery to the factory state; on some devices, the first thing you need to do is run the flashed custom recovery, and only then reboot it. Before flashing your smartphone/tablet, do not forget to check this point).
- Now all that remains is to click on the “Start” button and wait for the firmware process to complete. Remember not to turn off the computer or disconnect the device at this point.
- As soon as the firmware is finished, your device will automatically reboot and you can disconnect it from the PC.
Disadvantages of the ODIN program
Many experts note that the ODIN application has a simple interface, intuitive controls and the absence of unnecessary functions. However, there are disadvantages that some users may notice:
- The Russian language is not yet supported - all elements are displayed in English.
- The tool only interacts with Samsung phones and gadgets.
- If done incorrectly, your mobile device can be seriously damaged. To prevent such situations, you must carefully follow the instructions for use.
( 1 ratings, average: 5.00 out of 5)
How to get ROOT using the Odin program (CF-Auto-Root)
If you want to learn more about root (superuser rights), then you should read the article “What are Root rights and how to get them.”
- We carry out the first two points from the first instructions.
- Go to the official CF-Auto-Root website, look for your device in the list and download the archive with files to your computer. Then we extract the files to any of the folders on the computer, where there will be a file with the extension .tar or .tar.md5.
- Launch Odin, click on the “AP” button and specify the path to the just unpacked file with the extension .tar or .tar.md5.
- Go to the “Options” tab and check the boxes only opposite the “Auto Reboot” and “F. Reset Time", the rest must be cleared.
- Now all that remains is to click on the “Start” button and wait for the firmware process to complete. Remember not to turn off the computer or disconnect the device at this point.
- As soon as the firmware is finished, your device will automatically reboot and you can disconnect it from the PC.
Firmware for kernels (boot.img, zImage), recovery files and modems
How to flash a modem?
If you are told to flash the modem, this means that you need to the modem file into the Phone and flash it.
How to flash the kernel or Recovery?
If you are flashing a third-party kernel or Recovery and you have Android 5.XX and higher preinstalled, then you need to make certain changes to the Android settings:
- Enable “USB Debugging” and in the same settings enable “OEM Unlocking”;
- Disable Samsung Remote Control;
Flashing a kernel, kernel or CWM means that you need to insert the file into the AP or PDA field and flash it.
Possible problems when installing Recovery
If suddenly, after flashing a custom recovery, you see that the recovery remains standard, then these instructions will be useful to you:
- In ODIN, uncheck AUTO REBOOT
- Flash custom Recovery
- Turn off Android device
- Go directly to the Recovery menu (if Samsung just starts to boot, then repeat procedure 1-4)
- Apply patch (root rights)
- How to create a TAR file with IMG
- How to create a TAR file with IMG to install Recovery on a Samsung smartphone
Read more articles and instructions in the section Articles and Android Hacks or Android Firmware . Stay with the Android +1 , it will be even more interesting!
How to flash the kernel using Odin
If you are lucky and you can find stock or custom kernels for your smartphone/tablet, then you can easily reflash them.
- We carry out the first two points from the first instructions.
- We download the archive with the kernel from a topic on the forum dedicated to your device, or from the well-known XDA site. Unpack the downloaded files.
- Launch Odin, click on the “AP” button, and then specify the path to the kernel file with the extension .tar or .tar.md5.
- Go to the “Options” tab and check the boxes only opposite the “Auto Reboot” and “F. Reset Time", the rest must be cleared.
- Now all that remains is to click on the “Start” button and wait for the firmware process to complete. Remember not to turn off the computer or disconnect the device at this point.
- As soon as the firmware is finished, your device will automatically reboot and you can disconnect it from the PC.
↑ What is needed for Samsung firmware
- First, download and unpack the archive with the Odin program (install the latest version), install the program on your computer;
- Install Samsung USB driver (latest version) Samsung USB Driver - v1.5.45.0 [15.27 Mb] (downloads: 6)
- ADB&FASTBOOT Tools for your (smartphone) device. Adb_fastboot.zip [552.58 Kb] (downloads: 6)
- Original USB cable from your device.
- Odin is launched as an administrator from a shortcut on the desktop (to launch, click on the “Odin” shortcut and click on the mouse button on the right - there will be a line to run as administrator);
- The smartphone turns on in firmware mode - to do this, you need to press three buttons simultaneously: power
, volume
down
and
HOME
; - the smartphone is connected and if all the drivers are installed correctly, then on the left side at the top it should be indicated which port the custom Android was connected to;
- then paste (specify the path to the firmware).
It should be taken into account that firmware for “One” comes from one to four files. At the beginning of all firmware files there are symbols that must be inserted correctly.
An inscription of the user's choice is inserted into the CSC field: if a simple firmware update is required without deleting programs and personal information, then HOME is inserted, and when everything needs to be erased, CSC is inserted. If the user has the firmware installed in a single file, then it is inserted into the PDA field.
After clicking on the START button located at the bottom, the installation of the firmware should begin - the user just has to wait until the firmware is completely installed. After all these steps, the smartphone should be rebooted with the new firmware.
Types of firmware
Flashing the device, in other words, reinstalling the software, is necessary if you are not satisfied with the software component.
The firmware installation can be stored in one or more files. Depending on this, single-file and multi-file firmware are divided. There are Recovery firmwares, which reinstall the software for Recovery Mode; kernel firmware, that is, reinstalling the operating system version.
As for the kernel firmware, they can be divided into official and custom. Official firmware versions released by the manufacturer of your mobile device or Google are the best option for undemanding users: they do not have a lot of functions, but they are reliable and designed specifically for your device model. And, importantly, they come with a guarantee.
But any third-party (custom) custom firmware releases the manufacturer from the obligation of warranty repairs. Do not think that this is some kind of violation of the rules or that the firmware is illegal. Manufacturers simply cannot know what will happen to your device due to third-party firmware, and they do not want to be responsible for it.
But if you're ready to say goodbye to warranty service, third-party firmware will give you a lot of options. There are different types of third-party firmware, the most famous: Cyanogen Mod, MIUI, Illusion ROMS, AOKP.
Cyanogen Mod
Cyanogen Mod was born as a custom modification and has grown to become the most popular custom Android firmware: in 2020, there are about 14 million devices with Cyanogen installed.
It is reliable, stable and works on many smartphones and tablets. A big plus of the firmware: there is a normal installer. To install CyanogenMod, you don’t need to worry about Recovery modes, getting root rights and other deep things. The program will do everything for you.
CyanogenMod, unlike standard versions of Android, allows full access to the operating system. Even root access on the device will not give you such freedom. This leads to a variety of applications and security problems. The system is open not only to you, but also to viruses. Therefore, it is better to use CyanogenMod together with a good antivirus. The firmware also frees you from the manufacturer’s imposed standard applications that cannot be removed.
Cyanogen simplifies working with the device, supports many themes, allows you to change any element of the system, and increases performance through optimization.
Video: review of CyanogenMod 10.1
MIUI is based on Android and CyanogenMod source code. That is why it has many similarities with Cyanogen. This includes complete freedom for the user, improved performance, and support for themes. But MIUI has an interface unusual for Android, which is something similar to iOS. MIUI does not have an application menu at all; instead, it uses an unlimited number of desktops with a set of applications. But, unlike iOS, MIUI also supports widgets, of which there are a lot in the built-in store.
You can install all applications from Google Play Market on MIUI. The built-in SuperMarket store has them all. And some of those that are paid on Play are free on Supermarket.
Illusion ROMS
Illusion ROMS significantly speeds up the device and reduces energy costs. It has advanced accelerometer settings: for example, reducing the rotation angle to “flip” the screen interface from 90 to 80 degrees. You can also customize the screen: in addition to brightness settings, you can change the contrast and color rendition to improve the image.
Video: custom firmware Illusion ROMS for Android (review in English)
AOKP has many of the features of CyanogenMod (most firmwares are based on it), but has unlimited interface customization options. You can change everything, every single menu element. You can upload your own animation for the interface, create your own template for a vibration alert, set special actions for any gesture and any press, you can change the background and appearance of the notification panel, remake the status bar, and manually configure the processor.
A separate topic is widgets. They can also be adjusted. Devices powered by AOKP can turn Android into something unimaginably beautiful, all it takes is some imagination.
Video: review of custom AOKP firmware on Nexus 4
How to remove Odin from your computer and recover encrypted data
Odin is a ransomware virus created by a team of hackers who became famous throughout the world thanks to their previous brainchild, the Locky ransomware virus. This virus is, in fact, nothing new, and was created in order to complicate the work of employees of research laboratories working on a previous version of the Locky virus, called Zepto. In this article, we will tell you how to remove Odin from your computer and what to do with files encrypted by it.
Malicious software, collectively called ransomware, is rightly considered the most dangerous of all types of viruses. These are ransomware viruses that encrypt files on your PC and demand a ransom for them. Odin, by far, is considered the most dangerous of all. It differs from the previous version in several ways. Firstly, the name and extension added to encrypted files have been changed (.odin instead of .zepto). Secondly, the name of messages with instructions and ransom demands has been changed (they are now called _HOWDO_text.html, _HOWDO_text.bmp, and _[two-digit number]_HOWDO_text.html.
However, these two changes are insignificant compared to the most important: the ransom amount is now 3 BTC, which in ruble equivalent equals 113,200 rubles (in dollars - $1810). This is a rather considerable amount even for the most developed countries, and in the CIS countries there are unlikely to be ordinary users willing to pay that much for data from their home PC. The only exception may be cases of infection of work computers or entire networks of large enterprises. It is unknown what hackers are trying to achieve with this change in pricing policy, because usually such viruses try to get a maximum of 1 Bitcoin.
In all other respects, the properties of the virus, as well as its behavior, remained unchanged.
How to remove Odin from your computer
To remove Odin you can use one of two methods: manual removal or removal using an antivirus. We will be happy to provide you with detailed instructions on both methods, and all you have to do is choose between them. In short, manual removal is the ideal option if you have good computer knowledge, you are sure that there is only one virus on your PC, and you are also sure that nothing like this will happen again in the foreseeable future. And, of course, manual removal is absolutely free.
Removing it with an antivirus costs money, but in doing so, you will not only remove Odin from your PC, but also completely clean it of other viruses without wasting your time. Using the antivirus does not require any knowledge or skills, and after removal is completed, the antivirus will remain on the computer and will help you protect it from possible threats in the future. We suggest you use the services of a program such as Spyhunter.
It has held a strong position in the anti-virus market for more than ten years, and will easily remove Odin from your PC. You can download SpyHunter here.
Step 1. Start the system in safe mode
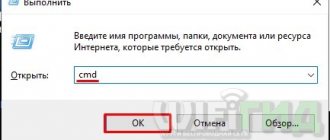
- Click Start
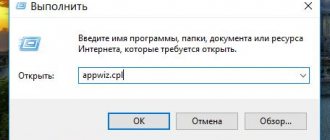
- Type Msconfig and press Enter
- Select the "Download" tab
- Select Secure Boot and click OK
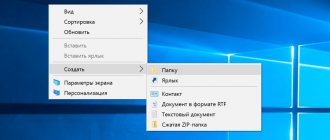
Step 2. Show all hidden files and folders
- Click Start
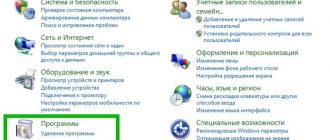
- Select "Control Panel"
- Select Appearance & Personalization
- Click on "Folder Options"
- Go to the "View"
- Select "Show hidden files, folders and drives"
Step 3. Remove virus files
Check the following folders for virus files:
- %TEMP%
- %APPDATA%
- %ProgramData%
Step 4: Clean the Registry (Advanced Users)
- Click Start
- Type "Regedit.exe" and press "Enter"
- Check startup folders for suspicious entries:
- HKEY_LOCAL_MACHINE\Software\Microsoft\Windows\CurrentVersion\Run
- HKEY_LOCAL_MACHINE\Software\Microsoft\Windows\CurrentVersion\RunOnce
- HKEY_LOCAL_MACHINE\Software\Microsoft\Windows\CurrentVersion\RunServices
- HKEY_LOCAL_MACHINE\Software\Microsoft\Windows\CurrentVersion\RunServicesOnce
- HKEY_LOCAL_MACHINE\Software\Microsoft\Windows NT\CurrentVersion\Winlogon\Userinit
- Likewise for the HKEY_CURRENT_USER folder
- Remove malicious files from these folders
How to recover damaged files
Data recovery is the most difficult part of the problem. At the moment, there is no way to decrypt data with the .Odin extension, since neither the attackers' website nor the virus code have yet been hacked. So far, the only way to restore data is to download backups. If you don’t have backups (backup copies of encrypted files stored on external media), then you have only one thing to do - wait.
Remove the virus from your computer, place the encrypted files in a separate folder, and wait for news from reputable antivirus companies or other virus fighters. To make things easier for you, we have compiled a small list of sites where this program will appear first. This is the Kaspersky Lab website, as well as the EmsiSoft and MalwareHunterteam websites.
Check the sites regularly for updates and hope for the best!
- Click Start
- Select "Control Panel"
- Click "System and Security"
- Select "Backup and Restore"
- Select "Recover files from archive"
- Select a save point
instructions
Source: https://ru.pcfixhelp.net/virus/1113-kak-udalit-odin-s-kompyutera-i-vosstanovit-zashifrovannye-dannye