About Apple iWork Pages documents
PAGES documents are very popular, but only among MacOS computer users. In addition, its own format is actively used by Apple for internal document flow. Windows users usually get .pages files from Mac owners when someone forwards documents without changing the format to the usual DOC or PDF.
The PAGES extension is based on the XML format, and therefore the content of files is not limited to text. Apple Pages comes with >140 document templates, which may contain:
- Text documents with formatting.
- Multi-page brochures.
- Tables.
- Graphs and diagrams.
- Special symbols.
Documents in Apple iWork Pages can be created either from scratch or based on one of the templates. The more special characters and other third-party elements (in addition to text and images) a document contains, the more formatting and content loss may occur during conversion. Regular text documents can usually be opened online without problems or converted to a popular format like DOC.
Opening .PAGES on Windows via ZIP
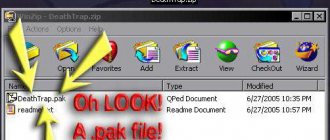
Since the main content of the file is a ZIP archive and an XML document, you can try to view the contents using standard Windows tools. To do this, you need to change the document extension from “.PAGES” to “.ZIP”, unpack the archive and open the file Preview.pdf or Thumbnail.jpg. It is advisable to make a backup copy of the file before making any changes, in case something goes wrong.
By its structure, the PAGES document is a ZIP archive with the following content :
- index.xml - a file with the main content of the document in XML format.
- buildVersionHistory.plist is a text file with a history of document changes.
- Preview.pdf - used to preview content, located inside the QuickLook folder.
- Thumbnail.jpg is another file for viewing from the QuickLook folder, only in a low extension (preview).
Preview files have some special features:
- The Thumbnail.jpg file has a low extension and only contains information from the first page. Suitable only for viewing single-page documents.
- The Preview.pdf file allows you to preview the entire contents of a document, but only if you selected the "Save original document with additional preview information in Pages" option when saving the document.
All this makes using Apple iWork files extremely inconvenient on computers running any version of Windows. Not to mention Android and other platforms, where the choice of software is even smaller.
iWork Pages allows you to convert any document to PDF, DOC or TXT. The easiest option is to ask the Mac user to convert the files while saving. If this is not possible, file conversion is available to everyone online, in several services at once.
How and with what to open the pages extension file
Apple's office suite is easy to use, but not every user can open a .pages file.
On Windows
If a user uses the tools of an Apple text editor, he involuntarily asks the question: how to open the pages format in Windows? Developers and experienced users offer two options to choose from.
Method I is to change the extension.
If you need to open the pages format, just change the document extension. The method does not work in all cases. 100% result depends on:
- document contents;
- method of preservation;
- distribution method.
Algorithm of actions:
- Save the file to your hard drive.
- Make a copy of the file.
- Change the extension to .zip.
- Unzip the file.
- Go to the QuickLook folder.
- Open the file thumbnail.jp, which is responsible for previewing the first page.
- Open the Preview.pdf document, which is responsible for previewing the entire document (the file is created only when additional settings are specified).
Method II – converting the . pages.
Apple iWork Pages supports exporting your own files to save them with a familiar extension. To do this you need:
- Select “Export” from the “File” menu.
- Confirm action.
Online
To open pages online, developers advise going to the official website of the CloudConvert service. The service built into Google Chrome converts documents of various formats.
Algorithm of actions:
- Go to the official website of the CloudConvert service.
- Click “Select files”.
- In the dialog box, specify the path to the document with the .pages extension and select it. The service will prompt you to select the required format.
- Save a new file and open using MS Word.
If the user works with files with the extension . pages – how to open a document online:
- Go to the iCloud web resource.
- Log in to the site.
- Select “Pages” from the drop-down menu.
- Specify the action: create a new one or open an earlier one. By default, a text editor with an English interface and extensive functionality will launch.
- Save the document on a Windows computer by right-clicking on the file, selecting “Download a copy” and the extension where to save.
Ez Freeware Free Opener
The simple Ez Freeware Free Opener program opens more than 70 formats, including .pages. The software is released only in English, but the interface is extremely simple and understandable.
The main problem of the program is that it does not allow editing documents - only viewing mode. But the document is displayed in its entirety, in its original quality and without additional conditions or loss of content, as is the case with the ZIP archive method.
There is one more unpleasant moment - at the time of writing the official website of the developer www.freeopener.com is unavailable. This means that the program will have to be downloaded from third-party sources. At the moment there are no problems with this - the software is lightweight and is available for download on dozens of sites.
Online conversion to DOC/PDF
Online services allow you to open, edit and convert documents in .pages format. You can send files for printing from a browser, or save them in a convenient format and edit them in familiar Windows programs.
- CloudConvert.com - the service is available both online and as a plug-in for the Google Chrome browser. 218 different formats and APIs are supported. After downloading the PAGES file, the system will think for a few seconds and offer to choose one of the formats to which you want to convert the file: TXT, DOC, DOCX, HTML or PDF. To avoid having to re-enter the site each time, you can click the Add to Chrome button at the very bottom of the page to add the plugin to the browser.
- iCloud.com is Apple's official service for working with Pages, Numbers and Keynote documents. The apps are free and available to everyone, not just Mac users. On the iCloud website, everything is done conveniently and thoughtfully, and registration and everything is available to everyone - including Windows or Android.
- OnlineConvertFree.com is a free online converter; the site has a version in Russian. Claims to support conversion of .pages to 100+ different formats. Among them there are all popular graphic and text extensions: pages converts to pdf, doc, docx, odt, ott, sxw, stw, xml, rtf, txt, sdw.
If these services are not enough, there are other sites with similar functionality: for example, zamzar.com in Russian.
Primary Menu
When it comes to creating a document, most people use Microsoft Word. And not without reason, because this text editor is the most popular. It's not that we don't love Microsoft and are Apple fans - no, we were Windows users back in the day too. We simply prefer Mac OS X, although we sometimes have to use Microsoft products at work. Of course, it's a shame that Apple doesn't put enough emphasis on iWork products, which do a great job for most documents, spreadsheets, and presentations, and in some cases, even better than Microsoft Office. Thus creating “hothouse” conditions for competitors, but let’s not talk about sad things. Let's take a closer look at Apple's text editor, Pages, and look at its interface using the example of creating a simple document.
Getting Started
If you don't have Pages yet, you can buy it from the Mac App Store for R649. Once you install it on your computer and run it, the following dialog box will be displayed:
A splash screen that will greet you when the page first loads.
With the Pages'09 update to version 4.2, which was released back in July last year, it became possible to store your documents in iCloud; it allows you to view and edit them on any iOS device. Unfortunately, the iOS version of Pages will have to be purchased separately! While it's not as feature-rich as the OS X version, using it allows you to do some basic editing of your documents while away from your main computer. But that is another topic.
So, let's create a new empty document, to do this, click on the “New Document” button in the lower left corner of the screen. A window will appear asking you to select a template.
Which template will you choose?
It includes two main modes, text processing and page layout. The first one is for basic documents like letters, forms, resumes, reports, and the second one is for more advanced things like newsletters, brochures, posters and more. This is very useful if you want to write something quickly (for example, a formal letter), but for our research, we will create a blank page. Select a blank portrait template by double-clicking the left mouse button.
In our opinion, Pages is much easier to use than Microsoft Word (the ribbon interface, where you have to navigate through "endless" menus to find what you're looking for, is especially annoying) and doesn't take long to get used to. It's also worth mentioning that you can easily import documents into Word format by simply clicking on "File > Export" and selecting "Word...".
Toolbar on default pages.
In the panel at the top, you can change the appearance of your document, view its structure, add individual sections (for example, a title or page text, depending on the selected template), add a text block and shape, a table or chart, and comments. Next is the inspector icon, which you will work with often, we will look at it in more detail a little later. To the right of it are settings where you can add photos from iPhoto and Aperture or audio from iTunes and GargeBand, add some color to your document using the Colors menu, and finally adjust fonts.
Writing the first document
Now that we've looked at the interface in more detail, it's time to write! Surely, everyone who reads this material has used some kind of text editor before, so we will not focus on the obvious things about creating text, but will consider only some of the subtleties of working with the page.
Formatting documents will not cause any difficulties, all the necessary tools are before your eyes (as you saw in the previous screenshot), they allow you to change the font and its location, as well as line spacing. You can change the number of columns in your document and create bulleted or numbered lists.
Adding a page title.
Unlike Word, you don't have to install headers and footers; they'll be automatically included on your document pages. Just hover your mouse over the top of the document, a window will appear in which you can enter anything you want, it will automatically appear on all pages of the document.
Adding page numbers to a document.
To add page numbering (top or bottom), click “Insert > Page Numbers Automatically...” in the menu bar, in the dialog box that appears (as seen in the screenshot above) you can configure the page numbering.
Using the Inspector
We previously mentioned the inspector function; Let's look at its application in practice. These are like system settings for a document. Click on it and a small window will appear on the right (which you can move). At the top of this window there are small icons that are responsible for text, graphic, metric, tabular and other parts of the document. From the screenshot below you can see how you can change page settings such as margins, orientation, headers and footers. When you click on the "Properties" tab inside this option, all the statistics about the document will be shown: number of words, characters, lines, paragraphs and so on.
Inspector window where you can change the settings of your document.
The rest of the tabs are pretty obvious, the only thing worth noting is the "T" text inspector. In it you can more precisely adjust the formatting of your document, for example, line spacing, spaces between characters, indents, settings, and so on. It is also worth considering that some inspector tabs are divided into sub-tabs (for example, the Text tab is divided into text, list, tabs and much more), so if at first glance you cannot immediately find something, do not forget about subtabs - the functions you need are probably there; They're just hidden!
Working with Images
Adding images to a Pages document is very simple: anyone who has used other word processors (Microsoft Word in particular) understands how difficult it can sometimes be to get images in the right place in a document, it can be an "absolute nightmare". But not in our case - just click on the "Media Browser" icon in the upper right corner or drag the image file from the Finder onto the document page, where it should be automatically imported.
Add an image to the created document.
Document text automatically wraps around the inserted image; You can disable text wrapping by clicking on the inspector icon and making basic image settings in the corresponding section. You can adjust brightness, contrast, saturation and other parameters.
Pages includes basic image editing tools, allowing you to customize it without opening it in an external editor.
Another very useful feature is the image mask (with the image selected, click on the icon with two rectangles, one inside the other, on the top panel), it allows you to crop images directly inside the page.
Working with an image mask.
In the pop-up window, you can zoom in and out of the image using the slider, select which part of the image you would like to keep, or drag and drop with changes.
Tables
Tables are a good way to present information in a convenient way: just click the table icon in the toolbar. An inspector will appear with a lot of different options, where you can customize your table to your liking, for example: shading, number of columns and rows, their width.
Setting up tables in the inspector.
Once you select a table, you can move it around the entire document; its adjustment follows the same principle as adjusting images.
Export documents
Pages allows you to export your creations to any PDF, Word, RTF, ePub format, as well as plain text. To do this, simply click on “File > Export” and select the desired format. If you save it to iCloud, it will appear on all iOS devices, you can edit it, all changes will be automatically synced. You can also return back to documents from previous versions by clicking on “File > Return to Item” and selecting “View All Versions”.
View all versions.
As you can see from the screenshot above, you will be taken to a Time Machine-like interface where you can scroll back through all versions of the document. Any changes will be automatically synced, so if you've made a lot of mistakes and don't want to correct them by pressing Cmd-Z a hundred times, this feature is just what you need and will help you save a lot of time!
Conclusion
Of course, this material does not outline all the capabilities of the program; this cannot be done within the framework of one article. But in the future we will try to tell you in more detail about the functions of Pages, we will look at them using specific examples. For now, this is enough to give you a general idea of this text editor, especially if you're switching to it from LibreOffice or Microsoft Word. We hope you found this article helpful.


