There is perhaps no greater irritation when working with a computer than its slow loading and response. If we put aside all the ridicule and approach the issue seriously, then the “brakes” and “lags” of the system greatly spoil the nerves and health of office workers and other users who spend most of the day at the monitor. In addition, this reduces the productivity of the operator himself, and leads to downtime (and in some cases, to losses).
Today we will look at several ways to make Windows 7, 8 and 10 boot faster, even on older computers.
Setting up the BIOS
Some ordinary users do not even realize that the computer (motherboard) has a BIOS input/output subsystem that boots even before the Windows operating system. On modern devices it is replaced by advanced UEFI, which has more functionality and a full-fledged graphical interface.
Correctly configuring the subsystem can significantly speed up the startup and boot time of the computer.
Here's how it's done:
- We go into the BIOS by pressing the “F1”, “F2”, “F12”, “Esc”, “Delete” or other button. Which button you need to press depends on the motherboard manufacturer and firmware developer. It is advisable to press it immediately after the power button on the system unit, and repeat for 30 seconds to a minute. You need to press until the screen with sections and settings appears.
- Using the index buttons on the keyboard, go to the “Boot” (or “Advanced BIOS Features”) tab and look for the “Fast Boot” parameter (aka “Quick Boot”, “Super Boot”, “Fast BIOS Mode”). It must be enabled by pressing the “Enter” key and selecting “Enabled”.
By default, during startup, the system polls all devices connected to the motherboard twice. Enabling the accelerated boot mode removes one stage of verification, placing this task entirely on the operating system. This gives a significant boost to boot speed for Windows 7, 8 and 10.
- We can also change the media loading queue. After startup, the BIOS looks for the boot file on all devices that are listed.
This option is usually located in the same “Boot” tab called “Disk Boot Priority”, “Boot Priority Order” or “Boot Sequence”.
If you do not plan to reinstall Windows in the near future and boot from under the system, then in the “1st Boot Priority” line we indicate the hard drive (“Hard Drive”). It can also be indicated as a device model, for example: “Hitachi_HDS721010DLE630”.
After this setup, the computer will not waste time searching for the boot file, and will immediately boot from the hard drive.
Removing unnecessary programs from startup
The next step in our work to optimize Windows boot will be cleaning the startup list. The fact is that many programs remain active and work in the “background” throughout the entire session. These include antiviruses, file downloaders, game clients and other services. Their simultaneous launch along with Windows greatly slows down the system, stretching out this process for minutes.
Our task is to remove unnecessary programs from the startup list. For this:
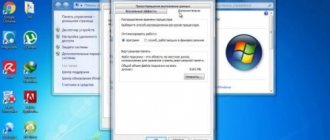
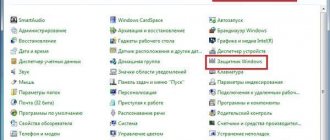
- Open the Start menu and enter the command “msconfig” in the line below. Click on the found program with the left mouse button.
- In the “System Configuration” console, go to the “Startup” tab.
Uncheck programs that do not perform important tasks in the background and those that are used occasionally. At the end, click “OK” and reboot the system to get a rough estimate of the result.
This method is relevant for all versions of Windows and is done in the same way.
Quickly launch programs via the Taskbar
You can make a quick launch for some programs by also using the Taskbar , located, as a rule, at the bottom of the screen (it can also be located on the side or top, depending on the settings).
The main advantage of placing program shortcuts on the Taskbar is their accessibility in one click, since they are always visible.
Let's look at adding your favorite programs for quick access to the taskbar, using the example of two programs: Explorer (one of the standard programs included in the operating system) and a browser.
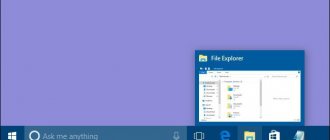
File Explorer on the Taskbar
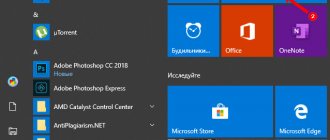
Go to the Start -> All Programs (1), go to the Accessories (2), find Explorer (3). Next, right-click and in the window that appears, click Pin to taskbar (4). As a result, an icon (5) will appear on the Taskbar to launch Explorer:
Browser on the taskbar
We also go to the Start -> All programs (1), find Browser (2). Next, right-click and in the window that appears, click Pin to taskbar (3). an icon will appear on the Taskbar to launch the Browser:
Of course, you shouldn’t add many programs to the Taskbar, since running programs are also added there. But adding a few frequently used programs would be helpful.
Cleaning Windows of temporary and unnecessary files and programs
During work, a lot of temporary files accumulate in the computer’s memory, which are no longer relevant, but have not been deleted. Over time, there are so many of them that they begin to take up a significant amount of memory on the local disk. At the same time, the hard drive head performs unnecessary movements, and this is precisely what prevents Windows from loading quickly.
Disk cleanup can be done using built-in Windows tools or external programs. First, let's use the standard method, for which:
- Open “Computer” (“This Computer”) and select the system drive “C:”, then right-click to call up the context menu, where we select “Properties”.
- In the “General” tab, you can visually estimate the amount of free space on your local disk. Click on the “Disk Cleanup” button.
- The program will begin to estimate the amount of space we can free up.
- After some time, we will be able to choose what kind of files should be deleted.
In the “Advanced” section, we can remove installed programs and Windows restore checkpoints.
After we have dealt with the programs and checkpoints, we return to “Disk Cleanup” and click “OK”. In the pop-up window, select “Delete files”.
You will probably be surprised at how much free space appears on the system partition of your hard drive. If necessary, you can separately remove unnecessary programs through “Start/Control Panel/Programs/Programs and Features”.
The “non-standard” method consists of downloading, installing and using a service utility from the Internet:
- Download the free CCleaner utility from the official source at https://www.ccleaner.com/ru-ru.
- After launching it, the cleaning window automatically opens. We check the boxes on the left side (or leave them as they are) and turn on “Analysis”.
- All found “garbage” will be displayed in the working area of the window. It's time to start cleaning using the corresponding button below.
This is how you can easily and quickly put things in order and, at the same time, speed up the loading of Windows 7, 8, 10 when you turn it on.
Create a new icon
Another feature of the Quick Access Toolbar is pinning programs. You can create a shortcut and launch the desired software using it. Often this turns out to be much more convenient than shortcuts on the desktop.
After all, this interface is almost always displayed unless you run the software in full screen mode.
You can create a new shortcut using various tools. The simplest methods are presented in the list:
- Take a regular shortcut on your desktop. After that, “grab” it with the mouse cursor and move it to the panel.
- Launch the required application. Right-click on its icon in the RMB panel and select the “Pin” option from the drop-down menu to create an icon.
- Open the Start menu using the corresponding icon. Find the required utility in it and “drag” it to the panel.
- Open File Explorer (“My Computer”). Find the exe file of the desired program and move it to the desired location in the same way.
You can also move icons relative to each other, arranging them in the order that suits you. If you want to remove an icon, call the context menu and select the “Remove” action.
Correcting the registry
The Windows Registry stores settings, instructions, and user account information on your computer. It also contains all the records about all programs, drivers and other software ever installed. Even after deleting a program, information about it does not disappear anywhere, but accumulates as “dead weight” in the database.
The Windows registry greatly affects the performance of your computer, and just as much as anything else needs to be kept in order. We will do this using the same CCleaner:
- We return to CCleaner and select the “Registry” section.
Leave all the checkboxes in place and click “Search for problems.”
- We do not go into the details of the search results, but immediately click on “Correct selected”.
- CCleaner will offer to create a backup copy of the registry - we agree and wait for the repair process to complete.
Now it is advisable to restart your computer and move on to the next method.
general description
The Quick Launch bar in Windows 7 contains icons of all windows and programs open on the personal computer.
Browser, games, explorer - all this is displayed here. You can switch between programs simply with a mouse click. Through tools like these, users can easily access any running application without resorting to the Alt+Tab key combination. If you launch several windows of the same software at once, the icon will change its appearance. It will look like a stack of files. When you click on it, a special list will open in which you can select the required window.
Defragmenting your hard drive
The principle of operation of a hard drive is to store files in cells of the magnetized coating of a rotating disk. Some files do not fit into one cell and are divided into several parts. These parts can be stored in any location on the disk, which increases the distance between them and, therefore, the access time to the entire file. This phenomenon is called fragmentation.
If too many system files begin to fragment, this will result in a constant disk load and a slowdown in Windows startup speed. You can solve the problem by defragmenting the HDD logical drives.
This is done using standard Windows tools like this:
- Go to “Start/Computer” (“This Computer”), select the required section and go to its “Properties” from the context menu.
- Click on the “Service” tab and “Run defragmentation”.
- The program window displays all logical drives, the time of the last defragmentation and their current level of fragmentation.
It is generally accepted that defragmentation should be started at a value of 10% or more, since its frequent use reduces the HDD resource. Fragmentation at the level of 20% already indicates strong fragmentation of files.
To ensure the accuracy of the result, select the system drive “C:” and start the check with the “Analyze disk” button. If the values specified above are exceeded, we start the process with the “Disk Defragmentation” command.
A good alternative to the basic option is the free Defraggler utility. To start defragmentation:
- Download the program from the developer’s website https://www.ccleaner.com/defraggler.
- After installation, launch Defragler.
We immediately note a more understandable and pleasant design of the interface with a visual pie chart of disk fullness.
The utility is distinguished by the ability to check the performance of the hard drive and display SMART data.
- We return to the disk window and click “Performance Rating”.
You couldn't ask for better information. Based on this data, we start the defragmentation process.
Upon completion, Defragler will update the disk indicators and show the increase in data exchange speed.
RocketDock for Windows 7 8 10 download fast and convenient panel
Good afternoon friends. We all want our computer desktop to look more beautiful. Users often use additional gadgets for this. This could be various clocks, temperature indicators, electronic voices, etc.
All these gadgets can be called additional visual effects. I have already written that unnecessary visual effects slow down the system. But, now most users have fairly powerful computers with a decent processor, so most likely these visual effects will not affect the performance of your system.
So, I want to introduce you to an additional panel for the RocketDock software. This panel is much more beautiful than the regular Windows panel. In my opinion, it resembles the Mac OS X panel. Many users find this panel more convenient.
It contains animation. When you select a specific program, it enlarges and moves. Nearby labels also enlarge and move slightly. It looks quite impressive. Many people use the RocketDock panel for antlers, because it’s nice to show off such a panel to your friends!
This quick launch toolbar is free. We need to go to the official website and download RocketDock https://rocketdock.com/download. The program takes up only 6.20 MB. Which is quite small. Works from Windows 2000 to Windows 10. Please note that only 10 MB of RAM is required. The processor for it is suitable from 500 MHz. In other words, any modern PC. So, let's install the program. During installation, select Russian language.
We launch the program from a shortcut on the desktop. We now have the panel itself.
Let's look through it. If you don’t like any of the shortcuts offered by the program, select it, right-click on it and click “Delete icon”.
For example, an icon with a black T-shirt takes us to a site with a non-existent page. Let's delete it. We insert into it those programs that you often use, and delete the rest. For example, my panel currently looks like this.
As you can see, I have updated most of the programs.
We are upgrading your computer
We left this option for last, since many of the readers of this article have the goal of speeding up the boot time of Windows 7, 8, 10 without investing money. Here we want to note that the most effective way to speed up the computer as a whole is to upgrade its RAM and permanent memory.
The best and simplest option is to buy an SSD. It is installed on both relatively new and hopelessly outdated systems. For these purposes, we advise you to look for inexpensive models with a SATA or USB interface, for example: Western Digital Green SSD 120GB 2.5″ SATAIII TLC or Kingston SSDNow A400 120GB 2.5″ SATAIII TLC.
For those who want to go further, we can advise adding RAM. This will relieve your hard drive by disabling the page file. At the time of writing, we see the point in upgrading memory to a standard no lower than DDR3. It makes sense to consider earlier DDR2 only for outdated “top” motherboards with a large number of slots, where it is possible to increase the modern minimum - 8 GB (for Windows 7, 8 and 10).