In the original, “pure” Windows 10, the desktop wallpaper looks like just a logo on a dark blue background. This picture will not suit everyone: some will find it too dark, some will find it too static, some will simply not be happy with the standard picture, which is far from even the classic sunny lawn from XP. Then you will need to change the wallpaper. It should also be noted that the wallpaper can only be changed on the activated version of the system.
How to change the screensaver on your computer screen
Method one
Step 1. Expand “Start” - “Settings”.
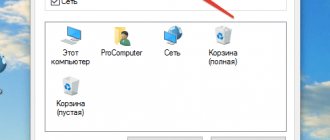
In the Start menu, open Settings
Step 2. In the window that opens, select the “Background” tab.
Select the “Background” tab
Step 3. The screensaver type selection menu will open:
- solid color fill;
- rotating slide show;
- or photo.
Expand the “Background” option and select the screensaver type
Select the required screensaver type:
- for a slide show, select one of the options offered by the operating system; if there are none, you need to click on the “Browse” button;
In the “Background” section, select the “Slideshow” type, select from the proposed options, if there are none, click on the “Browse” button and select on PC
- for a photo, select one of the standard options, or click on the “Browse” button and select your own in the window that opens.
Select one of the standard options, or click on the “Browse” button and select your photo in the window that opens
How to change the screensaver on the Windows 10 desktop at boot?
Windows 10 allows you to customize the lock screen the way you like without using special programs (as we did previously in Windows7). This is done in the same “Personalization” window, but now select the “Lock Screen” option.
Now we have access to settings for the image that appears when loading (or when pressing the Ctrl+Alt+Del keys). You can select any individual photo through Browse, or create a slideshow of changing photos. Or leave the default settings (Windows is interesting)
You can display a brief or detailed display of the operation of selected applications (mail, calendar, etc.) on the screen. Those who yearn for Windows XP can set up a screensaver; this window is still available in the system:
In short, there is nothing complicated here, try it, adjust it. Follow the links to related articles for complete information. Write in the comments about your results. I'll end it here! Bye!
Author of the publication
offline for 5 days
Method two
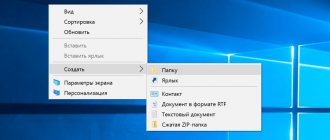
- Right-click to open the context menu and select “Personalization”.
Right-click on the desktop to open the context menu and select “Personalization”
- Select “Background”, then select the screensaver type.
Select the “Background” tab - After selecting the screensaver, follow step 3 of the previous method.
How to put your own image
To do this, you need to create a separate folder on your computer and place one or more desired images there. Next, select “Photos” from the drop-down list and click “Options”.
In the next window, click the “Browse” button and select the folder with your image(s). Then we set the display speed and, if necessary, check the box for random display of images. Click “Save”.
Learn more about screensaver types
Color
This method will fill the entire screen with a monotonous color. Suitable for undemanding users, or if for some reason the user’s image library is missing.
After selecting “Color” you just need to choose the color you like from the ones offered. This method does not consume a lot of system resources, puts almost no load on the video card and is very suitable for weak computers (meaning a configuration that still runs Windows 10).
In the “Background” section, select “Color”, click on the appropriate color from the shown result
Slide show
Allows you to create rotating images from system images or your own. Suitable if you are not satisfied with a solid fill or a static photo, and the image library is quite rich.
After selecting this item in the menu, you need to select the folder where the images are located, then set the frequency of changing pictures.
In the “Background” section, select the “Slideshow” type, select from the proposed options, if there are none, click on the “Browse” button and select on PC
Select a folder with photos for the slide show, click “Select this folder”
Note! This method puts a slightly higher load on the video card due to dynamics. Also, frequent changes of images tire the eyes and are not recommended for people suffering from epilepsy or predisposed to it. It is better to install if the computer is slightly higher than the configuration required for the system, at least for the video card.
Photo
A static photo that occupies the entire desktop or part of it. Suitable if you just need a screen saver better than a monotonous one, but you don’t want to use a slide show. There are two ways to set a photo as wallpaper:
- Through the personalization menu, select the “Photo” option and indicate the storage location for the image.
Right-click on the desktop to open the context menu and select “Personalization”Select one of the standard options, or click on the “Browse” button and select your photo in the window that opens
- Call up the context menu on the image by right-clicking the mouse and select “Set as desktop background”.
Call up the context menu on the image by right-clicking the mouse, select “Set as desktop background”
This background loads the video card slightly more than a solid background, but over time it can become boring. Well suited if there are few images on your computer. In addition, the OS has a good selection of its own wallpapers.
Video - How to change wallpaper in Windows 10
Windows 7+
Most modern computers that you can buy in stores come with a pre-installed operating system. Computers purchased from official distributors will have Windows 8 or, in rare cases, Windows 7 installed. Of course, the latest version of the Eight was considered a failure even by Microsoft, but it continues to be distributed under the pretext that updating to the next version will be free . So, how to change the desktop picture in Windows 8 and Windows 7?
These operating systems are similar to each other in many ways, but they are also very different. If you use G8, then after the start screen with the “tile” you need to go to the desktop itself. After this, all actions for both systems will be the same.
- To change the picture on your desktop, right-click on any free space on your screen.
- In the menu that opens, find and click “Personalization”. A window with managing desktop properties should appear in front of you.
- At the bottom right we find the sub-item “Desktop Background”. Click.
- In the window that opens, we need to select the folder in which the images we need are located. These can be photographs and pictures existing in the system during installation, or your own.
- Click browse and indicate the path to the folder in which the photos of interest to us are located. Let's open it.
- As you can see, all the images are now shown in this control menu. All you have to do is check the boxes next to those that you would like to see on your desktop and indicate the period of time after which they will change.
That's all, as you understand, changing the picture on the desktop is not so difficult.
How to add new pictures?
Some may not be satisfied with the small variety of screensavers available by default, so you can try adding new ones. To do this, you will need to find new screensavers in .scr format on the Internet.
These files should be placed in the path C:WINDOWS\System32. By the way, you can find other pre-installed screensavers there and double-click them to launch them. If you wish, you can create a shortcut to the desired screensaver, place it on your desktop and launch it when needed, without waiting for downtime.
Want to quickly clean up your PC from junk? Then our article will tell you how to quickly do this.
Do you want to defragment your hard drive, but don’t know how? Our instructions will show you the whole process.
And the added screensaver can now be seen in the list.
Conclusion
So we figured out how to install a screensaver on a computer or how to change the current one. There shouldn’t be any particular difficulties, unless you have to look for the right panel on Windows 10. You can choose pre-installed screensavers or use downloaded ones, but remember that in the latter case there is a high probability of encountering viruses.
♦ Category: Tips for beginners.
Changing your desktop background in Windows XP
By right-clicking on a blank screen, you open the context menu. In it, select the bottom line - Properties
.
In the Properties window that opens: Display
Desktop
tab :
This is where you can set the color or background image of the screen.
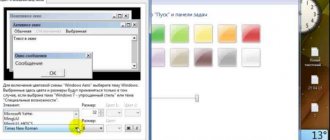
If you want your monitor screen to be one color, then on the Color tab 1
From the drop-down list, select any color you like (black, yellow, red, etc.).
And in the Background picture 2
, click on the top line
(no)
.
In this case, the color you selected will appear on the monitor screen, which is visible in the middle of the tab. If you like this color, then click the Apply
and then
OK
. That's it - the monitor screen is painted in your favorite color.
But it will be more beautiful if the screen is not monochrome, but has a background image. The picture can be selected from the standard Windows set. To do this, in the Background image 2
Click the cursor on the names of the pictures and these pictures will appear on the screen of the sample monitor.
Currently there is a standard Windows XP graphic called Serenity
.
Having selected a picture, you click the Apply
, and then
OK
and this picture will appear on your desktop - on the screen of your monitor.
But, after a while, you will get bored with all the standard drawings and will want to find something new.
Many drawings are available on CDs and on the Internet. You can choose several designs for yourself and then change them every week. To display such a picture, click the Browse
and use Windows Explorer to find the file with this picture on your computer.
The selected file will appear in the list Wallpaper 2
Now click the
Apply
, and then
OK
and your picture will appear on the screen.
I only draw attention to the fact that the drawing must be on the hard drive, and not on a CD. That is, the picture you like must first be copied from a CD, and then installed as a background picture.
But perhaps this will not seem enough to you. You will want to use your own photos as the background image. This is also possible.
It is only desirable that the drawing matches your screen resolution. If the screen resolution is 1024 x 768, then the photo size should be the same. Because if the photo is larger than the screen, then only part of the photo will fit on the screen and not necessarily the best part.
If the photo size is smaller than the screen, then you will need in the Location field 4
choose an option. The photo will either have to be placed in the center or stretched, or the screen will be covered with it, which, in any case, will not be very beautiful. This means that the photograph must be prepared in advance.
Everyone who has the Windows 7 Starter
(usually it is installed on netbooks and sometimes on laptops) read
the lesson How to change the wallpaper in a netbook and laptop
, and also in the
Desk Wallpaper
, select the high-quality screensavers you like.
As you know, the desktop background image in Windows 7 initial edition cannot be changed using standard methods; there is no “Personalization” item in the control panel and context menu; the background image is hard-coded. In this article we will look at several ways to get around this limitation. But it should be remembered that formally this is a violation of the terms of the license.
Step-by-step instructions on how to do this are below.
Very important!
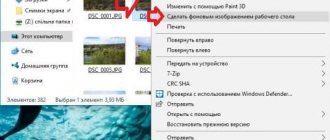
I. If, while trying to change the desktop background, your screen turns black or after loading you see only a black screen background, then:
- Make sure that in the section “Control Panel\Accessibility\Ease of Access Center\Optimize screen image” next to the item “Remove background images (if possible)” you do not have a checkmark.
- Run the REGEDIT command (Start -> find programs and folders -> regedit -> Enter)
- You need the branch “HKEY_CURRENT_USER/Control Panel/Desktop/”, go to it and select “Desktop” with the mouse
- On the right side of the window, find the key called "Wallpaper". It should contain the following value "%windir%\web\wallpaper\windows\img0.jpg". If it contains something else, then the initial version of Windows 7 sets a “black screen” instead of the standard background.
- Set the value there to “%windir%\web\wallpaper\windows\img0.jpg” (without quotes) and reboot.
II. If your program does not start, the background is not installed during operation, or the background disappears after a reboot:
- Disable your antivirus while installing and configuring the program.
- Disable User Account Control (UAC) while installing and configuring the program (Control Panel\User Accounts\User Accounts) and there “Change User Account Control settings”.
- Make sure that in the section “Control Panel\Accessibility\Ease of Access Center\Optimize screen image” next to the item “Disable all unnecessary animations (if possible)” you do not have a checkmark.
- A number of netbook/laptop manufacturers like to install their own proprietary programs into the boot, which change the appearance of the OS or somehow influence the design. In this case, Oceanis may not work correctly (or not work at all). Try, if you don’t need these programs, uninstall them, then restart your computer and reinstall Oceanis again.
To change the desktop picture in Windows 7 initial edition:
- Download the Oceanis Change Background program.
- Unpack the archive, install the program and restart your computer.
- After downloading, you will see a new background on your desktop:
4) Open the program and select a new picture for your desktop:
5) Select the necessary parameters: number of pictures, time period for changing the background, position, etc.
6) After that, click Save Changes.
Now you have a new background image:
After installing updates, the program may begin to work incorrectly. In this case, uninstall it and install it again. It should help.
The first thing you should understand before you start changing your desktop is that, depending on the version, the method of changing the desktop picture is different.
Change the desktop background/picture to Windows Strarter/Windows Starter.
By default, this version does not allow desktop changes. But... you can still change it, for this there are two ways - the first is to install a program with which you can not only install a picture on the desktop, but also change them over time, the second way is to indicate in the registry the path to the required picture that will be used as a background.
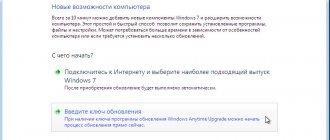
Let's start with the first method, there are quite a lot of programs for changing the desktop background, in this article I will look at a free program in Russian - Wally
. Since you will be using the program for Windows, you need to download the file for Win32 executable.
The installation process is very simple and requires a few clicks of the Next
“, after installation, the program icon will appear on the taskbar, right-click on it and select “
Settings
”.
In the settings window that opens, I recommend checking the boxes next to “ Automatic playback when the program starts”
" and "
Automatic start of the program when the system starts
", so that the program would automatically start every time the computer/laptop is turned on. You can choose the interval for changing the desktop background at your discretion.
The next step is to add a folder or folders where the pictures that you would like to see as a background on your desktop are located, to do this, click “ Files”
"or "
Folders
" (if you have pictures in several folders) and indicate the directory where the images are located.
Then restart your computer and enjoy the selected background on your desktop.
The second way is to specify the displayed desktop picture in the registry; for this you need to start the registry. Click " Start
" and in the search bar of the program write
REGEDIT
and press the
"Enter"
.
Go to the path HKEY_CURRENT_USER\ Control Panel\ Desktop
, on the right, find the
Wallpaper
, open it with two mouse clicks and specify the path to the picture, click “
Ok
”.
Then right-click on the “ Desktop”
" and select "
Permissions
".
In the properties window that opens, click the “ Advanced”
«.
Uncheck the box next to “ Add permissions inherited from parent objects”
".
A security window will open, click “ Delete
”.
The next step is to click “ Add”
" and enter
All
, click "
Ok
".
After that, click the “ Advanced”
“- “
Change
” and select the resolutions of the corresponding images below.
After that, save all the settings by pressing the “ Ok”
" and restart your computer. After downloading it, you will see the changed desktop background.
Change the desktop background/picture to Windows Home Basic/Windows Home Basic.
For this version of Windows, it is possible to change the desktop background using standard tools. To do this, just select the picture that you would like to make your desktop background, right-click on it and select “”.
If you want the images on your desktop to change automatically, you cannot do without installing third-party programs. As I described above, the Wally program may be suitable for these purposes (more about it at the beginning of the article).